
Fall weather is here to stay, but that doesn’t mean we must say goodbye to summer flavors! Blueberries, in my opinion, deserve a place in our pantry all year round, and so does sourdough. If you’re looking for a burst of color, juiciness, and flavor, blueberries are the perfect fruit to add to sourdough bread. Today we’re making blueberry sourdough bread!

About this blueberry sourdough bread
In our home, blueberries are a staple. We use them as snacks, to make muffins, in smoothies, ice cream, oatmeal, pancakes… you name it! Blueberries are a nutritional powerhouse and we try our best to eat them often.
These berries are packed with more antioxidants than many other fruits and vegetables; they’re high in soluble fiber, low in calories, and relatively low in carbohydrates compared to other fruits (which is important if you need to monitor your blood sugar).
They’re not called a superfood for nothing! Let’s combine all these benefits with sourdough bread to make a delicious blueberry sourdough bread that I’m sure you will love.
Why blueberries?
Blueberries are very nutritious and make a healthy addition to our diets. Just 100 g of blueberries (about 2/3 of a cup) provides 24% of the recommended daily intake of Vitamin K1, 16% of Vitamin C, and 14% of manganese among other vitamins and minerals.
They are rich in phytochemicals like anthocyanins, powerful antioxidants that give blueberries their characteristic blue/purple color. Blueberries also contain quercetin, a flavonoid with antioxidant, anti-inflammatory, and anti-cancer effects, as well as resveratrol, another antioxidant that supports heart health.
Other health benefits associated with blueberries are lower blood pressure and improved digestion. Overall, they’re a fantastic addition to our daily nutrition. And when incorporated into sourdough bread they add a nutritious boost to the loaf. This blueberry sourdough bread is not only delicious but also an excellent way to deliver essential nutrients to our meals.
Incorporating fruit into bread
Adding fruit to bread can be tricky. The moisture, acidity, and dietary fiber in fruit can affect the dough’s consistency and fermentation process. It’s important to choose the right type of fruit and adapt the recipe accordingly.
Dried, rehydrated, frozen, and fresh fruit behave differently in the dough. The differences in momisture can modify the water content of your recipe and disrupt the balance of ingredients. This recipe is designed for fresh or frozen blueberries. Now, let’s dive into how to incorporate blueberries into sourdough.
Incorporating blueberries into bread
For a burst of color, you can blend a few blueberries, mix the puree with the recipe’s water, and prepare a colorful dough. If you make kombucha or other fermented drinks you can use the strained pulp in bread as well. If you’re looking for a burst of flavor and a mouthful of juicy blueberries… Then adding whole berries is the way to go. The experience of biting into bread and having a blueberry burst in your mouth is next-level delicious!
Can I use frozen blueberries in my sourdough?
Absolutely! Frozen blueberries are a convenient option when fresh berries are out of season, or they’re not easily available. If you use frozen berries, make sure to thaw them first or your dough will be too cold and ferment much slower.
As the blueberries thaw they will release some juice, which you can either drain or incorporate into the dough as part of the total water. This will give the dough a slight pink color (the acidity of sourdough turns their purple hue into pink, how cool is that?).
If you live in a warm climate where sourdough tends to ferment quickly, you can probably benefit from not thawing the blueberries.

When to add the blueberries
When making this blueberry sourdough bread we have two options: fresh or frozen blueberries. The best time to incorporate fresh blueberries is before the dough is fully developed.
Whole, fresh blueberries are relatively hard and they can stand the kneading process without releasing too much juice and changing the dough’s hydration (unless you smash them), so it’s safe to add them early in the process.
Frozen blueberries, however, are a bit different. When blueberries are frozen and then thawed, the expansion and compression may create micro-channels in the skin. These tiny holes are the reason the juice leaks out of the berries. If you’ve ever thawed blueberries you might have noticed this.
The extra juice can impact the dough’s overall hydration, and since they’re much softer than fresh blueberries, they can break as the dough is kneaded. The best time to add frozen blueberries to the dough is toward the end of the kneading process, preferably during a lamination step or between coil folds.
If you want to use the juice, you can thaw the blueberries in advance and incorporate the juice as part of the water content. If you don’t want the juice, you can strain the berries.
A good tip to remember when laminating the dough for this blueberry sourdough bread is to reserve some berries and add them as you fold the dough back. It’s the best way to have the blueberries spread evenly throughout your dough and avoid having them all on one side of the loaf.
How to make blueberry sourdough bread
Now that we’ve discussed how to add the blueberries, let’s talk about the proofing and baking of this blueberry sourdough bread because the fruit can have an impact on the process.
Something that can happen when adding fresh fruits to bread dough is that juice starts to leak. This can make the dough look a bit softer than it should. A strong gluten network can help with this. It’s essential to develop a strong enough dough to avoid future problems if there are significant changes in the hydration of the dough. In other words, to avoid baking a flat loaf.
Fresh (or raw) fruit is also heavy, so a strong gluten network is really necessary. I prefer to knead the dough until it’s almost fully developed, and then add some coil folds. Whatever your preference is, follow the method that works for you.

Fermentation & proofing
When the dough has heavy inclusions, it might feel like it didn’t rise as much during proofing. Here it’s important to pay attention and not let it overfement. Look for air pockets in the bottom of the bowl (if you have a transparent bowl you can see the dough), and larger air bubbles when you preshape the dough. The dough should not feel too sticky or leave a lot of residue on the bowl.
Inclusions can also make shaping challenging, and you might feel some resistance from the dough when you try to shape it. The best thing you can do is to let it rest. A preshape step is always beneficial, but only if you have enough time to let it rest before the final shape. At least 30 minutes to 1 hour. Of course, you will need to time your fermentation accordingly. One more hour at room temperature can be a lot in a warm kitchen.
Baking your blueberry sourdough bread
Sourdough bread is supposed to have a lovely crispy crust paired with a pillowy crumb. This blueberry sourdough bread is no exception. However, to avoid burning the blueberries that might be on the surface, I recommend baking with steam for at least 20 minutes. This will prevent the crust from drying out too fast and turning too thick. And the last 20-30 minutes of baking will give your loaf the crispiness we all so enjoy.
Due to the additional moisture that the blueberries carry, the loaf might take slightly longer to bake. If you’re not sure when the dough is ready, the best thing you can do is test the internal temperature with a thermometer. Once it reads 96C your loaf is ready! Test a couple of different spots to make sure you got the correct temperature. You could stick the thermometer in a blueberry and get the wrong reading.
Storing Blueberry Sourdough Bread
To keep your blueberry sourdough bread fresh, store it in an airtight container or a resealable plastic bag at room temperature. For longer storage, you can freeze slices of the bread wrapped in plastic wrap to avoid freeze burn and place them in a freezer bag. Then you can toast the slices directly in your toaster (it will take a bit longer to toast), or your air fryer!
Sourdough bread lasts longer than yeasted bread but not if it has fruit. The extra moisture and sugar are the perfect combination for microorganisms to grow. If you keep this bread in a warm kitchen, you might have to finish the bread within a couple of days to avoid mold. I know, the sacrifices we make! 😉
How to add more flavor to your blueberry sourdough bread
If you are looking for a very flavorful loaf, you can always add more aromatics and inclusions of your choice. My recipes are guides and ideas for you to customize to your taste. And as a scientist, I’d be doing you a disservice if I didn’t encourage you to experiment.
Blueberries are incredibly versatile and pair well with a wide variety of flavors. I like to pair them with seasonal ingredients. Maybe lemon zest during warmer months, maybe some cinnamon and ginger during colder months. Or just plain, blueberries are very tasty on their own.
And that’s it, now you can make this fabulous blueberry sourdough bread all year round! And for a delicious suggestion, try a toast with goat cheese and honey; you’ll never want anything else!
Happy baking!
For more recipes, baking tips, and scientific insights into bread making, subscribe to my blog and stay updated with the latest in bread baking!
If you make any of my recipes let me know what you think! As always you can find me on Instagram, Pinterest, and Facebook. I also have a few videos up on my YouTube channel.
(This post contains affiliate links, if you purchase something from these links I will make a small commission that helps me run this blog, but you will not be charged any extra money 😉 )
You might also like


Blueberry Sourdough Bread
The perfect combination of sourdough and juicy blueberries for a mouthwatering treat!
Ingredients
- 25 g whole wheat flour
- 375 g bread flour
- 300 g water *See notes
- 8 g salt
- 80 g active sourdough starter
- 100 g fresh or frozen blueberries
Instructions
-
In a large mixing bowl add the water, active sourdough starter, and salt and dissolve.
-
Add the flours and mix until just incorporated. Cover and let it sit for 30 minutes for an autolysis step.
-
Knead the dough for a few minutes incorporating short resting periods (5 mins). If you are using fresh blueberries add them when the dough starts getting some consistency.
-
If you’re using thawed frozen blueberries, add them now with a lamination step.
-
Perform 3-4 sets of stretch-and-folds every 30-40 minutes. To do a stretch and fold, wet your hands, lift one side of the dough, stretch it up, and fold it over itself. Rotate the bowl and repeat on all four sides.
-
Cover and let the dough ferment at room temperature for 6 hours at 72°F/22°C or until it looks bubbly and airy but not wobbly.
-
Gently turn the dough out onto a lightly floured surface. Preshape it into a boule.
-
Cover with a floured cloth or bowl, and let it rest fo 30 minutes to 1h.
-
Finish shaping the dough into your preferred shape and place it in a floured banneton seam side up.
-
Cover and refrigerate for 12 or overnight.
-
Preheat your oven to 450°F (230°C) with a Dutch oven or baking stone inside.
-
Carefully turn the dough out onto a piece of parchment paper. Score the top of the loaf with a sharp blade. Transfer the dough into the preheated Dutch oven, cover with the lid, and bake for 20 minutes. Remove the lid and bake for another 20-30 minutes, until the crust is deeply golden or inner temperature reaches 205°F or 96°C
Recipe Notes
* If you are unsure of the strength of your flour, reduce the water content by 30g and add more if necessary as you start mixing your dough.
How to make black sesame bread
Black sesame bread is one of my favorite bread recipes. I’m talking top 3 favorites! And it’s simply because black sesame is incredibly aromatic and the taste combines spectacularly with bread, especially if you are using sourdough. But don’t worry, this recipe is for both yeast and sourdough bakers. Black sesame bread is so good, that I want everybody to enjoy it!
I started making this bread using black sesame powder. I learned about it when my husband bought it many years ago at our Chinese store. He likes to make a hot soup for dessert, especially on the days he feels more homesick. The smell of that soup was so delicious! That toasty and nutty aroma of sesame but deeper and with some sweetness to it. So, of course, my baker’s mind thought… “black sesame bread!”.

Are black sesame seeds good for you?
In Traditional Chinese Medicine, black sesame can help you with your liver and kidney health, and grey hair, among other things. Given the amount of good compounds found in sesame seeds and the results of some studies, it’s safe to say that yes, sesame, and in this case black sesame, is good for us. Of course, as a part of a balanced diet and healthy lifestyle.
What are sesame seeds rich in?
Black sesame seeds are rich in omega-3 fatty acids and lignans, a type of polyphenol typically found in seeds. They are also rich in vitamins, minerals, and antioxidants. Some studies have even suggested that black sesame can have a positive impact in cardiovascular health and others have seen improvements in fasting blood sugar. Overall, sesame, and in particular, black sesame seeds, are an excellent addition to our diet!
How to make black sesame powder at home
After making black sesame bread several times, I realized that making the powder myself was not only super easy but also more flavorful because I was using freshly ground seeds. These steps are optional, but I highly recommend them to make the most out of your seeds.
Toasting the seeds
Black sesame seeds are very flavorful, but I prefer toasting them to deepen the aromas even more. To toast the seeds put them in a saucepan and heat them at medium-high temperature, stirring often. Because of their rich oil content, they can burn easily, so keep stirring until you start seeing seeds popping and a bit of smoke. Then transfer the seeds to a plate to cool.
Grinding the seeds
In the industry, companies have equipment to grind sesame seeds without releasing all the oil and turning it into a paste. When you buy black sesame powder, it’s less oily and a tad drier than the powder you make at home. At home, we need to be cautious when grinding sesame seeds (all sesame seeds, and even chia, or flax seeds) because they’re rich in oils and can turn into a paste quickly (like tahini but with a darker color).
You don’t need to grind all of the seeds to make black sesame bread, you can use them whole. I prefer blitzing at least 3/4 of the seeds to enhance the aroma of the bread. To avoid releasing too many oils, pulsing instead of grinding for long periods works better.
You can grind the seeds with any device of your choice, I have this coffee grinder that I only use for spices, etc. it’s inexpensive and does the job perfectly! But you can use anything you have at home. Even a mortar and pestle if you don’t have a grinder. However, if you have a very powerful grinder (something like a Vitamix), I’d recommend freezing the seeds. When the seeds are hot, they release the oils much faster, and powerful grinding can raise the temperature of the seeds, so starting with frozen seeds gives you a bit of a leeway.
Preparing the dough
Now that we have the seeds ready, let’s start with the dough! The method is similar for both sourdough and yeast versions. The yeasted version uses a poolish and has only a very small amount of yeast, so the fermentation will be as slow as sourdough. If you were to make this bread on a cold day, you can add a bit more yeast to the final dough.

Black sesame bread with poolish
The night before dissolve 1/4th of a teaspoon (a pinch) in 40ml of water, then add 40g of bread flour and mix well. Cover the container loosely and let it ferment overnight.
If your kitchen is too warm, you can prepare the poolish earlier, and keep it in the fridge overnight.
Black sesame bread with sourdough
The night before refresh your starter as you normally do. Prepare more than 80g total, 80g for the recipe plus what you need to feed it again.
Mixing the dough
Both poolish and sourdough methods are prepared the same. First, you need to dissolve the starter in the water. This step will make developing the dough easier. I like to add salt in this step as well, if I leave it for later, the chances of forgetting it increase exponentially!
When you have dissolved the salt, add the seeds and the flour and mix well until you don’t see dry flour particles. Let the dough rest for 20 minutes to allow the flour and seeds to hydrate. Depending on the strength of your flour, the seeds will absorb more or less water. Give the dough some time so you can decide if it needs more water or if it’s okay the way it is. And always add water little by little, it’s easy to go from a dry dough to a very slack one.
Kneading vs no-knead method
After a 20-minute autolyse, I like to knead the dough using the “slap and fold” technique. This technique is very efficient and you can have your dough ready in a few minutes. But if you don’t like kneading, you can try the stretch and fold + coil folds method. And always remember that when you knead and the dough doesn’t come together, rest is your best choice. Let the dough rest and the gluten proteins realign and when you go back to kneading you will see a big difference!
Fermentation & proofing of black sesame bread
Both methods (poolish and sourdough) will ferment slowly. If you start early in the morning, you will be able to shape your bread somewhere between late afternoon and early evening. Aim for 8-12h fermentation (depending on the temperature of your kitchen), or when the dough almost doubles in size.
I usually don’t give exact times in my recipes because it depends on your specific conditions. Weather, skills, type of flour, oven… everything can alter the times for each part of the process.. That’s why it’s important to get familiar with your dough.
How to tell my bread is fermented
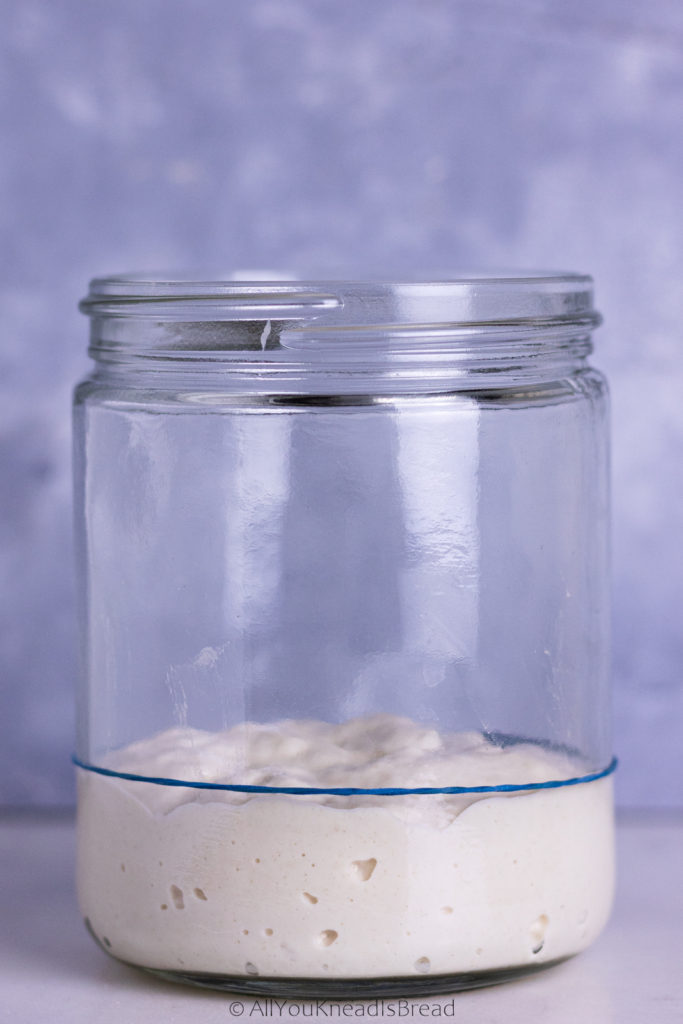
If you struggle with fermentation times and when the dough is ready etc., there are two easy ways to keep an eye on the fermentation. One is using a clear bowl where you can see the air pockets in the bottom that develop over time. You want to see a consistent size of air pockets. Not some too large and some areas without any pocket. The dough shouldn’t leave residue in an oiled bowl. If it does, it’s probably a bit over-fermented.

Another way is to use a “spy”. This is very common in panettone making. You put some dough in a cylindric container, and make a mark where the dough is, as it grows, you can tell when it doubles, triples… For this method you don’t need to buy anything, you can use a small glass, a recycled glass jar… I use a shot glass or a little measuring cylinder I have.
Shaping and cold-proofing black sesame bread
When the bulk fermentation is over, it’s time to shape the bread! If you feel the dough is a bit slack, you can add a pre-shape to add a bit of extra tension. It’s usually a good idea when the dough has over fermented a bit, or if the gluten network wasn’t developed properly.
You can shape the bread in any shape you want using any method. I like to do it like this, a very simple way and it has yet to fail me.
After shaping and putting the dough in a banneton, it’s time for the final proof. You can do it at room temperature, but doing it in the fridge will improve the flavor profile of your bread. Either sourdough or poolish, a cold-proof is a very interesting way to develop extra aromas in your bread. Plus, a cold dough is much easier to score than a warmer one!
During the cold proof, the dough will rise while it’s at a warm temperature, but once it cools down, it will stop. That’s why bulk fermentation is so important, once it’s in the fridge, not much will happen no matter how long it stays in the fridge. You can leave the bread in the fridge for 12-24 hours to develop flavor.
PRO TIP: If your bulk fermentation isn’t long enough and the dough is a bit underfermented, shape your bread and let it ferment at room temperature in the banneton for an hour or two before putting it in the fridge.
Tips on how to bake your black sesame bread
To have a great oven spring it’s necessary to have steam during the first minutes of baking. You can achieve this by introducing steam, or by baking the loaf in a closed container like a Dutch oven. A cast iron Dutch oven is ideal because it’s less susceptible to temperature changes when you open and close the oven.
If you don’t have a Dutch oven, just know that you don’t need to spend hundreds of dollars on one. I have this one and is been working perfectly for many years! Since the lid is flat, you can put the bread there and use the larger part as the lid to avoid burning your hands when loading and unloading the bread!
I also like to add one ice cube inside the Dutch oven. It helps with oven spring and keeps the crust a bit thinner because it takes longer to dry out. But this is a matter of preference, if you like thicker crusts avoid the ice.
Many people usually preheat the oven and Dutch oven to 500F, but in my experience, that’s too hot and my loaves have suffered because they dried out too fast at such a high temperature. So I use 435F in my convection oven or 445F in a non-convection oven.
I like to bake the loaf covered for 15-20 minutes and uncovered for another 20-25 minutes or until the loaf has the color I like.
An that’s it! That’s how you make one of the most delicious breads you’ll ever eat!
If you liked this recipe…
You might enjoy these:
Brie and olives sourdough rolls
If you make any of my recipes let me know what you think! As always you can find me on Instagram, Pinterest, and Facebook. I also have a few videos up on my YouTube channel (which I hope I can resume soon!)
Starting on breadmaking but don’t know where to start? Check my Amazon store to see my favorite and affordable utensils you will need. You can make the best bread with simple and inexpensive tools!
(This post contains affiliate links, if you purchase something from this link I will make a small commission that helps me run this blog, but you will not be charged any extra money 😉 )
Happy Baking!

Black sesame bread
Super aromatic bread with either yeast or sourdough, you choose!
Ingredients
Poolish (if you're making the yeasted version)
- 40 g bread flour
- 40 g water
- ¼ tsp dry active yeast
Sourdough (if you're making the sourdough version)
- 80 g active sourdough starter at peak
Black sesame seeds powder
- 35 g black sesame seeds (plus some extra for crust decoration if you want)
- 5 g white sesame seeds optional, for some extra color
Main dough
- 80 g poolish OR sourdough choose the preferment you like the most
- 280-320 g water depends on your flour
- 8 g salt
- 400 g bread flour
Instructions
Poolish
-
In a small bowl, dissolve the yeast in water.
-
Add the flour and mix until a sticky dough forms.
-
Cover the container and allow the poolish to ferment overnight at room temperature.
Sourdough
-
Refresh your sourdough starter to ensure you have at least 70g.
Black sesame seed powder
-
Toast the sesame seeds in a saucepan until they consistently pop and emit a slight smoke.
-
Allow the seeds to cool, then grind them in a spice grinder until coarse powder forms. Some whole seeds may remain.
Main dough
-
In a large bowl, combine water and the chosen preferment (poolish or sourdough), dissolving the preferment.
-
Add salt and sesame seeds, mixing thoroughly.
-
Gradually incorporate the flour until no dry particles remain, adjusting the water if necessary. Cover and allow the dough to hydrate for 20 minutes.
-
After the autolyse, knead the dough using the slap and fold method until smooth, allowing the dough to rest for 10 minutes if it starts resisting.
-
Let the dough rest for 30 minutes, then perform 2-3 sets of coil folds every 30-60 minutes until the dough nearly doubles in size (adjust this step to your own schedule)
-
Turn the dough onto a floured surface and shape it into a boule or batard, placing it in a banneton.
-
Refrigerate the banneton for up to 24 hours.
Baking
-
Preheat the oven to 440°F (225°C) with a Dutch oven inside for 20 additional minutes.
-
Remove the banneton from the fridge and transfer the dough onto a baking paper. Score the dough's surface.
-
Place the dough in the hot Dutch oven with an ice cube and cover quickly to trap the steam.
-
Bake with the lid on for 10-20 minutes (the longer it bakes without a lid the thicker the crust will be)
-
Remove the lid and continue baking for 35-25 minutes or until it's golden brown and the inner temperature reaches 96°C (204°F).
-
Take the loaf out of the oven and allow it to cool for at least one hour before slicing
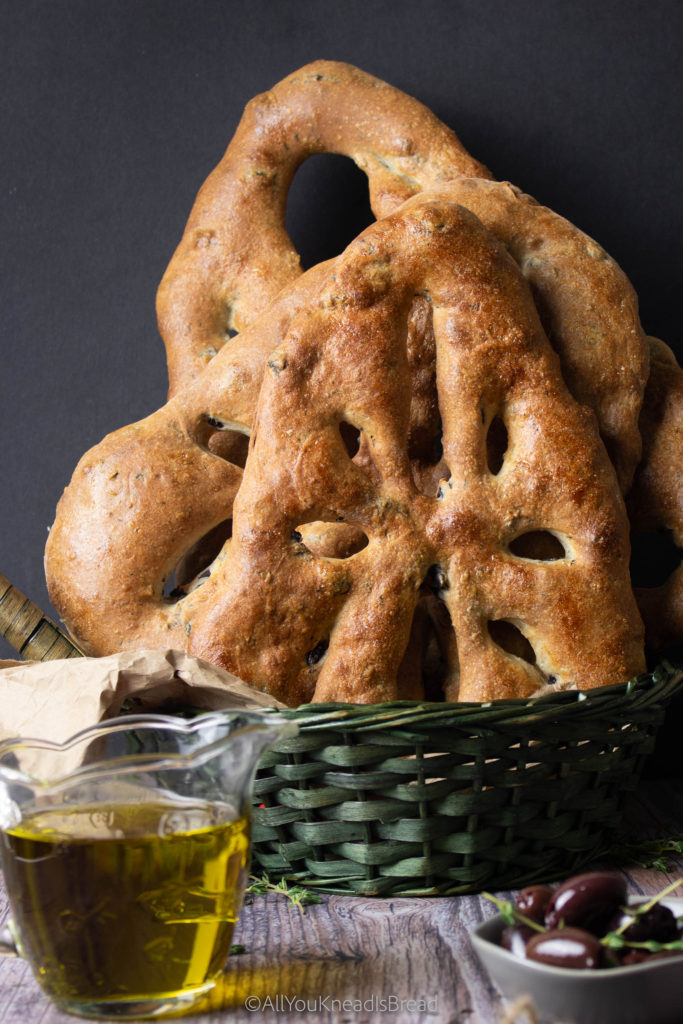
The best Sourdough Fougasse With Pasta Madre discards
Lately, I’ve been focusing on my Pasta Madre a lot. While studying it and playing around with different flours I generated a considerable amount of pasta madre discards. Of course, I found a way to repurpose them instead of throwing them away. I made this fantastic sourdough fougasse with olives and thyme that is going to blow your taste buds! This is the most aromatic sourdough fougasse I’ve ever made! It’s definitely a delicious treat to share and a fantastic appetizer to keep your guests happy while dinner is finishing cooking!
What is fougasse bread?
In a world full of focaccias, baguettes, and sourdough loaves it’s easy for this incredibly delicious bread to go unnoticed. Let me tell you a bit about it!
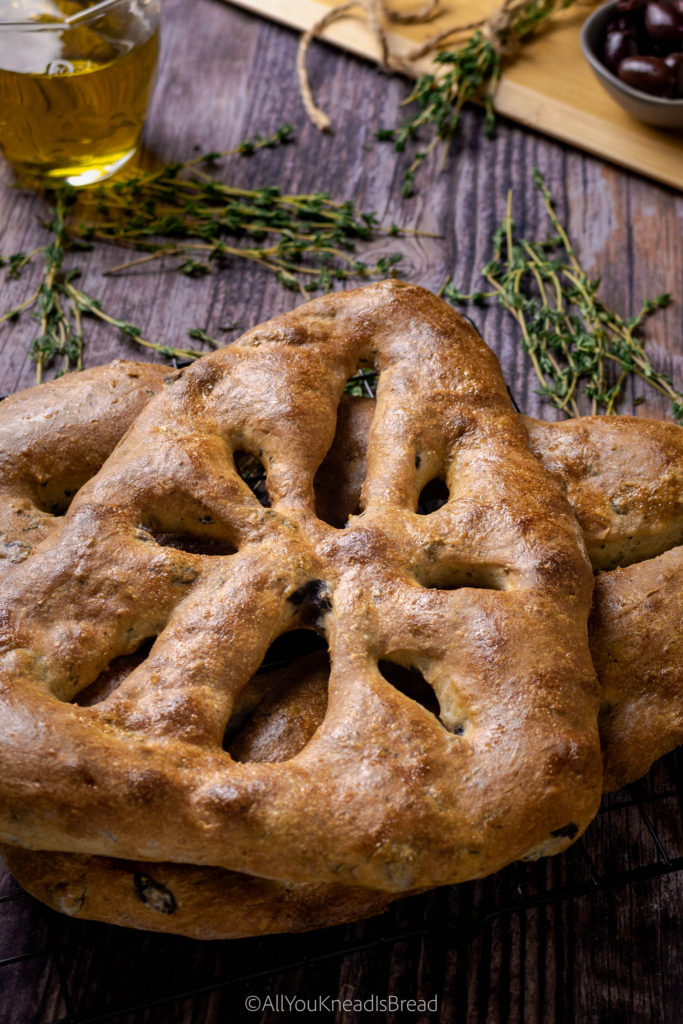
Fougasse is a French bread typical from Provence although it has more variants in other regions of France. It’s somehow a flatbread and it’s shaped in an irregular shape with slits in the middle. In France is very common to add fillings such as olives, cheese, anchovies…
FUN FACT! this bread was originally used to test the temperature of the wood fire ovens they had back in the day. The bakers could estimate the temperature based on how long it took to bake a fougasse. So there you have it, delicious bread full of tradition!
What is pasta Madre?
In case you’re not familiar with it, let me make a quick summary of what pasta madre is: It’s a special stiff starter used in the making of Grandi Lievitati products, namely Panettone, Pandoro, Colomba… I said special because it’s not *just* a stiff stater. Pasta madre, (or lievito madre, or lievito naturale in some cases) is typically maintained under pretty specific conditions and methods. The method I use is the one where the starter is kept in water. The other method wraps the pasta madre and keeps it tied.
If you want to learn more about it you can check this post to learn how to create your own lievito madre, this post for information about the 3 preparatory refreshments before making panettone, and this post for a mini-guide to troubleshoot your pasta madre.
Stiff starter vs. Pasta Madre, two different things
Social media has done a very poor job of explaining what Pasta Madre is. And frequently people use starters at 60% hydration and call them Pasta Madre. But a real pasta madre s about 35-45% hydration (depends on the flour). And it has a very controlled maintenance process in order to keep a healthy ratio of bacteria and yeasts and promote specific types of LAB. The purpose of this special maintenance is to make a panettone (Grandi lievitati) that is very very very soft, packed with flavor, that can stay fresh for many days and that has not a single hint of acidy nor acidifies over time. Not just to leaven the dough.
Why do I generate so many pasta madre discards?
The thing is… because Pasta Madre is kept either in water or tied up, you can’t really use small amounts of flour because otherwise it’d disintegrate in the water very quickly or it’ll completely dry out in the cloth. My normal maintenance amounts are:150-200g of pasta madre, 150-200g of very strong flour, and 70-80g of water.
Basically, I generate about a pound of pasta madre discards every 24h. And that is a lot of perfectly fine and very strong pasta madre that could be used for other things. I usually keep it in the fridge and accumulate it over a few days and use it to make crackers. I also use it for sourdough loaves, or to make these delicious orange and cinnamon rolls.
And now we have another recipe! This sourdough fougasse is good! Trust me on this! And it uses about all the discard from one refreshment.
If you are using pasta madre discards, I recommend you start the fougasse dough right after the last maintenance refreshment. That is when the pasta madre is at its peak of activity.
Is this a sourdough discard recipe?
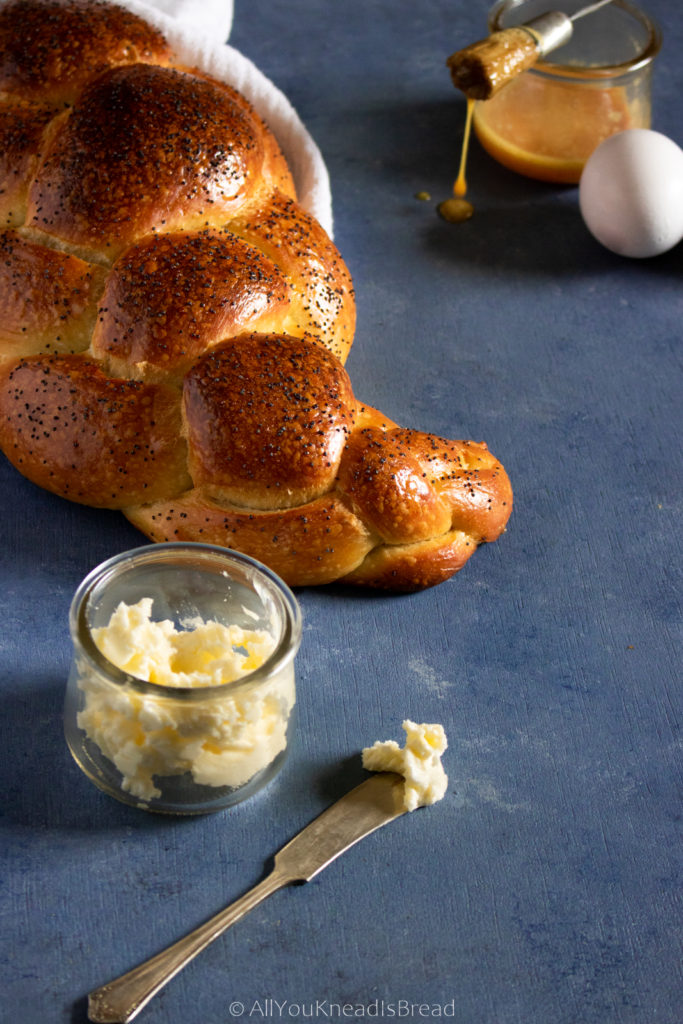
Yes, because pasta madre is still sourdough, and a very active one! It’s still a dough packed with wild yeasts and bacteria. And like sourdough discards, you can use it in pretty much anything! It’s also great for stiffer dough, you can use it to make bread like this sourdough challah, or my sourdough burger buns… The options are endless here!
What if I don’t have pasta madre?
Don’t worry! If you don’t have pasta madre you can either create a stiff starter and use it, or use your liquid sourdough starter (100% hydration), I got you!
How to create a stiff starter with your 100% hydration starter
I’m going to show you how to make a shortcut stiff starter at 55% hydration because if we lower the hydration too much, your bacteria will end up a bit stressed and there’s a chance it won’t be active enough to use. You can read all about adaptation periods and water content on this post. It’s about the science of your sourdough starter (without fancy words and easy to follow).
A 55% hydration starter would be very easy to make by mixing 100g of flour with 55g of water. But this will make a total of 155g of starter. We don’t need that much, so we need to scale it down to a total of 100g. So we need to scale down.
| Ingredients | For 155g of starter | For 120g of starter | For 100g of starter |
| Total Flour | 100g | 77.4g | 64.5g |
| Total Water | 55g | 42.6g | 35.5g |
Pay attention to the water
Now, water is our limiting factor here because we just need a little amount. Since we’re using our 100% hydration starter, that means that whatever weight of this starter is made of 50% flour and 50% water.
So, let’s say you want to make 120g of stiff starter (just to play safe). That starter will have 42.6g of water. This water comes ONLY through your liquid starter. Since water is only 50% of the liquid starter, we will need twice the amount. And then to make it stiffer we just add the flour difference. Let me show you!
Twice the amount of 42.6g (of water we need) is 85.2g. We need to take 85.2g of liquid starter (42.6g of water, and 42.6g of flour). And according to the table above, to make 120g of stiff starter we need a total of 77.4g of flour. From our liquid starter, we already have 42.6g of flour. The difference we need to add is: 77.4 – 42.6 = 34.8g
Let me do the math for you!
Too much math for a beautiful day such as this one? Then let me do the numbers and just pick on the table below the amount of starter you prefer to make:
| Ingredient | For a total of 120g of stiff starter | For a total of 100g of stiff starter |
| 100% hydration starter | 85.2g | 71g |
| Extra flour | 34.8g | 29g |
You can now pick how much stiff starter you want and mix the ingredients. Knead the dough by hand for a couple of minutes. You don’t need to develop the gluten perfectly but make sure there aren’t dry flour particles or dry chunks of dough. The idea is to have a dough that is stiff but workable and not sticky. Aim for a bagel dough kind of consistency.
Once mixed put it in a container with a loose lid and wait until at least doubles in size. It’d be helpful to have a narrow and taller container rather than a wider and shorter one. That way it’ll be easier to see how much it grows. Once you see it doubles wait for a while, if it stalls then it’s at the peak, if it continues growing then it’s not at the peak yet. Wait a bit longer and test again.
You also need an active starter to make sure the stiff starter can grow fast and you don’t need to refresh it again to make it stronger. Remember, the purpose of this recipe is to reduce waste 😉
If this is not a method you like, I got you! You can go ahead and use your liquid starter
How to make sourdough fougasse with liquid starter
If you just don’t really care about making a stiff starter or don’t have pasta madre, you can still make this delicious sourdough fougasse with your liquid starter. Just add 100g of the starter and then 21g LESS of water and 21g MORE of flour to the base recipe and you’re good to go! (This is to keep the total dough hydration the same regardless of the starter you’re using).
About this sourdough fougasse recipe
For this fougasse, I chose strong-flavored fillings because pasta madre doesn’t have the sour punch that liquid sourdough has. It’s a milder flavor that I wanted to balance with something savory. Olives and thyme are a combination that I love and along with olive oil and the bread (once is baked) is just perfect.
You can use other ingredients of your preference, although traditionally fougasse has more savory and umami fillings. This can also be an opportunity to let your creativity flow and experiment with how you cut the slits when you’re shaping your bread. Fougasse is truly a gorgeous bread that can just be the perfect centerpiece for a table.

How to prepare this sourdough fougasse
As with any other sourdough bread, we need to start mixing the ingredients. If you know my baking style, you know that I add starter and salt all at the same time. And this case is no different. However, due to the nature of pasta madre, you probably can’t dissolve it in the water the same way you do with a liquid starter.
What I like to do is hold back about 20% of the water to start with a bit of stiffer dough, and then progressively add the rest of the water and finally the wet fillings. This is what works for me, but if you want to add all the water right away and just knead directly it’s fine too.
This is a lovely dough to work with, honestly. You can use your stand mixer but if you want to try doing it by hand, I think it’s a beautiful recipe to do so!
If you’re using a liquid starter just dissolve it in water and proceed with the rest of the ingredients. You don’t need to add water slowly.
When should I add the fillings?
I like to classify fillings into two groups: wet and dry. Wet fillings are those that carry a considerable amount of moisture with them and that could, potentially, alter the dough. These are things like olives, roasted peppers, capers… Dry are those that don’t carry with them much moisture like spices, herbs, cured cheese, dry things preserved in oil (sundried tomatoes, caramelized onion…).
Why this classification? When we need the dough we usually apply pressure to the ingredients that are in the dough. Wet ingredients will release that moisture if we “squeeze” them as we knead the dough. And our somehow stiff dough can become sticky in no time!
What I like to do is add the dry ingredients mixed with the flour and wait until the dough is developed to add the wet, then I just have to knead enough to incorporate the fillings, and not for incorporating them filings and developing the gluten at the same time.
For this sourdough fougasse, I used black olives and thyme. Thyme is not a problem, it’s a “dry” ingredient (even though I used fresh herbs, but you get the idea), you can add it at the beginning with the flour and the other ingredients. Olives, on the other hand, are preserved in brine, they carry quite an amount of moisture. So I added them at the very end. Once the dough was ready and the gluten was where I wanted it to be, I added the olives and kneaded just enough to incorporate them.
Don’t worry if by doing this you still have a couple of olives that aren’t incorporated, just put them on top of the dough, after they bake they’ll give your fougasse a rustic look!
How to ferment this sourdough fougasse
Since fougasse is a flatbread of sorts, it’s okay if the dough is not super strong. In other words, it’s okay if we over ferment it a little if that’s going to fit our schedule better. Here you have a couple of options:
Same day fougasse
Start the dough early in the morning, knead it well, add all the fillings, and let it ferment (bulk ferment) until it doubles in size and gets a bit puffy. Depending on your temperature, this might be anywhere between 3-5h. If you’re using a clear bowl you should see some fermentation bubbles in the bottom but nothing too crazy. Try not to over ferment it or when you want to shape it and cut the slits it’ll be tricky.
Then proceed to divide the dough into as many fougasses as you wish to make, shape them, and let them proof. We’re not looking for super chubby fougasses here. So when you start seeing them rising a bit turn the oven on and continue proofing while the oven preheats.
If you’re an early bird you might have them ready by lunchtime, if you’re a sleepyhead like me, maybe aim for dinner to be safe 🙂 *giggles as she writes this sentence*
Overnight fougasse
This method is based on cutting the bulk and keeping the dough in the fridge until you’re ready to continue. So, let’s say you refresh your pasta madre in the early evening or your stiff starter is not ready until later in the day. Maybe you don’t have time to bake your fougasse the same day. In this case, what you can do is prepare the dough and start the bulk fermentation. Then 1 and a half or two hours later put the bowl in the fridge and keep it there overnight. Then the next morning take the dough out of the fridge and divide it into the number of pieces you want. This way the dough will come to room temperature a bit faster
How to shape your sourdough fougasse
Either if you are following the same-day method or the overnight method. After dividing the pieces shape them into a ball, cover them with a cloth or plastic wrap, and let them rest for 20 minutes or so.
After the rest period is over… Unleash your inner creativity! The basics of shaping a fougasse are:
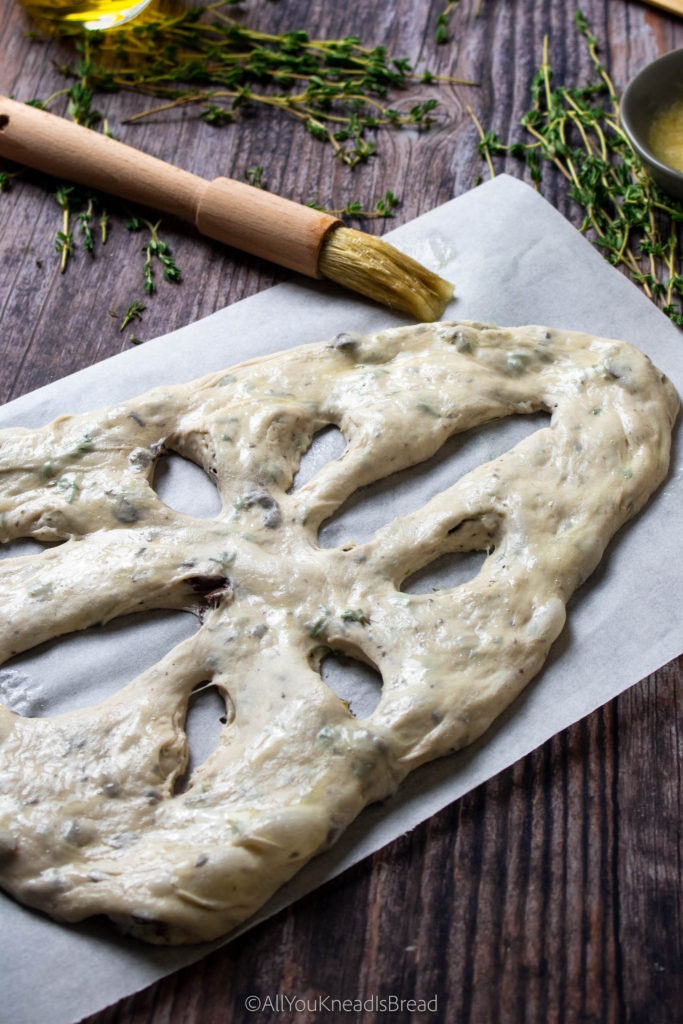
Flatten the piece of dough into an oval-ish/triangular-ish/leafy-ish shape, then cut slits with a bench scraper or a pizza cutter (bench scraper works better for me), loosen up the slits, and done!
Don’t try to make them perfect, the beauty of a good fougasse is in that rustic touch! I personally like a triangular/leafy kind of shape. I think they look really nice and if you have a bread basket they will look very cute in it. Also, feel free to use plenty of flour to avoid the dough from sticking to the counter. Cutting the slits can be tricky.
Baking your sourdough fougasse
Once you’re done shaping the fougasses, cover them and let them proof at room temperature until they start getting puffy, but didn’t necessarily grow much. At that moment turn your oven on at 425F/220C. The proofing stage will continue as the oven preheats. If you have an old metallic tray, put it in the bottom part oven, you will use it to create steam.
When the oven is ready put your fougasses in the middle part of the oven and throw a cup of boiling water into the bottom tray. This will create a nice touch of steam for the first few minutes.
After 10 minutes or so, you can retrieve the bottom tray and continue baking until your fougasses have a nice golden brown color. Let them cool down on a rack until you can hold them with your hands without burning yourself and enjoy!
A few tips about this sourdough fougasse recipe
For a shiny touch, I like to brush my fougasses with egg wash. This also allows the crust from drying out too quickly. This bread is pretty thin, so a bit of extra moisture is always helpful.
If you don’t want to brush your fougasses with egg wash, you can spray some water before putting them in the oven. This, along with the steam we create with the boiling water, it’ll be enough.
Fougasse is best consumed right away. When it’s crispy outside and soft inside. It’s even better when it’s still warm. This bread is thin, most of the moisture scapes as it bakes, so it goes stale faster than other types of sourdough bread.

Can I use other fillings?
Absolutely! You can use other flavor combinations that you like. I love fresh herbs combined with something extra savory or umami (like olives, blue cheese…). But I also love caramelized onions and nuts together. The sky is the limit here!
Do I really need steam to bake it?
You don’t need it, but I think it’ll be a good idea. I always get better results when I add steam during the first 10 minutes of baking. Since these are pretty thin, the crust will dry out quickly. A bit of steam will help to create a fluffy interior and crispy crust! But if you can’t create steam don’t worry, your fougasse will still turn out delicious!
How big should my fougasse be?
With this recipe, you can make one mega-fougasse, 2 large fougasses, 3 medium fougasses, 4 small ones, or 5 tiny ones. Just be careful when you bake them because the small ones will bake faster.
That is all for today! If you liked this recipe, you might also like these other ones, give them a try and let me know what you think!
Brie and olive sourdough rolls
Tomato and rosemary sourdough bread
Gorgonzola and apple sourdough bread
If you make any of my recipes let me know what you think! As always you can find me on Instagram, Pinterest, and Facebook. And I also have a few videos up on my Youtube channel (which I hope I can resume soon!)
Starting on breadmaking but don’t know where to start? Check my amazon store to see my favorite and affordable utensils you will need. No need to buy a $200+ baking pot. You can make the best bread with simple and affordable tools! (This is an affiliate link if you purchase something from this link I will make a small commission that helps me run this blog, but you will not be charged any extra money 😉 )
Happy Baking!

Sourdough Fougasse with pasta madre discards
Make this incredibly aromatic bread typical from the Provence using your pasta madre discards!
Ingredients
- 500 g bread flour
- 100-120 g pasta madre discards see notes
- 300-350 g water see notes
- 50 g extra virgin olive oil
- 8-10 g salt see notes
- 135 g sliced black olives drained and patted dry
- 10 g fresh thyme leaves chopped
- 1 egg for brushing optional
Instructions
-
Mix salt, chopped thyme, and flour in a bowl and set aside
-
Cut the pasta madre into smaller pieces and add them into the bowl that has the flour mix
-
Add about 80% of the water, the olive oil, and start kneading until you feel the pasta madre is incorporating well into the dough. Then add the rest of the water
-
Knead the dough until the gluten is almost developed and add the drained olives
-
Do a set of stretches & folds to help incorporate the olives. If the dough feels tight and you can't incorporate them, let the dough rest for 20 minutes to relax the gluten. Then proceed again to finish incorporating the olives
-
Once ready lightly oil your bowl and put the dough inside, let it proof at room temperature until it doubles or almost doubles and you see some fermentation bubbles at the bottom (Refer to the post to see how you can do a cold retard of this dough)
-
When the bulk fermentation is over, lightly flour your counter and divide the dough in as many fougasses as you want (3-4 pieces will have a nice medium-small size). Shape the pieces into dough balls, cover them and let them rest 10 minutes
-
Take one dough ball and flatten it with your fingers giving it an oval or semi triangular shape. With your fingertips stretch the dough into a larger piece of about 1cm/0.5in thickness. Use as much flour as needed to avoid the dough from sticking
-
Once you have shaped all pieces cover them and let them rest for 10 minutes
-
Place the pieces on the trays you will use to bake them and with the narrow side of a bench scraper cut slits into the fougasse pieces and stretch them a little so the cuts don't close while the dough proofs and bakes
-
Cover the fougasses and let them proof until you see them getting puffy, then turn on the oven at 425F/220C and finish proofing while the oven preheats. If you want to create some steam place an old metallic tray in the bottom part of the oven
-
When the oven is ready brush the pieces with egg wash for a shinier touch (optional) or just spray some water. Bake them for about 30 minutes or until they get a nice golden brown color. If you are creating steam in the oven you can add a cup of boiling water into the tray that has been preheating in the bottom of the oven.
Recipe Notes
*If you are adding wet fillings (like olives) start with the lesser amount of water, if the fillings are dry (like herbs or cheese), add the greater amount of water
*Use just 8g of salt if you’re using very salty/umami fillings like olives, anchovies… otherwise use 10g
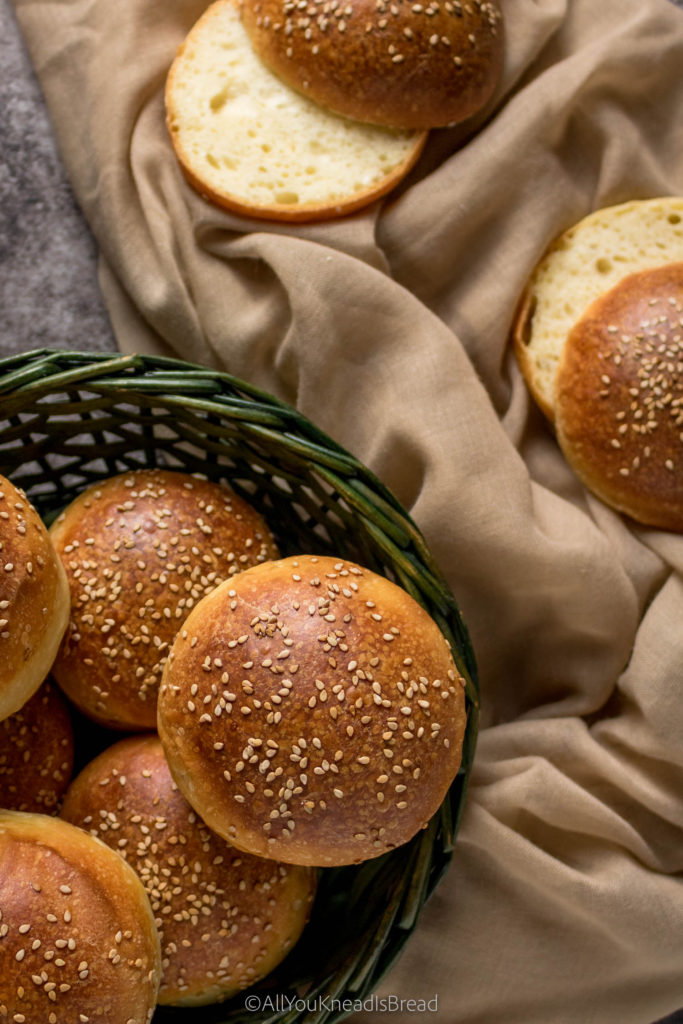
How to make sourdough burger buns

It’s officially cookout season! And we bakers know that’s time for some homemade burger buns. Today I’m showing you how to make sourdough burger buns that don’t fall apart. Tired of your hamburgers buns going soggy and the fixings slipping away? With these sourdough burger buns, you won’t have that problem again!
These hamburger buns have a velvety crumb with a strong exterior to hold your fixings, but they will still melt in your mouth. These buns are designed to last through your last bite! You can also cut them in two and freeze them so you always have sourdough burger buns available for an impromptu hamburger.
Use a ripe sourdough starter
I’ve tried making this recipe with different sourdough starter ratios, at different temperatures, etc. One of the most important things in this recipe is the starter. Some recipes are more forgiving than others and you can get away with a bit of a lazy starter. But these burger buns require you to use your starter at its peak of activity. You can learn more about this in this blog post,
What flour should I use for these sourdough burger buns?
I used King Arthur bread flour with 12.7% of protein. If you have different flour, just keep in mind that the absorption will be different. If your flour has less protein, it will need less liquid to achieve the same consistency. And if your flour has more protein it’ll need more liquid to achieve the same consistency. This is important for you to be able to customize the recipe to your flour and kitchen conditions.
How to prepare the dough
It’s slightly sticky, so that’s why you also need to knead the dough very well. When the gluten is fully developed, the dough is strong enough to pull itself and not leave bits everywhere it touches (like your hands!). Keep in mind that my flour is pretty strong; although you can use low protein flour, you will probably need to reduce the liquids (start with 10-15% less).

Mix everything together minus the butter. Once the dough can form a ball and it is not a shaggy mess, incorporate the butter and keep kneading. If necessary, let the dough rest for a few minutes every now and then so you don’t push the gluten too far. The process shouldn’t take you more than 1h (At the end of the post you will find a baking schedule so you can plan ahead).
I know many recipes call for 3-5 minutes of kneading time, but that’s not even close to fully develop the gluten, especially in enriched dough. So, take your time, and let the dough guide you. The only way to get the best quality in your baked goods is by having a properly developed gluten. That gives the dough enough structure to get a nice fluffy crumb, and enough strength so it doesn’t collapse and you end up with super dense buns.
A note about fermentation
Once the dough passes the windowpane test, place it in a lightly oiled container and let it ferment until the next morning. You can always cut the bulk fermentation and keep the dough in the fridge once it’s doubled. In this case, I’d probably cut the bulk fermentation shorter to avoid the dough from over-proofing in the fridge.

How to shape these sourdough burger buns
Once the bulk fermentation is over, lightly flour your counter and carefully deflate the dough. Make sure you get rid of large air pockets in the dough and divide it into as many buns as you’d like. I like to divide into 8 for a medium-small bun, but if you want larger hamburgers, divide the dough into just 6 or even 4 buns.
PRO TIP: If you think the dough is too sticky and you need lots of flour, oil your counter and your hands instead. That way you avoid the dough from sticking and drying out!
Take one piece of dough and flatten it with your fingers. Then start bringing the edges towards the center to make it into a ball shape. Then turn it upside down so the seam is touching your counter and roll it with your hand to finish shaping the ball and create some tension on the surface. You can use a bit of flour to avoid the dough from sticking to your hand or even some oil.
Do the same with each piece of dough, cover them with floured plastic wrap and let them rest for 15 minutes.
After 15 minutes if you see they are very flat roll them again with your hand to shape them back into a ball. If after 20 minutes they look still plump then transfer them into your baking tray. I find it’s very easy when you use a bench scraper, just slide it under the rolls and carefully place them on the tray.
Cover the buns and let them rest for 2h or until they are puffy. They don’t necessarily need to double in size, but they should feel puffy and if you touch them, the dough should spring back slowly.

How to bake these sourdough burger buns
When you think the buns are almost ready, preheat your oven at 375F/ 190C. Once the oven is preheated, use the leftover egg whites to brush the buns. Then sprinkle sesame seeds and off to the oven!
Bake the buns until they have a nice golden-brown color, if your oven doesn’t bake homogenously turn the tray 180 degrees halfway in the bake.
Once the buns are ready transfer them to a cooling rack and let them cool down for at least 30 mins to 1h. If you try to cut them while they’re hot you will destroy the crumb, it’ll get mushy because although the buns are out of the oven, the crumb is still cooking.
In the meanwhile, you can prepare your fixings, the patties… And once the buns are ready cut them in two and enjoy your hamburgers!
PRO TIP: If you want your buns to grow taller rather than spread flat on the tray, you can use these English muffin rings. Put the buns on the tray, butter the rings, and put them around each bun while they proof and until they’re half baked. You can take the rings off when the buns start getting a light golden color. The result will be buns with the exact same shape and very plump. Perfect for a Big Mac copycat!
Baking schedule for a 74F/23C room temperature
If you’re planning hamburgers for lunch my suggested schedule for an environment of 74F is the following
The day before:
- 10 pm: Mix the ingredients and knead the dough
- 11 pm: Start bulk fermentation
The next morning
- 7 or 8 am: deflate and shape
- 7:15 or 8:15 am: Proof
- 10:45 am: Preheat your oven
- 11:15 am: Bake the buns
- 11:50 am: Take the buns out of the oven and cool down before consuming them
- 12:30 pm: Enjoy!!
I’ve tried this recipe on hotter and colder days. At 74F/ 23C it took about 9-10h to rise, at 68F/ 20C it took 11-12h. The dough should at least double or almost double before you divide it. Plan accordingly to your schedule and how early you’re willing to get up the next morning 😉
Do these burger buns have yeast?
No, they do not. They’re made with a 100% sourdough starter. However, if for whatever reason your starter is not ready, or you find yourself with a lot of sourdough discards. You can absolutely turn these buns into “sourdough discards hamburger buns”. Add the same amount of starter, and 5g of active dry yeast. The procedure is the same, only the fermentation times will vary. Instead of starting in the evening, you will have to start in the morning of the same day you’re planning to eat them.
But what if I want to make them using yeast?
If you don’t have sourdough, you can just substitute it with flour and water and use just yeast. If you wanted to replicate a sourdough recipe but using yeast you can prepare the dough using a very little amount of yeast (maybe 1g or even less), but yeast is still much faster than sourdough, so I cannot assure you the dough won’t overproof if you leave it all night fermenting. You might need to experiment a bit to find out a schedule that works for you.
Can I make dairy-free sourdough burger buns?
Absolutely yes! I’ve actually made this recipe with soy milk and plant-based butter and they were amazing too.
If you don’t use soy milk, try to use plant-based milk that has a thicker consistency and it’s a bit creamy. If it’s too watery you will probably need to reduce the amount of total liquid. You can also use no milk and make these with water, but again, be careful. It’s already a slightly sticky dough.
Can I make vegan sourdough burger buns?
Yes again! You just need to do a bit of math. A large egg is about 50g and 1/3 of the egg is the yolk. Egg white is more liquidy and the yolk has some fat. You can substitute 2/3 of an egg with water/plant-based milk, and the other third you can substitute it with some type of fat (vegan butter, olive oil…). This recipe for vegan Hokkaido milk bread can also be shaped into buns and used for hamburgers, although it uses yeast.
Let me know if you make these delicious sourdough burger buns and I hope this year we can start enjoying cookouts and bbq gatherings with friends and family. Don’t forget to tag me on Instagram and use #allyoukneadisbread so I can see what you bake!
If you want to see more bakes you can find me on Instagram, Facebook, and Pinterest, and you can also subscribe to my Youtube channel.
Happy baking!
This post contains affiliate links and any sales made through such links will reward me a small commission – at no extra cost for you – that allows me to keep running this blog.

Perfect Sourdough Burges Buns
These sourdough hamburger buns have a velvety crumb and they melt in your mouth. Designed to last through your last bite!
Ingredients
- 355 g bread flour 12.7% protein
- 100 g active sourdough starter 100% hydration
- 40 g water
- 90 g milk
- 2 L eggs
- 1 L egg yolk
- 25 g sugar
- 8 g salt
- 50 g softened butter
- 1 tbsp sesame seeds (optional)
Instructions
-
Mix the eggs, yolk, water, milk, sugar, and starter in a large bowl (or stand mixer bowl)
-
Add the flour and salt to the wet ingredients and combine until you have a messy dough
-
Cover and let rest for 30 minutes (if your kitchen is too hot, let it rest in the fridge)
-
After 30 minutes start kneading the dough and once it becomes less sticky incorporate the butter
-
Continue kneading until the dough is very elastic and the gluten is properly developed. If necessary, let the dough rest for a few minutes once in a while
-
Shape the dough into a ball and place in a lightly oiled container until it doubles or almost doubles in size *See notes
-
When ready (if you followed my schedule, this step would be the next morning), carefully deflate the dough and divide in 8 equal pieces for medium-size buns, or 6 for larger buns
-
Shape each piece into a little ball and place them on your baking tray. For taller and exact shape buns you can use English muffins rings to proof and bake them
-
Cover the buns with lightly floured plastic wrap and let them rise until they're puffy and have grown in size (they don't necessarily need to double)
-
Preheat your oven a 375F/190C when the buns are almost ready (reduce the temperature a little if you have a convection oven)
-
Brush each bun with the leftover egg white and sprinkle with sesame seeds (optional)
-
Bake for 30-40 minutes or until the buns have a nice golden brown color. Time will vary depending on the oven **See notes
-
Once the buns are the color you like, remove them from the oven and let them cool down in a cooling rack. If you like them a bit more humid, let them cool down covered with a dry cotton cloth
Recipe Notes
* Please refer to the post for a baking schedule and approximate fermentation times
** If you used English muffin rings make sure to oil the inside, you can remove them when the buns are halfway baked
The science of your sourdough starter
Welcome to a new section of my blog: Bread Science Fridays! In this section I will be indulging on my nerd side and talk about the science of many things behind your beautiful bakes. This week’s post is dedicated to our beloved sourdough starters and the science behind them!
Ever since the pandemic started, more and more people jumped into sourdough. So, I thought it could be fun to explain scientifically what happens when you feed your starter (or build your levain).
A sourdough starter it’s just a culture of microorganisms that are alive and perform their own biological activity. These cultures are composed, mostly, by different strains of lactic acid bacteria (LAB), saccharomyces yeasts, and some candida yeasts among others.
In this post, you will learn the phases your starter goes through during a feeding cycle, why using your starter at its peak of activity is important, and the science behind it!
A couple of things about biology
In microbiology, a strain of a certain type of microorganism is like a subtype of named microorganism. For example, the lactic acid bacteria type would be the lactobacillus but there are many subtypes (Strains). Lactobacillus Acidophilus, Lactobacillus Sanfranciscensis, Lactobacillus Reuteri… They’re all LAB but with some differences (from shape to optimum living conditions).
Each strain has its specific optimum living conditions. That is the optimum temperature, water activity, pH… that will make the fermentation rate the fastest. The fact that a microorganism is “happy” at 28C, for example, doesn’t mean that it cannot perform its biological activities at 29C or at 20C. It means that the performance will not be the best. As you know, it slows down at cold temperatures. However, it’s higher temperature that pose a threat to the microorganisms. Too high temperatures will inhibit and eventually kill the bacteria.
The bacterial growth curve
Bacteria, as living organisms, grow, multiply, and die. The reason our sourdough starter is resilient is not because the bacteria are indestructible, its’ because there are millions of them and not all of them are the same age. They are in different growth phases. While maybe most of the bacteria are dying, some might have just been born.
Bacteria and yeast multiply by dividing themselves into two. 1 becomes 2, 2 become 4, 4 become 16, etc. This mechanism is called binary fission. Therefore, their growth is exponential. In microbiology, this growth is depicted using growth curves.
Bacterial growth curves are specific for each strain of bacteria in a specific set of conditions (Changing the temperature will change the curve). In these curves we can see the 4 phases bacteria undergo from the moment they’re born to the moment they die. A generic bacterial growth curve would look similar to this one:

Our starter will follow this growth cycle too. Understanding what happens in each phase will help us understand our starter and when we should use it for baking to prevent a excess of sourness
The phases explained
Phase 1: Lag phase. This is the very beginning of the curve. At this stage, the microorganisms have enough nutrients and are active but they’re still not multiplying. What they’re doing is synthesizing proteins and getting things ready to start the division. It’s also an adaptation period to the culture conditions.
Phase 2: Exponential phase. Once things are ready, the bacteria start multiplying (by binary fission). The metabolic activity on this stage is high and increases as the number of bacteria increases (optimal growth). Some bacteria might die too, but overall, there are more bacteria multiplying than dying.
Phase 3: Stationary phase. This phase is a plateau the bacteria reach because of the depletion of nutrients or accumulation of waste (the acids they produce can inhibit their own activity). Less food means less activity and therefore fewer bacteria dividing. At this point, the growth and death rates are equal, and the overall number of microorganisms remains constant.
Phase 4: Death phase. At this point, nutrients are decreasing and bacteria continue to produce waste from their biological activities (bacterial poop if you may 😉 ). The environment becomes harsh and bacteria start dying (some also go dormant). In this phase, the death rate is faster than the growth rate, so the overall number of microorganisms decreases.
Theoretical growth: it portrays how the curve would continue growing if the bacteria had an endless supply of nutrients.
When you add sourdough starter to your dough, the exponential phase will be much longer because the bacteria:nutrients ratio is much larger. The curve would, to certain extent, follow the theoretical growth because there are lots of nutrients!
How does this apply to your sourdough starter?
Knowing in which phase your starter is, will be very helpful for your baking. The fermentative power of your sourdough will depend on the phase of the cycle it is on, and it is different in each phase.
Although the by-products of the fermentation are essentially the same in each phase, the aromas developed in the bread will be substantially different because every time we take some starter and mix it with flour and water, we’re resetting the growth curve. It starts again in the lag phase.
And depending on the length of the lag phase, more/fewer aromas will build up in the dough. Ideally, we should use the starter at its peak of activity. Which means the lag phase will be shorter.
But, what exactly is the peak of activity and what’s the best way to know it? Let’s dive deeper into this!
The peak of activity and what it means
When it comes to sourdough it’s common to talk about the “peak of activity”; we understand that it represents the optimum conditions of the starter and it will work faster if it’s at the peak.
Based on the growth curve I showed you before, it’s easier to see that the peak of activity happens at the end of the exponential phase and throughout the stationary phase. During that time the sourdough starter is very active because 1) the number of alive bacteria is high because they still have lots of nutrients and 2) they’re all used to the environmental conditions, well past the lag phase where they’d be creating “waste” but not multiplying and growing.
Obviously, we are not going to do a bunch of experiments to determine when we should bake. However, once we’re familiar with our starters, we know when they reach the peak of activity (more on this later). We can, then, differentiate 3 stages in our starter:
1.- Before the peak of activity
2.- At the peak of activity
3.- Past the peak of activity
The dough fermentation will definitely be affected by the stage of the starter. Let’s analyze it a bit more how that translates into flavor and aromas of our bread and how it’s related to the growth curve.

The starter has not doubled yet after the last feeding

When we refresh our starter (or when we’re building the levain) what we’re doing is resetting the bacterial growth curve. The microorganisms need to adapt to the new conditions first (lag phase) and then eat and multiply (exponential phase).
If your starter has not even doubled since the last feeding, the microorganisms didn’t have enough time to reproduce; they are at the very beginning of the exponential phase and there is still a low number of them.
Basically, you’d be adding just flour and water with a low number of bacteria.
At this point, the fermentative power of the starter is not high enough because there aren’t enough bacteria to perform the job; which means your dough will need a longer time to ferment. This can be detrimental to your dough because longer fermentation times might lead to a more acidic dough.
Not only that, but you could also risk destroying the gluten network. If the fermentation is much longer than it should, your flour might not be able to resist and the gluten strands will start to deteriorate.
Maybe, flavor-wise, the bread turns out as tangy as you like it, but the structure could be compromised.
The starter has reached or almost reached the peak

People recommend using the starter at its peak of activity, but what many don’t know it’s why exactly this is the best condition for sourdough baking. Spoiler alert: It has nothing to do with your culture being hungry.
At least, not in the literal sense of the word, because the microorganisms eat when they have food, and when they don’t, they just change their metabolism pathway and go into “survival mode” (they become dormant). That’s why they can survive in the fridge for months without being fed, or they can be frozen or dried.
Every time we change the environment of the microorganisms, they need to adapt to the new conditions; so, they have to go through the lag phase again. If the starter has passed the peak or if it’s too early in the feeding cycle, this adaptation period is going to be longer. Either because the microorganisms need to get ready to increase the colony, or because they went into survival mode.
The idea of using the starter at the peak of activity is to reduce the lag phase as much as possible. Because longer lag phases can bring undesired aromas or weaken the gluten network.
The reason the bacteria are very active at this point is that they don’t have to use energy to get ready to multiply, and they’re not getting dormant or dying at a higher rate because there’s still plenty of nutrients.
A change of environment can be anything that makes the new conditions different from the culture. For example, adding salt to your dough, adding more/less water, adding more/less wholemeal flour, adding sugar, adding fats etc.
The starter passed the peak and it’s collapsing

If your starter has reached the peak and has started to collapse, it means that it’s either at the end of the stationary phase or at the beginning of the death phase already, and it already has accumulated a significant amount of fermentation by-products.
Among these by-products, there are several organic acids responsible for the acidity of the sourdough (lactic acid and acetic acid are the most common). If you used this starter, the fermentation would be slower at the beginning because:
1.- There are less alive bacteria, since many might have died already
2.- The acidification of the starter can inhibit the growth of the bacteria, so the fermentative power will be weaker. The extent of this inhibition depends on how acidic the starter became. That’s why when we try to revive a forgotten starter, it might take a couple of feedings until we see some activity.
3.- The bacteria that are still alive need a longer lag phase before they start growing again. During this lag phase they will get ready for the new environmental conditions (your dough) and will fix the pH of the dough that turned too acidic. And remember, during this phase, bacteria keep producing acids but they’re not reproducing.
Basically, if you don’t control de fermentation, your bread can be very sour. Once again, remember that longer fermentation times not only affect flavor, but also the structure.
Contrary to what many people think, though, you can still use a starter that has passed its peak of activity (by just a few hours) and still obtain a bread that has not soured too much, as long as you control the fermentation.
But.. What if I like my bread very tangy?
The sourness of sourdough bread comes from accumulated organic acids in the dough. So, in order to get the tangy flavor, we need to ensure that the dough has accumulated enough of these compounds.
We can do that by using slightly warmer temperatures during the bulk fermentation. Doing this, the bacteria will be closer to their optimum living conditions, and they will perform a faster fermentation. We could push the bulk a little to get that extra sourness.
How do I know my starter is ready to bake?
There are different ways to check when your starter is ready, and the more familiar you are with it, the easier it’ll be. I’m going to tell you my favorite way to check the peak of activity at home: The height test
I don’t know if this is how people know it, but it’s how I call it. The height test is, in my opinion, the most reliable way for the home baker to check their starter.
If you always feed your starter the same ratios of flour and water, or you build your levain in the same way, this test is great for comparisons; it will be very easy for you to know if it’s ready by just looking at how much it grew. It also prevents the “human factor” more than other tests and reduces the chances of making a mistake.
How to perform the maximum height test
As the name indicates, this test is to see how high the starter can grow (this applies to 100% or less hydration, more liquid starters can’t grow too much, for obvious reasons). The peak of activity coincides with the maximum height.
After reaching the maximum height, the starter will remain at that height for a few hours (stationary phase) before it starts collapsing (beginning of the death phase)
Let’s say you feed your starter with a 1:1:1 starter:water:flour ratio. Then you let it ferment and record the height (taking pictures might be even better!) after it reaches the maximum height you need to pay attention to how long it stays at that height and when it starts collapsing.
Imagine that right after feeding, your starter takes 5 hours to reach the highest height, and then it stays 2 more hours at that height. Those last 2h will be the best period to use your starter.
By doing this simple test, you will see how much your starter grows (double, triple, quadruple?). It’s important to know the temperature when you do this little experiment because in warmer days, your starter will grow faster. However, since you know more or less the highest height it will reach, you just need to keep an eye on it!
Always remember that the time your starter takes to grow will depend on the temperature of your kitchen. Warmer temperatures will make the starter more active because they’re close to their optimum growing temperature. Colder temperatures will make the starter grow slower, because these are far from the optimum conditions.
Let’s wrap this up
I’d like to finish my first Bread Science Fridays by highlighting a few concepts:
1.- Bacterial growth has four phases that can be applied to our sourdough starters. Knowing what happens in each phase will help us understand our starter.
2.- The starter works best when it’s used at its peak of activity because we’re reducing the lag phase and bacteria can use the energy more efficiently.
3.- The maximum height test is an easy experiment to know when a starter reached the peak of activity. It’ll help you understand at which phase your starter is and when it’s best to use.
I hope with today’s post you can understand better your starter and have a better idea of the science behind it! Isn’t the world of sourdough so amazing???
As always, if you ever have any doubts or would like me to talk about the science of something, let me know and I’ll try my best to answer your questions!
You can find me on Instagram or Facebook and you can also subscribe to my Youtube channel.
Happy Bread Science Friday!
Maria
Easy and Delicious Sourdough Challah
Something good about this quarantine? It gave me the time I needed to create more recipes and do experiments with all my starters. I’ve had sourdough challah in my “to-bake” list for the longest time. And I finally have a recipe I’m 100% satisfied with.
I used all-purpose flour with a protein content of 11.7% for this delicious challah recipe. Don’t worry if you can’t find bread flour, I know it’s difficult to find these days.
UPDATE 10/18/2020: Based on the feedback I received, I decided to update this post to talk about the oil and how to easily incorporate it.
About the recipe
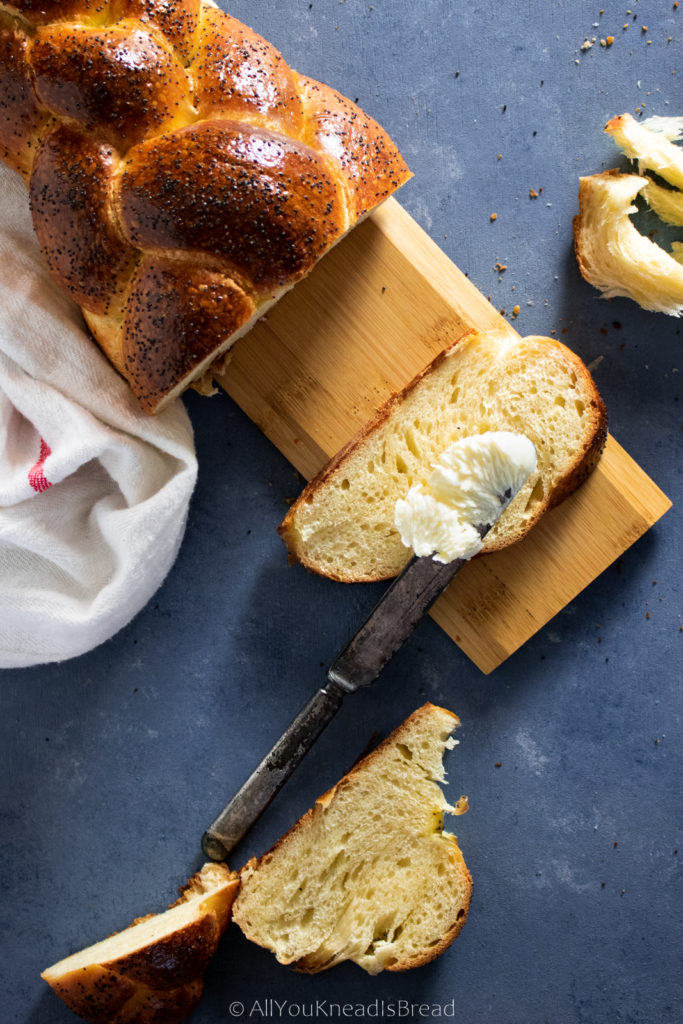
This dough is not on the sticky side, however, you need to make sure you develop the gluten very well. If you do so, you will have a delicate and cohesive sourdough challah that will stay fresh for several days. You can check this post for some guidance on how to knead enriched dough based on real bread science.
I can’t stress this enough: make sure you knead the dough well. Do it little by little. Allow the gluten enough rest if you think the dough is not really coming together after a while. If you’re using a stand mixer, the dough shouldn’t stick to the bottom. And if you’re using your hands, the dough shouldn’t stick to the heel of your hands or the counter.
Developing the gluten well takes a bit of time, but the reward will be amazing. You’ll end up with a dough that’s easier to handle (it won’t stick everywhere), a plump braid, and a bread that won’t dry out and harden right after it cools down.
The ingredients
Since this recipe doesn’t have a lot of moisture, I prefer to add all ingredients at once except the oil. I find it’s the best way to ensure salt and sugar dissolve well, and that all ingredients are properly distributed. You want to have a homogeneous dough.
Once you start kneading and the dough acquires certain consistency, add the oil and incorporate it well. This step might be easier to do by hand than with a stand mixer. You can add the oil little by little or all at once, whatever is more comfortable for you.
In the ingredient list, you’ll find a range in the amounts of oil and water. You can decide which type of dough you prefer. A slightly softer dough that leads to a slightly softer bread, or a slightly stiffer dough that’s easier to shape. The range is not large, but those extra 10 or 20g do make a difference, especially using AP flour.
My flour has 11.7% of protein, if yours has more/less, you will need to adjust the amount of water accordingly
What If I can’t eat eggs?
If you can’t eat eggs you can substitute them with pumpkin puree. It’ll give the dough an orangey color, but it’ll make the dough spongey too. Just be careful with the liquid because pumpkin puree does have some extra moisture.
How to incorporate the oil
If you have read some of my posts you know I’m very particular about developing the gluten network. Adding butter when the dough is half-developed is a bit of work but nothing impossible. However, adding oil can be a lot trickier. So here are my tips:
1) Add the oil little by little. If you add it all at once the outer layer of the dough will be covered in oil and won’t let it penetrate.
2) Squeeze the dough as you knead so you can break that outer layer and the oil can penetrate.
3) If you still have problems, cut the dough into smaller pieces to increase the surface area of dough that hasn’t been coated in oil yet (the inside part) and keep squeezing
4) If you work on your counter, squeeze the dough as if you were wringing out a cloth.
5) Be patient, it’ll take a few minutes but it’s not impossible!
The key to incorporate the oil is to make sure it can pass through that outer layer of dough that has been coated in oil and is slippery. You can cut the dough, squeeze it, wring it… Whatever works for you.
But.. Can I just add the oil with the rest of the wet ingredients?
Yes, you can AS LONG AS you make sure the gluten is developed correctly. The reason I encourage you to add it later is that we tend to stop working the dough absorbs the fats. And that leads to denser crumbs and lower quality bread.
But if you make sure you get that beautiful windowpane and a dough that is elastic and nice. Then yes, you can add the oil earlier in the process.
I’d still suggest you add it after mixing everything else, while you have that shaggy mess of dough at the beginning. The reason why is because the flour had at least some time to hydrate without oil getting in the middle. Moreover, the gluten network is still at a very early stage, so it’ll be easier to squeeze the dough and allow the oil to be absorbed.
How to ferment sourdough challah
I found that the temperature range in my house did not affect the fermentation too much. However, the amount of water did. Keep in mind that the temperature didn’t vary that much (68-74F) and wasn’t too warm.
Note: if your house is very warm, the temperature will affect the fermentation more than it affected me. Keep an eye on your dough during bulk fermentation.
While all sourdough challahs turned out great; I found that the recipe with a little more water fermented faster and the dough was a bit slacker; which made the braiding a bit more difficult as the ropes stretched very easily. The dough with slightly less water and oil ended up in very plump braids; (the very first photo), but the bread was slightly drier than I prefer.
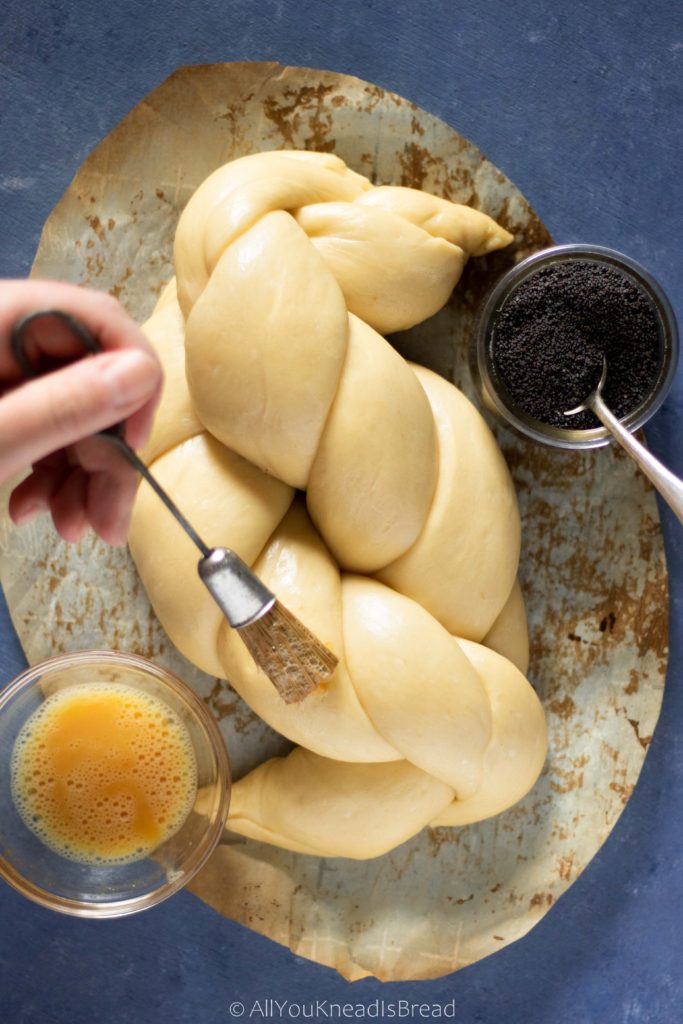
I did all bulk fermentations overnight at room temperature (about 8h at 68-74F depending on the day). The recipe with more water over-proofed a little and developed a slightly sour taste (at both temperatures, even at 68F). However, you can fix this easily by reducing the bulk fermentation.
The recipe with less water didn’t get to rise that much but was still puffy and the taste was sweeter. After shaping, all loaves proofed for 3-4 h (until they were puffy, not until they doubled). The loaves with less water held the shape better.
You should take these experiments as a guide. But what you’re looking for is a puffy dough that still feels stiff (not sticky). If you press carefully, you should leave a mark that springs back slowly. You can adapt the fermentation to your own kitchen conditions.
What I’d suggest is to not rush the bulk fermentation. If your dough didn’t ferment enough, then it could tear open during baking.
Find the balance between temperature and fermentation
In any case, try not to over ferment the dough, or it might turn sour and slacker. It should feel puffy, it should smell like sourdough but not too acidic with slightly but pleasant acetic hints. Same for the final proof, let it get puffy but don’t wait until it doubles.
It’s very difficult to see when it doubles unless the dough is in a container. Waiting for it to double might end up in an over-fermented dough that will flatten during or after baking and won’t taste as nice.
How to braid this sourdough challah
Divide the dough into as many portions as you want strands in your braid. Let them rest 10 minutes before you make the ropes.
To make the ropes, flatten the dough balls into a 2 in/10 cm oval. Then starting on the long side roll the oval onto itself giving it some tension as you go. Once you shaped the log seal the seam.
Let the logs rest a few minutes; then starting from the middle towards the outside stretch the logs and make the ropes. If the ropes keep shrinking let them rest. The gluten it’s pulling and if you continue to stretch the dough you’ll end up breaking the gluten structure.
Braiding the challah a little loose will allow it to tighten as it proofs. It will puff up during baking and be very plump. If the braid is too tight from the beginning, it could tear during baking
After you brush your challah with the egg white, you can sprinkle some poppy or sesame seeds to decorate it!
Here you have a video for an 8 strand challah:

The good thing about challah dough is its versatility when it comes to shapes and braiding. If you’re looking for a beautiful shape but are a bit intimidated by braids, I’d suggest you try your hand at a round challah. It’s very easy to braid and you won’t get lost.
The baking
Since every oven is a bit different, bake your challah until it’s golden brown. If it gets too dark on top you can tent it with aluminum foil until it’s done inside. If you have trouble knowing if the bread is done, check the inside temperature. It should register at least 200F / 94C.
I have this thermometer and I’m very happy with it. It’s fast and accurate and it can hold the max/min temperature. What I like the most is that it has a magnet! So I can leave it stuck on the fridge while I’m baking for easy use.
After baking let the challah cool down for a while. It will help set the crumb and aromas!
I hope you enjoy this wonderful sourdough challah!

If you make this easy sourdough challah, let me know what you think and tag me on your creations! I love to see what you guys make!
You can find me on Instagram or Facebook and you can also subscribe to my Youtube channel.
For suggestions or want me to adapt a yeast-based recipe into a sourdough one, etc. please contact me and I’ll try my best to respond and plan a recipe!
Happy baking!
This post contains affiliate links and any sales made through such links will reward me a small commission – at no extra cost for you – that allows me to keep running this blog.

Easy and Delicious Sourdough Challah
A delicious sourdough challah with a very fluffly crumb. Perfect to eat plain, to make toasts, or even french toasts.
Ingredients
- 345 g king arthur all purpose flour (11.7% protein content)
- 110 g sourdough starter at its peak of activity
- 70-80 g water room temperature
- 1 Large egg
- 1 Large yolk (save the white for final egg wash)
- 50 g granulated sugar
- 80-90 g vegetable oil
- 6 g salt
- 1 tsp poppy or sesame seeds optional
Instructions
-
Add the water and the sourdough starter to a bowl and with a whisk bread down the starter
-
Add the egg, the yolk, and the sugar and combine everything
-
Sift the flour and salt together and add them to the dry ingredients
-
Combine everything until you don't see dry flour particles and let it rest 30-60 mins
-
Start kneading, if using a stand mixer you can use the paddle attachment
-
When the dough starts developing the gluten add the oil and keep kneading until it's completely absorbed (see notes)
-
Knead 4-5 minutes and let it rest another 5-7 minutes. Continue doing thes until it's ready (Let the dough rest as much as necessary).
-
When the dough passes the windowpane test and it's smooth and elastic, put it in a lightly oiled container and let it ferment until it doubles or almost doubles and feels puffy (at 68-74F it takes tops 8h, typically overnight)
-
Degas the dough and let it rest a few minutes. Then divide it in as many strands as you want for your braid, shape them into dough balls and let them rest (covered) for 10 minutes
-
Take one piece of dough and with the heel of your hand flatten it. Use a rolling pin to roll the dough into a 7 x 4 inches oval. Starting from the longe side roll the dough into itself and form a log. Pinch the seam closed and gently roll from the center outwards lengthening the log
-
Repeat with all the dough pieces, if it's difficult to stretch the log, let it rest a few minutes
-
Braid the challah and place it on a piece of parchemnt paper on the tray you'll use to bake it. Cover it with plastic wrap and let it rise until it feels puffy (at 68-74F it takes about 3-4h)
-
Preheat the oven for 20 minutes at 350 F. When the challah is ready, brush it with the egg white and sprinkle poppy or sesame seeds. Bake it for 35-40 minutes or until it has a nice golden brown color
-
Let the challah cool down to room temperature before slicing it
Recipe Notes
- If you’re kneading with a stand mixer you might find it easier to incorporate the oil by hand. Squeezing and twisting the dough will work faster.
- If you think the challah getting too dark but the inside is not done, tent it with a piece of aluminum foil.
- Kept it in a plastic bag or airtight container, it can last fresh and soft several days.
Sourdough Blueberry Muffins
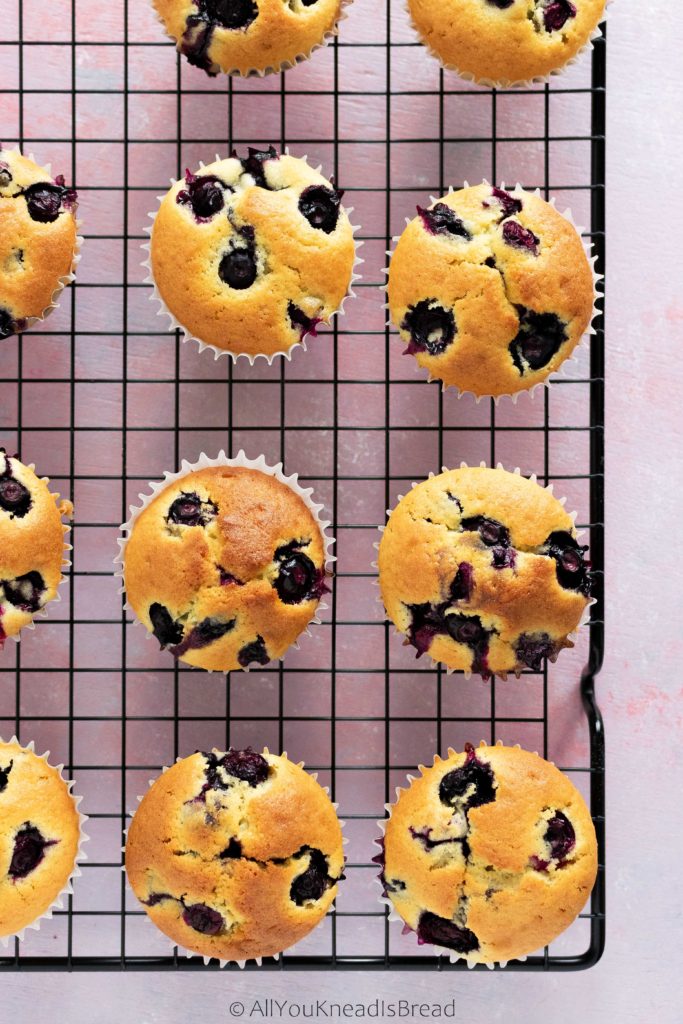
Two words: blueberry muffins. It can’t get better than that. Nah, it can, with sourdough it can! Sourdough blueberry muffins, my friends!
I’m determined to use all my sourdough discards, it is painful to throw it away! So these days the new normal is something like this:
Feed starter – save discards – bake loaf -bake with the discards
The more I bake with sourdough discards, the more I get to test the effect on other food. So far, I can say that cakes and muffins made with sourdough last longer than those without. Nothing new really, sourdough bread also lasts fresh longer time
Isn’t it amazing? Although… after you make these muffins, I doubt you’ll need an extended shelf life, they’re INCREDIBLE!

Why do sourdough baked goods last longer?
Bread and other baked goods are usually discarded when they lose quality rather than when they get spoiled. Bread gets stale kind of quickly, cakes dry and get crumbly… Although there are many factors involved in why and how baked goods dry out, obviously, moisture content plays a key role.
When you mix your ingredients with water, the very first thing that happens is that those ingredients absorb the water. They start making hydrogen bonds and trapping the water within the matrix. Sugar and salt start dissolving, gluten proteins start hydrating, starch granules starch absorbing water and swelling (you see why autolysis helps to develop the gluten? Wink wink)… And all this takes a long time. Much more time than we think.
If we focus on the physical changes of food, rather than the biological changes of sourdough fermentation, we need to pay close attention to how the water is used in baked goods.
Moisture is key
There are two types of water in food: the bound water that’s forming some type of bond and the free water, that is simply stored within the food matrix.
After baking, the free water is going to be the first to go. It moves from the inside of the food (The crumb) towards the outside. Thus, why crust gets soggy over time, and then it finally evaporates and leaves the food.
Bound water, however, it’s somewhat trapped. It can be part of the gluten network, of swollen starch granules, it can be trapped within the fat matrix etc. The amount of bound water (among other things, of course) is one of the things that determines how long the food stays fresh; because its’ much more difficult to separate from the other ingredients. So the loss of quality related to water is slowed down.
Since sourdough baking needs lots of time, the levain preparation, long fermentation times etc. allow all ingredients to keep absorbing water and binding it to other molecules. The flour had many hours to ensure al the particles are saturated with water (I’m assuming a 100% hydration starter here). These bonds survive throughout the whole process; after the food is baked and starts cooling down, the food holds onto these water bonds.
And that’s one of the reasons food made with sourdough lasts longer!
If you’re interested in other food science facts, feel free to send me an email or DM on social media and I’ll try my best to write a post about it!
Back to the muffins!
Alrighty! About these muffins… I made them small for two reasons: 1) because the number of muffins I eat doesn’t depend on the size, so I’d better eat smaller portions now that the gym is close 🙂 and 2) because I don’t have a large muffin tin and if I buy more kitchen stuff my husband is going to make me sleep in the kitchen.
So obviously, feel free to make larger muffins or smaller. Whatever you prefer!
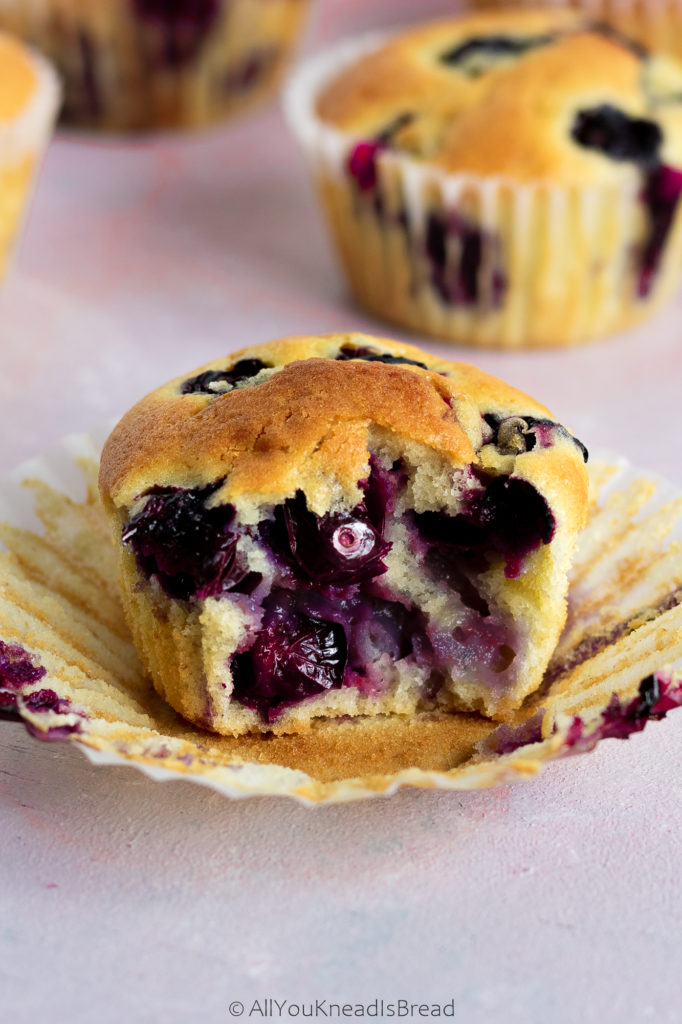
I like to whip eggs and sugar very well, this helps with the airy structure of the muffin and I think the texture turns out super delicate!
Usually, when you make blueberry muffins, they collapse a little after they come out of the oven, it’s normal, that’s because the water inside of the fruits turns into steam while the muffins are baking, and they swell. Some blueberries might burst, and the others, when they cool down, they collapse because the steam condenses. They also wrinkle because the heat affects the structure of the skin.
I like to let the batter chill in the fridge for at least a couple of hours to allow the baking powder and baking soda hydrate well. Their leavening power is activated by acids and moisture. You can leave the batter in the fridge overnight and bake the muffins first thing in the morning!

If you make this recipe, let me know what you think and tag me on your creations! I love to see what you guys do!
You can also follow me on Instagram or Facebook and you can also subscribe to my Youtube channel.
If you have any suggestions or would want me to make some recipes, adapt a yeast-based recipe into a sourdough one, etc, please contact me and I’ll try my best to respond and plan a recipe!
Happy baking!

Sourdough blueberry muffins
Use your sourdough discard to make these delicious muffins!
Ingredients
- 200 g all purpose flour
- 200 g sourdough discards (collected throughout a week)
- 1/2 tsp baking soda
- 1 tsp baking powder
- 1 pinch salt
- 3 L eggs
- 180 g caster sugar
- 1 tsp vanilla extract
- 1 tsp lemon extract (optional- to taste)
- 180 g heavy whipping cream
- 60 g olive oil (see notes)
- 1½ cups blueberries
Instructions
-
Preheat your oven at 375 F
-
Sift the flour into a large bowl. Take a tablespoon of that flour and reserve
-
Add the baking soda, baking powder and salt to the flour and combine
-
In the bowl of your stand mixer whip the eggs until they are fluffy and have a light yellow color
-
Add the sugar to the eggs and combine
-
Add the whipping cream, the oil, the sourdough starter, and the extracts and combine well. Use a spatula if you need to break down the sourdough blob
-
Change from the wire whisk to the paddle attachment, add the flour in 3 batches and combine at medium-low speed
-
In separate bowl toss the blueberries and the tbsp of flour you reserved and carefully stirr tso they blueberries get a nice coat of flour
-
Add the blueberries to the batter and with a spatula stir until just combined (you can put now the batter in the fridge if you want)
-
line a muffin tin with baking cups and fill them to about 3/4
-
Add some blueberries on top as decoration
-
Bake for about 30 minutes or until they have a nice golden color
Recipe Notes
I like to use olive oil because I think it gives muffins in general a really nice aroma. And it’s also how my mom taught me. But feel free to use melted butter or any other oil of your choice!
If you don’t have blueberries, you can make these muffins with any other fruit
How to make sourdough chocolate banana bread

A year ago I was writing that dissertation, I was stressed, hypersensitive, anxious… Sometimes I’d be happy it’d soon be over, and sometimes I’d feel nostalgic for the very same reason. A year has passed and I’m just starting to rebuild myself and enjoy my guilt-free life… With this sourdough chocolate banana bread! That’s right! It’s all about using sourdough discards!
Using sourdough discards in your baking
Learning the science of bread is one of the reasons I started this blog. Because I find breadmaking an incredibly endearing process and yet so misunderstood. There are different methods to take care of your sourdough starter; some people generate discards, others don’t. I never throw away the discards, that’s sourdough that can be used on other things!! It’s pre-fermented flour that can bring flavor to yeast bakes, like this brioche recipe with sourdough discards. It also helps increase the shelf life of baked products by slowing down the staling process and controlling the pH a bit. This way spoilage microorganisms find it harder to grow on the food.
This year I also want to start implementing a new approach when it comes to food: ZERO WASTE. I know many people generate a considerable amount of sourdough discards. And I know using sourdough discards sounds like a crazy idea for many. But let me tell you.. once you make this sourdough chocolate banana bread with sourdough discards, you will be converted forever!!!
So today I inaugurate a new type of recipe: SOURDOUGH DISCARDS
I’ll upload different recipes using sourdough discards so you don’t just throw them away. Recipes with that extra kick of healthiness that only a sourdough starter can provide. As always, all recipes will be tested to ensure the best results!
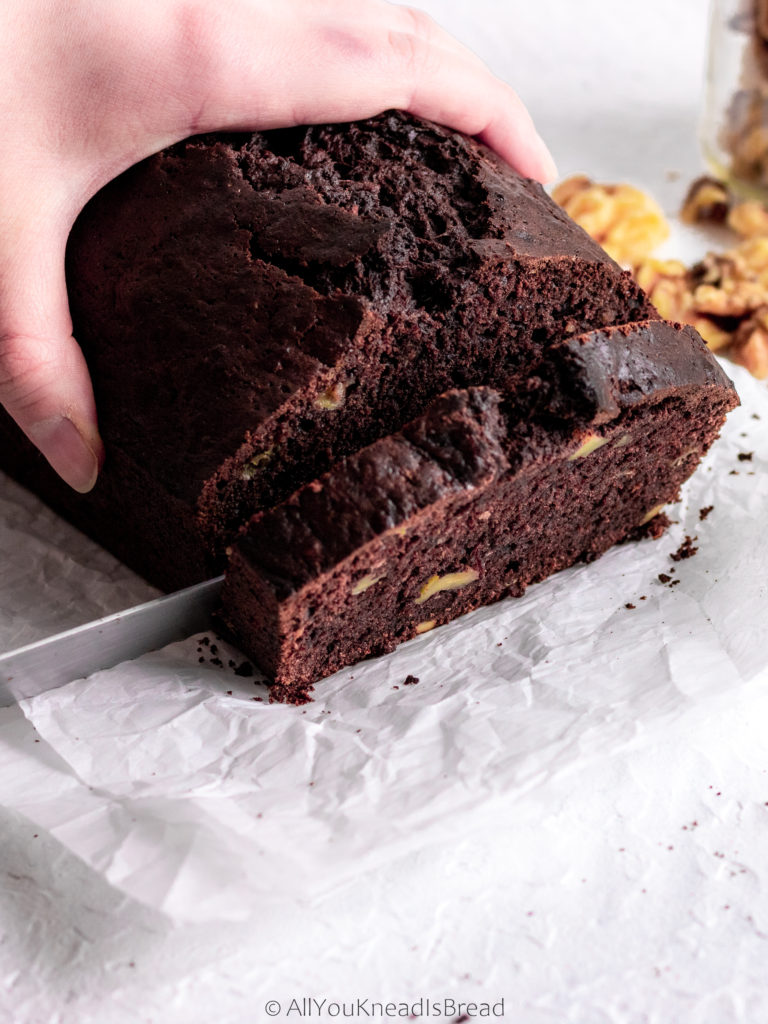
To inaugurate this new batch of recipes I wanted to make something special. I’ve developed this sourdough chocolate banana bread that’s going to make you fall in love with it!
It’s moist but not too dense. It’s spongy, full of flavors, a nice chocolate kick that doesn’t overtake the banana taste. And it lasts fresh for days even if you don’t keep it in an airtight container! (You didn’t think that sourdough could only keep regular bread fresh for a longer time, did you?)
I did not add chocolate chips of any kind to this bread, just walnuts. Because I wanted to taste the banana. But if you prefer a more chocolatey flavor, customize those extras to your taste buds.
About this sourdough chocolate banana bread
It works best with very ripe bananas. Those brown mushy ones? Yeah, those!
If you’re not ready to bake banana bread but your bananas are getting too ripe to eat, just peel them, freeze them and use them whenever you’re ready! Just make sure you drain the water after they thaw. I think frozen bananas are the best for banana bread, they keep the moisture much better and they also enhance the flavor of the bread.
I collected the sourdough discards throughout 3 or 4 days of consecutive feedings and kept it in the fridge until ready to bake.

What if I have old sourdough discards?
I have tested this recipe with discards that were several weeks old. The only difference in flavor is that the chocolate banana bread was less sweet. Which makes sense, because the discards have been acidifying and part of the sugar is used to neutralize those acids.
So, depending on your taste buds, you may want to adapt the sugar. Although, this recipe has a considerable amount of it. But like always, you have the idea here, then you can customize it to your liking! 🙂
How long does it take to bake?
The baking time depends on your oven. Start taking a look at the bread after 50-55 minutes. The best way to know if your banana bread is ready is by inserting a toothpick (or a thin skewer) all the way down in the middle part of the loaf (that’s the part that takes the longest to cook). If it comes out clean, you’re good to go!
Don’t overbake this sourdough chocolate banana bread, you want it moist, not too dry, once the toothpick comes out clean, it’s ready!
Let me know if you make this chocolate banana bread using your sourdough discards and tag me on Instagram or Facebook so I can see your creations! And don’t forget to subscribe to my Youtube channel too, where once in a while I upload videos for some of my recipes.
Enjoy!
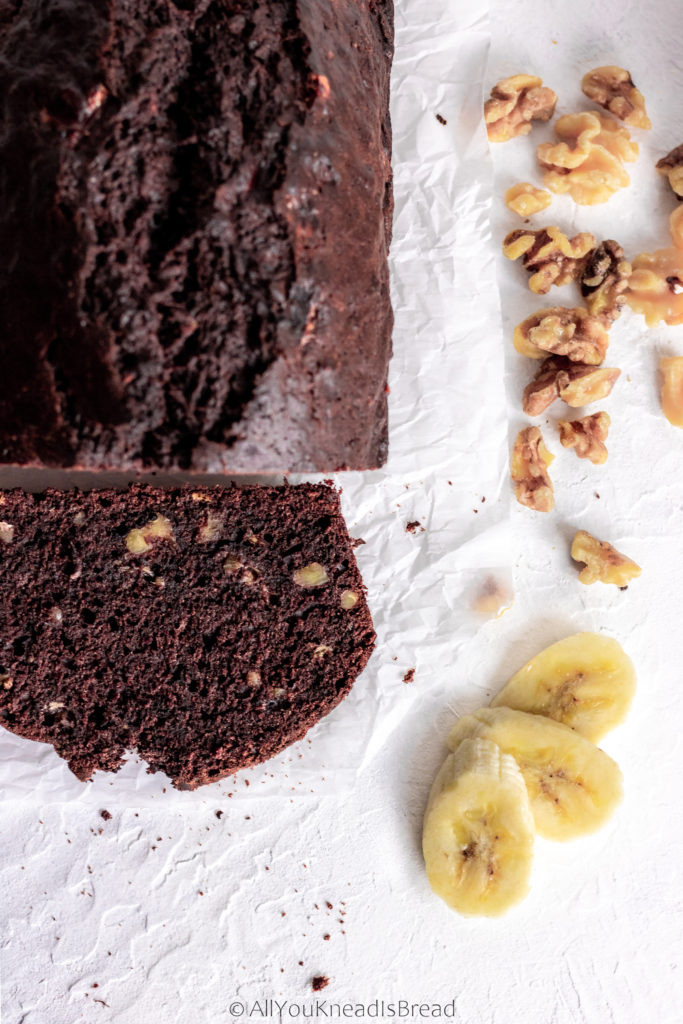

Sourdough chocolate banana bread
Ingredients
- 220 g all-purpose flour
- 40 g unsweetened dark cocoa powder
- 135 g sourdough starter discards
- 180 g brown sugar
- 2 eggs
- 115 g vegetable oil
- 3 very ripe bananas
- 1 tsp baking powder
- 1/4 tsp baking soda
- 1/4 tsp salt
- 1 tsp vanilla extract
- 1 cup chopped walnuts (optional and customizable)
Instructions
- Preheat your oven at 350F
- Grease a 9×5 in mold (or line it with parchment paper if you prefer)
- In a large bowl, combine all dry ingredients (flour, cocoa powder, salt, baking powder, and baking soda) and make sure the baking powder and baking soda don't have any lumps.
- In a smaller bowl whisk the eggs, add the vegetable oil and vanilla extract and combine until the eggs get a light color. Then add the brown sugar and mix for a couple of minutes.
- Add the sourdough starter and stir until it breaks down and it's incorporated (you might see some strands, it's ok, the starter had some gluten developed)
- Mash the bananas, add them to the egg mixture and combine everythng well
- With a spatula, lightly fold the wet ingredients into the dry ones
- Add the chopped walnuts and stir just until they're combined
- pour the batter into your mold and bake for 60 minutes or until a toothpick inserted comes out clean (time might vary depending on your oven temperature)
Gorgonzola and apple sourdough bread – Video

Hello friends!
I’ve decided that it was about time for me to post some sourdough bread recipe and spread the sourdough fever!
Before I start I’d like to make something clear:
There isn’t just one single method to make sourdough. Any bread, really. But especially sourdough. My method works for me because I’ve adapted it to my kitchen conditions, my flour, and our taste buds.
If you’re new to sourdough baking take this recipe as a guide and experiment with what you like
Since sourdough is the result of wild yeasts and bacteria fermentation, it’s unique for each person. Each starter is different because the flours used are different, the water quality is different, the temperature in each person’s kitchen is different…
Sourdough for beginners: what I wished someone told me when I first started
My very first sourdough bread was… pretty messy! I was intimidated and I thought that not following the recipe by the minute was going to turn my bread into something awful “OMG! It has fermented 5h and 1 minute!” So here are some of the things that I learned along the way:
1. Don’t worry! You can adapt the fermentation time to your own schedule. Sometimes deciding what you’re going to do with the bread is more difficult than actually making the bread. The more you bake, the more you learn.
2. Experiment, try different things. Shorter bulk fermentation, longer cold-proof… whatever works for you!
3. Flour flour flour! Flour your banneton, flour your dough and flour everything so the dough doesn’t stick to the banneton or the cloth. Too much flour ain’t never enough flour! After all the work you don’t want the dough to stick to the banneton or the cloth right before baking. Some people like to use rice flour or starch because they absorb more water and the dough never sticks. I found that all-purpose flour works great, as long as you use enough.
4. If anything, it’s better to under-ferment than over-ferment. Why? Scientifically speaking, the gluten network of over fermented dough loses strength and it’ll be difficult to shape, it won’t hold the shape during baking, and it’ll have a terrible oven spring because the lack of strength means less ability to hold gas inside (it’s the same concept as to over-knead the dough). Also, and this is my opinion, some people might disagree, but it’s been helpful for me: slightly under fermented dough has more chances to turn into a great bread than over fermented dough. The crumb might not have super large holes, or maybe you don’t have that tart taste you’re looking for, but the dough will hold the shape better, the oven spring will be better, and overall the bread will be better than an over-proofed one.
5. Make sure the gluten is developed. Either if you knead the dough by hand, on a stand mixer or if you do a “no-knead” bread. The dough has to be elastic and smooth, it shouldn’t be sticking everywhere. If you are kneading, there shouldn’t be dough on the walls of the stand mixer bowl, or on the counter. The dough has to be strong enough to be able to pull itself together without breaking. If you’re making “no-knead” bread, you should be able to stretch the dough without it tearing apart.
6. Shape the loaf well, don’t be afraid. During shaping, you’re going to use that strong gluten network that you’ve built to be able to create surface tension. That means that you’re going to stretch the outer layer of gluten in a way that will help keep the shape tight and in place, but if you push too much, the layer will eventually tear apart, and the bread won’t hold the shape. I like to think about it as covering a bowl with plastic wrap, you need the wrap tight in order to be in place, but if you pull too much, you will tear it.
7. Don’t get overwhelmed by information. The Internet is packed with sourdough recipes, methods, how to build a starter… My advice? Pick one method to build your starter and stick to it until you’re comfortable enough. Each method will be different and will be adapted to each baker. That’s why they’re all so different and why I don’t want to add more information about it, there’s just too much out there. If you really want to know how I built my starter, how I care for it etc. feel free to contact me and I’ll be more than happy to help!
8. BE PATIENT. Bread making is all about patience. If your first bread doesn’t turn out great, don’t worry! Keep trying. Write down what works, and what doesn’t. And if you want to experiment, change only 1 or 2 things at a time so it’ll be easier for you to narrow down what went wrong, what worked, what’s creating problems…
Let’s get to the recipe!
Gorgonzola cheese has a very intense flavor, it should be consumed in small amounts, so your palate is not overwhelmed and you get to enjoy all the aromas and flavors.
Apple is a sweet fruit but not too sweet that would take over the cheese taste. Actually, it helps your taste buds to balance everything every flavor.
And the bread, of course… the sourdough taste, the airy crumb, the slightly crunchy crust…

Are you drooling yet? I thought so 😊
I used 100g of gorgonzola (half packet) and 1 medium-large fuji apple. You can go for a tarter apple or a sweeter one.
I’ve tried this recipe with different water contents and the bread has always turned out very similar. The cheese fat and the water in the apple are essential to get the super soft bread. And because of those, the crust is crunchy but thin, so it’s not hard at all.
You’ll see how light and springy this bread is!

This bread is just amazing! I never recommend to eat the bread warm, but for this one? I can’t tell you to wait until it’s cooled down. Just give it 30 mins to set the crumb and go ahead! And since it has both savory and sweet, you can combine it with anything you want!
If you make this bread make sure you tag me on Instagram! I’d love to see what you made!


Gorgonzola & apple sourdough bread
This bread is very soft with incredibly balanced aromas
Ingredients
- 320 g bread flour
- 80 g whole wheat flour
- 320 g room temperature water
- 80 g 100% hydration starter
- 1 medium fuji apple
- 120 g gorgonzola cheese
- 7 g salt
Instructions
-
Mix flours and water (you can add less water if an 80% hydration is too much for you). Let the dough rest for up to 3h (autolysis)
-
Add the salt and mix the dough until you don’t feel salt particles. Wait 30 minutes
-
Add the starter, incorporate it very well and let the dough rest for 30-45 minutes
-
Peel and chop the apple and cut the cheese into small cubes
-
Laminate the dough: use your fingers and stretch the dough from the center towards the outside, don’t worry about the shape. Add the apple and the cheese and distribute them well. Fold the dough and shape it into a ball and place it back in the bowl. Wait for 45 mins
-
Do three sets of coil folds or stretch and folds every 45 mins (time can vary between 30-60mins). After the last set of fold, let the dough ferment until it doubles in size, the time depends on the temperature of the dough and the temperature of your kitchen (it can be anywhere from 3-8h)
-
Flour the counter well, let the dough fall from the bowl onto the counter by itself and shape it into a batard or a boule
-
Line a banneton with a clean cotton cloth and flour it generously. Place the dough into the banneton with the seam up and stitch the seam. Cover the dough with the cloth and put it in the fridge for 8-24h (If you don't have a banneton you can use a bowl).
-
Preheat your oven at 450F with a dutch oven inside (or a pizza stone or a baking tray) for at least 30-40 minutes
-
Take the dough out of the fridge and place it on a piece of parchment paper. Score the dough with a sharp knife or blade. Put it in the dutch oven and reduce the oven temperature to 425F . **See notes
-
Bake 20 mins with the lid on and another 15-25 mins without the lid or until it has browned nicely (depending on your oven the bread might be done earlier or later)
-
Cool on a cooling rack for 30 mins to let the crumb set and enjoy!
Recipe Notes
** If you don’t have a dutch oven, place another baking tray in the bottom rack while the oven it’s preheating. Add a cup of boiling water to that baking tray right after you put the bread inside and close the oven door fast. After 20 minutes remove that tray and bake the bread for another 20-25 minutes. If you use a pizza stone, be careful to not add the boiling water on it or it’ll, most likely, break.
How to do the 3 preparatory refreshments for panettone
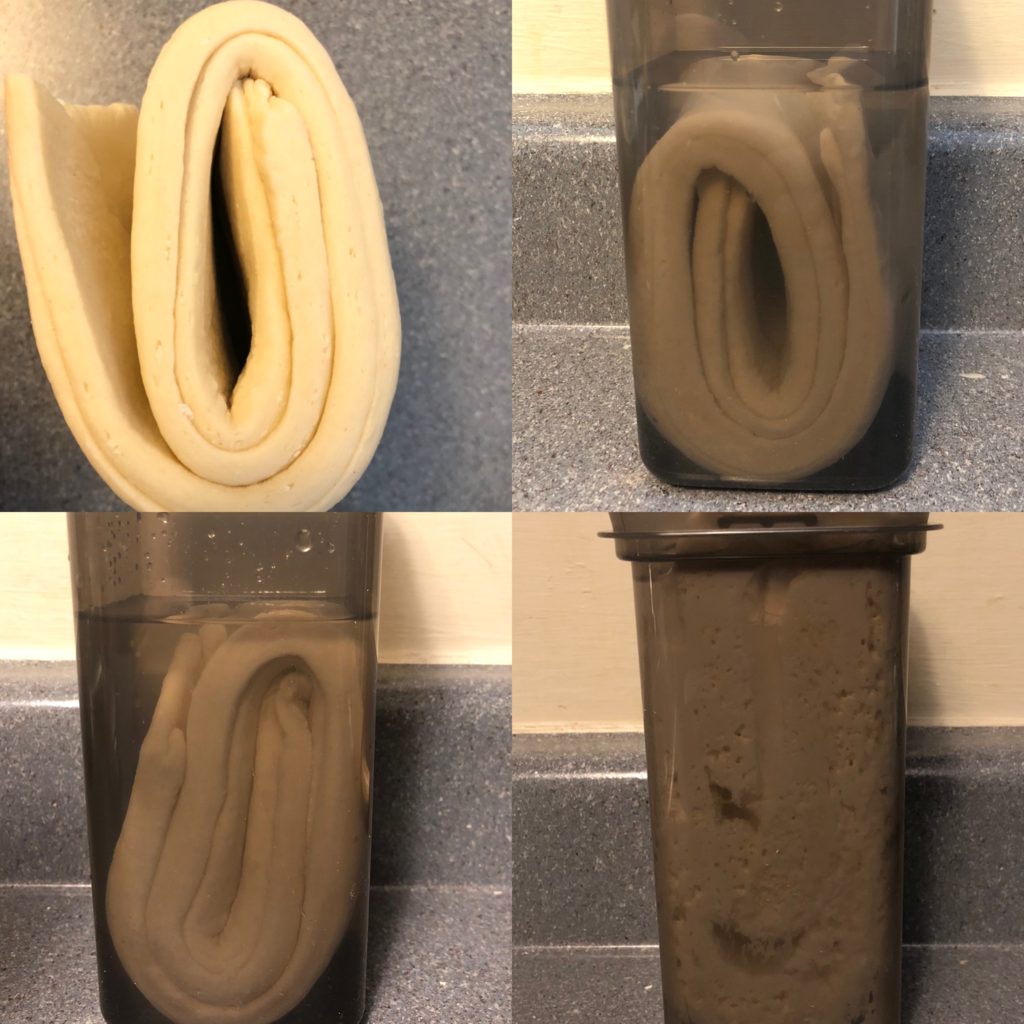
The first thing to make panettone is to create the lievito madre (LM from now on 😉 ) and then what? Then we need to make sure the LM is ready, strong and not acidic before we mix the panettone dough. We achieve this by doing the bagnetto followed by the 3 preparatory refreshments.
To learn how to create a lievito madre from scratch check this post
Why do we need the bagnetto?
This technique is a way to purify, oxygenate and release of acidity the LM. It consists of a warm bath where we’ll put the LM for 30 minutes. Depending on its behavior, we can assess how our LM is doing. If it’s too acidic, if it’s too weak, or if it’s just good to go!
When do we do the bagnetto?
Only in two cases
- Before every maintenance refreshment
- Before the 3 preparatory refreshments for panettone
We shouldn’t overuse this technique because it will weaken our LM if we do it too often, as an exception, if you’re in the same situation as me, I built up my LM in 19-20 days instead of 15. If during those days you suddenly feel a change in your LM and you think it’s smelling much more acidic than the day before (if you can actually measure the acidity that would be even better), you can do a bagnetto, just make sure that you leave at least 2 days between this bagnetto and the bagnetto before the 3 refreshments.
How to do the bagnetto?
This is the procedure:
- Fill up a large bowl with water at 38C/100F (it must be 38C/100F)
- To the warm water add 2g of sugar per liter of water and stir until it’s completely dissolved.
- Proceed to remove the LM from the container, drain the water, remove the mushy part and squeeze very well.
- Place the LM in the water bath and leave it there 30 minutes
Depending on the state of our LM, three things can happen now:
- Your LM floats right away: you either didn’t squeeze it well to remove all the air trapped inside or your LM is too weak.
- Your LM floats after 5-10mins (or within the bagnetto time, mine floated has floated between 7 and 15 mins): it’s perfect. It’ll start showing only the tip and by the end of the bagnetto more of it will be out of the water.
- Your LM doesn’t float after 30 minutes: It’s too acidic, it doesn’t mean it’s weak, it means there is lots of bacterial and yeast activity.
Once the bagnetto is over, proceed with a refreshment the same way you’ve done before:
- 200 g of lievito madre
- 200 g of Manitoba flour
- 30-50% of the weight of flour in water
Mix the dough, roll it until it’s smooth and place it in a water bath for 12-14h
What worked for me was to do the bagnetto in the evening and let the LM ferment overnight. So, the next morning I started the 3 refreshments and started the primo impasto in the evening.
How to fix your lievito madre
There are several techniques but I’m going to focus on the simplest ones
LM too weak
- Leave in the water bath for 5-10 minutes
- Remove it from the water bath an do the 3 refreshments as if you were going to bake panettone
- After the last refreshment let the LM ferment for 12h and do a bagnetto again. At this point, your LM should work fine and float after several minutes.
- If you wish to make panettone, you can proceed now with the 3 refreshments again.
LM too acidic
Since there is a lot of activity, the LM needs more time to get rid of all the acid accumulated.
- Leave the LM in the water bath until it shows signs of wanting to float. After 45-50 minutes it should float.
My LM usually weights somewhere between 250-350g, I used the bowl of my kitchenaid (5qt) and fill it up with 3 liters of water. Since the bowl is not transparent, I can see how the water turns murky during those 30 minutes of bagnetto.
Why do we have to do 3 refreshments?
As I mentioned above, these three refreshments are to ensure that our panettone will 1) Triple in size after 12h of mixing the primo impasto and 2) the aroma and flavor will not be sour or acidic.
When we do the 3 refreshments, we’re also testing how strong our LM is. If it doesn’t triple in 3-4 hours, it means it’s not suitable for panettone. In that case, we can fix whatever the problem is before wasting ingredients.
Also, these 3 refreshments are going to help keep the bacteria happy and in line before they start releasing acids. So we reduce the acidity significantly.
Does it have to be exactly 3 refreshments?
Yes, not 2, not 4, but 3.
Why? Because experience tells us (or better yet… told Italian pasticceri) that 3 is the magic number. Doing less than 3 refreshments does not get rid of the sourness and more than 4 can affect the LM by overfeeding it.
I never thought about this until I started my research for panettone, but sourdough can overeat just like we can. And sometimes, feeding it more won’t make it stronger.
When I learned this, I realized that I did exactly that when I created my sourdough starter, I was feeding it too often and it got to a point where it was lethargic. The moment I reduced the feedings, it came back to life.
So, refreshing the LM more than 3 times might not give you the results you look for.
When do we do the 3 refreshments?
After the bagnetto we have to do one more refreshment, then let the LM ferment in water for 12-14h and then we will start with the first preparatory refreshment, after 3-4h we’ll do the second, after another 3-4h we’ll do the third refreshment and it’ll be ready to add to the first panettone dough after 12-15h.
A mature LM should triple in size in 3 to 4 h, if it does it before 3h something is wrong, it might be too active.
How do we do the 3 refreshments?
The method is the same as to any other refreshment:
- 200 g of lievito madre
- 200 g of Manitoba flour
- 30-50% of the weight of flour in water
After the bagnetto you need to squeeze the dough well and get rid of that slimy layer. Then proceed as any other refreshment: mix the dough, roll it several times, place it in your container and add the water. Then wait 12-14 hours, probably overnight. and refresh the LM again following the same method.
After 3-4h, proceed to do the 3rd refreshment and let it ferment for another 3-4h, then it’ll be ready to add to the dough.
If your house it’s too cold, you should carry out the three refreshments in a controlled environment, somewhere around 26-28C / 80-84F, otherwise, the LM might not grow enough in 3-4h

Refreshment schedule
7:45 am (12h after the bagnetto) take the dough out of the container, squeeze it well and proceed with refreshment #1:
- 200 g of lievito madre
- 200 g of Manitoba flour
- 30-50% of the weight of flour in water
8:15 am Roll the dough and place it in the water bath. Let the LM ferment 4h
12:15pm take the dough out of the container, squeeze it well and proceed with refreshment #2:
- 200 g of lievito madre
- 200 g of Manitoba flour
- 30-50% of the weight of flour in water
12:45 pm Roll the dough and place it in the water bath. Let the LM ferment 4h
4:45pm take the dough out of the container, squeeze it well and proceed with refreshment #3:
- 200 g of lievito madre
- 200 g of Manitoba flour
- 30-50% of the weight of flour in water
5:15 pm Roll the dough and place it in the water bath. Let the LM ferment 4h
9:15 pm PANETTONE TIME!
Take the dough out of the container, squeeze it well, weight the amount of LM you need to your recipe and cut it into small pieces before adding them to the dough to avoid having lumps of LM in the panettone dough.
What’s the best Panettone recipe?
You can use any panettone recipe that calls for lievito madre. The ratios might vary depending on the amounts of egg yolks, butter, sugar, fruits… But if you follow the instructions of the recipe you shouldn’t have a problem 🙂
If you don’t have a recipe I encourage you to try Iginio Massari, Rolando Morandin, Alfonso Pepe, or Ezio Marinato’s recipes. They are well known Italian pasticceri and their panettones are some of the best.
As always, you can reach me through email, Instagram, or Facebook. I’ll be more than happy to help you out!
Cheers to best panettones, enriched dough, laminated dough and bread that you’ll ever make!