- The Reason Flour Changes Everything
- What Flour Actually Controls in Your Baking
- Protein Is Only the Beginning
- Flour Strength Explained: W and P/L — The Part Most Bakers Miss
- Flour Strength Cheat Sheet
- How Different Flours Behave: Real Baking Examples
- When You Change Flour, You Change a Living System
- Why Your Recipe Fails When You Swap Flour
- How to Choose the Right Flour
- The Blending Approach — What the Pros Actually Do
- Final Thoughts: Flour Is the System
- Frequently Asked Questions
Same recipe, same method, same hands… and your loaf turned out a disaster! How? If you only changed the flour! If something like this has ever happened to you, this guide is here to fix that. I’m going to walk you through how to choose the best flour for baking better bread, and how to adapt your recipe to the flour you have.
While an ingredient, flour is not just an ingredient; it’s the foundation that controls how your dough behaves from start to finish. Dough or batter, in fact.
In sourdough baking, especially, it can completely change the outcome of a bake, even when everything else stays the same. Because beyond the changes in flour, you are also introducing a change in the dynamic ecosystem of yeast and bacteria of your starter or recipe.
The Reason Flour Changes Everything
Most bakers are familiar with the protein content in flour. Fewer understand the difference between protein content and gluten proteins. And almost nobody realizes that not all gluten behaves the same; that properties like extensibility and tenacity can turn a loaf into either a masterpiece or a complete disaster.
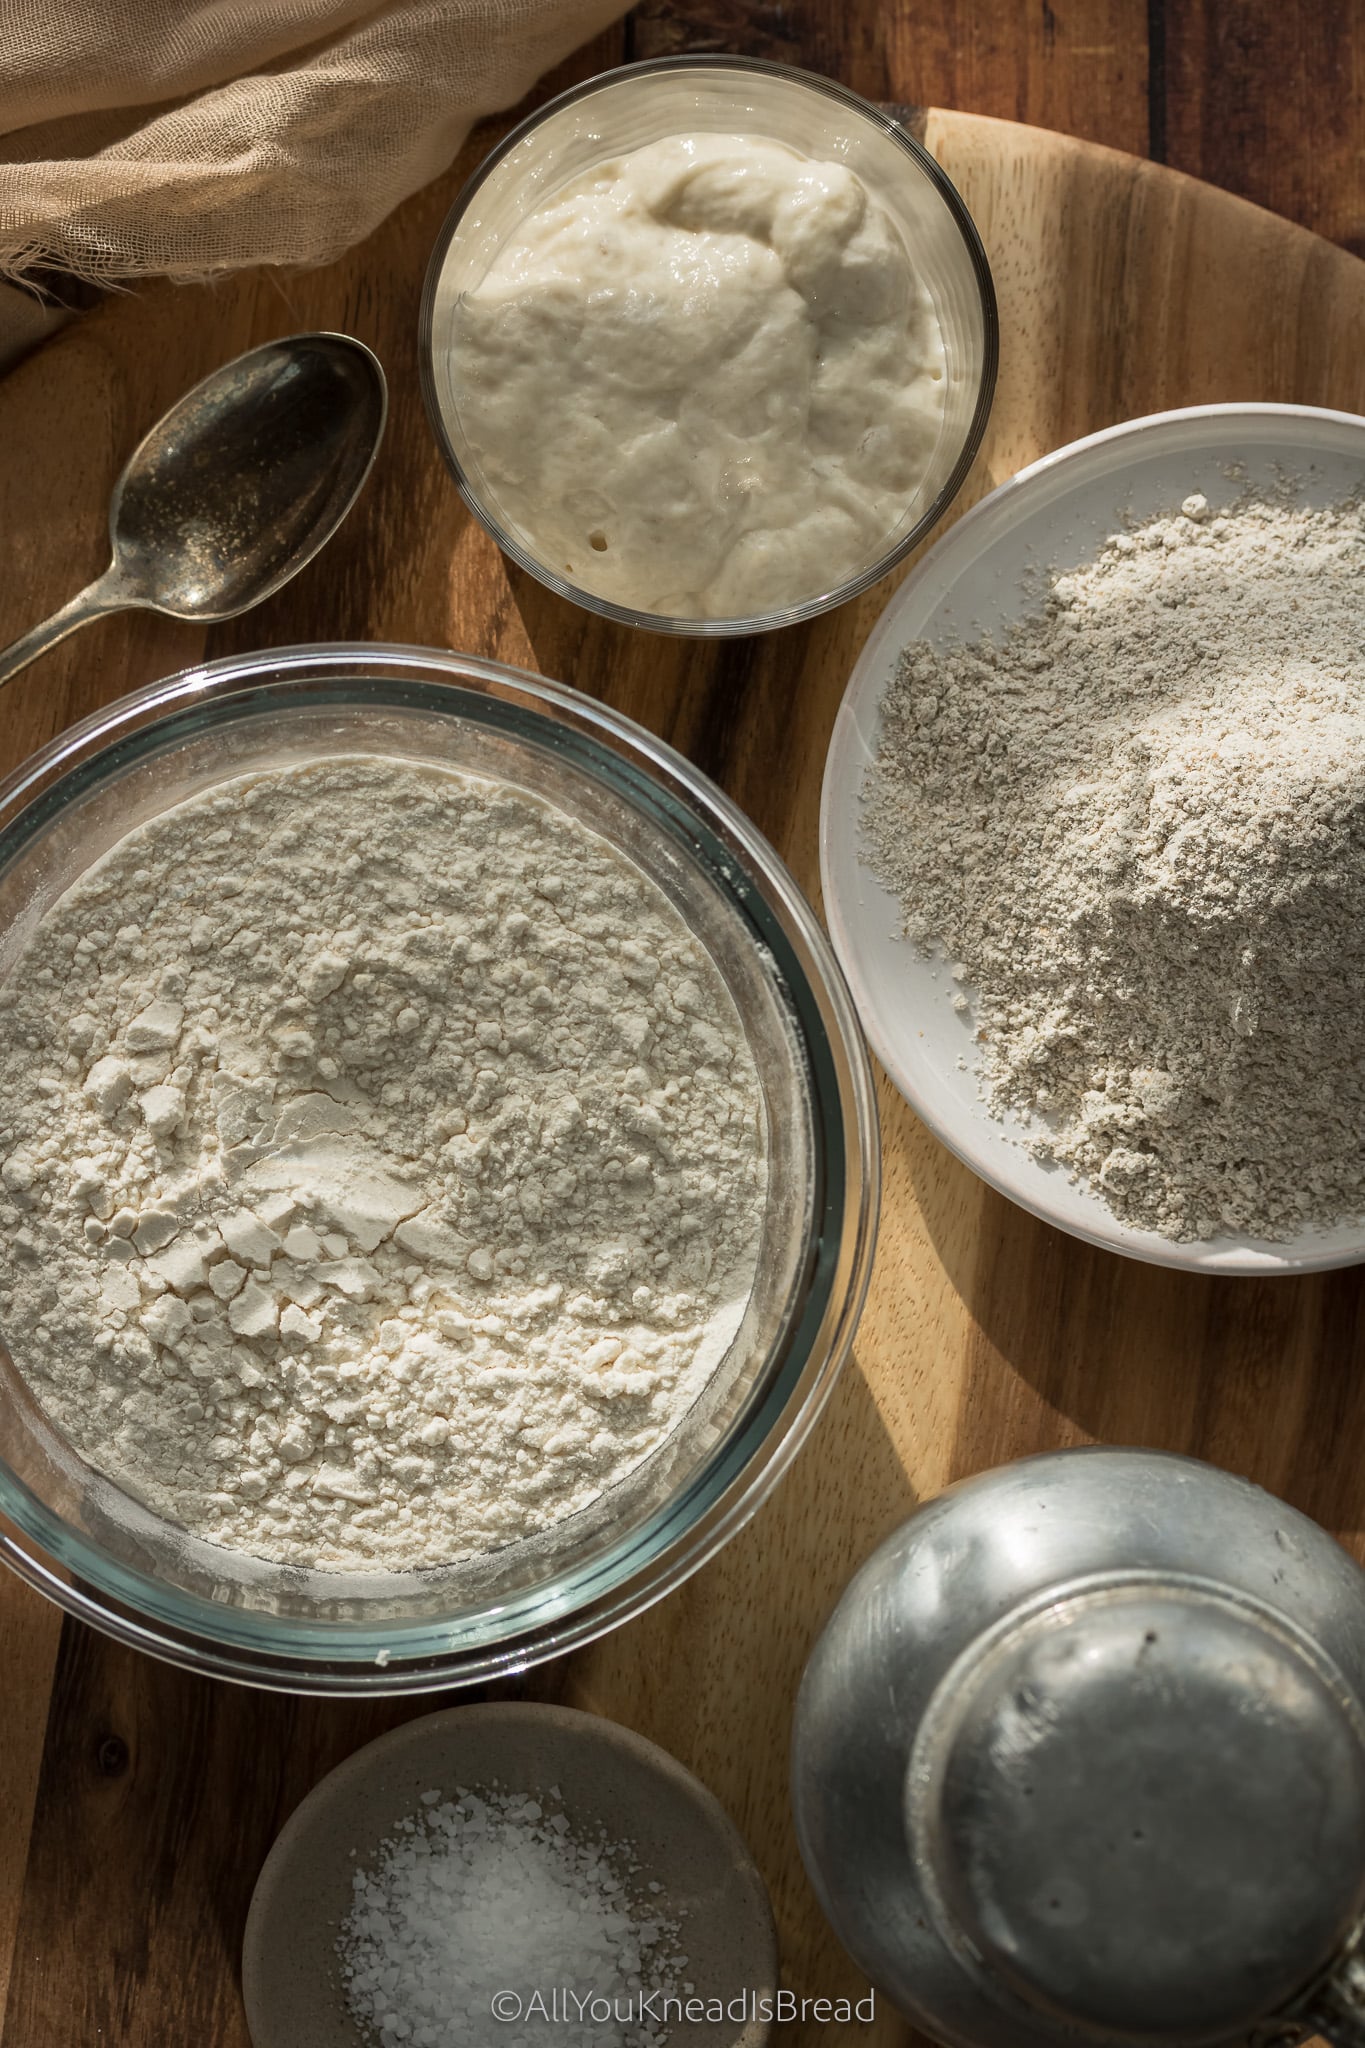
Flour provides structure through gluten-forming proteins that, when mixed with water, develop the famous gluten network. That process is driven by the enzymes, starches, and minerals naturally present in the flour, not just the mechanical part (kneading). Different flours, with different profiles, will have different mechanical needs. You don’t knead all-purpose flour the same as bread flour, right?
But it doesn’t stop there. There is also a biological side to all of this. Fermentation is, after all, the respiration of yeast (and bacteria, too, if you are baking with sourdough). During this process, the polysaccharides are broken into smaller sugar molecules that give the yeasts the necessary energy to produce carbon dioxide and organic acids, which are what make your dough rise and develop its characteristic flavor.
As you can see, flour affects everything! From how much water your dough can absorb, to how fast it ferments, to whether your final bake has a tender crumb or a tight one.
This is true across all of baking:
- Bread: needs gluten strength for structure and crust
- Cakes: need minimal gluten so the crumb stays soft
- Cookies: need controlled spread, gluten can help hold the dough together as the fat melts
- Pastries: need extensibility and delicacy, not toughness
The protein that makes bread chewy is the exact same protein you want to minimize in a cake. Flour itself doesn’t change; what changes is how much of its structure you actually develop, and how you handle it.
What Flour Actually Controls in Your Baking
Let’s break it down into four pillars. Every baking failure or success boils down to at least one of these.
Structure: Gluten and Protein
When flour meets water and mechanical action (mixing, kneading, folding), proteins called glutenin and gliadin hydrate and link together and form what we know as the gluten network. This network gives dough its elasticity and acts like a scaffold, trapping the tiny air bubbles that expand and make bread rise.
Protein content is the most visible indicator of gluten potential. Bread flour typically runs 12–14%, all-purpose flour around 10–12%, and cake flour as low as 7–9%. But protein alone doesn’t tell the whole story. Whole wheat flour can have 14–16% protein, but it still produces a weaker dough than white bread flour due to the bran’s presence.
Hydration: Water Absorption
Different flours absorb water at very different rates, and that’s why two doughs can look completely different even when you follow the same recipe.
- Whole wheat flour absorbs more water than white flour because its bran particles act like tiny sponges. They have lots of molecules that LOVE water, and they absorb it at a much faster pace than gluten can create the network.
- All-purpose flour gives you a moderate, predictable absorption
- Cake and pastry flours absorb less water and produce softer, more slack batters.
You’ve probably even noticed that different brands of the same type of flour absorb water at different rates. That’s because not all wheat varieties have the same properties; some can absorb more water even with the same protein content.
In other words, the same protein content doesn’t mean the same gluten behavior, and it definitely doesn’t mean the same hydration capacity.
This is why a recipe that says ‘70% hydration’ can feel dry with one flour and completely slack with another. Hydration percentages are always relative to the specific flour you’re using.
Fermentation: For Yeast and Sourdough
Flour is not inert in a dough. It contains amylase enzymes that break starch into simple sugars, which yeast and bacteria then consume, and different flours have very different levels of this activity.
- Whole-grain flours are more enzyme-active, which typically speeds up fermentation
- Rye has exceptionally high enzymatic activity; it can make your dough feel slack faster than you’d expect
- White flours are more predictable, but ferment more slowly
Mineral content works the same way. Since most minerals are concentrated in the bran, more minerals mean more bran, and more nutrients for the yeasts and bacteria. Which is why whole-grain flours tend to produce more vigorous starters: there’s simply more to eat.
This is where ash content comes in. In European flour labeling systems, mineral content is expressed as “ash” (not ash present in the flour, but what’s left after the flour is incinerated at high temperature). More ash means more minerals, more bran, more microbial fuel. Higher ash content supports a more active and diverse microbial community, which affects both fermentation speed and flavor development. It’s part of why stone-milled and less refined flours often produce more complex, aromatic bread.
If you’ve baked from European recipes, you’ve probably seen this system already: T45, T55, T65, T80, T110, T150. Those numbers refer to ash content, not protein. A T65 has more minerals than a T55 — meaning more bran, more activity, more flavor potential.
Flour that has been stripped of too many minerals (bran), might have problems during fermentation, especially when using sourdough. The lack of nutrients in the flour means the microorganisms can’t perform at their 100%. If you want to read more about this, you can go to my Troubleshooting my Lievito Madre post, where I had to deal with this very issue!
Flavor and Aroma
Refined white flour has more of a neutral flavor. Whole-grain flours bring overall more complexity: nuttiness, earthiness, and even a slight bitterness from the bran (depending on the grain).
But what are flavor and aroma in bread? In part, they are the result of fermentation: organic acids and volatile compounds (what we know as “aromatics”) that develop as the dough matures. Most of the precursors of these compounds are concentrated in the bran portion of the grain. That’s why whole-grain flours have more potential for flavor and aroma complexity. It’s why a just 10% whole wheat sourdough can taste noticeably richer than one made entirely from white flour.

Protein Is Only the Beginning
If you’ve spent any time in baking communities, you’ve heard protein content is treated like the one number that explains everything. High protein for bread. Low protein for cake. Done.
The problem is that this is incomplete, and it can lead you to make bad substitutions.
Here’s a practical example: two bread flours might both list 13% protein, but perform completely differently in a high-hydration sourdough. One builds a strong, extensible dough that holds its shape through a 16-hour cold retard. The other relaxes too quickly and gives you a flat loaf.
Same protein number. Completely different behavior.
Why? Because protein content measures how much protein is present, not the quality, structure, or balance of those proteins. That’s where the functional measurements come in.
Protein content tells you the potential. W (strength), P (tenacity), and L (extensibility) tell you what the flour actually does with it.
Flour Strength Explained: W and P/L — The Part Most Bakers Miss
Professional bakers and flour millers use a system called the Chopin alveograph to measure two things: how strong flour is, and how that strength is balanced. This gives us three numbers that are, honestly, more useful than protein percentage alone.
The Strength Index: W
W measures the total energy required to inflate and burst a small bubble of dough. Think of it as the flour’s overall horsepower.
- Low W (80–160): weak flour, extensible, struggles to hold structure, good for delicate things or short-process recipes
- Medium W (180–260): versatile, works for most everyday baking
- Strong W (280–350): robust, elastic, handles long fermentation and high hydration well
- Very strong W (350+): professional-grade, designed for panettone, brioche, very long cold fermentations
When you see a flour labeled ‘Manitoba‘ or ‘high-strength,’ that’s typically a W above 320. When you buy supermarket all-purpose, you’re probably working with W 160–220, whether you know it or not.
The Balance Ratio: P/L
P/L measures the balance between two opposing qualities of the dough:
- P (tenacity): measures how strongly the dough resists being stretched. This is elasticity, and the ability of the dough to snap back (if there is no resistance, the dough would behave like a chewing gum).
- L (extensibility): measures how far the dough can stretch before it tears. This is what lets you shape a loaf and allows for proper oven spring.
A P/L of around 0.5 is generally considered balanced. The dough has enough elasticity to hold its shape, but also enough extensibility to be shaped without tearing.
- Low P/L (0.2–0.4): very extensible, weak structure — typical of spelt, einkorn. Dough spreads easily; hard to shape tall loaves. These flours can be over-kneaded easily.
- Balanced P/L (0.45–0.65): the sweet spot for most baking
- High P/L (>0.7): very strong (tenacious) dough that resists shaping, needs more rest time, can feel stiff. Perfect for breads that need structure like panettone, pandoro, brioche…
Think of it this way: P is the muscle, L is the stretch. Ideally, we want to be strong and also flexible.
P/L also explains something bakers often struggle to articulate: why some doughs ‘fight back’ when you try to shape them (high P/L, needs more bench rest) and why some doughs just collapse and spread no matter what you do (low P/L, needs a stronger flour or blending strategy).

Flour Strength Cheat Sheet
Here’s a practical reference for how common baking flours compare across W, P/L, and real-world behavior in sourdough:
| Flour Type | Typical W Range | Typical P/L | What It Feels Like | Best Use in |
| All-Purpose | 160–220 | 0.4–0.6 | Soft, moderately extensible, less elastic | Sandwich loaves, beginner sourdough, lower hydration |
| Bread Flour | 250–320 | 0.5–0.7 | Strong, elastic, holds shape well | Artisan sourdough, boules, batards, open crumb |
| Whole Wheat | 200–300* | 0.6–1.0 | Thirsty, tighter, slightly rough | Blends (20–40%), hearty loaves |
| Rye Flour | — | — | Sticky, pasty, non-elastic | Starters, rye breads, 5–30% blends |
| Spelt | 180–260 | 0.3–0.5 | Very extensible, soft, weak structure | Rustic loaves, 20–30% blends |
| Einkorn | 80–160 | 0.2–0.4 | Very soft, almost batter-like | Pan loaves, 10–30% blends |
| Kamut (Khorasan) | 140–220 | 0.3–0.5 | Soft, silky, slightly weak | Enriched doughs, blends |
| High-Strength (Manitoba) | 320–400+ | 0.6–0.9 | Very strong, elastic, can feel tight | Long fermentation, high hydration, brioche/panettone |
* Whole wheat W values vary significantly depending on the wheat variety and milling process. Treat these as general ranges. The bran reduces the extensibility of the dough.
Note: Rye flour is not typically measured with the alveograph because its gluten structure is fundamentally different — pentosans, not gluten, dominate its behavior. Treating rye like any other gluten flour leads to confusion. For more information, go to my guide for Sourdough Marble Rye Bread
Want a printable version of this chart + a quick guide to choosing the right flour for any recipe?
How Different Flours Behave: Real Baking Examples
Bread Flour vs. All-Purpose
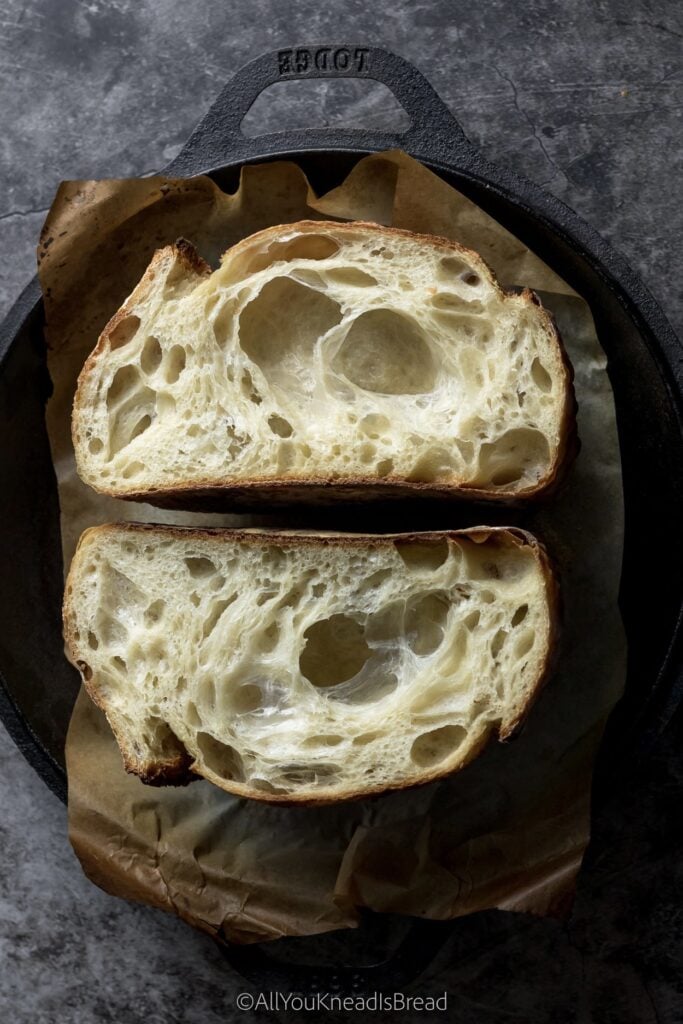
Bread flour has more protein and a higher W value, which means it builds a stronger, more elastic gluten network. This is what you want for chewy, open-crumbed artisan bread, the gluten holds the fermentation gases and gives you that sponge-like structure.
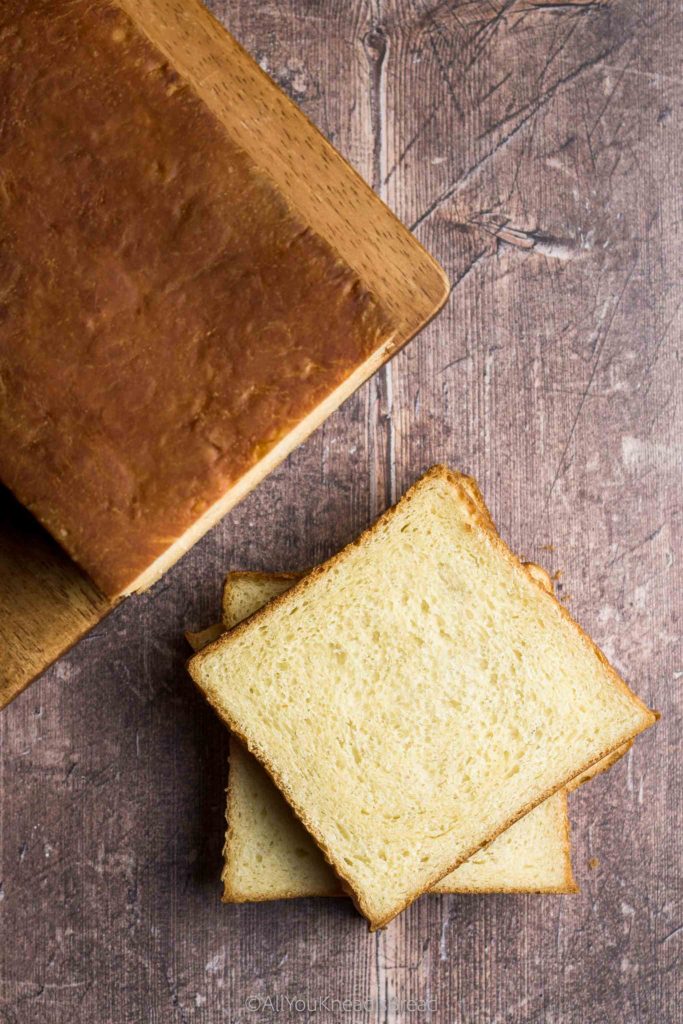
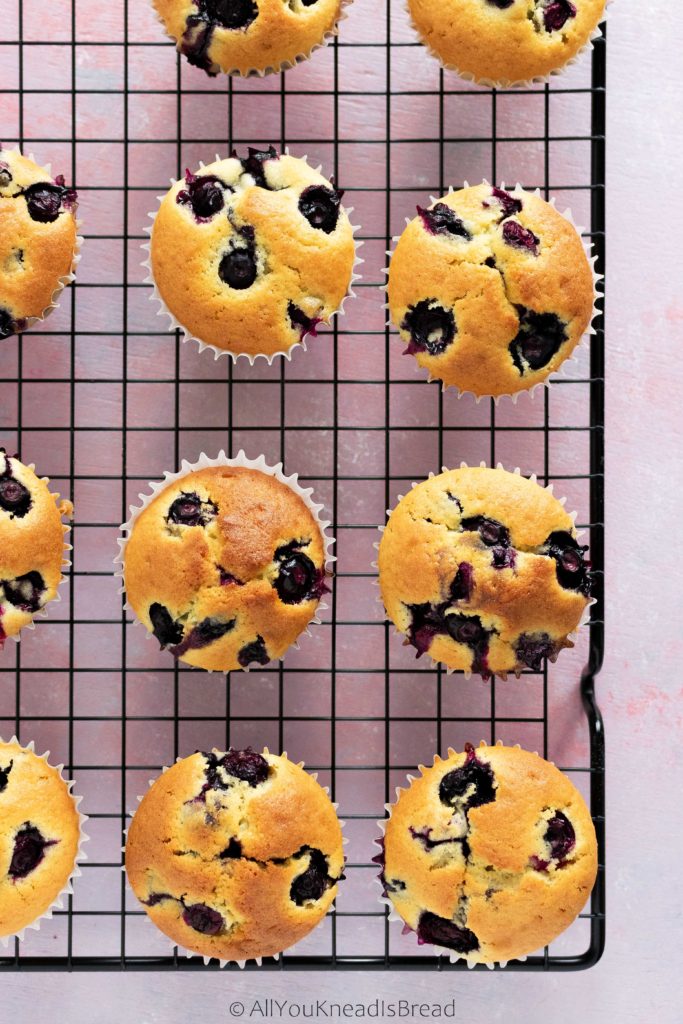
But that same strength is exactly why bread flour doesn’t work well in cookies or muffins. In cookies, too much gluten means the dough doesn’t spread properly, and the texture becomes tough. In muffins, a high-gluten batter becomes dense and rubbery. All-purpose flour gives you enough structure without overdoing it.
For sourdough specifically, bread flour handles long, cold fermentation better. It has the structural endurance to ferment overnight in the fridge without the dough becoming slack and unworkable.
Whole Wheat Flour
Whole wheat flour includes the bran and germ that white flour removes. This makes it more nutritious and more flavorful, but also more challenging to bake with. The bran particles physically interrupt the gluten network, cutting strands before they fully develop. They also “steal” water and hinder the proper development of the gluten network. The result is denser, more compact bread.
Whole wheat also absorbs significantly more water. If you swap 20% of your white flour for whole wheat without adjusting hydration, your dough will feel noticeably stiffer. Add water accordingly.
Best approach: if you’re not familiar with whole wheat, use it as a blend, not a complete substitution. Start with 20–40%, you get complexity and nutrition without losing structure. And as you get more familiar, you can increase the amount of whole wheat until fully substituted.
Cake and Pastry Flour
Cake flour is the opposite extreme: very low protein (7–9%), fine milling, and often treated to be more absorbent. The result is a flour that develops far less gluten, producing the soft, velvety crumb you want in a layer cake or tender biscuit.
The tradeoff: it can’t hold up to longer fermentations, it won’t give you the structure in bread that stronger flours can, and it produces a crumb with much smaller alveoli (holes). Use it for what it’s designed for: delicate baked goods where tenderness is the goal. Or to reduce the strength of other flours.
Rye flour
Rye deserves its own category because it doesn’t behave like wheat flour at all. It contains very little gluten-forming protein; instead, it’s dominated by compounds called pentosans, which absorb massive amounts of water and give rye dough its characteristic sticky, paste-like quality.
In sourdough, rye is incredibly useful in small amounts (5–20%) because it adds enzymatic activity, deepens flavor, and makes starters very lively. In larger quantities, it requires experience. There is a learning curve when it comes to rye as a dough made with it has a fundamentally different structure that doesn’t develop the same way as wheat.

Ancient Grains: Einkorn, Spelt, and Kamut
These older wheat varieties are having a well-deserved moment because they genuinely behave differently and taste different from modern wheat.
- Spelt: extensible and relatively weak (P/L around 0.3–0.5), with a nutty, slightly sweet flavor. It makes beautiful rustic loaves but needs a stronger flour to blend with for high-hydration baking
- Einkorn: the weakest of the group (W 80–160), almost batter-like in high percentages, with a golden color and rich, sweet flavor. Best at 10–30% in blends, or in pan loaves where structure is less critical
- Kamut (Khorasan): silky, slightly buttery flavor, moderately weak gluten. Works surprisingly well in enriched doughs and sourdough blends up to about 30%
The key with ancient grains: they reward patience and blending. Their flavor contribution is exceptional, but their structural contribution is limited. Pair them with a stronger flour, and they become one of the most interesting tools in your baking.
When You Change Flour, You Change a Living System
This is something most guides skip, and it’s genuinely important for sourdough bakers: flour is not just an ingredient in your starter, it’s the habitat.
Your sourdough starter is a community of wild yeasts and lactic acid bacteria that has adapted to the specific flour you’ve been feeding it. The microbes in your starter have selected themselves based on what grows well in that particular environment. Change the flour, and you change the food source, the mineral content, the enzyme activity, and the pH buffering capacity…
The result? Your starter may seem sluggish, unpredictable, or overly acidic for a few feedings. This is totally normal, it’s the adaptation period. The microbial community is adjusting to its new food source.
- After switching flours, expect 2–4 feedings before your starter stabilizes
- Don’t panic if your starter seems slower or smells different in the transition period
- Rye and whole wheat transitions tend to be more dramatic because of higher enzyme and mineral content
- Switching from a complex flour (whole wheat) to a refined one (white bread flour) can make a starter temporarily sluggish — it’s a simpler food environment
Want to understand exactly what’s happening inside your starter during this transition? Read my deep-dive on sourdough microbial science → The science of your sourdough starter
Why Your Recipe Fails When You Swap Flour
This might be the most practically useful section in this guide. You’ve followed the recipe. It’s a tried and true process. You’ve made this before and yet… something went wrong. If the only thing that changed was the flour, here are some ideas of what is probably happening:
Cookies spread too much: The flour you used has lower protein or a lower P/L than the recipe intended. There isn’t enough gluten structure to hold the dough together as the butter melts. The fix: use a higher-protein flour, chill the dough, or blend in a small amount of bread flour.
Bread is dense and tight: Two common culprits: 1) weak flour that couldn’t support the fermentation, or 2) a hydration mismatch where the flour absorbed more water than expected, leaving insufficient water for proper gluten development. Whole wheat swaps, especially, can cause this if hydration isn’t adjusted upward.
Sourdough won’t hold its shape: Classic low P/L problem. Spelt, einkorn, or old whole wheat with degraded gluten can’t maintain tension during proofing. The dough passes the windowpane test but still spreads in the oven. Blend with a high-W flour and tighten your shaping.
Sourdough over-ferments too fast: High-enzyme flour (whole wheat, especially fresh-milled) is pushing fermentation faster than expected. Drop your bulk fermentation temperature or reduce the percentage of whole grain flour.
Cake is tough: Too much gluten development. Either you used a flour with too much protein (bread flour in a cake recipe), or you over-mixed the batter and developed gluten beyond what the recipe intended. Use cake flour or pastry flour and mix only until combined.
Dough is sticky and unworkable: The flour is absorbing differently. Start adding less water than usual and increase water absorption time before adding extra flour (autolyse); the dough will often tighten on its own after a 30-minute rest. If, after a while, it’s still too dry, continue adding water in small amounts and allow the dough to absorb it. Some flours need more time to absorb the water; if you try to compensate the stickyness to fast, you might end up with a very dry dough. Then you will add more water, and then more flour… You see where I’m going, right?
How to Choose the Right Flour
Rather than giving you a list of rules, here’s a framework, four questions to ask before you reach for the flour bag:
- Do I need structure or tenderness? Structure → higher protein, higher W. Tenderness → lower protein, lower W. If it’s bread, you need structure. If it’s cake, you need tenderness. If it’s somewhere in between (soft dinner rolls, enriched dough), you’re in medium territory.
- How much hydration can this recipe handle? Whole-grain flours need more water. Refined flours need less. If you’re swapping flour types, adjust hydration — usually add water in batches of 5–10% extra when moving toward whole grain, reduce slightly when moving to a finer flour.
- Do I need extensibility or strength? Extensibility (low P/L): for thin pizza, flatbreads, anything you’re stretching. Strength (high P/L): for upright loaves, high hydration bread, anything that needs to hold its shape during a long proof.
- Am I fermenting this dough? Fermentation favors stronger flours. Long, cold fermentation especially needs high W to prevent the dough from degrading. Short, same-day recipes can work with weaker flours.
The Blending Approach — What the Pros Actually Do
Professional bakers rarely work with a single flour. They use blends because no single flour perfectly covers all the variables they’re managing at once.
Here’s the logic: you want flavor complexity from whole grain flour, but the structure of bread flour. You want the extensibility of spelt, but the strength of Manitoba. Blending lets you dial in exactly the behavior you’re after.
Practical blending examples:
- Bread flour + 20–30% whole wheat: strong structure with added flavor, deeper color, more mineral complexity
- All-purpose + 10–20% cake flour: softer crumb in muffins, quick breads, or enriched doughs without going full cake territory
- Bread flour + 5–15% rye: boosts fermentation activity and adds earthy, complex flavor without losing structural integrity
- Bread flour + 20% spelt: silkier dough feel, nuttier flavor, slightly more extensible — great for batards and oval loaves
- High-strength flour + 10–20% einkorn: adds golden color and sweetness, while the Manitoba holds everything together
Blending is a great approach when you’re following a recipe from someone who lives in a different country. For example, in North America, even all-purpose flour is quite strong, so making a batch of muffins from someone in South East Asia, might not turn out the same. Knowing how the flour in your region behaves is the key to succeed no matter where the recipe came from,
Final Thoughts: Flour Is the System
If there’s one idea to take from this guide, it’s this: flour isn’t a static ingredient you add to a recipe. It’s a dynamic system with its own chemistry, biology, and mechanical properties, and understanding it gives you control that no recipe can give you on its own.
The baker who knows why bread flour behaves differently from all-purpose flour is able to diagnose, adapt, and create with intention. They know why a dough feels tight, why fermentation is running fast, and why a loaf spreads when it should have risen.
This is the foundation. Everything else in baking (hydration, fermentation timing, shaping, scoring) sits on top of the flour decision.
If you want to stop guessing and start choosing your flour with confidence:
Frequently Asked Questions
What is the difference between bread flour and all-purpose flour?
Bread flour has a higher protein content (12–14%) and a stronger W value, which builds more gluten and gives bread its chewy, open structure. All-purpose flour (10–12% protein) is more versatile but produces a softer, less structured result. For bread, bread flour is generally better. For cookies, cakes, and most other baking, all-purpose is your everyday option.
What does the W value mean in flour?
W measures the overall strength of flour — technically, it’s the energy required to deform a small bubble of dough until it bursts. A low W (80–160) means weak, extensible flour that works for delicate baking and short-process recipes. A high W (320+) means strong flour designed for long fermentation, high hydration, and enriched doughs like brioche and panettone. Most supermarket bread flours sit around W 250–280 without telling you.
Can I substitute bread flour for all-purpose flour?
Yes, but you need to adjust your expectations. Your go-to 70% hydration sourdough with bread flour will feel more like a 85% hydration when you use all-purpose flour. Bread flour creates more gluten, so it needs more water. If you are baking bread, adjusting the hydration is key. If you only have bread flour but want to make cookies, a blend using starch will help reduce the gluten amount and reduce the chances of chewier and less spreadable cookies and tougher cakes.
What is the P/L ratio in flour?
P/L measures the balance between a flour’s tenacity (P — how much it resists stretching) and its extensibility (L — how far it stretches before breaking). A balanced P/L around 0.5 works well for most sourdough. High P/L dough fights back during shaping and needs more resting time. Low P/L dough spreads too easily and struggles to hold an upright shape. This ratio is one of the most useful predictors of dough behavior that most home bakers have never heard of.
Why does changing flour affect my sourdough starter?
Your sourdough starter is a living community of wild yeasts and bacteria that has adapted to the specific flour you feed it. Switching flours changes the food source, enzyme activity, and mineral content of that environment. The microbial community has to rebalance — expect 2–4 feedings before your starter’s behavior stabilizes. This is normal and not a sign that something is wrong.
Why do my cookies spread too much?
Excess spread usually traces back to flour. Lower-protein flour — or a flour with a very low P/L ratio — doesn’t build enough gluten structure to hold the dough in place as the fat melts during baking. Switching to a flour with slightly more protein or a higher P/L helps. Chilling the dough before baking also reduces spread by slowing the butter melt.
What ancient grain flours are best for sourdough?
Spelt (20–30%), einkorn (10–20%), and kamut/khorasan (up to 30%) all work beautifully in sourdough blends. They add complex flavor that modern wheat simply can’t replicate. The catch: all three have weaker gluten than modern bread wheat, so they need to be paired with a stronger flour if you want an upright, well-structured loaf. On their own, they tend to produce flatter, denser bread — which can still be delicious, just different. It is possible to bake a good loaf without blends, but it takes time to learn and understand their behaviour and find a process that works for you. These flours are not cheap, so blends tengo to me more cost-effective as well.
If you have made it this far, thank you! I hope this guide answered most of your flour questions. And if it didn’t, you can always reach me by email or drop a comment below. If you are still stuck with sourdough, I have a few more guides that can be helpful as well. And all my recipes come with clear explanations of each step.
Happy Baking!
For more recipes, baking tips, and scientific insights into bread making, subscribe to my blog and stay updated with the latest in bread baking!
If you make any of my recipes, let me know what you think! As always, you can find me on Instagram, Pinterest, and Facebook. I also have a few videos up on my YouTube channel.
(This post contains affiliate links, if you purchase something from these links I will make a small commission that helps me run this blog, but you will not be charged any extra money 😉 )
The science of your sourdough starter
Welcome to a new section of my blog: Bread Science Fridays! In this section I will be indulging on my nerd side and talk about the science of many things behind your beautiful bakes. This week’s post is dedicated to our beloved sourdough starters and the science behind them!
Ever since the pandemic started, more and more people jumped into sourdough. So, I thought it could be fun to explain scientifically what happens when you feed your starter (or build your levain).
A sourdough starter it’s just a culture of microorganisms that are alive and perform their own biological activity. These cultures are composed, mostly, by different strains of lactic acid bacteria (LAB), saccharomyces yeasts, and some candida yeasts among others.
In this post, you will learn the phases your starter goes through during a feeding cycle, why using your starter at its peak of activity is important, and the science behind it!
A couple of things about biology
In microbiology, a strain of a certain type of microorganism is like a subtype of named microorganism. For example, the lactic acid bacteria type would be the lactobacillus but there are many subtypes (Strains). Lactobacillus Acidophilus, Lactobacillus Sanfranciscensis, Lactobacillus Reuteri… They’re all LAB but with some differences (from shape to optimum living conditions).
Each strain has its specific optimum living conditions. That is the optimum temperature, water activity, pH… that will make the fermentation rate the fastest. The fact that a microorganism is “happy” at 28C, for example, doesn’t mean that it cannot perform its biological activities at 29C or at 20C. It means that the performance will not be the best. As you know, it slows down at cold temperatures. However, it’s higher temperature that pose a threat to the microorganisms. Too high temperatures will inhibit and eventually kill the bacteria.
The bacterial growth curve
Bacteria, as living organisms, grow, multiply, and die. The reason our sourdough starter is resilient is not because the bacteria are indestructible, its’ because there are millions of them and not all of them are the same age. They are in different growth phases. While maybe most of the bacteria are dying, some might have just been born.
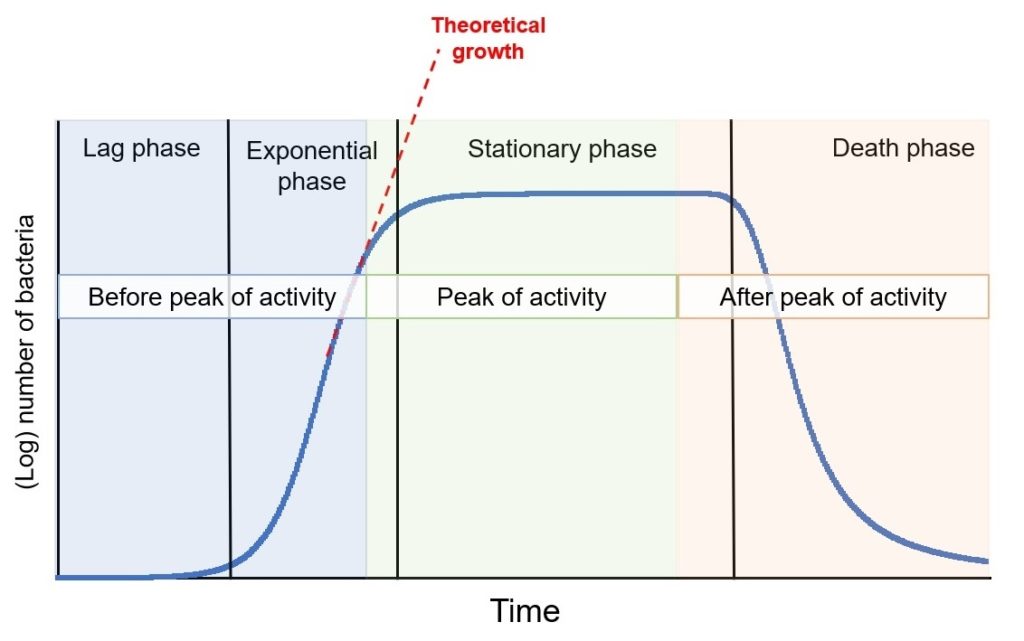
Bacteria and yeast multiply by dividing themselves into two. 1 becomes 2, 2 become 4, 4 become 16, etc. This mechanism is called binary fission. Therefore, their growth is exponential. In microbiology, this growth is depicted using growth curves.
Bacterial growth curves are specific for each strain of bacteria in a specific set of conditions (Changing the temperature will change the curve). In these curves we can see the 4 phases bacteria undergo from the moment they’re born to the moment they die. A generic bacterial growth curve would look similar to this one:
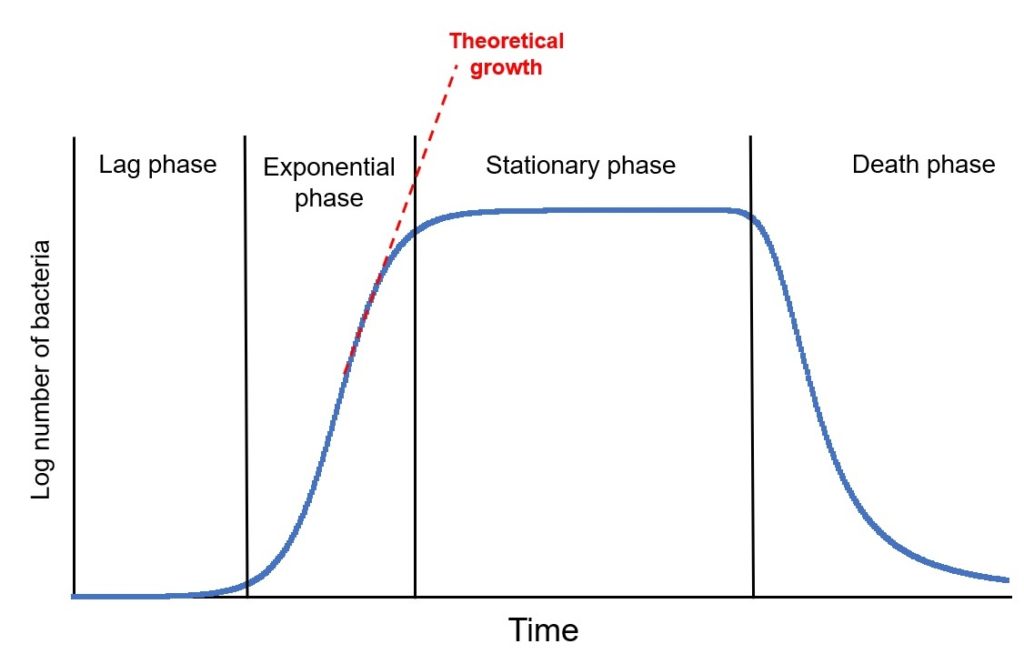
Our starter will follow this growth cycle too. Understanding what happens in each phase will help us understand our starter and when we should use it for baking to prevent a excess of sourness
The phases explained
Phase 1: Lag phase. This is the very beginning of the curve. At this stage, the microorganisms have enough nutrients and are active but they’re still not multiplying. What they’re doing is synthesizing proteins and getting things ready to start the division. It’s also an adaptation period to the culture conditions.
Phase 2: Exponential phase. Once things are ready, the bacteria start multiplying (by binary fission). The metabolic activity on this stage is high and increases as the number of bacteria increases (optimal growth). Some bacteria might die too, but overall, there are more bacteria multiplying than dying.
Phase 3: Stationary phase. This phase is a plateau the bacteria reach because of the depletion of nutrients or accumulation of waste (the acids they produce can inhibit their own activity). Less food means less activity and therefore fewer bacteria dividing. At this point, the growth and death rates are equal, and the overall number of microorganisms remains constant.
Phase 4: Death phase. At this point, nutrients are decreasing and bacteria continue to produce waste from their biological activities (bacterial poop if you may 😉 ). The environment becomes harsh and bacteria start dying (some also go dormant). In this phase, the death rate is faster than the growth rate, so the overall number of microorganisms decreases.
Theoretical growth: it portrays how the curve would continue growing if the bacteria had an endless supply of nutrients.
When you add sourdough starter to your dough, the exponential phase will be much longer because the bacteria:nutrients ratio is much larger. The curve would, to certain extent, follow the theoretical growth because there are lots of nutrients!
How does this apply to your sourdough starter?
Knowing in which phase your starter is, will be very helpful for your baking. The fermentative power of your sourdough will depend on the phase of the cycle it is on, and it is different in each phase.
Although the by-products of the fermentation are essentially the same in each phase, the aromas developed in the bread will be substantially different because every time we take some starter and mix it with flour and water, we’re resetting the growth curve. It starts again in the lag phase.
And depending on the length of the lag phase, more/fewer aromas will build up in the dough. Ideally, we should use the starter at its peak of activity. Which means the lag phase will be shorter.
But, what exactly is the peak of activity and what’s the best way to know it? Let’s dive deeper into this!
The peak of activity and what it means
When it comes to sourdough it’s common to talk about the “peak of activity”; we understand that it represents the optimum conditions of the starter and it will work faster if it’s at the peak.
Based on the growth curve I showed you before, it’s easier to see that the peak of activity happens at the end of the exponential phase and throughout the stationary phase. During that time the sourdough starter is very active because 1) the number of alive bacteria is high because they still have lots of nutrients and 2) they’re all used to the environmental conditions, well past the lag phase where they’d be creating “waste” but not multiplying and growing.
Obviously, we are not going to do a bunch of experiments to determine when we should bake. However, once we’re familiar with our starters, we know when they reach the peak of activity (more on this later). We can, then, differentiate 3 stages in our starter:
1.- Before the peak of activity
2.- At the peak of activity
3.- Past the peak of activity
The dough fermentation will definitely be affected by the stage of the starter. Let’s analyze it a bit more how that translates into flavor and aromas of our bread and how it’s related to the growth curve.
The starter has not doubled yet after the last feeding

When we refresh our starter (or when we’re building the levain) what we’re doing is resetting the bacterial growth curve. The microorganisms need to adapt to the new conditions first (lag phase) and then eat and multiply (exponential phase).
If your starter has not even doubled since the last feeding, the microorganisms didn’t have enough time to reproduce; they are at the very beginning of the exponential phase and there is still a low number of them.
Basically, you’d be adding just flour and water with a low number of bacteria.
At this point, the fermentative power of the starter is not high enough because there aren’t enough bacteria to perform the job; which means your dough will need a longer time to ferment. This can be detrimental to your dough because longer fermentation times might lead to a more acidic dough.
Not only that, but you could also risk destroying the gluten network. If the fermentation is much longer than it should, your flour might not be able to resist and the gluten strands will start to deteriorate.
Maybe, flavor-wise, the bread turns out as tangy as you like it, but the structure could be compromised.
The starter has reached or almost reached the peak

People recommend using the starter at its peak of activity, but what many don’t know it’s why exactly this is the best condition for sourdough baking. Spoiler alert: It has nothing to do with your culture being hungry.
At least, not in the literal sense of the word, because the microorganisms eat when they have food, and when they don’t, they just change their metabolism pathway and go into “survival mode” (they become dormant). That’s why they can survive in the fridge for months without being fed, or they can be frozen or dried.
Every time we change the environment of the microorganisms, they need to adapt to the new conditions; so, they have to go through the lag phase again. If the starter has passed the peak or if it’s too early in the feeding cycle, this adaptation period is going to be longer. Either because the microorganisms need to get ready to increase the colony, or because they went into survival mode.
The idea of using the starter at the peak of activity is to reduce the lag phase as much as possible. Because longer lag phases can bring undesired aromas or weaken the gluten network.
The reason the bacteria are very active at this point is that they don’t have to use energy to get ready to multiply, and they’re not getting dormant or dying at a higher rate because there’s still plenty of nutrients.
A change of environment can be anything that makes the new conditions different from the culture. For example, adding salt to your dough, adding more/less water, adding more/less wholemeal flour, adding sugar, adding fats etc.
The starter passed the peak and it’s collapsing

If your starter has reached the peak and has started to collapse, it means that it’s either at the end of the stationary phase or at the beginning of the death phase already, and it already has accumulated a significant amount of fermentation by-products.
Among these by-products, there are several organic acids responsible for the acidity of the sourdough (lactic acid and acetic acid are the most common). If you used this starter, the fermentation would be slower at the beginning because:
1.- There are less alive bacteria, since many might have died already
2.- The acidification of the starter can inhibit the growth of the bacteria, so the fermentative power will be weaker. The extent of this inhibition depends on how acidic the starter became. That’s why when we try to revive a forgotten starter, it might take a couple of feedings until we see some activity.
3.- The bacteria that are still alive need a longer lag phase before they start growing again. During this lag phase they will get ready for the new environmental conditions (your dough) and will fix the pH of the dough that turned too acidic. And remember, during this phase, bacteria keep producing acids but they’re not reproducing.
Basically, if you don’t control de fermentation, your bread can be very sour. Once again, remember that longer fermentation times not only affect flavor, but also the structure.
Contrary to what many people think, though, you can still use a starter that has passed its peak of activity (by just a few hours) and still obtain a bread that has not soured too much, as long as you control the fermentation.
But.. What if I like my bread very tangy?
The sourness of sourdough bread comes from accumulated organic acids in the dough. So, in order to get the tangy flavor, we need to ensure that the dough has accumulated enough of these compounds.
We can do that by using slightly warmer temperatures during the bulk fermentation. Doing this, the bacteria will be closer to their optimum living conditions, and they will perform a faster fermentation. We could push the bulk a little to get that extra sourness.
How do I know my starter is ready to bake?
There are different ways to check when your starter is ready, and the more familiar you are with it, the easier it’ll be. I’m going to tell you my favorite way to check the peak of activity at home: The height test
I don’t know if this is how people know it, but it’s how I call it. The height test is, in my opinion, the most reliable way for the home baker to check their starter.
If you always feed your starter the same ratios of flour and water, or you build your levain in the same way, this test is great for comparisons; it will be very easy for you to know if it’s ready by just looking at how much it grew. It also prevents the “human factor” more than other tests and reduces the chances of making a mistake.
How to perform the maximum height test
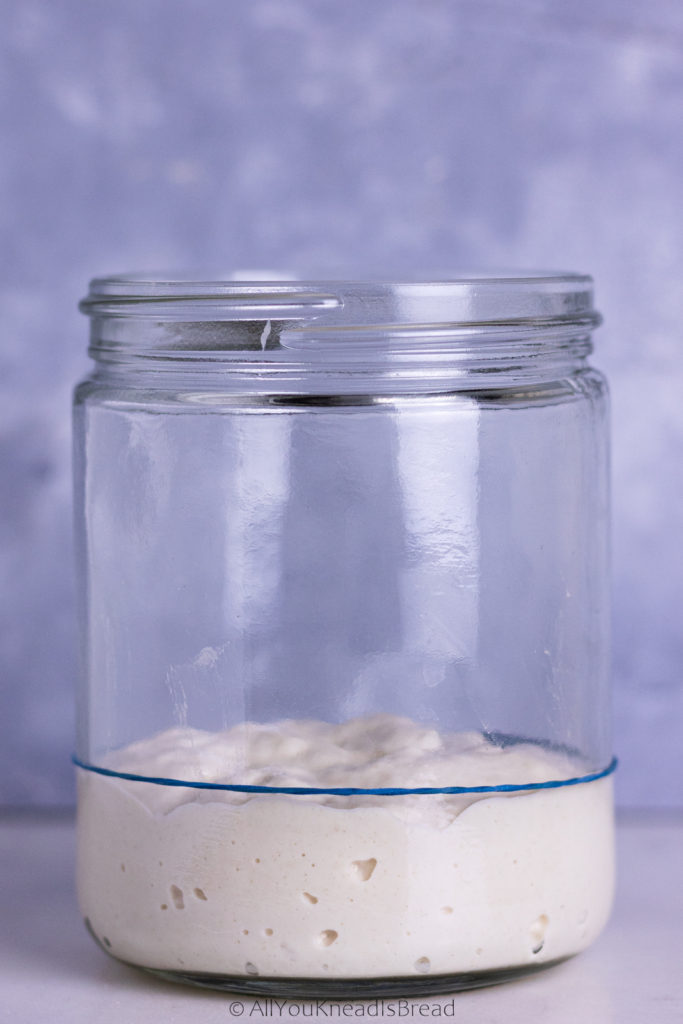
As the name indicates, this test is to see how high the starter can grow (this applies to 100% or less hydration, more liquid starters can’t grow too much, for obvious reasons). The peak of activity coincides with the maximum height.
After reaching the maximum height, the starter will remain at that height for a few hours (stationary phase) before it starts collapsing (beginning of the death phase)
Let’s say you feed your starter with a 1:1:1 starter:water:flour ratio. Then you let it ferment and record the height (taking pictures might be even better!) after it reaches the maximum height you need to pay attention to how long it stays at that height and when it starts collapsing.
Imagine that right after feeding, your starter takes 5 hours to reach the highest height, and then it stays 2 more hours at that height. Those last 2h will be the best period to use your starter.
By doing this simple test, you will see how much your starter grows (double, triple, quadruple?). It’s important to know the temperature when you do this little experiment because in warmer days, your starter will grow faster. However, since you know more or less the highest height it will reach, you just need to keep an eye on it!
Always remember that the time your starter takes to grow will depend on the temperature of your kitchen. Warmer temperatures will make the starter more active because they’re close to their optimum growing temperature. Colder temperatures will make the starter grow slower, because these are far from the optimum conditions.
Let’s wrap this up
I’d like to finish my first Bread Science Fridays by highlighting a few concepts:
1.- Bacterial growth has four phases that can be applied to our sourdough starters. Knowing what happens in each phase will help us understand our starter.
2.- The starter works best when it’s used at its peak of activity because we’re reducing the lag phase and bacteria can use the energy more efficiently.
3.- The maximum height test is an easy experiment to know when a starter reached the peak of activity. It’ll help you understand at which phase your starter is and when it’s best to use.
I hope with today’s post you can understand better your starter and have a better idea of the science behind it! Isn’t the world of sourdough so amazing???
As always, if you ever have any doubts or would like me to talk about the science of something, let me know and I’ll try my best to answer your questions!
You can find me on Instagram or Facebook and you can also subscribe to my Youtube channel.
Happy Bread Science Friday!
Maria