
One thing that I remember dearly from my childhood is eating milk buns with a small chocolate bar. It was something so simple that brought so much happiness into my days. Those milk buns were very soft and fluffy and had the perfect structure so you could buy the ones filled with whipped cream and they wouldn’t be soggy. I think the simplicity of these milk buns is what makes them so special, they’re such a delicious treat!
What are milk buns?
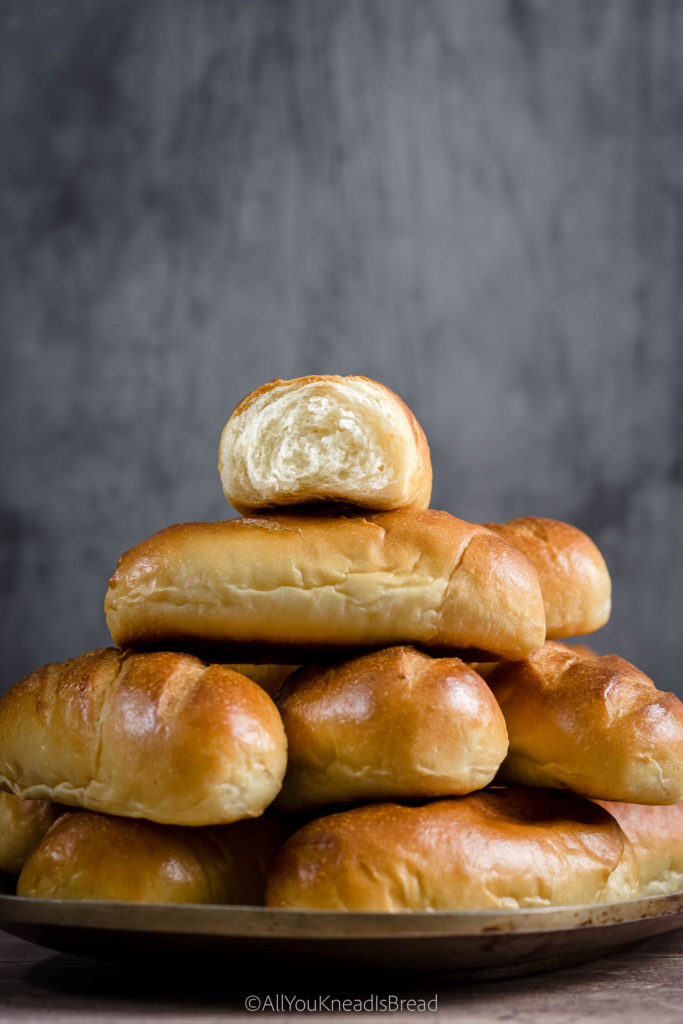
When you talk about milk buns these days, people usually think about a pull-apart style of buns. But today I bring a Spanish version of milk buns (Or at least the milk buns from my childhood). They have a slightly thicker (not crunchy) crust with a very spongy and slightly moist crumb. They’re usually shaped into an oblong shape and they don’t touch each other while they bake. Many times you could find milk buns filled with whipped cream or custard, those were some chubby buns!
About this milk buns recipe
Before we start, I want to emphasize how important gluten development is in this recipe. These milk buns should stay soft and fresh for several days, and proper gluten formation is crucial. I’ve tested this recipe many times and the yudane (I’ll talk about it later) definitely helps, but good ole’ elbow grease is what’s going to help you take these buns from good to amazing!
Activate the yeast in milk
I find that scalding the milk always helps when making bread. What I like to do is boil part of the milk (exact measurements in the recipe card), and let it cool down as I prepare the rest of the ingredients. Once the milk is warm and nice to the touch I add the yeast and let it rest a few minutes to activate.
Try acid whey for extra milkiness
I’ve been making my own yogurt for a few months and I found a perfect way to use the leftover acid whey: Bread making! Check this sandwich loaf recipe. I also found that whey gives the bread a more intense aroma than milk, so if you like your bread extra milky, and you have leftover whey, you can also use it for this recipe.
How to make the buns super soft
The key to ultra-soft milk buns is gluten development. By gluten development, I don’t mean *just* gluten formation. But developing a gluten network that is reinforced by fats and starch. Those are the key components to any soft bread. Different recipes will have a slightly different gluten network organization, but the idea is to have these three ingredients create a sturdy network (a good foundation starts with gluten) that is elastic and malleable (fats, they act as a lubricant among the gluten chains), and that makes a bread that is very spongy and fluffy (starch helps with setting the crumb and creating a more cohesive and less crumbly texture).
What is the yudane method?
One of the things that happen in breadmaking is the gelatinization of starch. The liquids in the recipe hydrate the starch in the flour. The hydrated starch granules swell and burst open when the temperature increases while the bread is baking. This is called gelatinization. The yudane method is based on the incorporation of pre-gelatinized starch into the bread recipe. Adding pre-gelatinized starch means two things: 1) more gelatinized starch will increase the fluffiness of the bread, and 2) pre-gelatinized starch will avoid “stealing” part of the moisture of the recipe for starch swelling, rather than gluten building. So we end up with a bread that is fluffier and has a stronger gluten network.
How does yudane look like
It is basically a 100% hydration dough. It looks sticky! Don’t worry, the main purpose of yudane is to gelatinize as much starch as possible. At this point, we don’t care about kneading the dough perfectly.
Later, when you put all the ingredients together, the yudane will incorporate into the dough and you wouldn’t tell it’s there
How to make the yudane
In order to keep the flavor of the milk buns, I like to prepare my yudane with milk. For these buns, I boiled the other part of the milk (careful with spills!) and prepare the yudane with it. You can do this the day before, but I prefer to use my yudane fresh to make sure there is no starch retrogradation. You can learn more about it in this post
If you use a stand mixer, you can put the flour for yudane in the bowl beforehand. Once the milk starts boiling turn the stand mixer on, add the milk, and knead the dough using the paddle attachment. If you prefer to do it by hand use a heavy bottom bowl that can stand the heat and allows you to stir somehow vigorously. Add the flour and when the milk is boiling aff it to the bowl and start stirring until you form a dough. Knead until you can touch the dough and don’t get burnt.
When the yudane is done, wrap it with plastic wrap and let it cool down to room temperature. In the meanwhile prepare the rest of the ingredients.
Fermenting these milk buns
You have two options here, 1 bulk fermentation and 1 proof, or 2 bulk fermentations and 1 proof. What I like to do with these buns is to ferment the dough until it almost doubles in size, then knead it for a minute to deflate it and let it ferment again until it doubles in size. Only then do I deflate it for a second time and divide it to shape the buns.
I find 2 bulk fermentations help develop more flavor. This is a yeasted dough, so any extra aroma is always welcome! And if you’re wondering if longer fermentation will make this dough sour the answer is no! It’s not sourdough, so don’t worry about that. It’ll just have a more bready and less yeasty flavor.
However, if you prefer to do one single bulk fermentation, let the dough ferment until it doubles or almost triples. Then proceed with the shaping and proofing.
How to shape these milk buns
After the dough is ready and has fermented. Divide it into 20-25 pieces of similar weight, shape them into a ball, and let them rest for 10 or 15 minutes. I like smaller and chubbier buns, but you can make larger buns. In that case, divide the dough into 10 or 12 pieces.
Then, with your hands or a rolling pin, flatten the balls, one at a time, into an oval of 15-20 cm long and 15-10 cm wide. This depends on how you like your buns. (shorter and chubbier, or thinner and longer. I like the chubbier version better!)
Then starting from the narrow side roll the dough into a little log, seal the edges and place it on the baking tray you will use. Leave enough separation amount the buns so they don’t touch each other while fermenting or baking.
If you’re making small buns you will need 2 or 3 trays to proof them or they might be too close to each other and will end up touching each other in the oven.
Score the buns!

One of the times I was testing this recipe I asked my Instagram community which scoring pattern they liked better, and the majority responded that they liked better 3 cuts across the buns. I had tried no cuts and also one cut lengthwise. I like 3 cuts better, as well. But, of course, you can choose whatever pattern.
How to bake the milk buns
If you choose to make small buns, be careful because they will be done fast and they can go from almost brown to dark brown in a matter of minutes. I don’t use steam while I bake these milk buns but that’s also an option to consider if you have an oven with a fan. The fan always dries out the crust much faster.
If you decide to make larger buns, then adding some steam can be a good idea, to allow the buns to rise a bit more in the oven.
The power of a good egg wash
Egg wash is not only the last touch for some shiny buns, it also develops a crust that seals part of the moisture inside to the buns can last fresh for a bit longer.
Questions you might have
How long do milk buns last?
I made 25 small buns and, at room temperature, they lasted fluffy and nice for 3-4 days. On days 5 and 6 the buns were a bit dryer but still edible. Nothing some butter or mayo couldn’t fix!
Can you freeze milk buns?
Yes! I reserved some of the buns for freezing. The best way for me was a ziplock bag, but you could wrap them in plastic wrap individually as well. Then I cut them lengthwise before freezing and when I wanted to eat one I just popped it in the toaster. You could also let them thaw at room temperature or steam them. Although this last technique can be tricky if there’s water condensing and dripping on top of the buns.
How do you eat milk buns?
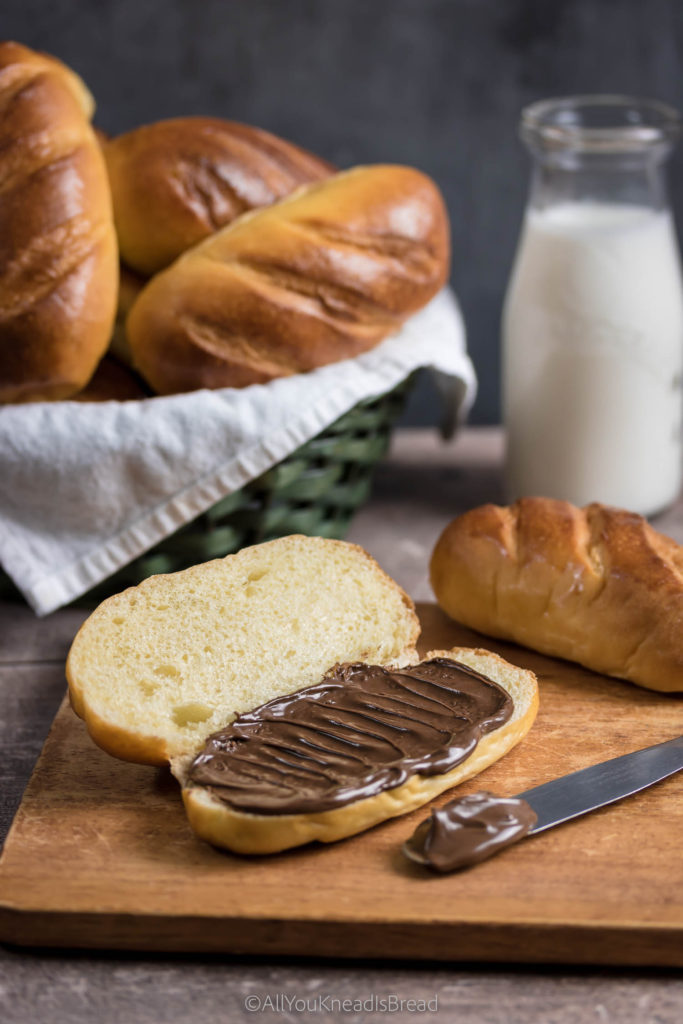
As mentioned before, these milk buns are probably a bit different than other styles of buns. They are perfect for sliders, hotdogs… whatever savory filling you prefer. But my favorite is with a chocolate bar. This combination just takes me back to my childhood and I see myself in that small pastry shop, unwrapping the chocolate bar and putting it inside the bun. As an adult, I found that Nutella can also be an amazing filling!
Are milk buns sweet?
Yes! These buns are sweet, not crazy sweet but you can taste the sweetness. That, along with the milky flavor, is what makes these buns so versatile! They go well with sweet or savory fillings. And if you’re like me and dunk everything in your morning coffee… you can do that too!

Are these milk buns the same as brioche?
Not quite! While brioche is mostly eggs and butter, these buns have more milk, not as much butter, and not that much egg. They are also sweeter than brioche.
Other uses for this milk dough
This dough is amazing to work with! Unless I don’t have a lot of time I like to knead it by hand because it’s truly nice to work with! And it’s also very versatile. If you don’t want long buns you can you can make buns for burgers, or cinnamon rolls, or a babka… You can also shape it into thinner and longer buns for hot dogs. You can even use it to make a tin loaf. This recipe is a keeper!
If you liked this recipe you might also like these
Super fluffy nuts and cardamom babka
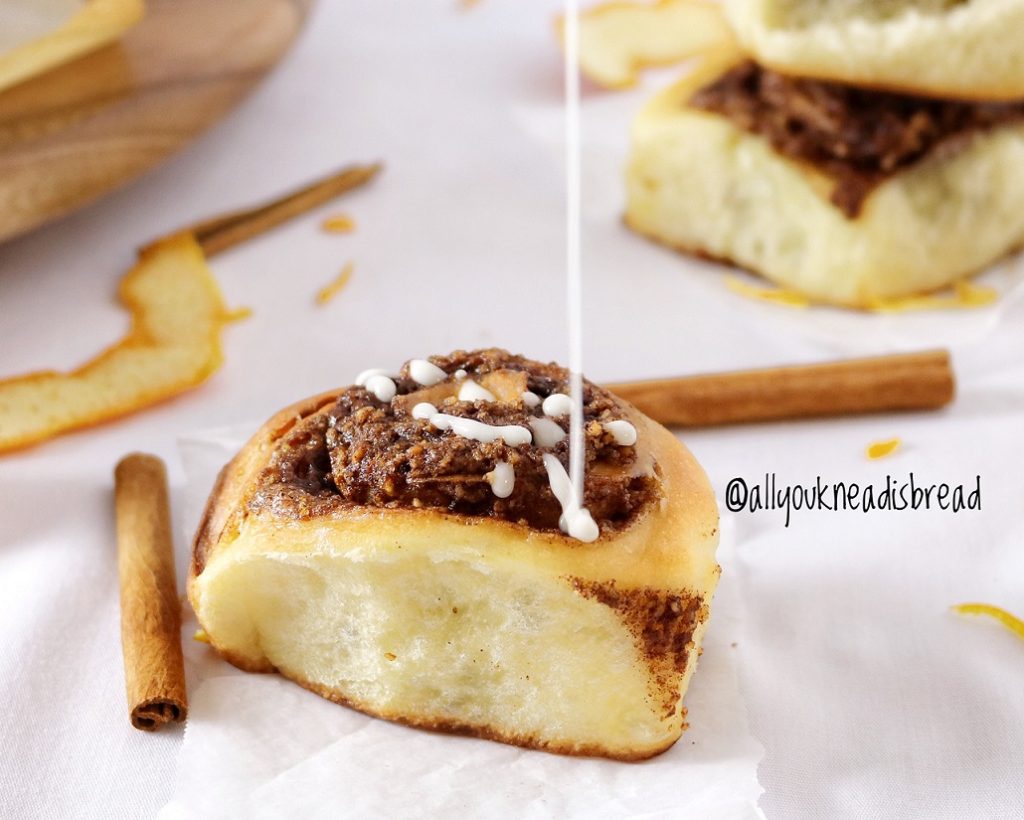
Orange and cinnamon sourdough rolls
Sourdough donuts with rose cream
If you make any of my recipes let me know what you think! As always you can find me on Instagram, Pinterest, and Facebook. And I also have a few videos up on my Youtube channel (which I hope I can resume soon!)
Starting on breadmaking but don’t know where to start? Check my amazon store to see my favorite and affordable utensils you will need. You can make the best bread with simple and affordable tools! (This is an affiliate link if you purchase something from this link I will make a small commission that helps me run this blog, but you will not be charged any extra money 😉 )

Super soft milk buns
Ingredients
Yudane
- 150 g bread flour
- 150 g boiling milk
Main dough
- 300 g yudane
- 600 g bread flour 12.7% protein
- 300-335 g Whole milk (scalded, lukewarm) (start with the lesser amount and add more if your flour requires it)
- 75 g heavy whipping cream
- 3 egg yolks
- 7 g active dry yeast
- 90 g sugar
- 12 g salt
- 75 g softened butter
Instructions
Yudane
-
Add 150g of bread flour to your bowl.
-
Heat a bit over 150g of whole milk and when it comes to a boil weigh 150g and quickly add it to the flour.
-
With a wooden spoon or with a stand mixer mix the flour and milk until it forms a sticky dough. Wrap it in plastic and keep it at room temperature until you're ready to start the dough.
Main dough
-
Mix the lukewarm milk, the whipping cream, the yeast, and the egg yolks, and let the mixture sit for 10 minutes.
-
Add the sugar to the egg mixture and give it a whisk.
-
In the bowl where you have your yudane add the egg mixture and break up the yudane a little bit.
-
Add flour and salt to the bowl where you have the yudane and pour the wet ingredients. Mix everything until you don't have dry flour particles. Cover and let it sit for 20 minutes.
-
After 20 minutes start kneading, if the dough feels too stiff and you didn't add all the milk, add a bit more. Once the dough starts coming together add the softened butter and continue kneading to incorporate it.
-
Knead until the dough becomes smooth and elastic. It shouldn't stick to your fingers and it should feel nice to the touch.
-
Place the dough in a lightly oiled container, cover it and let it ferment at room temperature for 2h or until it almost doubles in size
-
Deflate de dough gently and let it ferment again for 1 hour or until it almost doubles the size
-
After 1h or when the dough is ready deflate it gently and let it rest, covered, for 10 minutes.
-
Divide the dough into as many buns as you'd like, shape the pieces into small balls and let them rest covered for 10 minutes. This recipe can make 25 small buns, 12 medium buns, or 6 large buns.
-
Take one dough ball and flatten it with your hands or a rolling pin into an oval of half centimeter thick (1/4 in). For small-size buns, the oval will be 15x7cm. Starting from the short side roll the dough into a log and seal the edges.
-
Put the buns on baking trays separate enough they won't touch each other while they bake, cover them loosely with plastic wrap and let them ferment until they get puffy and have grown in size.
-
Before the buns finish proofing preheat your oven at 360F/180C (lower to 340F if you're making larger buns).
-
When the buns are ready, brush them with a mix of milk and the leftover egg white, make three cuts across the surface of each bun and bake them at 360F/180C for 25-35 minutes or until they have a nice golden brown color.
-
Let the buns cool down to room temperature. You can keep them in a seal-tight container or ziplock bag at room temperature. You can also freeze them and defrost them in the toaster.
Sourdough Blueberry Muffins
Two words: blueberry muffins. It can’t get better than that. Nah, it can, with sourdough it can! Sourdough blueberry muffins, my friends!
I’m determined to use all my sourdough discards, it is painful to throw it away! So these days the new normal is something like this:
Feed starter – save discards – bake loaf -bake with the discards
The more I bake with sourdough discards, the more I get to test the effect on other food. So far, I can say that cakes and muffins made with sourdough last longer than those without. Nothing new really, sourdough bread also lasts fresh longer time
Isn’t it amazing? Although… after you make these muffins, I doubt you’ll need an extended shelf life, they’re INCREDIBLE!

Why do sourdough baked goods last longer?
Bread and other baked goods are usually discarded when they lose quality rather than when they get spoiled. Bread gets stale kind of quickly, cakes dry and get crumbly… Although there are many factors involved in why and how baked goods dry out, obviously, moisture content plays a key role.
When you mix your ingredients with water, the very first thing that happens is that those ingredients absorb the water. They start making hydrogen bonds and trapping the water within the matrix. Sugar and salt start dissolving, gluten proteins start hydrating, starch granules starch absorbing water and swelling (you see why autolysis helps to develop the gluten? Wink wink)… And all this takes a long time. Much more time than we think.
If we focus on the physical changes of food, rather than the biological changes of sourdough fermentation, we need to pay close attention to how the water is used in baked goods.
Moisture is key
There are two types of water in food: the bound water that’s forming some type of bond and the free water, that is simply stored within the food matrix.
After baking, the free water is going to be the first to go. It moves from the inside of the food (The crumb) towards the outside. Thus, why crust gets soggy over time, and then it finally evaporates and leaves the food.
Bound water, however, it’s somewhat trapped. It can be part of the gluten network, of swollen starch granules, it can be trapped within the fat matrix etc. The amount of bound water (among other things, of course) is one of the things that determines how long the food stays fresh; because its’ much more difficult to separate from the other ingredients. So the loss of quality related to water is slowed down.
Since sourdough baking needs lots of time, the levain preparation, long fermentation times etc. allow all ingredients to keep absorbing water and binding it to other molecules. The flour had many hours to ensure al the particles are saturated with water (I’m assuming a 100% hydration starter here). These bonds survive throughout the whole process; after the food is baked and starts cooling down, the food holds onto these water bonds.
And that’s one of the reasons food made with sourdough lasts longer!
If you’re interested in other food science facts, feel free to send me an email or DM on social media and I’ll try my best to write a post about it!
Back to the muffins!
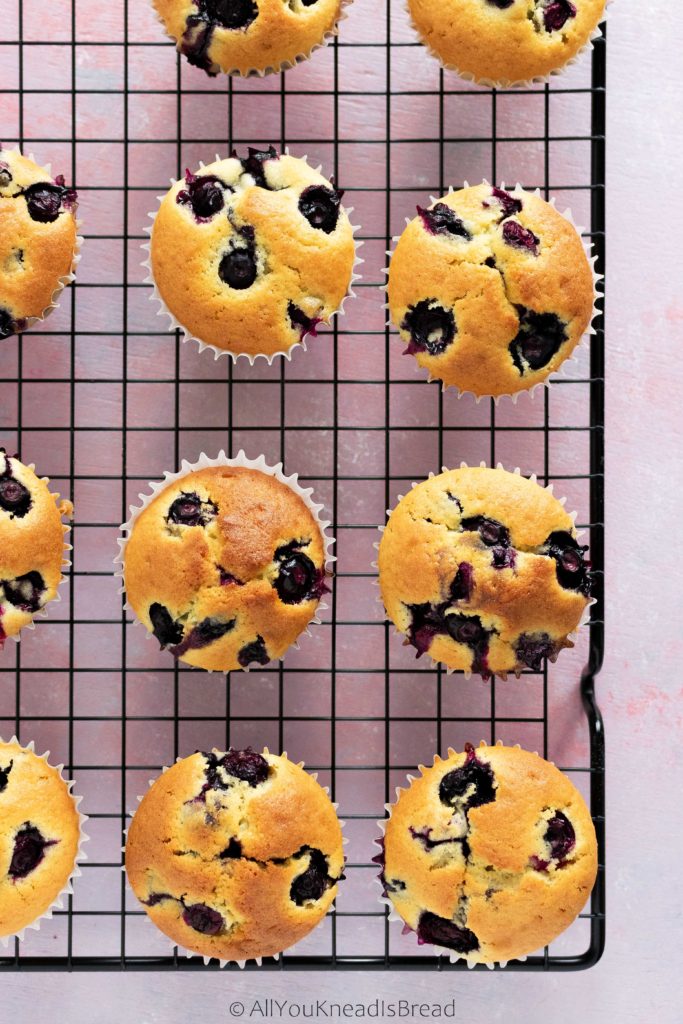
Alrighty! About these muffins… I made them small for two reasons: 1) because the number of muffins I eat doesn’t depend on the size, so I’d better eat smaller portions now that the gym is close 🙂 and 2) because I don’t have a large muffin tin and if I buy more kitchen stuff my husband is going to make me sleep in the kitchen.
So obviously, feel free to make larger muffins or smaller. Whatever you prefer!
I like to whip eggs and sugar very well, this helps with the airy structure of the muffin and I think the texture turns out super delicate!
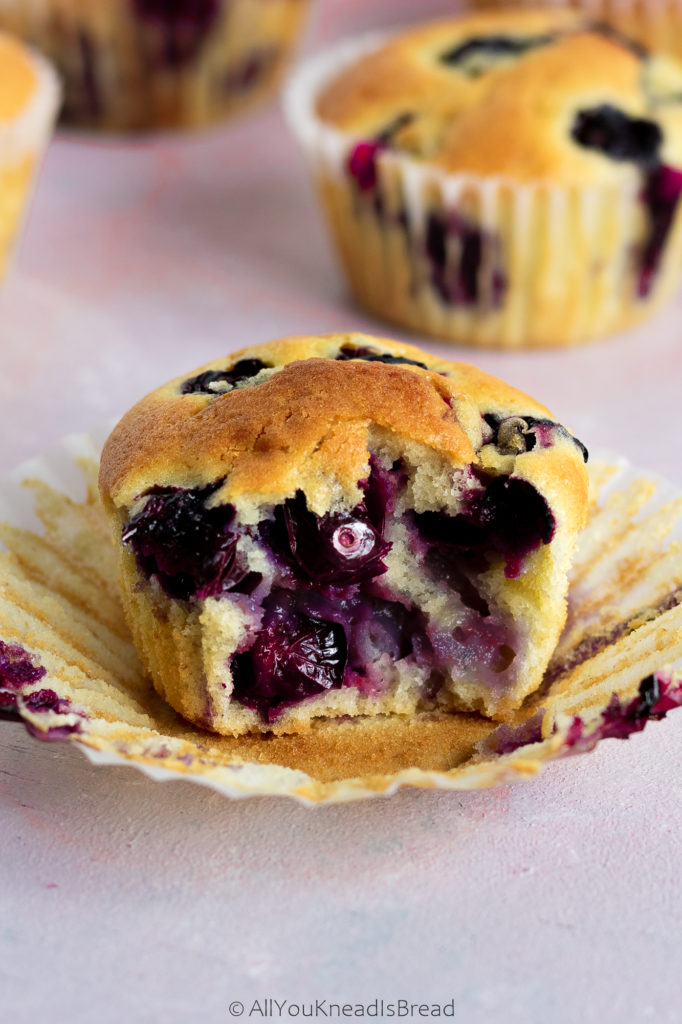
Usually, when you make blueberry muffins, they collapse a little after they come out of the oven, it’s normal, that’s because the water inside of the fruits turns into steam while the muffins are baking, and they swell. Some blueberries might burst, and the others, when they cool down, they collapse because the steam condenses. They also wrinkle because the heat affects the structure of the skin.
I like to let the batter chill in the fridge for at least a couple of hours to allow the baking powder and baking soda hydrate well. Their leavening power is activated by acids and moisture. You can leave the batter in the fridge overnight and bake the muffins first thing in the morning!

If you make this recipe, let me know what you think and tag me on your creations! I love to see what you guys do!
You can also follow me on Instagram or Facebook and you can also subscribe to my Youtube channel.
If you have any suggestions or would want me to make some recipes, adapt a yeast-based recipe into a sourdough one, etc, please contact me and I’ll try my best to respond and plan a recipe!
Happy baking!

Sourdough blueberry muffins
Use your sourdough discard to make these delicious muffins!
Ingredients
- 200 g all purpose flour
- 200 g sourdough discards (collected throughout a week)
- 1/2 tsp baking soda
- 1 tsp baking powder
- 1 pinch salt
- 3 L eggs
- 180 g caster sugar
- 1 tsp vanilla extract
- 1 tsp lemon extract (optional- to taste)
- 180 g heavy whipping cream
- 60 g olive oil (see notes)
- 1½ cups blueberries
Instructions
-
Preheat your oven at 375 F
-
Sift the flour into a large bowl. Take a tablespoon of that flour and reserve
-
Add the baking soda, baking powder and salt to the flour and combine
-
In the bowl of your stand mixer whip the eggs until they are fluffy and have a light yellow color
-
Add the sugar to the eggs and combine
-
Add the whipping cream, the oil, the sourdough starter, and the extracts and combine well. Use a spatula if you need to break down the sourdough blob
-
Change from the wire whisk to the paddle attachment, add the flour in 3 batches and combine at medium-low speed
-
In separate bowl toss the blueberries and the tbsp of flour you reserved and carefully stirr tso they blueberries get a nice coat of flour
-
Add the blueberries to the batter and with a spatula stir until just combined (you can put now the batter in the fridge if you want)
-
line a muffin tin with baking cups and fill them to about 3/4
-
Add some blueberries on top as decoration
-
Bake for about 30 minutes or until they have a nice golden color
Recipe Notes
I like to use olive oil because I think it gives muffins in general a really nice aroma. And it’s also how my mom taught me. But feel free to use melted butter or any other oil of your choice!
If you don’t have blueberries, you can make these muffins with any other fruit
Gorgonzola and apple sourdough bread – Video

Hello friends!
I’ve decided that it was about time for me to post some sourdough bread recipe and spread the sourdough fever!
Before I start I’d like to make something clear:
There isn’t just one single method to make sourdough. Any bread, really. But especially sourdough. My method works for me because I’ve adapted it to my kitchen conditions, my flour, and our taste buds.
If you’re new to sourdough baking take this recipe as a guide and experiment with what you like
Since sourdough is the result of wild yeasts and bacteria fermentation, it’s unique for each person. Each starter is different because the flours used are different, the water quality is different, the temperature in each person’s kitchen is different…
Sourdough for beginners: what I wished someone told me when I first started
My very first sourdough bread was… pretty messy! I was intimidated and I thought that not following the recipe by the minute was going to turn my bread into something awful “OMG! It has fermented 5h and 1 minute!” So here are some of the things that I learned along the way:
1. Don’t worry! You can adapt the fermentation time to your own schedule. Sometimes deciding what you’re going to do with the bread is more difficult than actually making the bread. The more you bake, the more you learn.
2. Experiment, try different things. Shorter bulk fermentation, longer cold-proof… whatever works for you!
3. Flour flour flour! Flour your banneton, flour your dough and flour everything so the dough doesn’t stick to the banneton or the cloth. Too much flour ain’t never enough flour! After all the work you don’t want the dough to stick to the banneton or the cloth right before baking. Some people like to use rice flour or starch because they absorb more water and the dough never sticks. I found that all-purpose flour works great, as long as you use enough.
4. If anything, it’s better to under-ferment than over-ferment. Why? Scientifically speaking, the gluten network of over fermented dough loses strength and it’ll be difficult to shape, it won’t hold the shape during baking, and it’ll have a terrible oven spring because the lack of strength means less ability to hold gas inside (it’s the same concept as to over-knead the dough). Also, and this is my opinion, some people might disagree, but it’s been helpful for me: slightly under fermented dough has more chances to turn into a great bread than over fermented dough. The crumb might not have super large holes, or maybe you don’t have that tart taste you’re looking for, but the dough will hold the shape better, the oven spring will be better, and overall the bread will be better than an over-proofed one.
5. Make sure the gluten is developed. Either if you knead the dough by hand, on a stand mixer or if you do a “no-knead” bread. The dough has to be elastic and smooth, it shouldn’t be sticking everywhere. If you are kneading, there shouldn’t be dough on the walls of the stand mixer bowl, or on the counter. The dough has to be strong enough to be able to pull itself together without breaking. If you’re making “no-knead” bread, you should be able to stretch the dough without it tearing apart.
6. Shape the loaf well, don’t be afraid. During shaping, you’re going to use that strong gluten network that you’ve built to be able to create surface tension. That means that you’re going to stretch the outer layer of gluten in a way that will help keep the shape tight and in place, but if you push too much, the layer will eventually tear apart, and the bread won’t hold the shape. I like to think about it as covering a bowl with plastic wrap, you need the wrap tight in order to be in place, but if you pull too much, you will tear it.
7. Don’t get overwhelmed by information. The Internet is packed with sourdough recipes, methods, how to build a starter… My advice? Pick one method to build your starter and stick to it until you’re comfortable enough. Each method will be different and will be adapted to each baker. That’s why they’re all so different and why I don’t want to add more information about it, there’s just too much out there. If you really want to know how I built my starter, how I care for it etc. feel free to contact me and I’ll be more than happy to help!
8. BE PATIENT. Bread making is all about patience. If your first bread doesn’t turn out great, don’t worry! Keep trying. Write down what works, and what doesn’t. And if you want to experiment, change only 1 or 2 things at a time so it’ll be easier for you to narrow down what went wrong, what worked, what’s creating problems…
Let’s get to the recipe!
Gorgonzola cheese has a very intense flavor, it should be consumed in small amounts, so your palate is not overwhelmed and you get to enjoy all the aromas and flavors.
Apple is a sweet fruit but not too sweet that would take over the cheese taste. Actually, it helps your taste buds to balance everything every flavor.
And the bread, of course… the sourdough taste, the airy crumb, the slightly crunchy crust…

Are you drooling yet? I thought so 😊
I used 100g of gorgonzola (half packet) and 1 medium-large fuji apple. You can go for a tarter apple or a sweeter one.
I’ve tried this recipe with different water contents and the bread has always turned out very similar. The cheese fat and the water in the apple are essential to get the super soft bread. And because of those, the crust is crunchy but thin, so it’s not hard at all.
You’ll see how light and springy this bread is!

This bread is just amazing! I never recommend to eat the bread warm, but for this one? I can’t tell you to wait until it’s cooled down. Just give it 30 mins to set the crumb and go ahead! And since it has both savory and sweet, you can combine it with anything you want!
If you make this bread make sure you tag me on Instagram! I’d love to see what you made!


Gorgonzola & apple sourdough bread
This bread is very soft with incredibly balanced aromas
Ingredients
- 320 g bread flour
- 80 g whole wheat flour
- 320 g room temperature water
- 80 g 100% hydration starter
- 1 medium fuji apple
- 120 g gorgonzola cheese
- 7 g salt
Instructions
-
Mix flours and water (you can add less water if an 80% hydration is too much for you). Let the dough rest for up to 3h (autolysis)
-
Add the salt and mix the dough until you don’t feel salt particles. Wait 30 minutes
-
Add the starter, incorporate it very well and let the dough rest for 30-45 minutes
-
Peel and chop the apple and cut the cheese into small cubes
-
Laminate the dough: use your fingers and stretch the dough from the center towards the outside, don’t worry about the shape. Add the apple and the cheese and distribute them well. Fold the dough and shape it into a ball and place it back in the bowl. Wait for 45 mins
-
Do three sets of coil folds or stretch and folds every 45 mins (time can vary between 30-60mins). After the last set of fold, let the dough ferment until it doubles in size, the time depends on the temperature of the dough and the temperature of your kitchen (it can be anywhere from 3-8h)
-
Flour the counter well, let the dough fall from the bowl onto the counter by itself and shape it into a batard or a boule
-
Line a banneton with a clean cotton cloth and flour it generously. Place the dough into the banneton with the seam up and stitch the seam. Cover the dough with the cloth and put it in the fridge for 8-24h (If you don't have a banneton you can use a bowl).
-
Preheat your oven at 450F with a dutch oven inside (or a pizza stone or a baking tray) for at least 30-40 minutes
-
Take the dough out of the fridge and place it on a piece of parchment paper. Score the dough with a sharp knife or blade. Put it in the dutch oven and reduce the oven temperature to 425F . **See notes
-
Bake 20 mins with the lid on and another 15-25 mins without the lid or until it has browned nicely (depending on your oven the bread might be done earlier or later)
-
Cool on a cooling rack for 30 mins to let the crumb set and enjoy!
Recipe Notes
** If you don’t have a dutch oven, place another baking tray in the bottom rack while the oven it’s preheating. Add a cup of boiling water to that baking tray right after you put the bread inside and close the oven door fast. After 20 minutes remove that tray and bake the bread for another 20-25 minutes. If you use a pizza stone, be careful to not add the boiling water on it or it’ll, most likely, break.
Cinnamon rolls with lievito madre discards
Hello everyone!
Today I bring something delicious! If you’ve been following me on Instagram or Facebook, you already know I’ve been experimenting with lievito madre, and I even made panettone with it! 🙂

Lievito madre is the stiff sourdough starter used by Italian bakers to make panettones the artisanal way. This method requires a lot of flour and a lot of refreshments during the first 15 days, and while the first-week discards are not suitable for baking, the rest are. Especially the 3 discards from the 3 preparatory refreshments before making panettone.
If you want to learn how to make your own lievito madre check this post!
Every time I did a refreshment, I had 150-200 g of lievito madre that I threw away. On day 9 or 10 of the process, I made a loaf of bread and it turned out great, so the next day I used the discards to make challah and it turned out great too. The taste was amazing, and it just had a pleasant hint of sourness.
Sourness in enriched dough has been my pet peeve and the reason I usually use commercial yeast. I can’t stand a bread that’s supposed to be sweet and yet the only thing you taste is a strong acidic flavor. I like that on country loaves, but not on brioche or a croissant.
That’s the whole point of working with lievito madre (either soaked in water or tied up in a cloth). In the soaked in water method, part of the acid is released in the water. Don’t forget that this sourdough starter is used in panettone, and real Italian panettones are not acidic at all. You shouldn’t be able to tell that the panettone was made with sourdough.
Baking with lievito madre
Working with lievito madre is addictive, seriously! I don’t even care how much time I’ve invested in creating it, or how much flour I’ve used. I can tell how differently the dough behaves, the different aromas compared to my regular sourdough starter, etc.
Based on the amazing flavor and incredible texture of the challah I baked, I decided to experiment a bit more and make cinnamon rolls. Because I have yet to find a recipe that doesn’t turn out into super dry rolls.
This recipe doesn’t have frosting because I wanted to taste the bread, the aromas from the lievito madre and how they combined with the ingredients on the recipe.
I did tweak the recipe a bit and I used orange syrup and orange blossom water in the dough, the filling has ground walnuts, ground cinnamon, and orange zest, and the icing has orange juice instead of milk or water.
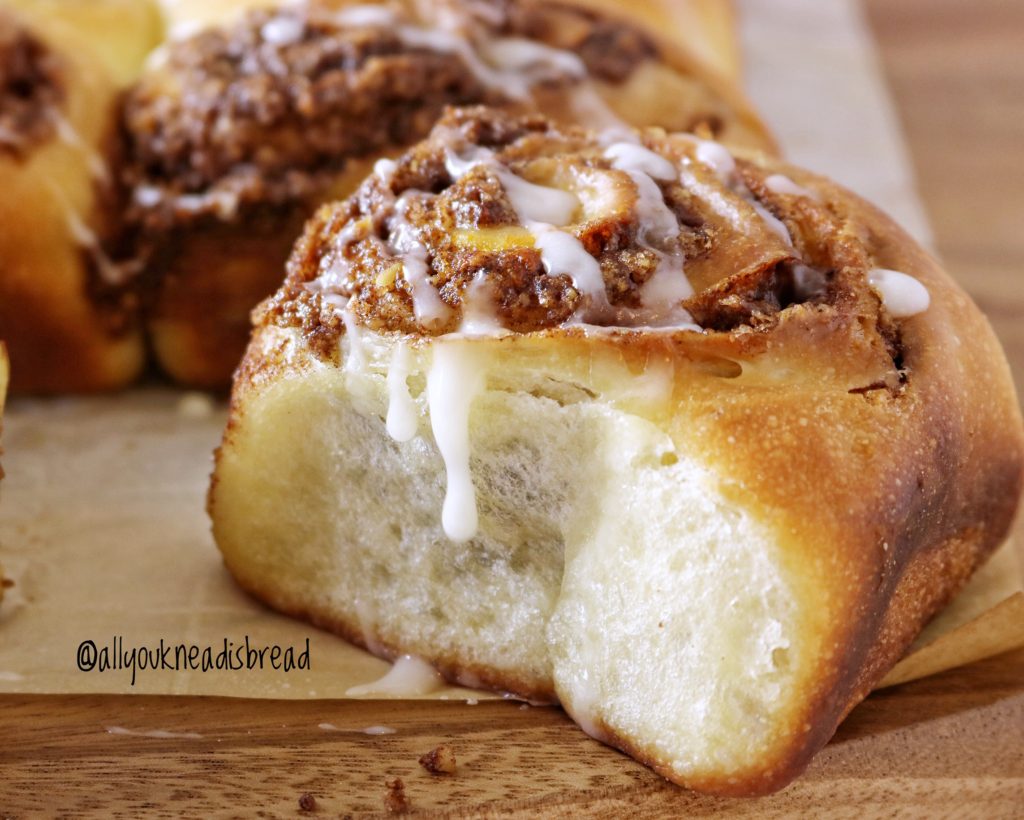
The result was amazing, the lievito madre helped to balance the aromas of the dough and significantly improved the texture of the rolls, they were soft and chewy and delicious! Even though I used lievito madre that had never been “purified” before (by doing a bagnetto, a technique to reduce the acidity of the dough when making panettone with lievito madre), and the dough fermented for 8h at room temperature and another 8 in the fridge, the rolls tuned out delicious with a pleasant hint of sourness, you could tell they were made with sourdough but the flavor was great.
I think the texture of the dough was also different, it was more forgiving, and I could develop the gluten with a much gentle kneading that using levain or commercial yeast.
Let’s get into the recipe!
After draining, squeezing and using part of the lievito madre to do the refreshment, take the discards, weight how much you need and cut it into small pieces (half an inch or so) so they can be absorbed into the dough faster.
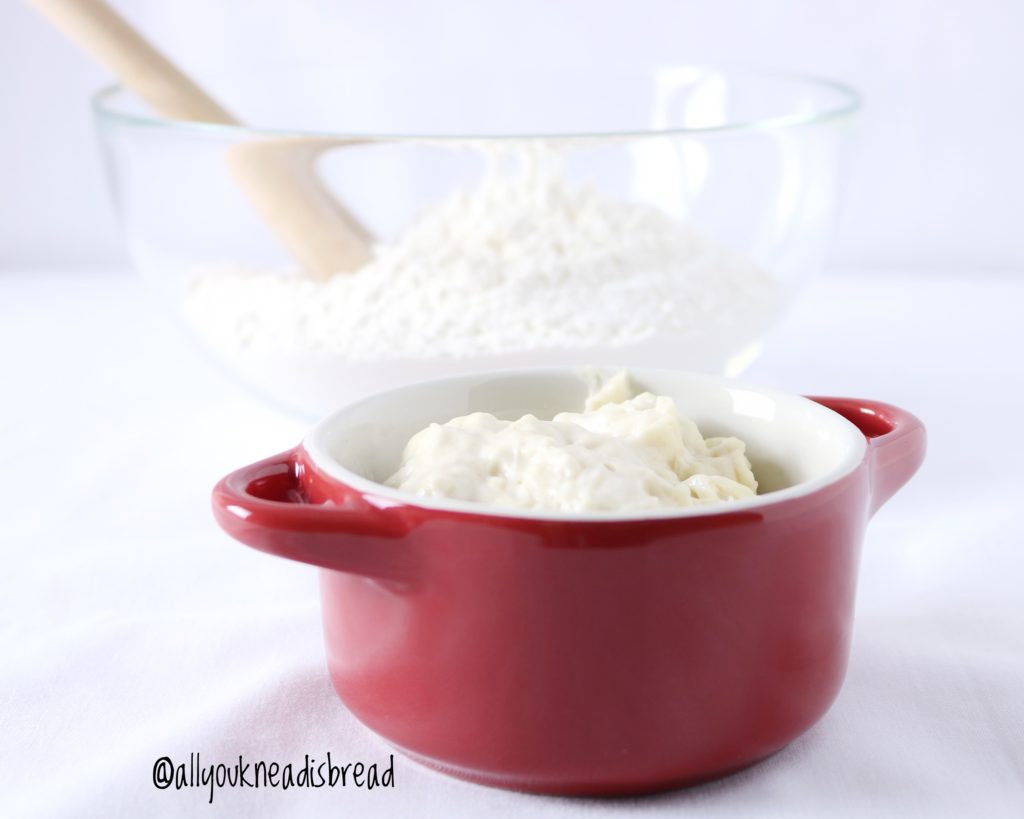
In your stand mixer bowl, add the wet ingredients and combine very well, then add the flour and the lievito madre in pieces.
Knead until the dough gets some elasticity and then add the softened butter. continue kneading until you have a perfect gluten development. You will have to stop a few times and let the dough rest for some minutes. You can check this post to learn how to knead enriched dough.
Once the dough is ready, shape it into a ball and place it in a lightly oiled container. Cover it and let it ferment at room temperature until it doubles in size. Mine took about 8h (the milk and the egg were cold). Place the dough in the fridge and let it ferment another 8h (I left it in the fridge overnight).
If you have enough time, you don’t have to leave the dough in the fridge overnight, although I do recommend you to let the dough chill for 1h before you shape the rolls, because this dough is stikier than the regular cinammon roll dough.
The next day, take the dough out of the fridge, deflate it very well and let it rest 10 mins before shaping.
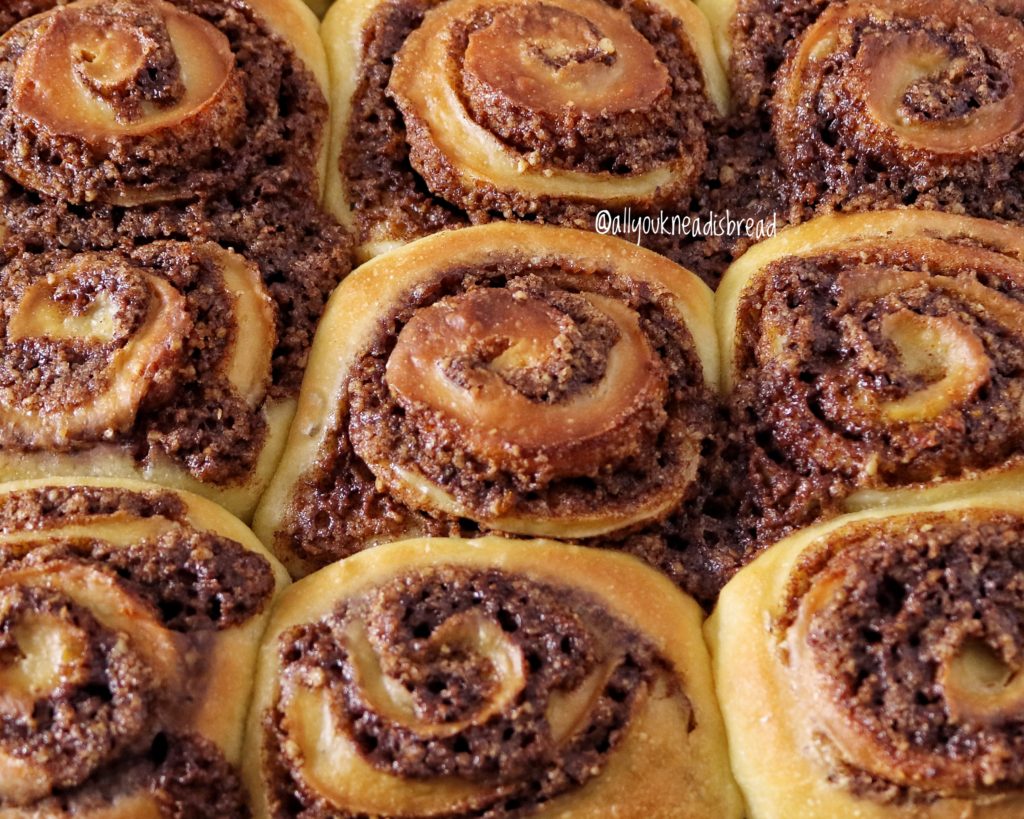
Roll the dough into a 35x45cm rectangle, spread the filling and starting from the longer side, roll the dough onto itself to make a log. Seal the log and cut it into 9-12 pieces.
Place the rolls into a lightly oiled 9x9in square pan and let them ferment, covered, until they touch each other.
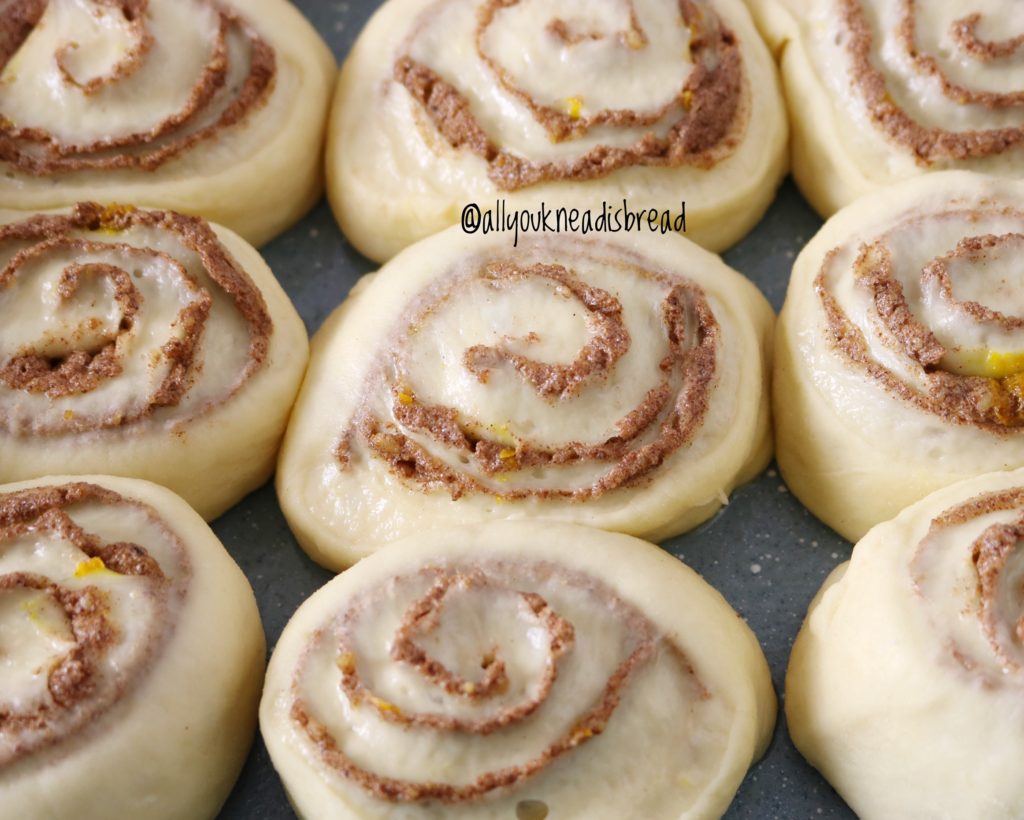
Before they finish proofing, turn your oven on at 350F.
When ready, bake for 30 mins or until the rolls are golden brown. You can brush them with egg wash if you prefer.
Prepare the icing and wait until the rolls cool down a little before you drizzle the icing.
Enjoy!

Sourdough cinnamon rolls with stiff starter
Use lievito madre to make these chewy, soft, and moist cinnamon rolls. It's another level of sourdough goodness!
Ingredients
Dough
- 300 g bread flour
- 100 g lievito madre discards
- 135 g milk
- 50 g butter softened
- 4 g salt
- 2 eggs
- 1 tsp vanilla extract
- 1 tbsp orange syrup or honey optional
- 1/2 tbsp orange blossom water
- 50 g sugar
Filling
- 80 g ground walnuts
- 4 tbsp sugar
- 3 tbsp melted butter
- 2 tsp orange zest
- 1 tbsp ground cinnamon
Icing
- 1/2 cup powdered sugar
- 1-2 tbsp orange juice
Instructions
Dough
-
In the bowl of your stand mixer add the milk, eggs, salt, sugar, vanilla extract, orange blossom water, and orange syrup and combine very well
-
Sift 300 g of bread flour and add them to the wet ingredients
-
Take 100g of the discards from refreshing your lievito madre and cut small pieces and add them to the bowl of the stand mixer
-
Knead at low speed for a few minutes until the dough gets a bit elastic and add the softened butter
-
Knead until you have a perfect gluten development
-
Shape the dough into a ball and place it in a lightly oiled container. Cover it and let it ferment at room temperature until it doubles in size (about 8h in my kitchen)
-
Place the dough in the fridge and let it ferment at a cold temperature for up to 8 more hours
-
Take the dough out of the fridge, deflate it gently and with a rolling pin shape a 35x45cm rectangle
-
Spread the filling and start rolling the log starting on the wider side
-
Cut 9-12 pieces and place them in your 9x9in square pan (use parchment paper if it's not non-stick)
-
Let the rolls proof until they touch each other (about 2h)
-
Bake the rolls in a preheated oven at 350F
-
Drizzle the icing after they cooled down to room temperature
Filling
-
Combine the ground walnuts, sugar, cinnamon, and orange zest
-
Add the melted butter and mix well
Icing
-
Sift the powder sugar
-
Start adding the orange juice until you get the desired consistency
Russian Kefir Bread – Video

Well well well… Looks like summer is already here! One of the things I like of the crazy weather we have in NC is the summer storms. I find rain quite relaxing, the trickling sound of the water, the smell of wet soil, the sunset of a stormy day… And baking while raining? That’s a complete spa day!
I guess many of you will go on a vacation this summer, but if for some reason you won’t, I’d like to take you on a little trip without leaving your kitchen! I’d like to take you to the Caucasus region!
This region is well known for their kefir. A fermented milk drink made from kefir grains. These grains are a combination of yeasts and bacteria that you add to milk. The culture ferments overnight, and the next morning you have your fresh fermented drink! The consistency is similar to drinkable yogurt. A little bit sour because of the lactic acid bacteria. While I’m not an expert on homemade kefir, I believe you can control the sourness by controlling the fermentation temperature and times.
Kefir has gained much attention in the last years because it’s a probiotic, so it’s very healthy for your gut microbiota and digestive system. Now you can find it in almost all grocery stores!
I came to realize that almost every country and region have a bread recipe that uses local ingredients or cooking techniques, so in Eastern European countries, kefir is sometimes used to make “батон” (baton) bread. I guess the name comes from the shape of the bread.
I’ve been doing some research on this recipe, I’ve looked for blogs and videos (Thank you Google translate!) and I finally found a recipe that I like, although I’ve made a few changes.
This bread is very easy to make and it the perfect candidate to start kneading by hand. This dough is on the dry side, therefore comes together pretty fast. It’s great to try different kneading techniques and develop your own style. I think making this bread can also be an excellent activity to do with your kids, the recipe it’s simple, they can help you knead, and they won’t make a mess because the dough is not very sticky! 😉
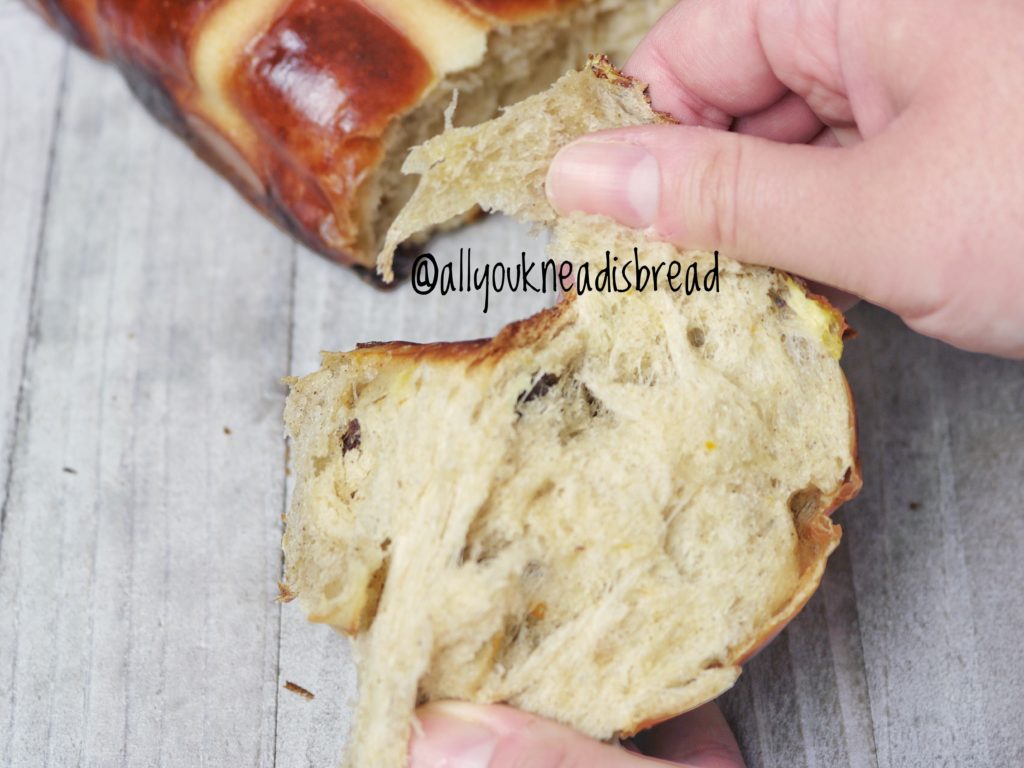
You can eat this kefir bread with savory dishes, or jam, or just plain! And it makes wonderful French toasts too! The flavor is rich and delicate, and the kefir really gives the bread an interesting kick and aroma! The crumb is perfectly fluffy and cohesive, and the crust is not too thick, so you can use this recipe to make homemade subs! The crust will get softer after a few hours. And in my opinion, the aroma of the bread is better after it cooled down completely.

The recipe yields 3 large loaves or 4 medium loaves, so if you’re not going to eat them all you can freeze some and keep the rest in a Ziplock bag for a few days.
Let’s start with the recipe!
As always, activate the yeast in the water and let it sit for a few minutes.
Once the yeast is active, add sugar, salt, kefir and butter and give it a good whisk. Don’t worry if there are chunks of butter.
Then add 1/3 of the flour and combine everything very well until you have a thick paste. By doing this, incorporating the butter will be easier and you don’t have to melt it. Bread usually turns out better if you don’t melt the butter.

Add the paste to the rest of the flour (previously sifted) and combine all the ingredients together until there are no dry flour particles.
Let the dough rest for 20-30 minutes to allow the flour particles to hydrate. This is a pretty dry dough, since the gluten doesn’t have much moisture, it’s important to start working the dough after the gluten proteins had some time to hydrate.
Knead the dough until it’s soft and elastic. Knead it the best way you can with the technique you’re more comfortable with. The dough feels a little hard at the beginning, use the heel of your hand to apply pressure and eventually it’ll become more elastic. Be patient, it’ll take about 15 minutes to have the dough ready.

After autolysis After kneading


You shouldn’t need extra flour to knead the dough, it’s not sticky, but if you do, try not to add too much or your bread will turn out too dry.
When the dough is ready, let it ferment until it doubles in size and it’s puffy. In a warm environment it will take between 1 h and 1 h 30 mins.
After that, deflate the dough very well, we’re not looking for big alveoli in the crumb, but a bun-like crumb.
Divide the dough into 4 equal pieces (or as many as you want! It depends on how large you want the loaves). Shape them into balls and let them rest, covered, for 10 minutes. During this time the gluten strands will relax, and it’ll be easier to shape the loaves.
To shape the loaves, flatten each dough ball with your hand and with a rolling pin roll them into a rectangle as wide as you’d like the loaves. The rectangle should be about 1/3 or 1/4 of an inch (0.5-0.8 cm).

You can use some flour while you shape the loaves to avoid the dough from sticking on the counter.
Once you have the rectangle start rolling the dough from the narrowest side, tugging the ends inside of the log.


Let the loaves rest, covered, until they double in size. Before the proofing time is over, preheat your oven at 375 F (190 C).

Right before baking the loaves, make cuts through them and brush some water. This step is optional, the water will help develop the crust but if you prefer a softer crust, don’t brush it.

Bake the loaves for 25 minutes or until they are golden brown
NOTE: you might need to bake at lower temperature to make sure the loaves are fully cooked. You know your oven better!
When the loaves are ready, let them cool down on a cooling rack. I know it’s tempting but try to wait until the bread is at room temperature so the crumb finish baking and the aromas finish developing.

Enjoy!

Russian Kefir Bread
A delicious and easy bread recipe
Ingredients
- 600 g bread flour sifted
- 175 g plain kefir
- 175 g water room temperature
- 6 g dry yeast
- 10 g salt
- 30 g white sugar
- 50 g unsalted butter softened
Instructions
-
Dissolve the yeast in the water and let it sit for 10 minutes
-
Add to the yeast mixture the salt, sugar, kefir, butter, and 200 g of flour and combine everything until you get a paste.
-
Add the paste to the leftover flour and incorporate all the ingredients until there are no dry flour particles. Let it sit, covered, for 20 minutes
-
Knead the dough until it's elastic and soft
-
Place the dough on a lightly oiled bowl and let it ferment, covered, until it doubles in size and it's puffy.
-
Deflate the dough and knead it for 1 or 2 minutes to make sure you get rid of big bubbles
-
Divide the dough in 4 equal pieces. Shape them into balls, cover them and let them rest for 10 minutes.
-
With a rolling pin roll the balls into a rectangle and shape the loaves.
-
Let the loaves rest, covered, until they double in size and they are puffy.
-
Make cuts on the loaves, brush them with water (optional) and bake them at 375 F for 25 minutes or until they're golden brown
Super Soft Hot Cross Buns – Video
Easter is here!
When I was a kid I was always looking forward the next special occasion because I knew my mom and my grandma would cook something good and I’d get to be the official taster 😊 Now, as an adult, I do the same, I look for recipes for every occasion!
I discovered hot cross buns about 3 years ago. The moment I saw the recipe I was already in love. The combination of spices, the fruits… so aromatic! I LOVE these buns! Bread, sweet fruits and spices all together? Uhmm.. yeah!
I have seen many videos and recipes and I have found a common “problem”, and that’s the lack of a proper gluten network. The tricky part of this recipe, in my opinion, is the kneading process. It takes a bit of time to develop the gluten network, it’s an enriched dough and therefore, not easy. This recipe has a good amount of wet ingredients, I found that increasing the liquid and fat content a little bit can go a long way. It’s a bit of a long process to get the dough ready, but boy! The result is AMAZING! The buns are SUPER SOFT and they last fresh much longer.
HOW SHOULD YOU KNEAD ENRICHED DOUGH?
Well… being patient is a must, with butter, eggs, and sugar in the middle, developing the gluten network is more difficult, so take your time. If you’re using a stand mixer, don’t knead too fast. You can start with the paddle attachment until the dough starts to come off the bowl sides and rolls upon the paddle, then change to the hook attachment. My stand mixer has 10 speeds and I use the paddle attachment at speed 2-3 and then the hook attachment at speed 3-4.
I’d suggest you knead for 10 minutes and then let the dough rest for 3-5 minutes. Then knead again, and rest again. It helps the gluten proteins 😉
WHY DOES GLUTEN NEED TO REST?
Gluten proteins get tired of being kneaded, basically. And it’s difficult for them to keep linking each other. When we knead the dough, we facilitate the interactions between the gluten strands, but at the same time, the long chains get somehow tangled. So, when we let the dough rest, what happens is that these chains reorganize and realign. It’s like a ball of yarn, when it’s tangled you can’t do anything with it, but when it’s properly rolled you can keep taking the yarn out of it.
Enriched doughs need longer kneading times, that means the gluten proteins are going to be under a lot of stress. Let them rest a little and save time in the long run.
WHAT ABOUT THESE BUNS?
Jump to Recipe
Let’s get into this delicious recipe!
NOTE: if you’re using cow milk, boil it for a couple of minutes and let it cool down until it’s lukewarm. Boiling the milk will break down some enzymes that, otherwise, could weaken the gluten network. Boil more milk than the amount in the recipe because some of it will evaporate as it heats up.
As always, dissolve the yeast in the lukewarm milk and let it sit for a few minutes. You can add a pinch of sugar and when the mixture is frothy, the yeast is active!
Add the eggs, sugar, and spices to the yeast mixture and give it a good whisk. I like to add the spices to the liquid ingredients because I think they can infuse more aromas this way. But if you prefer to mix them with the flour it’s fine too.
Then add the sifted flour and combine everything until you don’t see dry flour particles. You should have a sticky mess, a bit runny even.

Cover the dough and let it rest for 20-30 minutes. This step will allow the flour particles to hydrate so the gluten proteins are at full strength when you start kneading.
After the autolysis period, add the salt and start kneading.

When the dough starts being elastic add the softened butter and keep kneading.

When the dough is elastic enough (it should be smooth), add the dry fruits and knead just enough to integrate all the fruits.
Make a ball with the dough and place it in a lightly oiled container. It’s better to use vegetable or canola oil, because they have milder flavors than, for example, olive oil.

NOTE: the dough should pass the windowpane test. Let the dough rest 5 minutes before checking it. If you can see some of the fruits through the dough and it doesn’t tear apart, that’s a good sign of proper gluten development.
HOW TO PREPARE THE FRUITS
Typically, this recipe calls for raisins, but I like to add a bit of everything. You can add candied orange, dry apricots, candied green cherries…
The night before (preferably), or at least a few hours before, mix the raisins (and other very dry fruits you might use) with about ¼ cup of some liquid. You can use tea, freshly squeezed orange juice, or even rum or sherry if you don’t mind the alcohol. Close the container and shake it every now and then to make sure all the fruits get to soak some liquid. Strain the fruits before adding them to the dough. You don’t want to incorporate too much liquid to the dough.

ROOM TEMPERATURE VS. OVERNIGHT FERMENTATION
If you want to bake the buns the same day, let the dough rise at room temperature until it has almost doubled in size, deflate it very well and knead it for 1 minute to get rid of big air pockets.
If you prefer to do a cold fermentation let the dough ferment at room temperature for about 30 minutes and then transfer it to the fridge and let it rise overnight. The next morning take the dough out of the fridge and let it warm up a little bit (30mins to 1h, depending on the temperature of your kitchen), deflate it very well and knead it for 1 minute.

Line a 16x12in (40x30cm) with parchment paper. Divide the dough into 12 pieces of similar weight.
NOTE: I had to use a smaller pan and bake the other 3 buns apart because I forgot my 16×12 pan was in the freezer! 😊

Cover it with plastic wrap and let the buns rise until they look puffy and they increased in size. They don’t need to double in size necessarily, just make sure the dough feels puffy, not hard. The buns should touch each other too.

MAKE THE CROSS AND PREPARE THE BUNS FOR BAKING
***preheat your oven at 375F (190C)***
To prepare the paste just mix the all-purpose flour, icing sugar and milk. It must be a pest. So, it’s better to add the milk little by little until you have the right consistency. The amount of milk depends on the flour you use, play around with the ratio as long as you end up with a paste.

Now that the paste is ready, let’s finish up these buns! Prepare the egg wash, and brush the buns with it BEFORE you pipe the cross. I emphasize before, because I didn’t do it and brushing the buns when the cross was already there was tricky, to say the least!

With a piping bag, make the crosses. Don’t be afraid! I know there’s a lot of pressure but don’t let the piping part intimidate you 😊
Place the buns in the preheated oven and let them bake until they have a nice golden brown color. If your oven doesn’t bake evenly, turn the pan 180 degrees halfway.
When ready, take them out of the oven and let them cool down for 5 minutes before you take them out of the pan.


Enjoy!


Super Soft Hot Cross Buns
Ingredients
Dough
- 500 g bread flour
- 280-320 g lukewarm milk depends on the protein content of your flour. Start with the lesser amount and add more if needed.
- 1 L egg
- 1 L yolk
- 90 g softened butter
- 50 g brown sugar
- 1 tsp salt
- 7 g active dry yeast
- 1 tsp ground cinnamon
- 1 tsp ground allspice
- 1/4 tsp nutmeg optional
- 1 1/2 tsp vanilla extract
- zest of 1 orange
Fruits
- 100 g dark raisins
- 50 g golden raisins
- 50 g glazed green cherries optional
- 2 tbsp dark rum
- 2 tbsp orange syrup
- 1 tbsp water
Cross paste
- 60 g all purpose flour
- 24 g icing sugar
- 80-90 g cold milk amount could vary
Instructions
Dough
-
Combine yeast and lukewarm milk, mix until the yeast is dissolved and let it sit for 10 minutes to activate the yeast.
-
Add the eggs, spices, vanilla extract, orange zest, and salt to the yeast mixture and combine very well.
-
Sift the flour and add it to the wet ingredients. Combine everything until you don’t see dry flour particles. Let it rest for 20-30 minutes
-
Start kneading with the paddle attachment until the dough starts coming off the sides of the bowl.
-
Change to the hook attachment and knead for a few minutes or until you see it’s starting to be elastic and add the butter little by little
-
Keep kneading until the dough is no longer sticky, it comes off the bowl completely and it’s very elastic. It should pass the windowpane test.
-
Add the drained fruits and knead just until they are incorporated into the dough
-
Place the dough into an oiled container, cover and let it ferment until it almost doubles in size.
-
Deflate the dough very well and divide it into 12 portions of equal weight.
-
Roll each portion into a ball an place them into a 16x12in pan lined with parchment paper. Cover and let them rise until they’re puffy and touching each other.
-
Preheat your oven at 375F
-
Brush the buns with egg wash and with a piping bag make the crosses.
-
Bake the buns for about 22 minutes or until they’re golden brown. Keep an eye on them after 20 minutes.
-
Take the buns out of the oven and wait 5 minutes before taking them out of the pan.
Fruits
-
The night before combine the fruits with the rum, syrup, and water in a container. Close it and shake it once in a while to redistribute the liquid
-
Drain the liquid before adding the fruits to the dough
Cross paste
-
Mix the flour and the icing sugar
-
Start adding the milk little by little until you get the right viscous consistency. Whisk the mixture well until there are no lumps.
Recipe Notes
The glazed cherries are completely optional, I like to add them because of their intense color.
The nutmeg is optional too. I like how it can intensify other aromas, but the buns can be perfectly fine without it too.
For best storage wait until the buns cooled down completely and put them into a sealed plastic bag. Keep at room temperature