
How on earth did you come up with a whey bread recipe? I’m glad you ask! A few months ago I started to make my own yogurt. But with homemade yogurt came leftover whey. I don’t like throwing away things that I can use, especially something that 1) I know it’s an industry waste very difficult to deal with and 2) is not milk but smells like it and therefore could give great aroma to my bakes. I thought I could find a good use for it, and the most obvious one for me was to try my hand at a whey bread. Spoiler alert: it’s AMAZING!
For this recipe, I decided to use active dry yeast (you can also use instant if that’s what you have). I know I know… I’ve been on a sourdough roll for quite a while but because I wasn’t sure if making a 100% whey bread was possible, I wanted to try first using yeast. Then, during the recipe development, I realized that I needed to reconnect with my beloved yeast. The challenge of making something with sourdough is exciting but yeasted bread is delicious too and more convenient when you don’t have the time or patience for sourdough. And honestly, I think this recipe is perfect the “whey” it is *pun intended* 😉
Check the notes in the recipe box for the baker’s percentage, the measurements are for a large loaf pan.
What is whey?
For those who don’t know what whey is, it’s a by-product of the yogurt-making process. Once the milk is curdled and the yogurt is set, the yogurt is strained to get a creamier texture or Greek-style yogurt. The leftover liquid is known as whey or yogurt whey. It’s yellowish and it can be clear or a bit cloudy, it has a milky smell and it’s acidic. If you want to know more about the composition check this scientific article.
This whey is not the same whey protein powder has, they’re called the same, but they’re different. Protein whey is also known as “sweet whey”.
When I make yogurt I make 2 liters at a time; There’s a lot of whey in 2 liters of yogurt! I didn’t want to throw it away before I at least tried to do something with it. I also know whey is a huge problem in the dairy industry. It’s a by-product that pretty much goes to waste and it really poses an environmental problem. You can’t just throw it away because it has a lot of microorganisms and nutrients for other microorganisms that can lead to algae growth. The low pH can acidify the surroundings and thus affect the ecosystem where it’s dumped. It’s a big no-no.
Making the most of whey waste
Many researchers are looking into possible uses for whey in an attempt to relieve the industry from this problem and to minimize environmentally dangerous practices. Believe it or not, the Greek yogurt industry creates billions (billions with a b!!) of liters of whey. This article explains it very well, it’s an interesting read if you’d like to know more about this issue.
But we, bakers of the world, home cooks, kitchen creatives, zero waste enthusiasts… always find a use for everything! So, to your question “Can you make bread with whey?” The answer is YES, YOU CAN! And whey bread is actually now one of my favorite things to bake!

Using whey in bread
For this recipe, whey is the only liquid I use. Even for the yudane (which we’ll cover later). If your whey is clear or cloudy is not going to affect the bread. I’ve tried with both and they work the same.
I was a bit worried at the beginning because I wasn’t sure if the lower pH would affect gluten development or the final texture. But good news! The dough behaved beautifully! It’s very aromatic and you’re going to fall in love with this whey bread! And you can even keep the whey in the fridge for a couple of weeks before you use it. Its low pH and good microorganisms can extend its shelf life for quite some time!
About this whey bread recipe
Let’s get into the tidbits of the recipe! After testing different ingredient ratios, I decided to introduce some precooked flour. Some of you might have heard about tangzhong and yudane methods. Both are based on the same idea: the gelatinization of starch. Tangzhong is a roux and it’s made with a 1:5 flour to water ratio. Yudane, however, is a 1:1 flour to water ratio, and instead of gradually increasing the temperature and cook the mixture, you boil the liquid and pour it on top of the flour.
I’ve worked with both methods and I love them both. The gelatinized starch in the precooked flour makes quite a difference in the texture of the bread. I always mention how important gluten development is, but gluten development doesn’t only mean building the gluten network. It means incorporating all the necessary elements into the network. And that includes starch granules that will gelatinize during baking. These gelatinized starch granules give the crumb some springiness and elasticity, which are key for soft and fluffy bread.
How to make the yudane for this whey bread
If you have a stand mixer or some machine to knead the dough, I’d recommend you prepare the yudane with it. Measure the flour and keep it in the bowl. Boil a bit more whey than the amount you’ll need because some of it will evaporate. When it comes to a boil turn on your stand mixer, quickly measure the weight of the whey you need in another container, and pour it into the stand mixer bowl and knead it until you can touch it without burning yourself.
If you do it by hand, also measure the flour and keep it in the bowl, proceed to heat the whey in the same manner, and when it comes to a boil measure the amount you need directly on the bowl where you have your flour. Place the bowl on the scale, add the whey, and quickly, with a spatula or a wooden spoon mix the dough well and knead it until you have a sticky dough ball.
If you can, use a heavy bowl, so it doesn’t move around while you’re stirring and pouring the boiling water.
The yudane method explained
Usually, people make the yudane the night before baking and let it cool down in the fridge. However, I think that approach is not the best if we want to maximize the possibilities of adding gelatinized starch to our dough. Why? Because of something called starch retrogradation.
Starch is made of two monomeric units: amylose and amylopectin. At room temperature, these two compounds have a crystalline structure (not that they’re crystals per se, but their atoms are arranged in the space as crystals). In presence of heat and water, the starch granules swell and burst. When this happens, the crystalline structures of amylose and amylopectin are lost, the chains can interact with even more water, and the mixture becomes a gel, thus the “gelatinization” part.
However, the gelatinization process is not 100% irreversible. The moment heat is no longer applied and the temperature of the gel starts going down, some of the monomers start re-crystalizing. That means that as they go back to their original structure, they start losing the gel properties and become solid again. This process is called retrogradation.
Starch retrogradation is quite a big deal in starch science and it does have a role in bread staling. It’s also one of the main reasons bread gets hard and crumbly when we put it in the fridge.
Why I don’t put my yudane in the fridge
The retrogradation process is accelerated at cold temperatures. That’s why sauces or custards that have flour or starch harden in the fridge. If we put the yudane in the fridge, the starch retrogradation will go faster than if we just leave it at room temperature. We can keep more gelatinized starch and our bakes will be even better if there’s no cold involved.
Keep in mind that even if we let the cold yudane come back to room temperature, the retrograded starch won’t gelatinize again. Gelatinization starts at high temperatures (>65C/150F)
This is my personal preference when making yudane. I find it’s also more convenient because I always forget to prepare things the day before. But obviously, you can leave it in the fridge if that’s what you prefer.
When your yudane is ready and it’s not too hot, you can either start right away, or you can wrap it in plastic until you start making this whey bread.
How to ferment this dough
Since this is a yeasted dough, it’s going to be a 1-day bread. And in just a few hours you should be able to enjoy a nice slice of this whey bread that’s going to enamor you!
The bulk fermentation will take about 2-3h, proofing will take a bit less. These are just a guide, the total fermentation time depends on how hot your kitchen is, etc etc. Proofing is where things can be different depending on what type of loaf pan you have.
Proofing on a Pullman loaf pan with lid
I have this Pullman loaf pan with a lid. I must say… it’s large. I underestimated the size when I bought it some years ago. At the time I was baking just for myself. But now this size is very convenient because it makes a loaf large enough to last the whole work week and feed 2 people. I’m talking breakfast toasts, lunch sandwiches, mid-afternoon snacks…
Make sure you oil the pan and the lid. After you shape the dough, let it ferment until the dough is 1cm from the top. Then put it in the oven. If you bake the loaf when the dough is already touching the lid and is filling almost all the pan, the dough won’t have enough space and might pop the lid. As the bread keeps rising the first few baking minutes it might push the lid and you might hear a little explosion. Nothing major, but if you’re not expecting that it might scare you. I know because I almost had a heart attack when I heard that myself!
If this happens though, carefully put the dough back in the tin with the lid and everything (it will deflate after the shock) and continue baking. The worst that can happen is that the loaf will have a wonky shape. It might even be a bit smaller than you wanted. But it’ll be totally edible.
Proofing on a loaf pan without a lid
In this case, there isn’t any risk of “explosion”, but there’s a risk of mushroom shape loaf. If this happens it’s possible the bread gets stuck in the edges of the pan and it will not come out of the tin after it cools down. The best you can do is control the proofing and start baking when the center of the loaf is, at most, 1-1.5cm above the edge of the pan. This dough is very elastic, so it’ll have a nice oven spring. For smaller loaves, I use this loaf pan and it serves me well. It’s very versatile and useful for small cakes, banana bread, etc.
How to shape this whey bread
Deflate the dough gently and well by kneading it for a couple of minutes, let it rest for 5 minutes, and then roll it into a rectangle slightly narrower than the length of your loaf pan and as long as your dough allows you while keeping at least ½ inch thickness (if it’s thinner it might get stuck on your counter and be easier to trap air as you roll it). Shape the dough into a log and put it in the pan. If you’re using a Pullman loaf, close the lid. If your loaf pan doesn’t have a lid, cover the dough with plastic wrap or put the pan inside a large enough plastic bag.
How to bake this sandwich whey bread
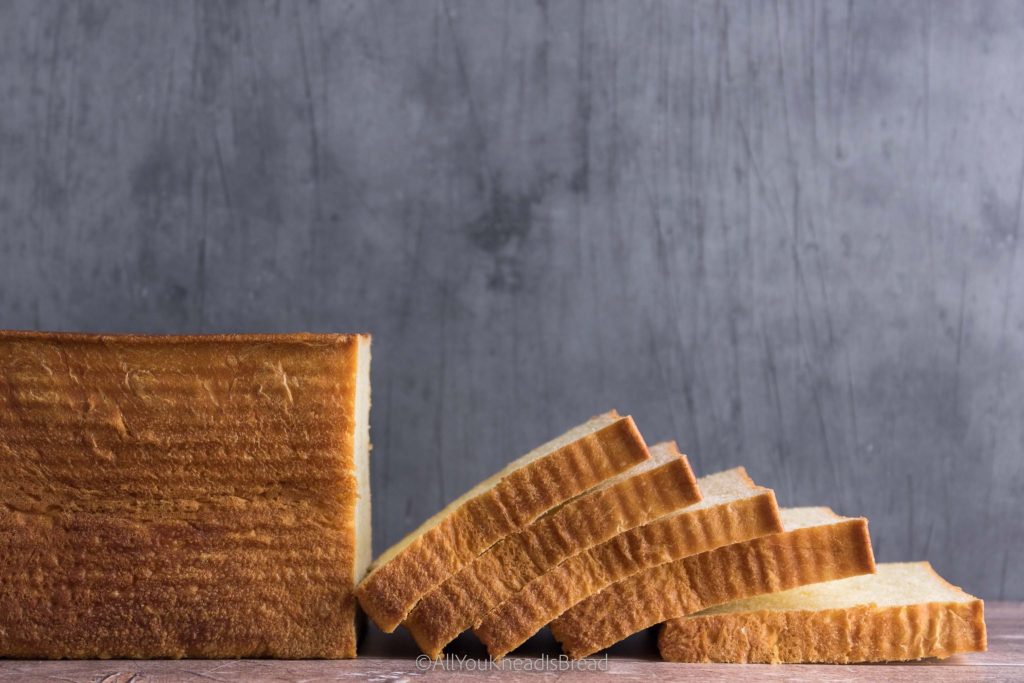
Whey has significant levels of galactose, a monosaccharide that’s also considered a reducing sugar. These types of sugars are the ones responsible for Maillard reactions. To the already happening Maillard reactions in bread, we’re adding more reducing sugars, thus your loaf will brown faster than usual. This will make a bit more difficult to test the doneness because the color can be misleading. You take the bread out of the oven when it’s still not fully baked, yet the outside is pretty dark.
For this, it’s better to test the temperature in the middle of the loaf. Once the temperature hits 96C, the bread is done! I have this thermometer and I am very happy, it’s fast and you can also put the probe at an angle, so you don’t burn yourself with the top side of the oven.
Baking with a lid
Here you have two options: you can bake the bread half the time with the lid on. When it starts browning remove the lid and continue baking until it’s done (by testing the inside temperature). Or you can bake with the lid on until it’s fully baked. If you remove the lid halfway, the loaf can get a slightly domed shape that will disappear after it cools down. However, there’s some risk for getting a weirdly shaped loaf. On the other hand, if you bake with a lid, the top might get a concave shape after it cools down.
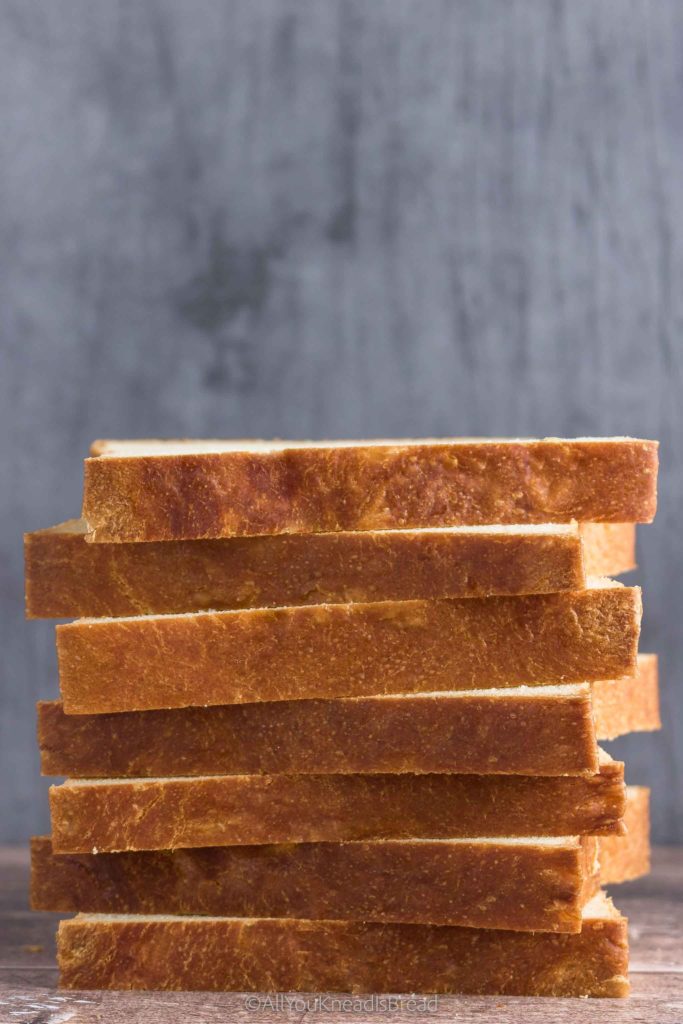
This all pure aesthetics, it’s not a big deal and it’s not going to affect the flavor or fluffiness of the bread. But sometimes we just want that perfect square toast. I find it easier to bake with the lid at all times, and then I have my process to cool this whey bread down to keep the square shape.
Baking without a lid
If you don’t have the Pullman-style loaf pan, your bread will have a lovely round top and you won’t have to worry about losing the shape while it cools down.
How to cool down your whey bread
One little issue that I’ve encountered when making Pullman loaves is the concave shape the loaf gets after it cools down. It’s a bit hard to find the exact moment to take the Pullman loaf pan lid off. If you take it off too early, the loaf might have a convex shape (like a mountain), but if you take it out too late, it’ll have a concave shape (like a valley).
My strategy is to bake the bread with the lid on at all times and I cool it down upside down for the first 30 mins. First 10mins in the tin, and the rest 20 out of the tin (otherwise the steam will condense on the bread and leave it wet and soggy). If you’re up for the challenge, you can keep turning the loaf upside down every 20 minutes until it’s room temperature. It worked for me, but that’s not something I’ll do all the time. Mostly because I forget about the loaf after it’s baked 🙂
How to store this whey bread
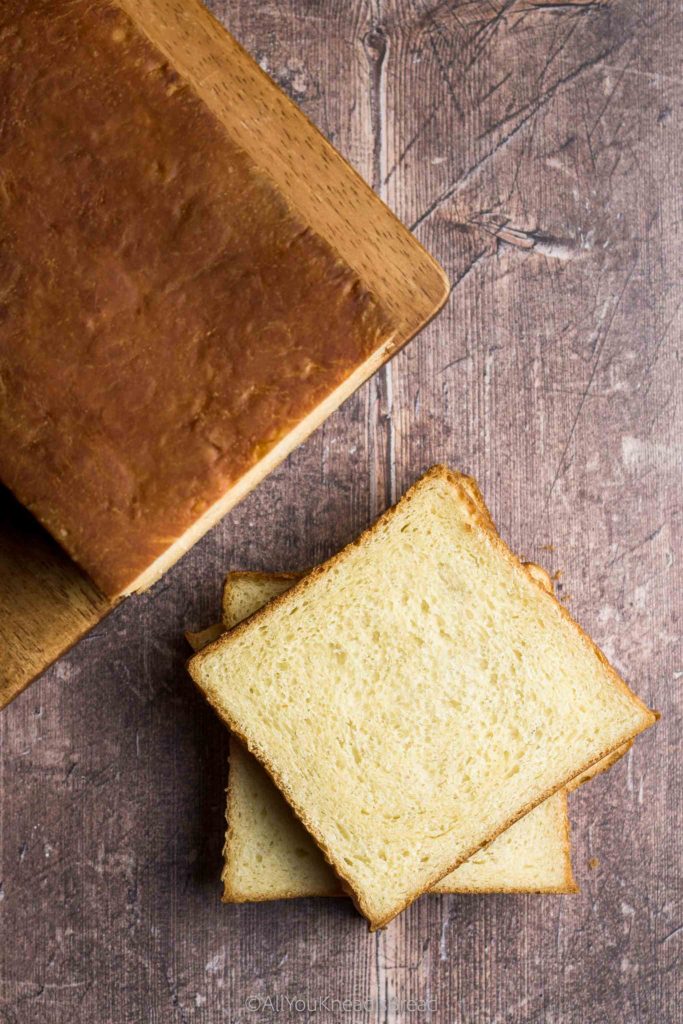
The yudane helps a lot keeping this whey bread fluffy for a longer time. I’ve tested this recipe with and without yudane and there’s a big difference (it stays fluffier with yudane). I’ve kept this whey bread at room temperature as is (not in a bag) for 5 days, just keeping the open side on the plate so it doesn’t get extremely dry. The crumb did dry out over time, but the bread was totally edible and after putting a couple of slices on the toaster it was perfect. The fats (from butter and eggs) kind of seal the crust of this bread, keeping the moisture inside. So while the crust might dry, the crumb remains nice and soft.
Now, this was an experiment, I don’t recommend leaving the loaf as is on the kitchen counter. If you have a square plastic container, you can slice the loaf up and place the slices there. You can also keep it in a ziplock bag and slice it as you need. You can cut the slices and freeze them and then just pop them in the toaster for 1 or 2 cycles when you want a slice.
If you make homemade yogurt I encourage you to try adding whey to your loaves, especially enriched ones! I am stunned by its versatility and incredibly milky aroma! I’d go as far as to say that if you use whey, you might even be able to skip powdered milk in some recipes!
Frequently asked questions
If you follow me on Instagram you might have seen me playing around with this bread. And I received several questions while I was developing this recipe. I hope they can be useful for you too!
Can I use whole wheat flour to make this whey loaf?
Yes, you can, always keeping in mind that cereal bran will alter the dough a little. The more bran, the more liquid you will need and the less smooth your bread will be. I have this recipe for a whole wheat loaf that you might like to try using whey.
Can I use gluten-free flour?
I get this question quite often, and the answer is no. A gluten-free bread requires a lot more testing and different ingredients to make sure you can mimic the properties of the gluten proteins. So you can’t just substitute one flour for the other. If you have experience with gluten-free bread, then you can probably twitch some of your recipes to add whey.
Can I make my whey bread in a Dutch oven?
I haven’t tried it, but I don’t see why not. As long as you control the temperature and you don’t mind the shape of the bread. Still, keep an eye on the dough, because it’s possible it’ll rise more in the oven than a lean dough would, you don’t want to get the dough stuck in your dutch oven.
Can I use parchment paper in the loaf pan?
I don’t see why not! my Pullman loaf pan doesn’t need it, even if I don’t spray oil. But if you’ve had problems before, parchment paper won’t affect your bread.
Can I use oil instead of butter?
If we were talking about other recipes I might not recommend you to do so. Butter and oil behave differently and can lead to very different results. Even solid and melted butter behave differently (You can read about that in this brioche with sourdough discards recipe).
But for this recipe, butter is not the key ingredient so you can substitute it for oil. I have tried using olive oil and it also makes delicious bread!

Whey bread: Your new favorite loaf
This sandwich whey bread is super flavorful, soft, and perfect for sandwiches and toasts. It's also a great way to use your leftover whey!
Ingredients
Yudane
- 130 g bread flour **Check notes for the baker's % to scale down this recipe to a smaller loaf pan**
- 130 g boiling whey
Whey bread dough
- 260 g yudane
- 520 g bread flour
- 150-190 g whey * See notes
- 10 g active dry yeast
- 2 eggs
- 90 g sugar
- 12 g salt
- 80 g softened butter
Instructions
Yudane
-
Add 130g of bread flour to your bowl.
-
Heat a bit over 130g of whey and when it comes to a boil weigh 130g and quickly add it to the flour.
-
With a wooden spoon or with a stand mixer mix the flour and whey until it forms a sticky dough. If you're not ready to bake wrap it in plastic and keep it at room temperature until you're ready to start your bread.
Whey bread dough
-
Mix the room temperature whey, the yeast, and the eggs and let the mixture sit for 10 minutes.
-
Add the sugar to the egg mixture and give it a whisk.
-
In the bowl where you have your yudane add the egg mixture and break up the yudane a little bit.
-
Add flour and salt to the bowl where you have the yudane and the wet ingredients and mix everything until you don't have dry flour particles. Cover and let it sit for 20 minutes.
-
After 20 minutes start kneading, if the dough feels too stiff and you didn't add all the liquid whey, add a bit more. Once the dough starts coming together add the softened butter and continue kneading to incorporate it.
-
Knead until the dough becomes smooth and elastic. It shouldn't stick to your fingers and it should feel nice to the touch.
-
Place the dough in a lightly oiled container, cover it and let it ferment at room temperature for 2h or until it at least doubled in size.
-
deflate the dough gently and let it rest, covered, for 10 minutes.
-
Dust the dough and the counter lightly with some flour and with a rolling pin roll your dough into a rectangle slightly narrower than your loaf pan. Roll the dough into a log and place it in your oiled loaf pan.
-
Let the dough ferment a second time until it's 1-1.5 cm from the edges of the loaf pan (if baking with a lid), or until the dough is at most 2cm above the edges of the loaf pan (if baking without a lid). This should take about 1.5h at a room temperature of 74F/23C. Check the post for more detailed information about this.
-
Before the dough finishes fermenting preheat your oven at 350F/175C.
-
When the dough is ready bake at 350F/175C for 35-45minutes or until the inner center temperature reads at least 205F/96C (Time will depend on the oven).
-
Take the loaf out and let it cool down for 10 minutes in the pan before you remove it from it. If using a Pullman loaf pan cool it down with the lid on upside down for 10 minutes and another 20 minutes without the lid (Check the post for detailed information about the cooling process).
Recipe Notes
(For detailed instructions, explanations, and FAQ refer to the post)
* The amount of whey depends on how much your flour can absorb. My flour has 12.7% protein content and I can comfortably add 170-180g, with stronger flour (14% protein) I need 190g of whey.
**Baker’s Percentage:
Yudane Flour: 20%
Yudane Whey: 20%
Dough flour: 80%
Dough whey: 29.2%
Eggs: 15.4%
Sugar: 13.8%
Yeast: 1.5%
Salt: 1.8%
Butter: 12.3%
If you liked this recipe you might also like:
- This super easy kefir bread (video included!)
- This sourdough marble rye loaf, perfect for sandwiches
- These sourdough burger buns that don’t fall apart
- These delicious sourdough blueberry muffins
- These tasty brie sourdough buns
You can find me on Instagram, Facebook, and Pinterest, and you can also subscribe to my Youtube channel.
This post contains affiliate links and any sales made through such links will reward me a small commission – at no extra cost for you – that allows me to keep running this blog.
Happy Baking!