
Fall weather is here to stay, but that doesn’t mean we must say goodbye to summer flavors! Blueberries, in my opinion, deserve a place in our pantry all year round, and so does sourdough. If you’re looking for a burst of color, juiciness, and flavor, blueberries are the perfect fruit to add to sourdough bread. Today we’re making blueberry sourdough bread!

About this blueberry sourdough bread
In our home, blueberries are a staple. We use them as snacks, to make muffins, in smoothies, ice cream, oatmeal, pancakes… you name it! Blueberries are a nutritional powerhouse and we try our best to eat them often.
These berries are packed with more antioxidants than many other fruits and vegetables; they’re high in soluble fiber, low in calories, and relatively low in carbohydrates compared to other fruits (which is important if you need to monitor your blood sugar).
They’re not called a superfood for nothing! Let’s combine all these benefits with sourdough bread to make a delicious blueberry sourdough bread that I’m sure you will love.
Why blueberries?
Blueberries are very nutritious and make a healthy addition to our diets. Just 100 g of blueberries (about 2/3 of a cup) provides 24% of the recommended daily intake of Vitamin K1, 16% of Vitamin C, and 14% of manganese among other vitamins and minerals.
They are rich in phytochemicals like anthocyanins, powerful antioxidants that give blueberries their characteristic blue/purple color. Blueberries also contain quercetin, a flavonoid with antioxidant, anti-inflammatory, and anti-cancer effects, as well as resveratrol, another antioxidant that supports heart health.
Other health benefits associated with blueberries are lower blood pressure and improved digestion. Overall, they’re a fantastic addition to our daily nutrition. And when incorporated into sourdough bread they add a nutritious boost to the loaf. This blueberry sourdough bread is not only delicious but also an excellent way to deliver essential nutrients to our meals.
Incorporating fruit into bread
Adding fruit to bread can be tricky. The moisture, acidity, and dietary fiber in fruit can affect the dough’s consistency and fermentation process. It’s important to choose the right type of fruit and adapt the recipe accordingly.
Dried, rehydrated, frozen, and fresh fruit behave differently in the dough. The differences in momisture can modify the water content of your recipe and disrupt the balance of ingredients. This recipe is designed for fresh or frozen blueberries. Now, let’s dive into how to incorporate blueberries into sourdough.
Incorporating blueberries into bread
For a burst of color, you can blend a few blueberries, mix the puree with the recipe’s water, and prepare a colorful dough. If you make kombucha or other fermented drinks you can use the strained pulp in bread as well. If you’re looking for a burst of flavor and a mouthful of juicy blueberries… Then adding whole berries is the way to go. The experience of biting into bread and having a blueberry burst in your mouth is next-level delicious!
Can I use frozen blueberries in my sourdough?
Absolutely! Frozen blueberries are a convenient option when fresh berries are out of season, or they’re not easily available. If you use frozen berries, make sure to thaw them first or your dough will be too cold and ferment much slower.
As the blueberries thaw they will release some juice, which you can either drain or incorporate into the dough as part of the total water. This will give the dough a slight pink color (the acidity of sourdough turns their purple hue into pink, how cool is that?).
If you live in a warm climate where sourdough tends to ferment quickly, you can probably benefit from not thawing the blueberries.

When to add the blueberries
When making this blueberry sourdough bread we have two options: fresh or frozen blueberries. The best time to incorporate fresh blueberries is before the dough is fully developed.
Whole, fresh blueberries are relatively hard and they can stand the kneading process without releasing too much juice and changing the dough’s hydration (unless you smash them), so it’s safe to add them early in the process.
Frozen blueberries, however, are a bit different. When blueberries are frozen and then thawed, the expansion and compression may create micro-channels in the skin. These tiny holes are the reason the juice leaks out of the berries. If you’ve ever thawed blueberries you might have noticed this.
The extra juice can impact the dough’s overall hydration, and since they’re much softer than fresh blueberries, they can break as the dough is kneaded. The best time to add frozen blueberries to the dough is toward the end of the kneading process, preferably during a lamination step or between coil folds.
If you want to use the juice, you can thaw the blueberries in advance and incorporate the juice as part of the water content. If you don’t want the juice, you can strain the berries.
A good tip to remember when laminating the dough for this blueberry sourdough bread is to reserve some berries and add them as you fold the dough back. It’s the best way to have the blueberries spread evenly throughout your dough and avoid having them all on one side of the loaf.
How to make blueberry sourdough bread
Now that we’ve discussed how to add the blueberries, let’s talk about the proofing and baking of this blueberry sourdough bread because the fruit can have an impact on the process.
Something that can happen when adding fresh fruits to bread dough is that juice starts to leak. This can make the dough look a bit softer than it should. A strong gluten network can help with this. It’s essential to develop a strong enough dough to avoid future problems if there are significant changes in the hydration of the dough. In other words, to avoid baking a flat loaf.
Fresh (or raw) fruit is also heavy, so a strong gluten network is really necessary. I prefer to knead the dough until it’s almost fully developed, and then add some coil folds. Whatever your preference is, follow the method that works for you.

Fermentation & proofing
When the dough has heavy inclusions, it might feel like it didn’t rise as much during proofing. Here it’s important to pay attention and not let it overfement. Look for air pockets in the bottom of the bowl (if you have a transparent bowl you can see the dough), and larger air bubbles when you preshape the dough. The dough should not feel too sticky or leave a lot of residue on the bowl.
Inclusions can also make shaping challenging, and you might feel some resistance from the dough when you try to shape it. The best thing you can do is to let it rest. A preshape step is always beneficial, but only if you have enough time to let it rest before the final shape. At least 30 minutes to 1 hour. Of course, you will need to time your fermentation accordingly. One more hour at room temperature can be a lot in a warm kitchen.
Baking your blueberry sourdough bread
Sourdough bread is supposed to have a lovely crispy crust paired with a pillowy crumb. This blueberry sourdough bread is no exception. However, to avoid burning the blueberries that might be on the surface, I recommend baking with steam for at least 20 minutes. This will prevent the crust from drying out too fast and turning too thick. And the last 20-30 minutes of baking will give your loaf the crispiness we all so enjoy.
Due to the additional moisture that the blueberries carry, the loaf might take slightly longer to bake. If you’re not sure when the dough is ready, the best thing you can do is test the internal temperature with a thermometer. Once it reads 96C your loaf is ready! Test a couple of different spots to make sure you got the correct temperature. You could stick the thermometer in a blueberry and get the wrong reading.
Storing Blueberry Sourdough Bread
To keep your blueberry sourdough bread fresh, store it in an airtight container or a resealable plastic bag at room temperature. For longer storage, you can freeze slices of the bread wrapped in plastic wrap to avoid freeze burn and place them in a freezer bag. Then you can toast the slices directly in your toaster (it will take a bit longer to toast), or your air fryer!
Sourdough bread lasts longer than yeasted bread but not if it has fruit. The extra moisture and sugar are the perfect combination for microorganisms to grow. If you keep this bread in a warm kitchen, you might have to finish the bread within a couple of days to avoid mold. I know, the sacrifices we make! 😉
How to add more flavor to your blueberry sourdough bread
If you are looking for a very flavorful loaf, you can always add more aromatics and inclusions of your choice. My recipes are guides and ideas for you to customize to your taste. And as a scientist, I’d be doing you a disservice if I didn’t encourage you to experiment.
Blueberries are incredibly versatile and pair well with a wide variety of flavors. I like to pair them with seasonal ingredients. Maybe lemon zest during warmer months, maybe some cinnamon and ginger during colder months. Or just plain, blueberries are very tasty on their own.
And that’s it, now you can make this fabulous blueberry sourdough bread all year round! And for a delicious suggestion, try a toast with goat cheese and honey; you’ll never want anything else!
Happy baking!
For more recipes, baking tips, and scientific insights into bread making, subscribe to my blog and stay updated with the latest in bread baking!
If you make any of my recipes let me know what you think! As always you can find me on Instagram, Pinterest, and Facebook. I also have a few videos up on my YouTube channel.
(This post contains affiliate links, if you purchase something from these links I will make a small commission that helps me run this blog, but you will not be charged any extra money 😉 )
You might also like


Blueberry Sourdough Bread
The perfect combination of sourdough and juicy blueberries for a mouthwatering treat!
Ingredients
- 25 g whole wheat flour
- 375 g bread flour
- 300 g water *See notes
- 8 g salt
- 80 g active sourdough starter
- 100 g fresh or frozen blueberries
Instructions
-
In a large mixing bowl add the water, active sourdough starter, and salt and dissolve.
-
Add the flours and mix until just incorporated. Cover and let it sit for 30 minutes for an autolysis step.
-
Knead the dough for a few minutes incorporating short resting periods (5 mins). If you are using fresh blueberries add them when the dough starts getting some consistency.
-
If you’re using thawed frozen blueberries, add them now with a lamination step.
-
Perform 3-4 sets of stretch-and-folds every 30-40 minutes. To do a stretch and fold, wet your hands, lift one side of the dough, stretch it up, and fold it over itself. Rotate the bowl and repeat on all four sides.
-
Cover and let the dough ferment at room temperature for 6 hours at 72°F/22°C or until it looks bubbly and airy but not wobbly.
-
Gently turn the dough out onto a lightly floured surface. Preshape it into a boule.
-
Cover with a floured cloth or bowl, and let it rest fo 30 minutes to 1h.
-
Finish shaping the dough into your preferred shape and place it in a floured banneton seam side up.
-
Cover and refrigerate for 12 or overnight.
-
Preheat your oven to 450°F (230°C) with a Dutch oven or baking stone inside.
-
Carefully turn the dough out onto a piece of parchment paper. Score the top of the loaf with a sharp blade. Transfer the dough into the preheated Dutch oven, cover with the lid, and bake for 20 minutes. Remove the lid and bake for another 20-30 minutes, until the crust is deeply golden or inner temperature reaches 205°F or 96°C
Recipe Notes
* If you are unsure of the strength of your flour, reduce the water content by 30g and add more if necessary as you start mixing your dough.
The Ultimate Chocolate Sourdough Bread
When you think of sourdough bread, you may just think of a rustic loaf, full of tangy flavors and a chewy, airy crumb. But what if I told you that you could take this classic favorite to the next level by just adding chocolate? That’s right, today we are making chocolate sourdough bread!

This recipe takes everything you love about sourdough and adds melty pockets of rich, semi-sweet chocolate, creating a bread that’s perfect for a special breakfast, a sweet snack, or even dessert. Because yes, chocolate belongs in breakfast 😉 In this post, I’ll walk you through the process of making this chocolate sourdough bread and explain some of the science behind what makes it so special.
Quick overview of this chocolate sourdough
You might be wondering why we’re adding chocolate to something as traditionally savory as sourdough. While chocolate might seem like an odd addition at first or something that belongs in a brioche dough, it’s actually a fantastic pairing for the natural tang of sourdough because their flavors balance each other out.
Unlike sweet breads which are loaded with sugar, this chocolate sourdough is only lightly sweetened (and the addition of sugar is completely optional) making it a great choice for those who want to enjoy a treat without the extra sugar.
Acidity and chocolate in sourdough
Chocolate, and especially dark chocolate, has a slightly bitter and astringent flavor, and typically, the best way to balance these flavors is with an acid. Sourdough fermentation provides those acids to counterbalance the chocolate. This chocolate sourdough loaf is simply delicious!
About the ingredients of this chocolate sourdough
Bread flour vs whole wheat
For this recipe, you’ll want to stick to bread flour. The higher protein content helps develop a stronger gluten network, and therefore better structure. This structure is necessary to hold the weight of the chocolate chunks. However, if you want more fiber in your bread, you can substitute some bread flour with whole wheat flour. This will give your bread a deeper flavor and enhance its nutritional profile. You will need extra water to help the dough become more elastic.
Don’t panic if you add a lot of whole wheat flour and the dough is not very stretchy, it’s normal. This happens when wheat bran is present, and it’s one of the quintessential challenges for bread scientists.
If you only have all-purpose flour, you can use it, but it’s important to adjust the water of the recipe according to your flour.
Chocolate vs. cocoa powder
To get the best chocolate sourdough bread, the type of chocolate you choose is key. I prefer to use semi-sweet or dark chocolate chips for a perfect balance. Semi-sweet chocolate chips contain a higher amount of cocoa, which means they’re not too sweet and still have a deep chocolate flavor. If you prefer a more chocolatey bread, you can use dark chocolate instead.
You can use your favorite chocolate bar, chop it into chunks of different sizes, or use chocolate chips. One of the great things about chocolate chips is that they hold their shape during baking. When the chips are heated they create little pockets of melty chocolate within the bread.
For this loaf, I used three different sizes of chocolate chips for a more interesting mouthfeel. You can use the ones you typically buy. I just happened to have different sizes because I had been using them for other things.
I wouldn’t recommend white chocolate because it tends to meld and sometimes burn, leaving the pockets empty and not that much flavor. And although tempting, I wouldn’t add cocoa powder either. Cocoa powder can change the flavor by turning the bread unpleasantly sour so the chocolate aroma is lost in the sourness, and it can also affect the dough by absorbing too much moisture.

Sourdough Starter
Your sourdough starter is probably the most important part of this bread; or any sourdough bread. An active and well-maintained starter will give your dough the fermentative power it needs and contribute to the aromas and flavors of the loaf. If you’ve baked sourdough before, you know that the starter’s health also plays a huge role in determining the final product’s texture.
Make sure your starter is well-fed and active before starting this recipe, as this will ensure a good rise and fermentation. If you want to know more about starters I have a series of articles about them. This one is about the science of your sourdough starter, this one is about feedings, and this one is all about understanding feeding ratios.
The long fermentation process helps develop volatile products that give sourdough its interesting flavor profile, I like my chocolate sourdough bread to have a relatively normal tang because I’m not going to eat the whole loaf in one day and it typically gets a bit sourer as the days go by. But if you prefer a very tangy loaf, then you will have to play with the fermentation times to adapt this loaf to your taste.
Adding sugar to chocolate sourdough bread
Adding sweeteners to your chocolate sourdough is optional. In this recipe, the chocolate chips provide enough sweetness for most people, but if you want a slightly sweeter loaf, you can add 1 or 2 tablespoons of the sweetener of your choice when you mix the ingredients. I prefer to dissolve sugar in the water; if you’re planning to develop the dough using stretch and folds, dissolving the sweetener in the water ensures a more homogeneous distribution.
Fats
Traditional sourdough bread doesn’t usually include any added fat and I wouldn’t recommend adding any on this loaf either. In this case, the chocolate has fat, and part of it will be absorbed into the dough. Your loaf might turn out a bit softer than plain sourdough bread thanks to this, and adding even more might change the consistency of the dough.
Other aromatics that can enhance the chocolate
This chocolate sourdough is perfect to try some interesting flavors. This time, I added a bit of cinnamon because I had just made an Aztec hot chocolate ice cream with cinnamon that blew my mind, but this sourdough bread is a white canvas and you can do whatever you want! Here are some ideas:
- Toasted nuts: all nuts go well with chocolate, but my favorites are hazelnuts (hello Nutella!), macadamia nuts, and pecans.
- Espresso powder: coffee can enhance the chocolate flavor when using cocoa powder, but when using chunks of chocolate you can get both flavors and make a spectacular mocha bread! This espresso powder is specifically for baking and I highly recommend it!
- Amarena cherries or other sweet and tart fruits: the combination of chocolate and amarena cherries is incredible. But if you don’t have access to them other tart and juicy fruits can work just fine. Remember what I said about chocolate and acidity?
- Spices: allspice, cardamom, chili powder, ginger, clove… warming spices usually pair very well with chocolate.
- Fruits: candied citrus, raisins, dry apricots, dry coconut, dry berries… And if you are feeling extra adventurous, you can semi-rehydrate the dry fruits with a touch of brandy or the liquor of your choice. Every bite of this chocolate sourdough bread will pack a punch!
When to add the chocolate to the dough
Unlike cocoa powder, which would fully blend into the dough and affect its water absorption, chocolate maintains its structure during baking. This means you get those lovely pockets of melted chocolate dispersed throughout the bread. This is also thanks to the fat in the chocolate, which melts and is partially absorbed by the dough, making the crumb very soft and velvety.
However, adding a solid ingredient like chocolate also adds weight to the dough, which can affect its rise. To counteract this, you’ll want to ensure that your dough is well-hydrated and strong enough to support the additional ingredients. And how do we do that? By kneading! You can use any technique, just make sure the gluten network is properly developed. And if you only use folds, you might want to add a couple extra more.
Another consideration is the timing of when you add the chocolate chips. If you add them too early, they can melt a bit or partially dissolve. And it might be difficult to distribute them evenly if you add them too late. The best time to add the chocolate chips is during one of the early folding stages.

Bulk fermentation and proofing
After developing the loaf the whole bulk fermentation took about 6h at 74F/23C. I didn’t see a change in the fermentation time, I don’t think the chocolate pieces affected it.
Since my baby was born, I’ve been trying to find the best schedule for my sourdough loaves. So far lunchtime seems to be the best time to mix the dough and knead it. I don’t have much time to do stretch and folds, and I need to make sure I will have enough time to shape and rest the dough before the fridge. So the bulk fermentation for this loaf happened in the afternoon and proofing happened overnight.
If you prefer a very tangy loaf, you can extend the bulk for a few hours. Try to start earlier in the day, and extend the proofing for as long as you can the next day.
Baking your chocolate sourdough bread
Preheat your oven to 450°F (235°C) and place a Dutch oven inside to heat up. When the oven is ready, carefully transfer the dough into the preheated Dutch oven. Bake for 20 minutes with the lid on, then remove the lid and bake for an additional 20-25 minutes, or until the crust is golden brown.
I have recently changed my Dutch oven for THIS ONE. I used to use a combo cooker upside-down but removing the lid was always challenging when you have the oven mitts. In fact, once it slipped and fell on the floor when it was hot and it was very difficult to pick it up. My floor didn’t burn, but you can see a slight mark when the sun shines through the window. Ever since that happened I panic a little when I bake but with this Krustic Dutch oven baking is so much easier!
Cool it before you dig it!
If you have been following for a while you know I’m not a fan of cutting the bread when it’s still hot because the crumb is still finishing outside the oven. And this still applies to this loaf with the particularity that the chocolate might be very hot and runny and you could get burnt. Wait a little before cutting it open, once it’s warm to the touch, you can enjoy this delicious chocolate sourdough!
Flavor Pairing Ideas
Somehow I always think that I should honor a good bread by finding a special way to eat it. It’s a small ritual, but it helps me enjoy my bakes to the fullest. Here is how you can pair this chocolate sourdough:
- Toasted with salted butter: for a delightful breakfast toast, slather some salted butter when the toast is still hot so it can melt and enjoy one of the most beautiful bites!
- Tahini and honey: this is a feast of flavors in your mouth! Sweet, savory, and bitter elements combined to perfection!
- Chocolate sauce: I have nothing else to add, maybe a good cup of tea!
FAQs about this chocolate sourdough bread
Can I use milk chocolate chips instead of dark chocolate?
Yes! Milk chocolate will create a sweeter bread with a creamier texture. However, I recommend using semi-sweet or dark chocolate for a better balance of flavors and textures.
How do I prevent the chocolate chips from burning?
If you’re concerned about the chocolate chips burning on the surface of the loaf, you can lightly tuck them inside the dough during shaping. You can also cover the bread with aluminum foil during the last 10 minutes of baking.
Final thoughts on this chocolate sourdough
Chocolate sourdough bread is a very interesting variation of a classic that brings together the best of both worlds. It’s indulgent without being overly sweet, and it maintains the heartiness and complexity that sourdough bakers love. The next time you bake a sourdough loaf, consider adding chocolate for a special treat that’s sure to impress. And remember, this recipe is endlessly customizable; experiment with different types of inclusions and spices like nuts, dried fruit, or cinnamon and make it your own.
Move, cookies and milk, chocolate sourdough, and milk is the next favorite thing!
Happy baking!
If you make any of my recipes let me know what you think! As always you can find me on Instagram, Pinterest, and Facebook. I also have a few videos up on my YouTube channel.
Starting on breadmaking but don’t know where to start? Check my Amazon store to see my favorite and affordable utensils you will need. You can make the best bread with simple and inexpensive tools!
(This post contains affiliate links, if you purchase something from these links I will make a small commission that helps me run this blog, but you will not be charged any extra money 😉 )

Ultimate chocolate sourdough bread
A luxurious twist on traditional sourdough that will make every bite an explosion of flavors.
Ingredients
- 360 g bread flour
- 40 g whole wheat flour
- 80 g active sourdough starter
- 300 g water
- 8 g salt
- 1 tbsp sweetener of choice optional
- 100 g semi-sweet or dark chocolate chips
- ½ tsp ground cinnamon or spices of choice optional
Instructions
-
In a large mixing bowl, combine water, sourdough starter, salt, and sugar (if using), and stir until dissolved.
-
Add the flour and spices (if using any) and mix until there is no dry flour. Cover and let the dough rest for 20-30 minutes.
-
Knead the dough using the slap-and-fold method for a few minutes, then let it rest for 5-10 minutes. Repeat this process a few more times.
-
Transfer the dough back to the mixing bowl and let it rest for 20 minutes.
-
Add the chocolate chips, gently incorporating them during the first set of folds.
-
Once the dough is fully developed and the chips are evenly distributed, cover and let it ferment at room temperature until it rises about 1.5x in size and feels puffy and airy (this took about 6 hours at 74°F/23°C).
-
Once the bulk fermentation is complete, gently pre-shape the dough into a round or oval loaf and let it rest for 20 minutes. Then, shape it one final time and place it in a proofing basket.
-
Cover and refrigerate for 8-12 hours.
-
When ready to bake, preheat your oven to 450°F (230°C) and heat a Dutch oven inside. Carefully transfer the dough into the preheated Dutch oven. Bake for 20 minutes with the lid on, then remove the lid and bake for an additional 20-25 minutes, or until the crust is golden brown. If you prefer a thicker crust, remove the lid after 10 minutes.
-
Let the bread cool completely on a wire rack before slicing. Enjoy!
The best ever sourdough discard banana muffins
Is your sourdough discard jar full and you don’t know what to do with it? Look no further than these soft and moist sourdough discard banana muffins. Packed with flavor, these sourdough banana muffins are a must-try recipe! They are soft, moist, and full of banana flavor. The subtle tang from the sourdough discard adds complexity to every bite. If you have never baked with sourdough discard this is the perfect recipe to start! And I am very confident, that these will be the best sourdough banana muffins you’ll ever make!

Baking Sourdough Discard Banana Muffins
If you’ve never used sourdough discard in baking, it can seem intimidating at first but it’s actually quite simple. Using a 100% hydration starter is usually more convenient because you know that half is water and the other half is flour. With this, you can customize any recipe you want as long as you replace moisture elements (like egg whites, milk, water…) for the corresponding amount of discard.
Another thing to keep in mind is that sourdough discard is acidic, even more so if you use an old one. The acidity can affect the texture of your baked goods, for cakes and cake-like things, the acidity is actually helpful because it can help soften the baked goods.
Why Choose Sourdough Discard for Banana Muffins?
Sourdough discard banana muffins are, in my opinion, the best muffins. And I am always trying to make them better. For me, better means soft and moist with a great flavor and aroma profile.
Baking with sourdough discard not only helps reduce food waste but also adds flavor and texture to your muffins and can increase their shelf life. You can use the leftover sourdough you have after making your weekly loaf, or some old discard that’s been in your fridge for a few weeks. Older, and thus sourer, sourdough discard might produce less sweet muffins because part of the sourness is neutralized by the sugars in the recipe. But the texture will still be great and you can always add more sugar if you want your sourdough discard banana muffins sweeter.
How Sourdough Discard Affects Muffins
The acidity of sourdough discard helps break down the proteins in flour, making the crumb more tender and creating a moist texture in your muffins. It also reacts with leavening agents like baking soda, which gives your muffins a nice lift, making them fluffy and light.
While the tangy flavor of sourdough is very subtle in these muffins, it adds a depth that complements and balances out the sweet bananas. That’s what makes these sourdough discard banana muffins a delicious blend of flavors, creating a balanced and complex taste that sets them apart from traditional banana muffins.
Benefits of using Sourdough Discard in Banana Muffins
Using sourdough discard in baking comes with several benefits. Since sourdough is a fermented product, it can aid in digestion and offer a lower glycemic index compared to traditional baked goods. This makes sourdough discard banana muffins a better alternative to regular banana muffins. Plus, it’s a great way to add more nutrients to your diet, such as B vitamins, thanks to the fermentation process. You can try other recipes like these sourdough blueberry muffins or this sourdough chocolate and orange bundt cake
Ingredients for Moist and Soft Sourdough Discard Banana Muffins
One of the key features of these muffins is how incredibly moist and soft they turn out. This is largely thanks to the unique combination of ingredients. Instead of using milk and butter, this recipe calls for buttermilk, Greek yogurt, and oil. Here is why these ingredients make all the difference:
1. Buttermilk
The acidity of the buttermilk also helps tenderize the muffins by hindering the formation of too-long gluten chains. It also reacts with baking soda, creating tiny air bubbles that will make these sourdough banana muffins fluffier. In essence, the acidity of buttermilk reinforces the effect of the acidity of the sourdough discard.
2. Greek Yogurt
Greek yogurt is thicker than regular yogurt and adds a rich creaminess to the batter. It locks in moisture, keeping these sourdough discard banana muffins tender and moist for longer.
3. Vegetable Oil
The absence of water in oil allows it to coat the flour particles more uniformly and lock in the moisture and preventing these sourdough discard banana muffins from drying out. Oil can also coat the gluten proteins and limit gluten development yielding a much softer texture than butter-based recipes. You can use any oil of your choice that is liquid at room temperature; avocado oil is a good neutral oil, but if you want to give your banana muffins an extra kick you can use olive oil or a mixture.
These ingredients ensure you get the moistest and softest sourdough banana muffins you’ve ever tasted. Whether you’re baking these muffins or other recipes, these ingredients will always help you elevate your muffins.

Role of Overripe Bananas in Sourdough Discard Banana Muffins
When it comes to banana muffins, overripe bananas are a must. The ripening process of bananas brings significant chemical changes that enhance the flavor, sweetness, and texture of your sourdough banana muffins.
Chemical Changes in Overripe Bananas
As bananas ripen, the starches in the fruit break down into sugars. This conversion makes overripe bananas much sweeter and softer compared to green or just-ripe bananas. The sugar content in an overripe banana can be up to 80% higher than in an unripe one, contributing to the overall sweetness of your banana sourdough discard muffins without the need for extra sugar.
Overripe bananas are also softer, which means they integrate more easily into the muffin batter. This creates a smooth, cohesive batter that bakes into a uniformly moist sourdough banana muffin.
What if I don’t have overripe bananas?
If you don’t have overripe bananas you can bake the bananas you have for a few minutes at a low temperature, but personally, I don’t like this method, I prefer to let my bananas ripe naturally. So to ensure that I always have overripe bananas, I just let a bunch go very ripe and then peel and freeze them and collect every overripe banana that nobody would want to eat. I always keep a bag of frozen bananas in my freezer, in our house not a single banana goes to waste!
Frozen bananas can be used for many things such as smoothies, banana bread, oatmeal, or even homemade ice cream! Next time your bananas get too ripe, don’t throw them away. Keep them in the freezer and enjoy them later in these delicious sourdough banana muffins!
How to get tall sourdough discard banana muffins
Achieving tall, bakery-style muffins with a beautiful domed top can be tricky, but it’s all about the technique. Here are my tips for getting your sourdough banana muffins (or any kind of muffin) to rise tall and look professional.

Let the Batter Rest Overnight
Letting your batter rest in the fridge overnight is a game-changer. This rest period allows the flour to fully hydrate and gives the baking soda and baking powder time to activate. It also thickens the batter, which means the muffins will rise more evenly and reach new heights when baked.
Fill the Muffin Cups
To get tall sourdough banana muffins, don’t be afraid to fill your muffin cups almost to the top. Many muffin recipes suggest filling them ⅔ of the way, but for tall muffins, you want the batter to have more volume. Especially if you are not letting the batter rest overnight in the fridge.
Bake at a High Temperature Initially
Start baking your muffins at a high temperature (around 425°F/220°C) for the first 5–10 minutes. The temperature contrast will give the batter a quick burst of heat, helping the muffins rise rapidly. After 10 minutes, reduce the heat to 350°F/180°C to finish baking. This also works with cold batter.
If you’re short on time, feel free to use cold ingredients. The batter will be chilly, but starting with a higher temperature for the first few minutes will help your sourdough discard banana muffins rise taller.
I baked these banana muffins in a jumbo-size pan but you can use any baking pan you have. Just be mindful of the baking time; smaller muffins will bake faster.
These tips will help you achieve tall, bakery-worthy muffins, whether you’re making these sourdough muffins overnight or a fresh batch of blueberry sourdough muffins. So, grab those overripe bananas, pull out your sourdough discard, and get baking!
If you liked this recipe…
You might enjoy these:
Chocolate & orange sourdough discard bundt cake
Sourdough chocolate banana bread
Sourdough Spanish style muffins
If you make any of my recipes let me know what you think! As always you can find me on Instagram, Pinterest, and Facebook. I also have a few videos up on my YouTube channel (which I hope I can resume soon!)
Starting on breadmaking but don’t know where to start? Check my Amazon store to see my favorite and affordable utensils you will need. You can make the best bread with simple and inexpensive tools!
(This post contains affiliate links, if you purchase something from this link I will make a small commission that helps me run this blog, but you will not be charged any extra money 😉 )

The best sourdough banana muffins
Moist, soft, and decadent muffins using your overripe bananas and sourdough discards
Ingredients
- 300 g all purpose flour
- 100 g sourdough discard
- 300 g overripe bananas
- 180 g brown sugar
- 2 eggs large
- 100 ml vegetable oil
- 100 ml buttermilk
- 85 g full fat Greek yogurt
- 5 g vanilla extract
- 10 g baking powder
- 2 g baking soda
- 3 g salt
- 75 g chopped walnuts optional
Instructions
-
Preheat your oven to 425°F (220°C). Line a muffin tin with paper liners.
-
In a medium bowl, whisk together the flour, baking powder, baking soda, and salt.
-
In a separate large bowl, mash the overripe bananas. Add the sourdough discard, brown sugar, eggs, oil, buttermilk, Greek yogurt, and vanilla extract. Mix until smooth.
-
Gently fold the dry ingredients into the wet mixture until just combined. Avoid overmixing.
-
Fold in the chopped walnuts if desired.Fill the muffin cups almost to the top with the batter.
-
Bake at 425°F for 5-10 minutes, then lower the temperature to 350°F (180°C) and bake for another 10-15 minutes, or until a toothpick inserted in the center comes out clean. See notes**
-
Let the muffins cool in the pan for 5 minutes before transferring them to a wire rack to cool completely.
Recipe Notes
** This baking time is for jumbo size muffins. If you are baking smaller muffins, the baking time will be shorter. Always bake until the toothpick comes out clean, even if it means the baking time is different than the recipe’s.
How to make black sesame bread
Black sesame bread is one of my favorite bread recipes. I’m talking top 3 favorites! And it’s simply because black sesame is incredibly aromatic and the taste combines spectacularly with bread, especially if you are using sourdough. But don’t worry, this recipe is for both yeast and sourdough bakers. Black sesame bread is so good, that I want everybody to enjoy it!
I started making this bread using black sesame powder. I learned about it when my husband bought it many years ago at our Chinese store. He likes to make a hot soup for dessert, especially on the days he feels more homesick. The smell of that soup was so delicious! That toasty and nutty aroma of sesame but deeper and with some sweetness to it. So, of course, my baker’s mind thought… “black sesame bread!”.

Are black sesame seeds good for you?
In Traditional Chinese Medicine, black sesame can help you with your liver and kidney health, and grey hair, among other things. Given the amount of good compounds found in sesame seeds and the results of some studies, it’s safe to say that yes, sesame, and in this case black sesame, is good for us. Of course, as a part of a balanced diet and healthy lifestyle.
What are sesame seeds rich in?
Black sesame seeds are rich in omega-3 fatty acids and lignans, a type of polyphenol typically found in seeds. They are also rich in vitamins, minerals, and antioxidants. Some studies have even suggested that black sesame can have a positive impact in cardiovascular health and others have seen improvements in fasting blood sugar. Overall, sesame, and in particular, black sesame seeds, are an excellent addition to our diet!
How to make black sesame powder at home
After making black sesame bread several times, I realized that making the powder myself was not only super easy but also more flavorful because I was using freshly ground seeds. These steps are optional, but I highly recommend them to make the most out of your seeds.
Toasting the seeds
Black sesame seeds are very flavorful, but I prefer toasting them to deepen the aromas even more. To toast the seeds put them in a saucepan and heat them at medium-high temperature, stirring often. Because of their rich oil content, they can burn easily, so keep stirring until you start seeing seeds popping and a bit of smoke. Then transfer the seeds to a plate to cool.
Grinding the seeds
In the industry, companies have equipment to grind sesame seeds without releasing all the oil and turning it into a paste. When you buy black sesame powder, it’s less oily and a tad drier than the powder you make at home. At home, we need to be cautious when grinding sesame seeds (all sesame seeds, and even chia, or flax seeds) because they’re rich in oils and can turn into a paste quickly (like tahini but with a darker color).
You don’t need to grind all of the seeds to make black sesame bread, you can use them whole. I prefer blitzing at least 3/4 of the seeds to enhance the aroma of the bread. To avoid releasing too many oils, pulsing instead of grinding for long periods works better.
You can grind the seeds with any device of your choice, I have this coffee grinder that I only use for spices, etc. it’s inexpensive and does the job perfectly! But you can use anything you have at home. Even a mortar and pestle if you don’t have a grinder. However, if you have a very powerful grinder (something like a Vitamix), I’d recommend freezing the seeds. When the seeds are hot, they release the oils much faster, and powerful grinding can raise the temperature of the seeds, so starting with frozen seeds gives you a bit of a leeway.
Preparing the dough
Now that we have the seeds ready, let’s start with the dough! The method is similar for both sourdough and yeast versions. The yeasted version uses a poolish and has only a very small amount of yeast, so the fermentation will be as slow as sourdough. If you were to make this bread on a cold day, you can add a bit more yeast to the final dough.

Black sesame bread with poolish
The night before dissolve 1/4th of a teaspoon (a pinch) in 40ml of water, then add 40g of bread flour and mix well. Cover the container loosely and let it ferment overnight.
If your kitchen is too warm, you can prepare the poolish earlier, and keep it in the fridge overnight.
Black sesame bread with sourdough
The night before refresh your starter as you normally do. Prepare more than 80g total, 80g for the recipe plus what you need to feed it again.
Mixing the dough
Both poolish and sourdough methods are prepared the same. First, you need to dissolve the starter in the water. This step will make developing the dough easier. I like to add salt in this step as well, if I leave it for later, the chances of forgetting it increase exponentially!
When you have dissolved the salt, add the seeds and the flour and mix well until you don’t see dry flour particles. Let the dough rest for 20 minutes to allow the flour and seeds to hydrate. Depending on the strength of your flour, the seeds will absorb more or less water. Give the dough some time so you can decide if it needs more water or if it’s okay the way it is. And always add water little by little, it’s easy to go from a dry dough to a very slack one.
Kneading vs no-knead method
After a 20-minute autolyse, I like to knead the dough using the “slap and fold” technique. This technique is very efficient and you can have your dough ready in a few minutes. But if you don’t like kneading, you can try the stretch and fold + coil folds method. And always remember that when you knead and the dough doesn’t come together, rest is your best choice. Let the dough rest and the gluten proteins realign and when you go back to kneading you will see a big difference!
Fermentation & proofing of black sesame bread
Both methods (poolish and sourdough) will ferment slowly. If you start early in the morning, you will be able to shape your bread somewhere between late afternoon and early evening. Aim for 8-12h fermentation (depending on the temperature of your kitchen), or when the dough almost doubles in size.
I usually don’t give exact times in my recipes because it depends on your specific conditions. Weather, skills, type of flour, oven… everything can alter the times for each part of the process.. That’s why it’s important to get familiar with your dough.
How to tell my bread is fermented
If you struggle with fermentation times and when the dough is ready etc., there are two easy ways to keep an eye on the fermentation. One is using a clear bowl where you can see the air pockets in the bottom that develop over time. You want to see a consistent size of air pockets. Not some too large and some areas without any pocket. The dough shouldn’t leave residue in an oiled bowl. If it does, it’s probably a bit over-fermented.

Another way is to use a “spy”. This is very common in panettone making. You put some dough in a cylindric container, and make a mark where the dough is, as it grows, you can tell when it doubles, triples… For this method you don’t need to buy anything, you can use a small glass, a recycled glass jar… I use a shot glass or a little measuring cylinder I have.
Shaping and cold-proofing black sesame bread
When the bulk fermentation is over, it’s time to shape the bread! If you feel the dough is a bit slack, you can add a pre-shape to add a bit of extra tension. It’s usually a good idea when the dough has over fermented a bit, or if the gluten network wasn’t developed properly.
You can shape the bread in any shape you want using any method. I like to do it like this, a very simple way and it has yet to fail me.
After shaping and putting the dough in a banneton, it’s time for the final proof. You can do it at room temperature, but doing it in the fridge will improve the flavor profile of your bread. Either sourdough or poolish, a cold-proof is a very interesting way to develop extra aromas in your bread. Plus, a cold dough is much easier to score than a warmer one!
During the cold proof, the dough will rise while it’s at a warm temperature, but once it cools down, it will stop. That’s why bulk fermentation is so important, once it’s in the fridge, not much will happen no matter how long it stays in the fridge. You can leave the bread in the fridge for 12-24 hours to develop flavor.
PRO TIP: If your bulk fermentation isn’t long enough and the dough is a bit underfermented, shape your bread and let it ferment at room temperature in the banneton for an hour or two before putting it in the fridge.
Tips on how to bake your black sesame bread
To have a great oven spring it’s necessary to have steam during the first minutes of baking. You can achieve this by introducing steam, or by baking the loaf in a closed container like a Dutch oven. A cast iron Dutch oven is ideal because it’s less susceptible to temperature changes when you open and close the oven.
If you don’t have a Dutch oven, just know that you don’t need to spend hundreds of dollars on one. I have this one and is been working perfectly for many years! Since the lid is flat, you can put the bread there and use the larger part as the lid to avoid burning your hands when loading and unloading the bread!
I also like to add one ice cube inside the Dutch oven. It helps with oven spring and keeps the crust a bit thinner because it takes longer to dry out. But this is a matter of preference, if you like thicker crusts avoid the ice.
Many people usually preheat the oven and Dutch oven to 500F, but in my experience, that’s too hot and my loaves have suffered because they dried out too fast at such a high temperature. So I use 435F in my convection oven or 445F in a non-convection oven.
I like to bake the loaf covered for 15-20 minutes and uncovered for another 20-25 minutes or until the loaf has the color I like.
An that’s it! That’s how you make one of the most delicious breads you’ll ever eat!
If you liked this recipe…
You might enjoy these:
Brie and olives sourdough rolls
If you make any of my recipes let me know what you think! As always you can find me on Instagram, Pinterest, and Facebook. I also have a few videos up on my YouTube channel (which I hope I can resume soon!)
Starting on breadmaking but don’t know where to start? Check my Amazon store to see my favorite and affordable utensils you will need. You can make the best bread with simple and inexpensive tools!
(This post contains affiliate links, if you purchase something from this link I will make a small commission that helps me run this blog, but you will not be charged any extra money 😉 )
Happy Baking!

Black sesame bread
Super aromatic bread with either yeast or sourdough, you choose!
Ingredients
Poolish (if you're making the yeasted version)
- 40 g bread flour
- 40 g water
- ¼ tsp dry active yeast
Sourdough (if you're making the sourdough version)
- 80 g active sourdough starter at peak
Black sesame seeds powder
- 35 g black sesame seeds (plus some extra for crust decoration if you want)
- 5 g white sesame seeds optional, for some extra color
Main dough
- 80 g poolish OR sourdough choose the preferment you like the most
- 280-320 g water depends on your flour
- 8 g salt
- 400 g bread flour
Instructions
Poolish
-
In a small bowl, dissolve the yeast in water.
-
Add the flour and mix until a sticky dough forms.
-
Cover the container and allow the poolish to ferment overnight at room temperature.
Sourdough
-
Refresh your sourdough starter to ensure you have at least 70g.
Black sesame seed powder
-
Toast the sesame seeds in a saucepan until they consistently pop and emit a slight smoke.
-
Allow the seeds to cool, then grind them in a spice grinder until coarse powder forms. Some whole seeds may remain.
Main dough
-
In a large bowl, combine water and the chosen preferment (poolish or sourdough), dissolving the preferment.
-
Add salt and sesame seeds, mixing thoroughly.
-
Gradually incorporate the flour until no dry particles remain, adjusting the water if necessary. Cover and allow the dough to hydrate for 20 minutes.
-
After the autolyse, knead the dough using the slap and fold method until smooth, allowing the dough to rest for 10 minutes if it starts resisting.
-
Let the dough rest for 30 minutes, then perform 2-3 sets of coil folds every 30-60 minutes until the dough nearly doubles in size (adjust this step to your own schedule)
-
Turn the dough onto a floured surface and shape it into a boule or batard, placing it in a banneton.
-
Refrigerate the banneton for up to 24 hours.
Baking
-
Preheat the oven to 440°F (225°C) with a Dutch oven inside for 20 additional minutes.
-
Remove the banneton from the fridge and transfer the dough onto a baking paper. Score the dough's surface.
-
Place the dough in the hot Dutch oven with an ice cube and cover quickly to trap the steam.
-
Bake with the lid on for 10-20 minutes (the longer it bakes without a lid the thicker the crust will be)
-
Remove the lid and continue baking for 35-25 minutes or until it's golden brown and the inner temperature reaches 96°C (204°F).
-
Take the loaf out of the oven and allow it to cool for at least one hour before slicing
All you need to know about sourdough feeding ratios
I am back with this series of do’s and don’ts of sourdough starters to help you understand the science behind them so you can make more informed decisions in a time where everyone seems to have “the ultimate recipe and process” for sourdough. Spoiler alert: sourdough is not a one-fits-all kind of thing. This week’s topic is: feeding ratios.
Last time we talked about the age of our sourdough starter and why claims that a starter not working because it was too young were probably wrong, and the issues had more to do with how often the sourdough starter was being fed.
After learning how often we should feed our starter, the next question is “How much should I be feeding my starter?” So let’s dive into Feeding Ratios!

Buy this mango kiln wooden tray on BE HOME
What is a feeding ratio?
Feeding ratio refers to the proportions of sourdough starter, water, and flour we use to refresh our starters. Typically, everything is based on the amount of starter. I’m sure you’ve seen 1:1:1 ratios, or 1:2:2, or 1:10:10… It’s usually given as starter:water:flour, so a 1:1:1 ratio means 1 part starter, 1 part water, and 1 part flour. 1:2:2 means 1 part starter, 2 parts water, and 2 parts flour, and so on.
What happens if I change the feeding ratio?
Nothing, just that your starter will peak at different times. You can adjust feeding ratios to your needs and to whatever your starter needs. In the first post of this series, we talked about how a 1:1:1 ratio might be more convenient if you’ve been feeding your starter too often. But maybe your kitchen temperature and overall conditions allow you to keep a starter at room temperature and feed it at a 1:1:1 ratio once or twice a day. Or maybe you live in a very warm and humid area, where a 1:1:1 ratio is too limited and the starter peaks too fast. If that’s the case, you will probably benefit from a 1:10:10 ratio.
If you like to keep your starter in the fridge, maybe you prefer to refresh it a few times before baking and, in this case, you can use the standard 1:2:2 ratio. Maybe you prefer a “no discard approach” and just take a little bit of starter from your jar and feed it at a 1:10:10 or 1:15:15 ratio to end up with the exact amount of starter you will use on your recipe.
Ideal feeding ratios
The ideal feeding ratio is the ratio that works for your schedule and/or needs is the ideal ratio for you. And this ratio can change at any time. Sourdough is alive, but we have a certain control over how fast or slow we want it to grow.
For a given temperature
The smaller the ratio, the faster it’ll grow because the amount of food for the bacteria is more limited. A larger ratio will result in a starter that will take its sweet time to peak.
Example 1: You have a few slow hours in the middle of the day and it’s the only moment you can prepare your dough. Then feed your starter a 1:1:1 ratio early in the morning and it’ll be ready around the time you’re free.
Example 2: You are having an extremely busy week. You can only prepare your dough tomorrow sometime during the morning but you only have time for your starter today. Then maybe a 1:10:10 feed today in the afternoon will work.
For a given feeding ratio
The higher the temperature the faster your starter will peak. And the lower the temperature, the longer it’ll take to peak.
Example 1: It’s winter and your kitchen is usually at around 66-68F (19-20C), you can feed your starter a 1:2:2 ratio on Friday evening and it’ll be ready in the morning. You can start preparing your dough on Saturday morning.
Example 2: You live in a very hot and humid place. Maybe higher feeding ratios (plus using fridge cold water) is what works for you. Feed your starter in the evening at a 1:15:15 ratio and it’ll be ready the next morning, or feed your starter at a lower ratio in the morning, and you can probably start your dough early in the afternoon.
All these are examples, of course, you know your starter better than anyone and can probably anticipate how it’s going to behave. But what if you are new to sourdough? Then let’s experiment a bit!

How to get familiar with your sourdough starter
If you don’t know your starter very well, you need to record its behavior for a little while. For that follow these simple steps:
- Kitchen temperature: Record your kitchen temperature, I usually just follow my house thermostat, but you can use any thermometer.
- Feeding ratios: Based on your temperature choose a feeding ratio. Unless you live in extreme cold or heat conditions, I would go for a 1:2:2.
- Time to peak: Record the time of the feeding and keep an eye on your starter until it peaks, then record that time and calculate how long it took.
Anything from 8-12h cycles using a 1:2:2 ratio falls under normal behavior for my starter. During winter it grows slower, during summer it grows faster. My house has AC, in winter we keep it from 66-69F (19-20C), and during summer we keep it 70-74F (21-23C), but when we are not home we let the temperature increase a bit, so during North Carolina’s hot summer days, I sometimes use 1:10:10 feeding ratios.
Can I adjust the water?
A typical liquid sourdough starter is a 100% hydration dough. But sometimes it’s interesting to play with the hydration levels of our starters. For example, if you’re working with Lievito Madre, you know it is a starter at 40% hydration (ish). Dryer starters tend to be a bit sweeter and less acidic and they’re fabulous for sweet breads. But they do take a bit of extra elbow grease to maintain. On the other hand, liquid starters at 100% hydration are very easy to maintain. But can you use 85% hydration? or 125%? of course! You’ll have to calculate how much water you need.
How do I calculate the water for feeding ratios?
If you want to experiment with other water contents in your starter, you need to know just a basic concept. If you want LESS water than flour, you will have to multiply the flour content by 0. something and if you want MORE water than flour you will have to multiply by 1.something
Example 1
If you want a starter at 75% hydration, then you decide the ratio of starter and flour, calculate the flour, and finally, multiply that amount by 0.75
Let’s start with a 1:3 ratio of starter:flour and 10 g of starter. This means we have 30 g of flour (3 times the amount of starter). To calculate the water we multiply the flour by 0.75:
30 x 0.75 = 22.5g of water
Example 2
If you want a starter at 125% hydration, then you decide the ratio of starter and flour, calculate the flour, and finally, multiply that amount by 1.25
Let’s start with a 1:5 ratio of starter:flour and 15g of starter. This means we have 75 g of flour (5 times 15g). To calculate the water we multiply the flour by 1.25:
75 x 1.25 = 93.75g of water
(you can round it up to 94 or 95 and it will be fine)
Can I use volume instead of weight for feeding ratios?
Working with weights allows you to be more precise and it makes the process easier to repeat. Weights are much more accurate to measure than volume. At least with regular home equipment. If you’re new to sourdough, bread baking, or baking in general, I would strongly suggest you use weight instead of volume. This way you’re already avoiding possible differences between feedings that could potentially lead to different outcomes. You will have a better picture without doubting if the differences you see come from off feeding ratios or something else. If you want an affordable scale I use THIS ONE, I’ve used it for many years and I think I’ve changed the battery once. Baking doesn’t need to be expensive!
With this being said, you do what works for you, if you are comfortable using volume measurements, use them. Just try to be as precise as possible (Can you tell I’m a scientist? 😉 )
How do feeding ratios work with other flours?
As far as bacteria go, the same! However, different flours make different doughs so you might not see your starter peak as a wheat starter would. You will have to find how the peak looks for different flours. Also, some flours absorb a lot more water than others, and a 100% hydration starter might look very different depending on the flour.
All this might seem a bit complicated but I assure you that once you start, you’ll understand right away and you will start to understand your starter much better!
One last thing about sourdough starters
You don’t have to put yourself in a box and follow exactly what others are doing. Use the feeding ratio that works for you, the hydration that works for you, and the measurements that work for you (volume vs weight). The idea of this series of posts is to give you enough information so you can make an informed decision that will work for your particular needs. Don’t be afraid of experimenting!
Here are a few recipes that you can try if you’re starting in the art of sourdough!
Sourdough burger buns (cookout time is here!)
Sourdough marble rye bread (one of the blog favorites!)
Sourdough Challah (another favorite!)
Happy Baking!
Sourdough starter troubleshooting – Feedings
Lately, I’ve seen people saying things like “a 4-week-old sourdough starter is too young” to justify someone’s problems with their bread or starters. This statement is just wrong and very discouraging for new bakers, or people on a budget who can’t just throw flour every day for feedings.
Two weeks (as a rule of thumb) should suffice to have an active and powerful starter. Let alone 4 weeks!. In fact, depending on the method you used to create your starter, you might be able to make bread in just a week!
Chances are that the age of your sourdough starter has nothing to do with the problems you might be having. In this series of posts I’m going to delve into the science of your starter so you can troubleshoot whenever you need. Although, I hope you only need to troubleshoot it once!

WHAT DEFINES THE STRENGTH OF YOUR SOURDOUGH STARTER?
It’s not time, it’s THE NUMBER OF ACTIVE BACTERIA present in your starter. If your sourdough starter is not ready after 2 weeks (and depending on the method, maybe just a week), your feeding schedule probably needs adjustment. Either you’re following a fixed schedule instead of refreshing the starter when is ready, or you’re using the wrong ratio and not introducing enough nourishment for all the microorganisms to reproduce. Let’s dive into it:
BASICS OF SOURDOUGH BACTERIA
Bacteria in sourdough follow a 4-phase growth curve: Lag phase, exponential phase, stationary phase, and death phase, (For more of this go check this post where I tell you all about it). During the lag phase, they’re not multiplying yet; they’re just checking the environment and synthesizing the proteins and products they need to start multiplying (growing). At this stage, whichever ratio you used to feed your sourdough starter introduced some nutrients for the bacteria.
The second phase involves the exponential growth we’re all familiar with; the duration of the second phase(how much the starter is going to grow) purely depends on how much food there is available for the bacteria. Or better said, how many grams of food per bacteria were introduced. Let me explain:
Imagine a family of 4 people that has 4 cupcakes; they get one cupcake per person, they will run out of cupcakes fast, and they are not going to get a lot of weight because they only ate one cupcake each. Now let’s say we have the same family, and instead of 4, we have 12 cupcakes; then they get 3 cupcakes per person, it’s going to take longer to finish them all, and they will gain more weight because there was more food, right?
Same with your sourdough starter! Smaller ratios mean that the food is going to run out faster, and the growth (bacteria multiplying) is going to take place for a shorter period of time. Now let’s say you used a 1:3:3 ratio (like the family), the bacteria have a lot more food, so they’ll be eating for longer; therefore, it’ll take a longer time to finish all food.
What happens after the bacteria eats all the food? Bacteria multiply as long as they have food (energy), once all the food is depleted, they can stay active for a while, this is what we call the “peak” (the stationary phase), and the reason we say this is the best moment to use your sourdough starter is that it’s when there’s the largest number ALIVE AND ACTIVE bacteria.
After the peak, bacteria start going dormant; some die too (death phase). When using a 100% hydration starter (Keep in mind that gluten-free flours behave a bit differently because of the lack of gluten), this moment usually occurs at the same time the gluten network starts breaking down. That’s when we see the starter collapsing (there are more variables involved in this, but for now, let’s imagine the kitchen is at around 20C, not too cold, not too warm, so neither the bacteria growth nor the gluten in the starter is compromised because of the temperature).

WHY IS MY SOURDOUGH STARTER NOT DOUBLING?
One of the main problems I see is that people refresh their sourdough starters based on time (fixed schedule) and not when it’s ready. So when you take part of your starter out too early and introduce new flour and water, what you’re really doing is reducing the number of active bacteria before they have a chance to multiply. What you’re doing is bringing more cupcakes to the family but taking away a few members, so yes, there are lots of cupcakes, but not enough people to eat them in a reasonable time. And the more you do this, the more you feed your starter too early, the more bacteria you’re taking away, and the more you’re reducing the fermentative power of your starter by introducing unfermented flour. It might get to a point where the number of bacteria is so low that you might not see any growth in maybe 12 hours! (Even though they’re still working hard multiplying!)
Basically, you are keeping your sourdough starter in a continuous lag phase or a very early exponential phase.
HOW CAN I FIX MY SOURDOUGH STARTER?
Easy, just WAIT!, leave the starter at room temperature for a whole day; it’s not going to grow mold, and it’s not going to go bad (if it does, then your starter was already contaminated with other microorganisms). If the problem is a very low number of bacteria, they need time to get out of the lag phase and get well into the exponential phase. Wait, and most likely, you’ll see some growth, maybe in the form of small bubbles, maybe you can smell it, or maybe you can even see the dough growing a tiny bit.
If you don’t keep a large amount of starter (less than 40 g total), you can add more flour and water without discarding anything and wait for it to grow again; then you can start with regular feedings. If you keep a larger amount, you can discard some and refresh it. At this stage, since the problem was (most likely) the low number of bacteria, you don’t want to give it too much food all at once because that might take too long to ferment, and you’re going to get frustrated. I would aim for a 1:1:1 ratio for a couple of feeds until you see obvious signs of activity and the starter growing. Then wait for it to peak, and decide which ratio works better for your situation.

Wrapping up
Feeding ratios are another big thing when it comes to sourdough starters, in part II I’ll tackle feeding ratios and some outrageous advice I’ve seen people tell newbies. Things like “if your starter doesn’t double in 4 hours then it’s not powerful enough”. If you’ve heard that before, stay tuned! And if you have questions write them in the comments so I can try to respond as best as I can.
You can find me on Instagram, Facebook, and Pinterest, and you can also subscribe to my Youtube channel.
Happy baking!
This post contains affiliate links and any sales made through such links will reward me a small commission – at no extra cost for you – that allows me to keep running this blog.
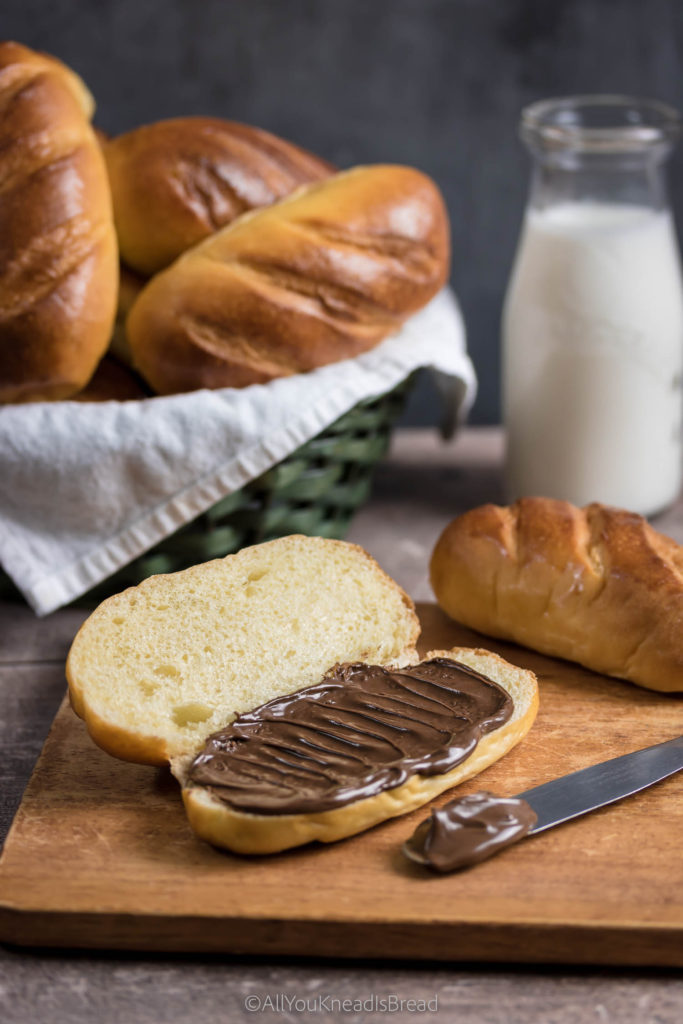
Super soft milk buns: full of flavor and delicious
One thing that I remember dearly from my childhood is eating milk buns with a small chocolate bar. It was something so simple that brought so much happiness into my days. Those milk buns were very soft and fluffy and had the perfect structure so you could buy the ones filled with whipped cream and they wouldn’t be soggy. I think the simplicity of these milk buns is what makes them so special, they’re such a delicious treat!
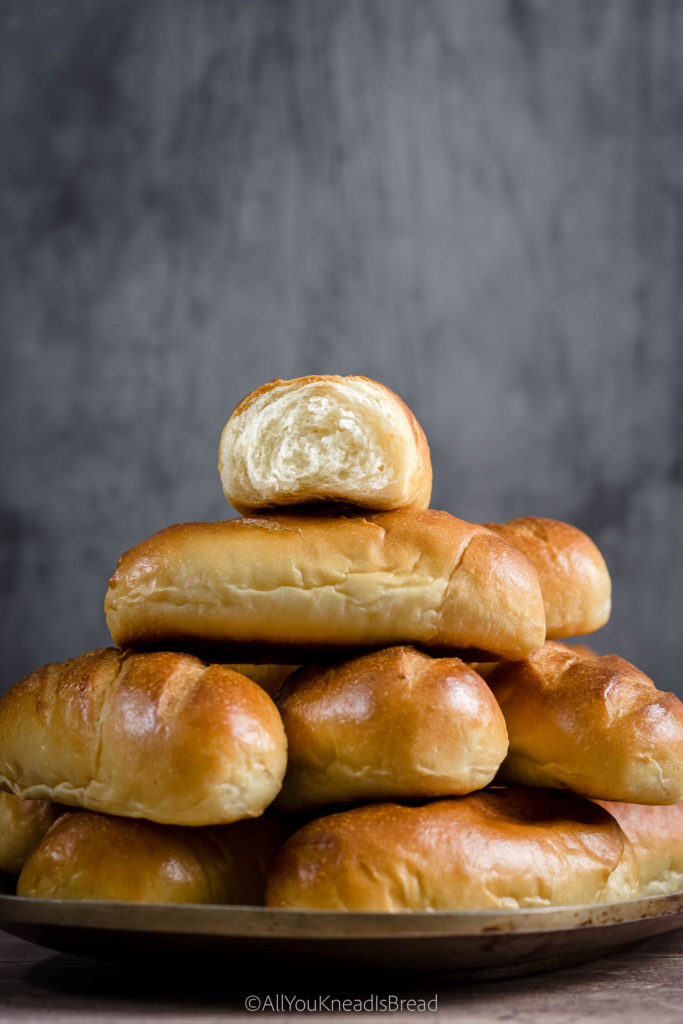
What are milk buns?
When you talk about milk buns these days, people usually think about a pull-apart style of buns. But today I bring a Spanish version of milk buns (Or at least the milk buns from my childhood). They have a slightly thicker (not crunchy) crust with a very spongy and slightly moist crumb. They’re usually shaped into an oblong shape and they don’t touch each other while they bake. Many times you could find milk buns filled with whipped cream or custard, those were some chubby buns!
About this milk buns recipe
Before we start, I want to emphasize how important gluten development is in this recipe. These milk buns should stay soft and fresh for several days, and proper gluten formation is crucial. I’ve tested this recipe many times and the yudane (I’ll talk about it later) definitely helps, but good ole’ elbow grease is what’s going to help you take these buns from good to amazing!
Activate the yeast in milk
I find that scalding the milk always helps when making bread. What I like to do is boil part of the milk (exact measurements in the recipe card), and let it cool down as I prepare the rest of the ingredients. Once the milk is warm and nice to the touch I add the yeast and let it rest a few minutes to activate.
Try acid whey for extra milkiness
I’ve been making my own yogurt for a few months and I found a perfect way to use the leftover acid whey: Bread making! Check this sandwich loaf recipe. I also found that whey gives the bread a more intense aroma than milk, so if you like your bread extra milky, and you have leftover whey, you can also use it for this recipe.
How to make the buns super soft
The key to ultra-soft milk buns is gluten development. By gluten development, I don’t mean *just* gluten formation. But developing a gluten network that is reinforced by fats and starch. Those are the key components to any soft bread. Different recipes will have a slightly different gluten network organization, but the idea is to have these three ingredients create a sturdy network (a good foundation starts with gluten) that is elastic and malleable (fats, they act as a lubricant among the gluten chains), and that makes a bread that is very spongy and fluffy (starch helps with setting the crumb and creating a more cohesive and less crumbly texture).
What is the yudane method?
One of the things that happen in breadmaking is the gelatinization of starch. The liquids in the recipe hydrate the starch in the flour. The hydrated starch granules swell and burst open when the temperature increases while the bread is baking. This is called gelatinization. The yudane method is based on the incorporation of pre-gelatinized starch into the bread recipe. Adding pre-gelatinized starch means two things: 1) more gelatinized starch will increase the fluffiness of the bread, and 2) pre-gelatinized starch will avoid “stealing” part of the moisture of the recipe for starch swelling, rather than gluten building. So we end up with a bread that is fluffier and has a stronger gluten network.
How does yudane look like
It is basically a 100% hydration dough. It looks sticky! Don’t worry, the main purpose of yudane is to gelatinize as much starch as possible. At this point, we don’t care about kneading the dough perfectly.
Later, when you put all the ingredients together, the yudane will incorporate into the dough and you wouldn’t tell it’s there
How to make the yudane
In order to keep the flavor of the milk buns, I like to prepare my yudane with milk. For these buns, I boiled the other part of the milk (careful with spills!) and prepare the yudane with it. You can do this the day before, but I prefer to use my yudane fresh to make sure there is no starch retrogradation. You can learn more about it in this post
If you use a stand mixer, you can put the flour for yudane in the bowl beforehand. Once the milk starts boiling turn the stand mixer on, add the milk, and knead the dough using the paddle attachment. If you prefer to do it by hand use a heavy bottom bowl that can stand the heat and allows you to stir somehow vigorously. Add the flour and when the milk is boiling aff it to the bowl and start stirring until you form a dough. Knead until you can touch the dough and don’t get burnt.
When the yudane is done, wrap it with plastic wrap and let it cool down to room temperature. In the meanwhile prepare the rest of the ingredients.
Fermenting these milk buns
You have two options here, 1 bulk fermentation and 1 proof, or 2 bulk fermentations and 1 proof. What I like to do with these buns is to ferment the dough until it almost doubles in size, then knead it for a minute to deflate it and let it ferment again until it doubles in size. Only then do I deflate it for a second time and divide it to shape the buns.
I find 2 bulk fermentations help develop more flavor. This is a yeasted dough, so any extra aroma is always welcome! And if you’re wondering if longer fermentation will make this dough sour the answer is no! It’s not sourdough, so don’t worry about that. It’ll just have a more bready and less yeasty flavor.
However, if you prefer to do one single bulk fermentation, let the dough ferment until it doubles or almost triples. Then proceed with the shaping and proofing.
How to shape these milk buns
After the dough is ready and has fermented. Divide it into 20-25 pieces of similar weight, shape them into a ball, and let them rest for 10 or 15 minutes. I like smaller and chubbier buns, but you can make larger buns. In that case, divide the dough into 10 or 12 pieces.
Then, with your hands or a rolling pin, flatten the balls, one at a time, into an oval of 15-20 cm long and 15-10 cm wide. This depends on how you like your buns. (shorter and chubbier, or thinner and longer. I like the chubbier version better!)
Then starting from the narrow side roll the dough into a little log, seal the edges and place it on the baking tray you will use. Leave enough separation amount the buns so they don’t touch each other while fermenting or baking.
If you’re making small buns you will need 2 or 3 trays to proof them or they might be too close to each other and will end up touching each other in the oven.
Score the buns!

One of the times I was testing this recipe I asked my Instagram community which scoring pattern they liked better, and the majority responded that they liked better 3 cuts across the buns. I had tried no cuts and also one cut lengthwise. I like 3 cuts better, as well. But, of course, you can choose whatever pattern.
How to bake the milk buns
If you choose to make small buns, be careful because they will be done fast and they can go from almost brown to dark brown in a matter of minutes. I don’t use steam while I bake these milk buns but that’s also an option to consider if you have an oven with a fan. The fan always dries out the crust much faster.
If you decide to make larger buns, then adding some steam can be a good idea, to allow the buns to rise a bit more in the oven.
The power of a good egg wash
Egg wash is not only the last touch for some shiny buns, it also develops a crust that seals part of the moisture inside to the buns can last fresh for a bit longer.
Questions you might have
How long do milk buns last?
I made 25 small buns and, at room temperature, they lasted fluffy and nice for 3-4 days. On days 5 and 6 the buns were a bit dryer but still edible. Nothing some butter or mayo couldn’t fix!
Can you freeze milk buns?
Yes! I reserved some of the buns for freezing. The best way for me was a ziplock bag, but you could wrap them in plastic wrap individually as well. Then I cut them lengthwise before freezing and when I wanted to eat one I just popped it in the toaster. You could also let them thaw at room temperature or steam them. Although this last technique can be tricky if there’s water condensing and dripping on top of the buns.
How do you eat milk buns?
As mentioned before, these milk buns are probably a bit different than other styles of buns. They are perfect for sliders, hotdogs… whatever savory filling you prefer. But my favorite is with a chocolate bar. This combination just takes me back to my childhood and I see myself in that small pastry shop, unwrapping the chocolate bar and putting it inside the bun. As an adult, I found that Nutella can also be an amazing filling!
Are milk buns sweet?
Yes! These buns are sweet, not crazy sweet but you can taste the sweetness. That, along with the milky flavor, is what makes these buns so versatile! They go well with sweet or savory fillings. And if you’re like me and dunk everything in your morning coffee… you can do that too!

Are these milk buns the same as brioche?
Not quite! While brioche is mostly eggs and butter, these buns have more milk, not as much butter, and not that much egg. They are also sweeter than brioche.
Other uses for this milk dough
This dough is amazing to work with! Unless I don’t have a lot of time I like to knead it by hand because it’s truly nice to work with! And it’s also very versatile. If you don’t want long buns you can you can make buns for burgers, or cinnamon rolls, or a babka… You can also shape it into thinner and longer buns for hot dogs. You can even use it to make a tin loaf. This recipe is a keeper!
If you liked this recipe you might also like these
Super fluffy nuts and cardamom babka
Orange and cinnamon sourdough rolls
Sourdough donuts with rose cream
If you make any of my recipes let me know what you think! As always you can find me on Instagram, Pinterest, and Facebook. And I also have a few videos up on my Youtube channel (which I hope I can resume soon!)
Starting on breadmaking but don’t know where to start? Check my amazon store to see my favorite and affordable utensils you will need. You can make the best bread with simple and affordable tools! (This is an affiliate link if you purchase something from this link I will make a small commission that helps me run this blog, but you will not be charged any extra money 😉 )

Super soft milk buns
Ingredients
Yudane
- 150 g bread flour
- 150 g boiling milk
Main dough
- 300 g yudane
- 600 g bread flour 12.7% protein
- 300-335 g Whole milk (scalded, lukewarm) (start with the lesser amount and add more if your flour requires it)
- 75 g heavy whipping cream
- 3 egg yolks
- 7 g active dry yeast
- 90 g sugar
- 12 g salt
- 75 g softened butter
Instructions
Yudane
-
Add 150g of bread flour to your bowl.
-
Heat a bit over 150g of whole milk and when it comes to a boil weigh 150g and quickly add it to the flour.
-
With a wooden spoon or with a stand mixer mix the flour and milk until it forms a sticky dough. Wrap it in plastic and keep it at room temperature until you're ready to start the dough.
Main dough
-
Mix the lukewarm milk, the whipping cream, the yeast, and the egg yolks, and let the mixture sit for 10 minutes.
-
Add the sugar to the egg mixture and give it a whisk.
-
In the bowl where you have your yudane add the egg mixture and break up the yudane a little bit.
-
Add flour and salt to the bowl where you have the yudane and pour the wet ingredients. Mix everything until you don't have dry flour particles. Cover and let it sit for 20 minutes.
-
After 20 minutes start kneading, if the dough feels too stiff and you didn't add all the milk, add a bit more. Once the dough starts coming together add the softened butter and continue kneading to incorporate it.
-
Knead until the dough becomes smooth and elastic. It shouldn't stick to your fingers and it should feel nice to the touch.
-
Place the dough in a lightly oiled container, cover it and let it ferment at room temperature for 2h or until it almost doubles in size
-
Deflate de dough gently and let it ferment again for 1 hour or until it almost doubles the size
-
After 1h or when the dough is ready deflate it gently and let it rest, covered, for 10 minutes.
-
Divide the dough into as many buns as you'd like, shape the pieces into small balls and let them rest covered for 10 minutes. This recipe can make 25 small buns, 12 medium buns, or 6 large buns.
-
Take one dough ball and flatten it with your hands or a rolling pin into an oval of half centimeter thick (1/4 in). For small-size buns, the oval will be 15x7cm. Starting from the short side roll the dough into a log and seal the edges.
-
Put the buns on baking trays separate enough they won't touch each other while they bake, cover them loosely with plastic wrap and let them ferment until they get puffy and have grown in size.
-
Before the buns finish proofing preheat your oven at 360F/180C (lower to 340F if you're making larger buns).
-
When the buns are ready, brush them with a mix of milk and the leftover egg white, make three cuts across the surface of each bun and bake them at 360F/180C for 25-35 minutes or until they have a nice golden brown color.
-
Let the buns cool down to room temperature. You can keep them in a seal-tight container or ziplock bag at room temperature. You can also freeze them and defrost them in the toaster.
The best Sourdough Fougasse With Pasta Madre discards
Lately, I’ve been focusing on my Pasta Madre a lot. While studying it and playing around with different flours I generated a considerable amount of pasta madre discards. Of course, I found a way to repurpose them instead of throwing them away. I made this fantastic sourdough fougasse with olives and thyme that is going to blow your taste buds! This is the most aromatic sourdough fougasse I’ve ever made! It’s definitely a delicious treat to share and a fantastic appetizer to keep your guests happy while dinner is finishing cooking!
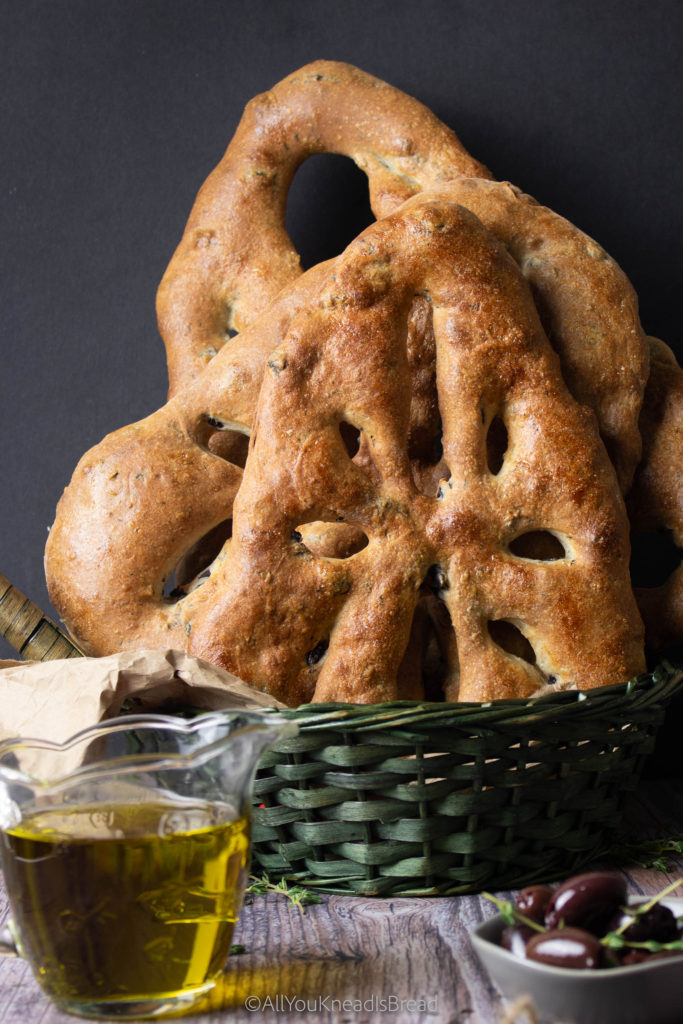
What is fougasse bread?
In a world full of focaccias, baguettes, and sourdough loaves it’s easy for this incredibly delicious bread to go unnoticed. Let me tell you a bit about it!
Fougasse is a French bread typical from Provence although it has more variants in other regions of France. It’s somehow a flatbread and it’s shaped in an irregular shape with slits in the middle. In France is very common to add fillings such as olives, cheese, anchovies…
FUN FACT! this bread was originally used to test the temperature of the wood fire ovens they had back in the day. The bakers could estimate the temperature based on how long it took to bake a fougasse. So there you have it, delicious bread full of tradition!
What is pasta Madre?
In case you’re not familiar with it, let me make a quick summary of what pasta madre is: It’s a special stiff starter used in the making of Grandi Lievitati products, namely Panettone, Pandoro, Colomba… I said special because it’s not *just* a stiff stater. Pasta madre, (or lievito madre, or lievito naturale in some cases) is typically maintained under pretty specific conditions and methods. The method I use is the one where the starter is kept in water. The other method wraps the pasta madre and keeps it tied.
If you want to learn more about it you can check this post to learn how to create your own lievito madre, this post for information about the 3 preparatory refreshments before making panettone, and this post for a mini-guide to troubleshoot your pasta madre.
Stiff starter vs. Pasta Madre, two different things
Social media has done a very poor job of explaining what Pasta Madre is. And frequently people use starters at 60% hydration and call them Pasta Madre. But a real pasta madre s about 35-45% hydration (depends on the flour). And it has a very controlled maintenance process in order to keep a healthy ratio of bacteria and yeasts and promote specific types of LAB. The purpose of this special maintenance is to make a panettone (Grandi lievitati) that is very very very soft, packed with flavor, that can stay fresh for many days and that has not a single hint of acidy nor acidifies over time. Not just to leaven the dough.
Why do I generate so many pasta madre discards?
The thing is… because Pasta Madre is kept either in water or tied up, you can’t really use small amounts of flour because otherwise it’d disintegrate in the water very quickly or it’ll completely dry out in the cloth. My normal maintenance amounts are:150-200g of pasta madre, 150-200g of very strong flour, and 70-80g of water.
Basically, I generate about a pound of pasta madre discards every 24h. And that is a lot of perfectly fine and very strong pasta madre that could be used for other things. I usually keep it in the fridge and accumulate it over a few days and use it to make crackers. I also use it for sourdough loaves, or to make these delicious orange and cinnamon rolls.
And now we have another recipe! This sourdough fougasse is good! Trust me on this! And it uses about all the discard from one refreshment.
If you are using pasta madre discards, I recommend you start the fougasse dough right after the last maintenance refreshment. That is when the pasta madre is at its peak of activity.
Is this a sourdough discard recipe?
Yes, because pasta madre is still sourdough, and a very active one! It’s still a dough packed with wild yeasts and bacteria. And like sourdough discards, you can use it in pretty much anything! It’s also great for stiffer dough, you can use it to make bread like this sourdough challah, or my sourdough burger buns… The options are endless here!
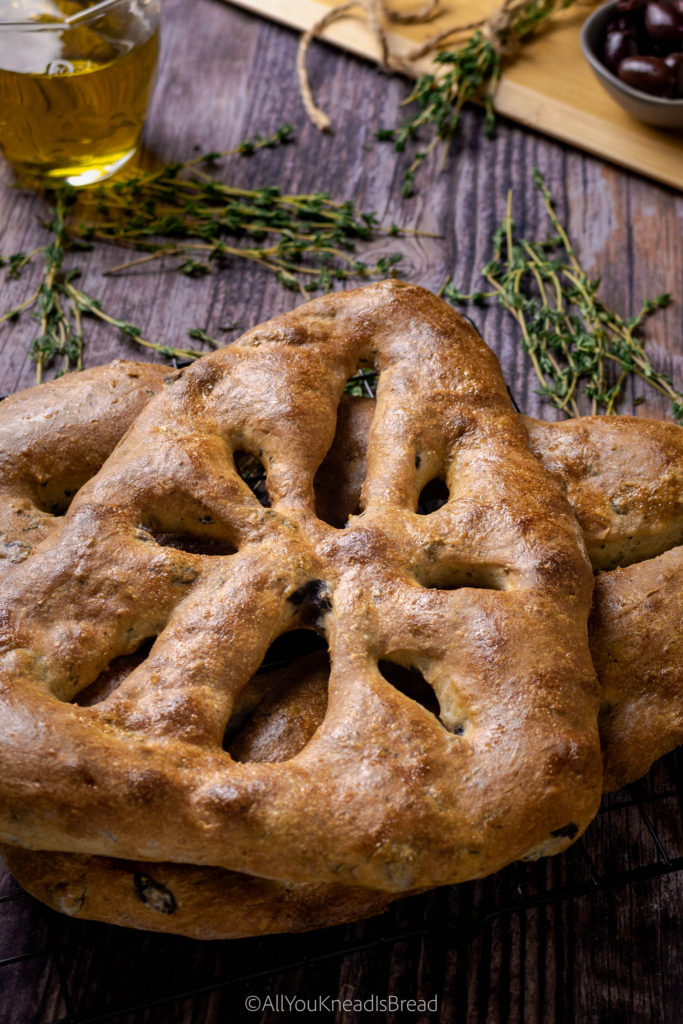
What if I don’t have pasta madre?
Don’t worry! If you don’t have pasta madre you can either create a stiff starter and use it, or use your liquid sourdough starter (100% hydration), I got you!
How to create a stiff starter with your 100% hydration starter
I’m going to show you how to make a shortcut stiff starter at 55% hydration because if we lower the hydration too much, your bacteria will end up a bit stressed and there’s a chance it won’t be active enough to use. You can read all about adaptation periods and water content on this post. It’s about the science of your sourdough starter (without fancy words and easy to follow).
A 55% hydration starter would be very easy to make by mixing 100g of flour with 55g of water. But this will make a total of 155g of starter. We don’t need that much, so we need to scale it down to a total of 100g. So we need to scale down.
| Ingredients | For 155g of starter | For 120g of starter | For 100g of starter |
| Total Flour | 100g | 77.4g | 64.5g |
| Total Water | 55g | 42.6g | 35.5g |
Pay attention to the water
Now, water is our limiting factor here because we just need a little amount. Since we’re using our 100% hydration starter, that means that whatever weight of this starter is made of 50% flour and 50% water.
So, let’s say you want to make 120g of stiff starter (just to play safe). That starter will have 42.6g of water. This water comes ONLY through your liquid starter. Since water is only 50% of the liquid starter, we will need twice the amount. And then to make it stiffer we just add the flour difference. Let me show you!
Twice the amount of 42.6g (of water we need) is 85.2g. We need to take 85.2g of liquid starter (42.6g of water, and 42.6g of flour). And according to the table above, to make 120g of stiff starter we need a total of 77.4g of flour. From our liquid starter, we already have 42.6g of flour. The difference we need to add is: 77.4 – 42.6 = 34.8g
Let me do the math for you!
Too much math for a beautiful day such as this one? Then let me do the numbers and just pick on the table below the amount of starter you prefer to make:
| Ingredient | For a total of 120g of stiff starter | For a total of 100g of stiff starter |
| 100% hydration starter | 85.2g | 71g |
| Extra flour | 34.8g | 29g |
You can now pick how much stiff starter you want and mix the ingredients. Knead the dough by hand for a couple of minutes. You don’t need to develop the gluten perfectly but make sure there aren’t dry flour particles or dry chunks of dough. The idea is to have a dough that is stiff but workable and not sticky. Aim for a bagel dough kind of consistency.
Once mixed put it in a container with a loose lid and wait until at least doubles in size. It’d be helpful to have a narrow and taller container rather than a wider and shorter one. That way it’ll be easier to see how much it grows. Once you see it doubles wait for a while, if it stalls then it’s at the peak, if it continues growing then it’s not at the peak yet. Wait a bit longer and test again.
You also need an active starter to make sure the stiff starter can grow fast and you don’t need to refresh it again to make it stronger. Remember, the purpose of this recipe is to reduce waste 😉
If this is not a method you like, I got you! You can go ahead and use your liquid starter
How to make sourdough fougasse with liquid starter
If you just don’t really care about making a stiff starter or don’t have pasta madre, you can still make this delicious sourdough fougasse with your liquid starter. Just add 100g of the starter and then 21g LESS of water and 21g MORE of flour to the base recipe and you’re good to go! (This is to keep the total dough hydration the same regardless of the starter you’re using).
About this sourdough fougasse recipe
For this fougasse, I chose strong-flavored fillings because pasta madre doesn’t have the sour punch that liquid sourdough has. It’s a milder flavor that I wanted to balance with something savory. Olives and thyme are a combination that I love and along with olive oil and the bread (once is baked) is just perfect.
You can use other ingredients of your preference, although traditionally fougasse has more savory and umami fillings. This can also be an opportunity to let your creativity flow and experiment with how you cut the slits when you’re shaping your bread. Fougasse is truly a gorgeous bread that can just be the perfect centerpiece for a table.

How to prepare this sourdough fougasse
As with any other sourdough bread, we need to start mixing the ingredients. If you know my baking style, you know that I add starter and salt all at the same time. And this case is no different. However, due to the nature of pasta madre, you probably can’t dissolve it in the water the same way you do with a liquid starter.
What I like to do is hold back about 20% of the water to start with a bit of stiffer dough, and then progressively add the rest of the water and finally the wet fillings. This is what works for me, but if you want to add all the water right away and just knead directly it’s fine too.
This is a lovely dough to work with, honestly. You can use your stand mixer but if you want to try doing it by hand, I think it’s a beautiful recipe to do so!
If you’re using a liquid starter just dissolve it in water and proceed with the rest of the ingredients. You don’t need to add water slowly.
When should I add the fillings?
I like to classify fillings into two groups: wet and dry. Wet fillings are those that carry a considerable amount of moisture with them and that could, potentially, alter the dough. These are things like olives, roasted peppers, capers… Dry are those that don’t carry with them much moisture like spices, herbs, cured cheese, dry things preserved in oil (sundried tomatoes, caramelized onion…).
Why this classification? When we need the dough we usually apply pressure to the ingredients that are in the dough. Wet ingredients will release that moisture if we “squeeze” them as we knead the dough. And our somehow stiff dough can become sticky in no time!
What I like to do is add the dry ingredients mixed with the flour and wait until the dough is developed to add the wet, then I just have to knead enough to incorporate the fillings, and not for incorporating them filings and developing the gluten at the same time.
For this sourdough fougasse, I used black olives and thyme. Thyme is not a problem, it’s a “dry” ingredient (even though I used fresh herbs, but you get the idea), you can add it at the beginning with the flour and the other ingredients. Olives, on the other hand, are preserved in brine, they carry quite an amount of moisture. So I added them at the very end. Once the dough was ready and the gluten was where I wanted it to be, I added the olives and kneaded just enough to incorporate them.
Don’t worry if by doing this you still have a couple of olives that aren’t incorporated, just put them on top of the dough, after they bake they’ll give your fougasse a rustic look!
How to ferment this sourdough fougasse
Since fougasse is a flatbread of sorts, it’s okay if the dough is not super strong. In other words, it’s okay if we over ferment it a little if that’s going to fit our schedule better. Here you have a couple of options:
Same day fougasse
Start the dough early in the morning, knead it well, add all the fillings, and let it ferment (bulk ferment) until it doubles in size and gets a bit puffy. Depending on your temperature, this might be anywhere between 3-5h. If you’re using a clear bowl you should see some fermentation bubbles in the bottom but nothing too crazy. Try not to over ferment it or when you want to shape it and cut the slits it’ll be tricky.
Then proceed to divide the dough into as many fougasses as you wish to make, shape them, and let them proof. We’re not looking for super chubby fougasses here. So when you start seeing them rising a bit turn the oven on and continue proofing while the oven preheats.
If you’re an early bird you might have them ready by lunchtime, if you’re a sleepyhead like me, maybe aim for dinner to be safe 🙂 *giggles as she writes this sentence*
Overnight fougasse
This method is based on cutting the bulk and keeping the dough in the fridge until you’re ready to continue. So, let’s say you refresh your pasta madre in the early evening or your stiff starter is not ready until later in the day. Maybe you don’t have time to bake your fougasse the same day. In this case, what you can do is prepare the dough and start the bulk fermentation. Then 1 and a half or two hours later put the bowl in the fridge and keep it there overnight. Then the next morning take the dough out of the fridge and divide it into the number of pieces you want. This way the dough will come to room temperature a bit faster
How to shape your sourdough fougasse
Either if you are following the same-day method or the overnight method. After dividing the pieces shape them into a ball, cover them with a cloth or plastic wrap, and let them rest for 20 minutes or so.
After the rest period is over… Unleash your inner creativity! The basics of shaping a fougasse are:
Flatten the piece of dough into an oval-ish/triangular-ish/leafy-ish shape, then cut slits with a bench scraper or a pizza cutter (bench scraper works better for me), loosen up the slits, and done!
Don’t try to make them perfect, the beauty of a good fougasse is in that rustic touch! I personally like a triangular/leafy kind of shape. I think they look really nice and if you have a bread basket they will look very cute in it. Also, feel free to use plenty of flour to avoid the dough from sticking to the counter. Cutting the slits can be tricky.
Baking your sourdough fougasse
Once you’re done shaping the fougasses, cover them and let them proof at room temperature until they start getting puffy, but didn’t necessarily grow much. At that moment turn your oven on at 425F/220C. The proofing stage will continue as the oven preheats. If you have an old metallic tray, put it in the bottom part oven, you will use it to create steam.
When the oven is ready put your fougasses in the middle part of the oven and throw a cup of boiling water into the bottom tray. This will create a nice touch of steam for the first few minutes.
After 10 minutes or so, you can retrieve the bottom tray and continue baking until your fougasses have a nice golden brown color. Let them cool down on a rack until you can hold them with your hands without burning yourself and enjoy!
A few tips about this sourdough fougasse recipe
For a shiny touch, I like to brush my fougasses with egg wash. This also allows the crust from drying out too quickly. This bread is pretty thin, so a bit of extra moisture is always helpful.
If you don’t want to brush your fougasses with egg wash, you can spray some water before putting them in the oven. This, along with the steam we create with the boiling water, it’ll be enough.
Fougasse is best consumed right away. When it’s crispy outside and soft inside. It’s even better when it’s still warm. This bread is thin, most of the moisture scapes as it bakes, so it goes stale faster than other types of sourdough bread.

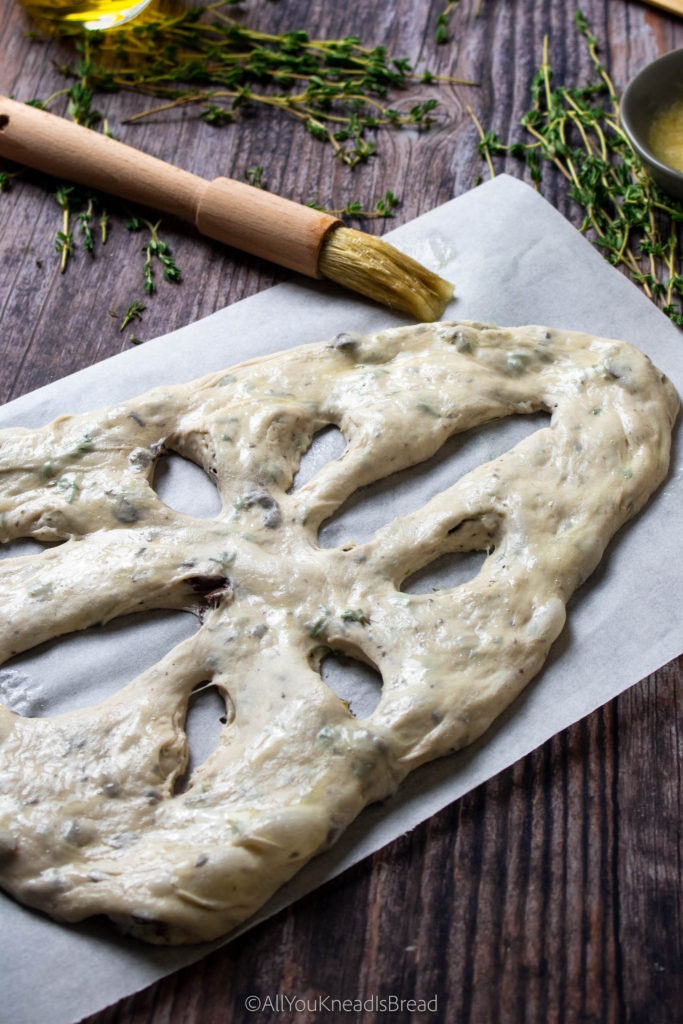
Can I use other fillings?
Absolutely! You can use other flavor combinations that you like. I love fresh herbs combined with something extra savory or umami (like olives, blue cheese…). But I also love caramelized onions and nuts together. The sky is the limit here!
Do I really need steam to bake it?
You don’t need it, but I think it’ll be a good idea. I always get better results when I add steam during the first 10 minutes of baking. Since these are pretty thin, the crust will dry out quickly. A bit of steam will help to create a fluffy interior and crispy crust! But if you can’t create steam don’t worry, your fougasse will still turn out delicious!
How big should my fougasse be?
With this recipe, you can make one mega-fougasse, 2 large fougasses, 3 medium fougasses, 4 small ones, or 5 tiny ones. Just be careful when you bake them because the small ones will bake faster.
That is all for today! If you liked this recipe, you might also like these other ones, give them a try and let me know what you think!
Brie and olive sourdough rolls
Tomato and rosemary sourdough bread
Gorgonzola and apple sourdough bread
If you make any of my recipes let me know what you think! As always you can find me on Instagram, Pinterest, and Facebook. And I also have a few videos up on my Youtube channel (which I hope I can resume soon!)
Starting on breadmaking but don’t know where to start? Check my amazon store to see my favorite and affordable utensils you will need. No need to buy a $200+ baking pot. You can make the best bread with simple and affordable tools! (This is an affiliate link if you purchase something from this link I will make a small commission that helps me run this blog, but you will not be charged any extra money 😉 )
Happy Baking!

Sourdough Fougasse with pasta madre discards
Make this incredibly aromatic bread typical from the Provence using your pasta madre discards!
Ingredients
- 500 g bread flour
- 100-120 g pasta madre discards see notes
- 300-350 g water see notes
- 50 g extra virgin olive oil
- 8-10 g salt see notes
- 135 g sliced black olives drained and patted dry
- 10 g fresh thyme leaves chopped
- 1 egg for brushing optional
Instructions
-
Mix salt, chopped thyme, and flour in a bowl and set aside
-
Cut the pasta madre into smaller pieces and add them into the bowl that has the flour mix
-
Add about 80% of the water, the olive oil, and start kneading until you feel the pasta madre is incorporating well into the dough. Then add the rest of the water
-
Knead the dough until the gluten is almost developed and add the drained olives
-
Do a set of stretches & folds to help incorporate the olives. If the dough feels tight and you can't incorporate them, let the dough rest for 20 minutes to relax the gluten. Then proceed again to finish incorporating the olives
-
Once ready lightly oil your bowl and put the dough inside, let it proof at room temperature until it doubles or almost doubles and you see some fermentation bubbles at the bottom (Refer to the post to see how you can do a cold retard of this dough)
-
When the bulk fermentation is over, lightly flour your counter and divide the dough in as many fougasses as you want (3-4 pieces will have a nice medium-small size). Shape the pieces into dough balls, cover them and let them rest 10 minutes
-
Take one dough ball and flatten it with your fingers giving it an oval or semi triangular shape. With your fingertips stretch the dough into a larger piece of about 1cm/0.5in thickness. Use as much flour as needed to avoid the dough from sticking
-
Once you have shaped all pieces cover them and let them rest for 10 minutes
-
Place the pieces on the trays you will use to bake them and with the narrow side of a bench scraper cut slits into the fougasse pieces and stretch them a little so the cuts don't close while the dough proofs and bakes
-
Cover the fougasses and let them proof until you see them getting puffy, then turn on the oven at 425F/220C and finish proofing while the oven preheats. If you want to create some steam place an old metallic tray in the bottom part of the oven
-
When the oven is ready brush the pieces with egg wash for a shinier touch (optional) or just spray some water. Bake them for about 30 minutes or until they get a nice golden brown color. If you are creating steam in the oven you can add a cup of boiling water into the tray that has been preheating in the bottom of the oven.
Recipe Notes
*If you are adding wet fillings (like olives) start with the lesser amount of water, if the fillings are dry (like herbs or cheese), add the greater amount of water
*Use just 8g of salt if you’re using very salty/umami fillings like olives, anchovies… otherwise use 10g
Whey bread: my new favorite
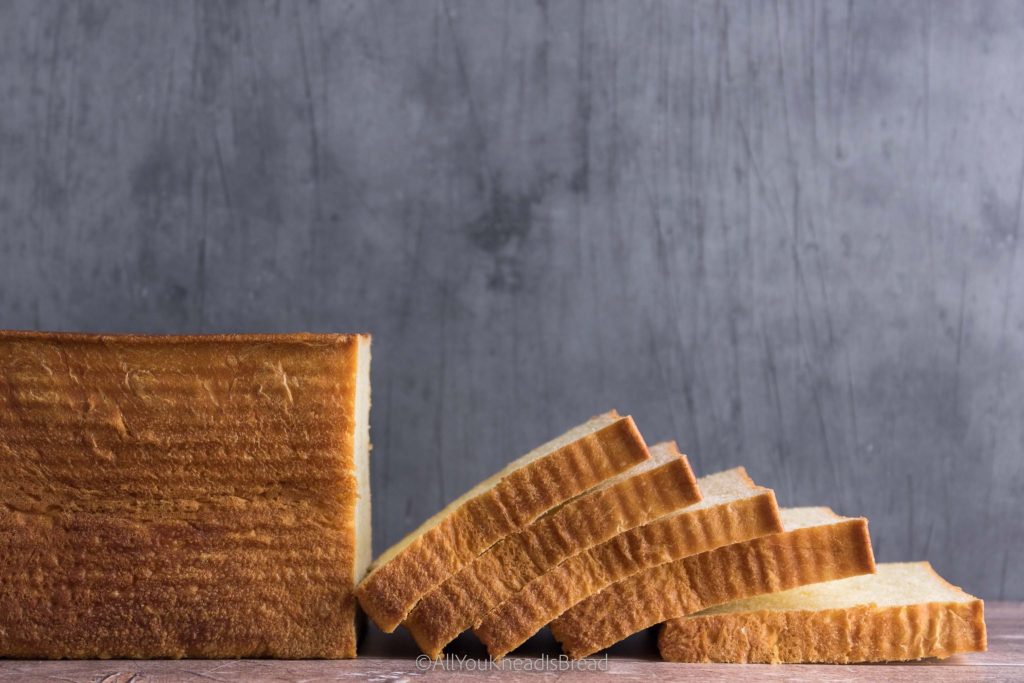
How on earth did you come up with a whey bread recipe? I’m glad you ask! A few months ago I started to make my own yogurt. But with homemade yogurt came leftover whey. I don’t like throwing away things that I can use, especially something that 1) I know it’s an industry waste very difficult to deal with and 2) is not milk but smells like it and therefore could give great aroma to my bakes. I thought I could find a good use for it, and the most obvious one for me was to try my hand at a whey bread. Spoiler alert: it’s AMAZING!
For this recipe, I decided to use active dry yeast (you can also use instant if that’s what you have). I know I know… I’ve been on a sourdough roll for quite a while but because I wasn’t sure if making a 100% whey bread was possible, I wanted to try first using yeast. Then, during the recipe development, I realized that I needed to reconnect with my beloved yeast. The challenge of making something with sourdough is exciting but yeasted bread is delicious too and more convenient when you don’t have the time or patience for sourdough. And honestly, I think this recipe is perfect the “whey” it is *pun intended* 😉
Check the notes in the recipe box for the baker’s percentage, the measurements are for a large loaf pan.
What is whey?
For those who don’t know what whey is, it’s a by-product of the yogurt-making process. Once the milk is curdled and the yogurt is set, the yogurt is strained to get a creamier texture or Greek-style yogurt. The leftover liquid is known as whey or yogurt whey. It’s yellowish and it can be clear or a bit cloudy, it has a milky smell and it’s acidic. If you want to know more about the composition check this scientific article.
This whey is not the same whey protein powder has, they’re called the same, but they’re different. Protein whey is also known as “sweet whey”.
When I make yogurt I make 2 liters at a time; There’s a lot of whey in 2 liters of yogurt! I didn’t want to throw it away before I at least tried to do something with it. I also know whey is a huge problem in the dairy industry. It’s a by-product that pretty much goes to waste and it really poses an environmental problem. You can’t just throw it away because it has a lot of microorganisms and nutrients for other microorganisms that can lead to algae growth. The low pH can acidify the surroundings and thus affect the ecosystem where it’s dumped. It’s a big no-no.
Making the most of whey waste
Many researchers are looking into possible uses for whey in an attempt to relieve the industry from this problem and to minimize environmentally dangerous practices. Believe it or not, the Greek yogurt industry creates billions (billions with a b!!) of liters of whey. This article explains it very well, it’s an interesting read if you’d like to know more about this issue.
But we, bakers of the world, home cooks, kitchen creatives, zero waste enthusiasts… always find a use for everything! So, to your question “Can you make bread with whey?” The answer is YES, YOU CAN! And whey bread is actually now one of my favorite things to bake!

Using whey in bread
For this recipe, whey is the only liquid I use. Even for the yudane (which we’ll cover later). If your whey is clear or cloudy is not going to affect the bread. I’ve tried with both and they work the same.
I was a bit worried at the beginning because I wasn’t sure if the lower pH would affect gluten development or the final texture. But good news! The dough behaved beautifully! It’s very aromatic and you’re going to fall in love with this whey bread! And you can even keep the whey in the fridge for a couple of weeks before you use it. Its low pH and good microorganisms can extend its shelf life for quite some time!
About this whey bread recipe
Let’s get into the tidbits of the recipe! After testing different ingredient ratios, I decided to introduce some precooked flour. Some of you might have heard about tangzhong and yudane methods. Both are based on the same idea: the gelatinization of starch. Tangzhong is a roux and it’s made with a 1:5 flour to water ratio. Yudane, however, is a 1:1 flour to water ratio, and instead of gradually increasing the temperature and cook the mixture, you boil the liquid and pour it on top of the flour.
I’ve worked with both methods and I love them both. The gelatinized starch in the precooked flour makes quite a difference in the texture of the bread. I always mention how important gluten development is, but gluten development doesn’t only mean building the gluten network. It means incorporating all the necessary elements into the network. And that includes starch granules that will gelatinize during baking. These gelatinized starch granules give the crumb some springiness and elasticity, which are key for soft and fluffy bread.
How to make the yudane for this whey bread
If you have a stand mixer or some machine to knead the dough, I’d recommend you prepare the yudane with it. Measure the flour and keep it in the bowl. Boil a bit more whey than the amount you’ll need because some of it will evaporate. When it comes to a boil turn on your stand mixer, quickly measure the weight of the whey you need in another container, and pour it into the stand mixer bowl and knead it until you can touch it without burning yourself.
If you do it by hand, also measure the flour and keep it in the bowl, proceed to heat the whey in the same manner, and when it comes to a boil measure the amount you need directly on the bowl where you have your flour. Place the bowl on the scale, add the whey, and quickly, with a spatula or a wooden spoon mix the dough well and knead it until you have a sticky dough ball.
If you can, use a heavy bowl, so it doesn’t move around while you’re stirring and pouring the boiling water.
The yudane method explained
Usually, people make the yudane the night before baking and let it cool down in the fridge. However, I think that approach is not the best if we want to maximize the possibilities of adding gelatinized starch to our dough. Why? Because of something called starch retrogradation.
Starch is made of two monomeric units: amylose and amylopectin. At room temperature, these two compounds have a crystalline structure (not that they’re crystals per se, but their atoms are arranged in the space as crystals). In presence of heat and water, the starch granules swell and burst. When this happens, the crystalline structures of amylose and amylopectin are lost, the chains can interact with even more water, and the mixture becomes a gel, thus the “gelatinization” part.
However, the gelatinization process is not 100% irreversible. The moment heat is no longer applied and the temperature of the gel starts going down, some of the monomers start re-crystalizing. That means that as they go back to their original structure, they start losing the gel properties and become solid again. This process is called retrogradation.
Starch retrogradation is quite a big deal in starch science and it does have a role in bread staling. It’s also one of the main reasons bread gets hard and crumbly when we put it in the fridge.
Why I don’t put my yudane in the fridge
The retrogradation process is accelerated at cold temperatures. That’s why sauces or custards that have flour or starch harden in the fridge. If we put the yudane in the fridge, the starch retrogradation will go faster than if we just leave it at room temperature. We can keep more gelatinized starch and our bakes will be even better if there’s no cold involved.
Keep in mind that even if we let the cold yudane come back to room temperature, the retrograded starch won’t gelatinize again. Gelatinization starts at high temperatures (>65C/150F)
This is my personal preference when making yudane. I find it’s also more convenient because I always forget to prepare things the day before. But obviously, you can leave it in the fridge if that’s what you prefer.
When your yudane is ready and it’s not too hot, you can either start right away, or you can wrap it in plastic until you start making this whey bread.
How to ferment this dough
Since this is a yeasted dough, it’s going to be a 1-day bread. And in just a few hours you should be able to enjoy a nice slice of this whey bread that’s going to enamor you!
The bulk fermentation will take about 2-3h, proofing will take a bit less. These are just a guide, the total fermentation time depends on how hot your kitchen is, etc etc. Proofing is where things can be different depending on what type of loaf pan you have.
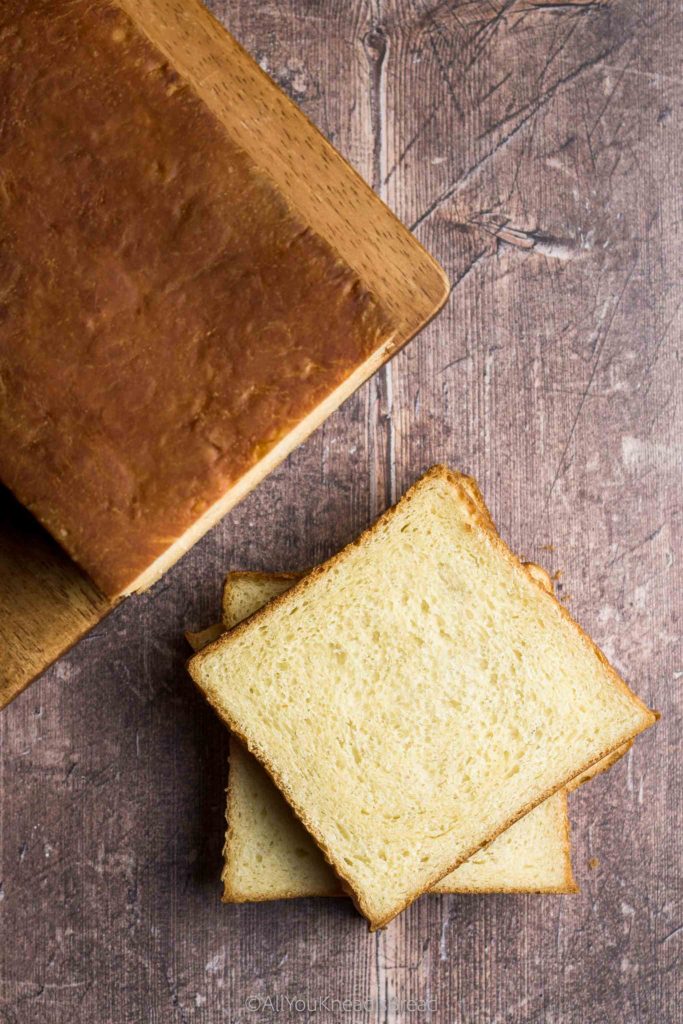
Proofing on a Pullman loaf pan with lid
I have this Pullman loaf pan with a lid. I must say… it’s large. I underestimated the size when I bought it some years ago. At the time I was baking just for myself. But now this size is very convenient because it makes a loaf large enough to last the whole work week and feed 2 people. I’m talking breakfast toasts, lunch sandwiches, mid-afternoon snacks…
Make sure you oil the pan and the lid. After you shape the dough, let it ferment until the dough is 1cm from the top. Then put it in the oven. If you bake the loaf when the dough is already touching the lid and is filling almost all the pan, the dough won’t have enough space and might pop the lid. As the bread keeps rising the first few baking minutes it might push the lid and you might hear a little explosion. Nothing major, but if you’re not expecting that it might scare you. I know because I almost had a heart attack when I heard that myself!
If this happens though, carefully put the dough back in the tin with the lid and everything (it will deflate after the shock) and continue baking. The worst that can happen is that the loaf will have a wonky shape. It might even be a bit smaller than you wanted. But it’ll be totally edible.
Proofing on a loaf pan without a lid
In this case, there isn’t any risk of “explosion”, but there’s a risk of mushroom shape loaf. If this happens it’s possible the bread gets stuck in the edges of the pan and it will not come out of the tin after it cools down. The best you can do is control the proofing and start baking when the center of the loaf is, at most, 1-1.5cm above the edge of the pan. This dough is very elastic, so it’ll have a nice oven spring. For smaller loaves, I use this loaf pan and it serves me well. It’s very versatile and useful for small cakes, banana bread, etc.
How to shape this whey bread
Deflate the dough gently and well by kneading it for a couple of minutes, let it rest for 5 minutes, and then roll it into a rectangle slightly narrower than the length of your loaf pan and as long as your dough allows you while keeping at least ½ inch thickness (if it’s thinner it might get stuck on your counter and be easier to trap air as you roll it). Shape the dough into a log and put it in the pan. If you’re using a Pullman loaf, close the lid. If your loaf pan doesn’t have a lid, cover the dough with plastic wrap or put the pan inside a large enough plastic bag.
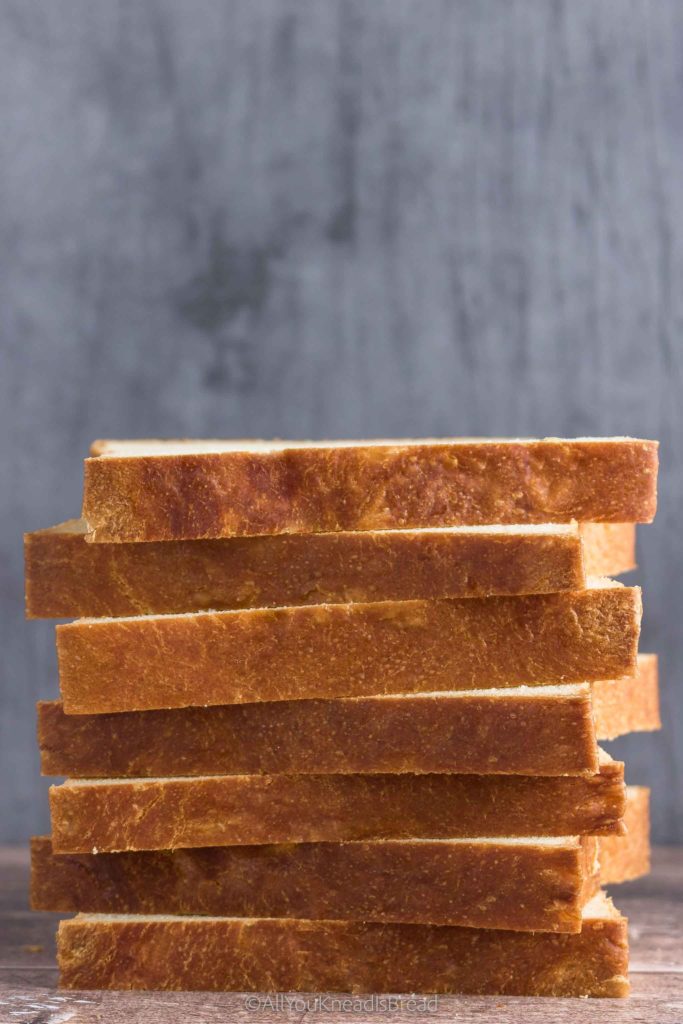
How to bake this sandwich whey bread
Whey has significant levels of galactose, a monosaccharide that’s also considered a reducing sugar. These types of sugars are the ones responsible for Maillard reactions. To the already happening Maillard reactions in bread, we’re adding more reducing sugars, thus your loaf will brown faster than usual. This will make a bit more difficult to test the doneness because the color can be misleading. You take the bread out of the oven when it’s still not fully baked, yet the outside is pretty dark.
For this, it’s better to test the temperature in the middle of the loaf. Once the temperature hits 96C, the bread is done! I have this thermometer and I am very happy, it’s fast and you can also put the probe at an angle, so you don’t burn yourself with the top side of the oven.
Baking with a lid
Here you have two options: you can bake the bread half the time with the lid on. When it starts browning remove the lid and continue baking until it’s done (by testing the inside temperature). Or you can bake with the lid on until it’s fully baked. If you remove the lid halfway, the loaf can get a slightly domed shape that will disappear after it cools down. However, there’s some risk for getting a weirdly shaped loaf. On the other hand, if you bake with a lid, the top might get a concave shape after it cools down.
This all pure aesthetics, it’s not a big deal and it’s not going to affect the flavor or fluffiness of the bread. But sometimes we just want that perfect square toast. I find it easier to bake with the lid at all times, and then I have my process to cool this whey bread down to keep the square shape.
Baking without a lid
If you don’t have the Pullman-style loaf pan, your bread will have a lovely round top and you won’t have to worry about losing the shape while it cools down.
How to cool down your whey bread
One little issue that I’ve encountered when making Pullman loaves is the concave shape the loaf gets after it cools down. It’s a bit hard to find the exact moment to take the Pullman loaf pan lid off. If you take it off too early, the loaf might have a convex shape (like a mountain), but if you take it out too late, it’ll have a concave shape (like a valley).
My strategy is to bake the bread with the lid on at all times and I cool it down upside down for the first 30 mins. First 10mins in the tin, and the rest 20 out of the tin (otherwise the steam will condense on the bread and leave it wet and soggy). If you’re up for the challenge, you can keep turning the loaf upside down every 20 minutes until it’s room temperature. It worked for me, but that’s not something I’ll do all the time. Mostly because I forget about the loaf after it’s baked 🙂
How to store this whey bread
The yudane helps a lot keeping this whey bread fluffy for a longer time. I’ve tested this recipe with and without yudane and there’s a big difference (it stays fluffier with yudane). I’ve kept this whey bread at room temperature as is (not in a bag) for 5 days, just keeping the open side on the plate so it doesn’t get extremely dry. The crumb did dry out over time, but the bread was totally edible and after putting a couple of slices on the toaster it was perfect. The fats (from butter and eggs) kind of seal the crust of this bread, keeping the moisture inside. So while the crust might dry, the crumb remains nice and soft.
Now, this was an experiment, I don’t recommend leaving the loaf as is on the kitchen counter. If you have a square plastic container, you can slice the loaf up and place the slices there. You can also keep it in a ziplock bag and slice it as you need. You can cut the slices and freeze them and then just pop them in the toaster for 1 or 2 cycles when you want a slice.
If you make homemade yogurt I encourage you to try adding whey to your loaves, especially enriched ones! I am stunned by its versatility and incredibly milky aroma! I’d go as far as to say that if you use whey, you might even be able to skip powdered milk in some recipes!
Frequently asked questions
If you follow me on Instagram you might have seen me playing around with this bread. And I received several questions while I was developing this recipe. I hope they can be useful for you too!
Can I use whole wheat flour to make this whey loaf?
Yes, you can, always keeping in mind that cereal bran will alter the dough a little. The more bran, the more liquid you will need and the less smooth your bread will be. I have this recipe for a whole wheat loaf that you might like to try using whey.
Can I use gluten-free flour?
I get this question quite often, and the answer is no. A gluten-free bread requires a lot more testing and different ingredients to make sure you can mimic the properties of the gluten proteins. So you can’t just substitute one flour for the other. If you have experience with gluten-free bread, then you can probably twitch some of your recipes to add whey.
Can I make my whey bread in a Dutch oven?
I haven’t tried it, but I don’t see why not. As long as you control the temperature and you don’t mind the shape of the bread. Still, keep an eye on the dough, because it’s possible it’ll rise more in the oven than a lean dough would, you don’t want to get the dough stuck in your dutch oven.
Can I use parchment paper in the loaf pan?
I don’t see why not! my Pullman loaf pan doesn’t need it, even if I don’t spray oil. But if you’ve had problems before, parchment paper won’t affect your bread.
Can I use oil instead of butter?
If we were talking about other recipes I might not recommend you to do so. Butter and oil behave differently and can lead to very different results. Even solid and melted butter behave differently (You can read about that in this brioche with sourdough discards recipe).
But for this recipe, butter is not the key ingredient so you can substitute it for oil. I have tried using olive oil and it also makes delicious bread!

Whey bread: Your new favorite loaf
This sandwich whey bread is super flavorful, soft, and perfect for sandwiches and toasts. It's also a great way to use your leftover whey!
Ingredients
Yudane
- 130 g bread flour **Check notes for the baker's % to scale down this recipe to a smaller loaf pan**
- 130 g boiling whey
Whey bread dough
- 260 g yudane
- 520 g bread flour
- 150-190 g whey * See notes
- 10 g active dry yeast
- 2 eggs
- 90 g sugar
- 12 g salt
- 80 g softened butter
Instructions
Yudane
-
Add 130g of bread flour to your bowl.
-
Heat a bit over 130g of whey and when it comes to a boil weigh 130g and quickly add it to the flour.
-
With a wooden spoon or with a stand mixer mix the flour and whey until it forms a sticky dough. If you're not ready to bake wrap it in plastic and keep it at room temperature until you're ready to start your bread.
Whey bread dough
-
Mix the room temperature whey, the yeast, and the eggs and let the mixture sit for 10 minutes.
-
Add the sugar to the egg mixture and give it a whisk.
-
In the bowl where you have your yudane add the egg mixture and break up the yudane a little bit.
-
Add flour and salt to the bowl where you have the yudane and the wet ingredients and mix everything until you don't have dry flour particles. Cover and let it sit for 20 minutes.
-
After 20 minutes start kneading, if the dough feels too stiff and you didn't add all the liquid whey, add a bit more. Once the dough starts coming together add the softened butter and continue kneading to incorporate it.
-
Knead until the dough becomes smooth and elastic. It shouldn't stick to your fingers and it should feel nice to the touch.
-
Place the dough in a lightly oiled container, cover it and let it ferment at room temperature for 2h or until it at least doubled in size.
-
deflate the dough gently and let it rest, covered, for 10 minutes.
-
Dust the dough and the counter lightly with some flour and with a rolling pin roll your dough into a rectangle slightly narrower than your loaf pan. Roll the dough into a log and place it in your oiled loaf pan.
-
Let the dough ferment a second time until it's 1-1.5 cm from the edges of the loaf pan (if baking with a lid), or until the dough is at most 2cm above the edges of the loaf pan (if baking without a lid). This should take about 1.5h at a room temperature of 74F/23C. Check the post for more detailed information about this.
-
Before the dough finishes fermenting preheat your oven at 350F/175C.
-
When the dough is ready bake at 350F/175C for 35-45minutes or until the inner center temperature reads at least 205F/96C (Time will depend on the oven).
-
Take the loaf out and let it cool down for 10 minutes in the pan before you remove it from it. If using a Pullman loaf pan cool it down with the lid on upside down for 10 minutes and another 20 minutes without the lid (Check the post for detailed information about the cooling process).
Recipe Notes
(For detailed instructions, explanations, and FAQ refer to the post)
* The amount of whey depends on how much your flour can absorb. My flour has 12.7% protein content and I can comfortably add 170-180g, with stronger flour (14% protein) I need 190g of whey.
**Baker’s Percentage:
Yudane Flour: 20%
Yudane Whey: 20%
Dough flour: 80%
Dough whey: 29.2%
Eggs: 15.4%
Sugar: 13.8%
Yeast: 1.5%
Salt: 1.8%
Butter: 12.3%
If you liked this recipe you might also like:
- This super easy kefir bread (video included!)
- This sourdough marble rye loaf, perfect for sandwiches
- These sourdough burger buns that don’t fall apart
- These delicious sourdough blueberry muffins
- These tasty brie sourdough buns
You can find me on Instagram, Facebook, and Pinterest, and you can also subscribe to my Youtube channel.
This post contains affiliate links and any sales made through such links will reward me a small commission – at no extra cost for you – that allows me to keep running this blog.
Happy Baking!
How to make sourdough burger buns

It’s officially cookout season! And we bakers know that’s time for some homemade burger buns. Today I’m showing you how to make sourdough burger buns that don’t fall apart. Tired of your hamburgers buns going soggy and the fixings slipping away? With these sourdough burger buns, you won’t have that problem again!
These hamburger buns have a velvety crumb with a strong exterior to hold your fixings, but they will still melt in your mouth. These buns are designed to last through your last bite! You can also cut them in two and freeze them so you always have sourdough burger buns available for an impromptu hamburger.
Use a ripe sourdough starter
I’ve tried making this recipe with different sourdough starter ratios, at different temperatures, etc. One of the most important things in this recipe is the starter. Some recipes are more forgiving than others and you can get away with a bit of a lazy starter. But these burger buns require you to use your starter at its peak of activity. You can learn more about this in this blog post,
What flour should I use for these sourdough burger buns?
I used King Arthur bread flour with 12.7% of protein. If you have different flour, just keep in mind that the absorption will be different. If your flour has less protein, it will need less liquid to achieve the same consistency. And if your flour has more protein it’ll need more liquid to achieve the same consistency. This is important for you to be able to customize the recipe to your flour and kitchen conditions.
How to prepare the dough
It’s slightly sticky, so that’s why you also need to knead the dough very well. When the gluten is fully developed, the dough is strong enough to pull itself and not leave bits everywhere it touches (like your hands!). Keep in mind that my flour is pretty strong; although you can use low protein flour, you will probably need to reduce the liquids (start with 10-15% less).

Mix everything together minus the butter. Once the dough can form a ball and it is not a shaggy mess, incorporate the butter and keep kneading. If necessary, let the dough rest for a few minutes every now and then so you don’t push the gluten too far. The process shouldn’t take you more than 1h (At the end of the post you will find a baking schedule so you can plan ahead).
I know many recipes call for 3-5 minutes of kneading time, but that’s not even close to fully develop the gluten, especially in enriched dough. So, take your time, and let the dough guide you. The only way to get the best quality in your baked goods is by having a properly developed gluten. That gives the dough enough structure to get a nice fluffy crumb, and enough strength so it doesn’t collapse and you end up with super dense buns.
A note about fermentation
Once the dough passes the windowpane test, place it in a lightly oiled container and let it ferment until the next morning. You can always cut the bulk fermentation and keep the dough in the fridge once it’s doubled. In this case, I’d probably cut the bulk fermentation shorter to avoid the dough from over-proofing in the fridge.

How to shape these sourdough burger buns
Once the bulk fermentation is over, lightly flour your counter and carefully deflate the dough. Make sure you get rid of large air pockets in the dough and divide it into as many buns as you’d like. I like to divide into 8 for a medium-small bun, but if you want larger hamburgers, divide the dough into just 6 or even 4 buns.
PRO TIP: If you think the dough is too sticky and you need lots of flour, oil your counter and your hands instead. That way you avoid the dough from sticking and drying out!
Take one piece of dough and flatten it with your fingers. Then start bringing the edges towards the center to make it into a ball shape. Then turn it upside down so the seam is touching your counter and roll it with your hand to finish shaping the ball and create some tension on the surface. You can use a bit of flour to avoid the dough from sticking to your hand or even some oil.
Do the same with each piece of dough, cover them with floured plastic wrap and let them rest for 15 minutes.
After 15 minutes if you see they are very flat roll them again with your hand to shape them back into a ball. If after 20 minutes they look still plump then transfer them into your baking tray. I find it’s very easy when you use a bench scraper, just slide it under the rolls and carefully place them on the tray.
Cover the buns and let them rest for 2h or until they are puffy. They don’t necessarily need to double in size, but they should feel puffy and if you touch them, the dough should spring back slowly.

How to bake these sourdough burger buns
When you think the buns are almost ready, preheat your oven at 375F/ 190C. Once the oven is preheated, use the leftover egg whites to brush the buns. Then sprinkle sesame seeds and off to the oven!
Bake the buns until they have a nice golden-brown color, if your oven doesn’t bake homogenously turn the tray 180 degrees halfway in the bake.
Once the buns are ready transfer them to a cooling rack and let them cool down for at least 30 mins to 1h. If you try to cut them while they’re hot you will destroy the crumb, it’ll get mushy because although the buns are out of the oven, the crumb is still cooking.
In the meanwhile, you can prepare your fixings, the patties… And once the buns are ready cut them in two and enjoy your hamburgers!
PRO TIP: If you want your buns to grow taller rather than spread flat on the tray, you can use these English muffin rings. Put the buns on the tray, butter the rings, and put them around each bun while they proof and until they’re half baked. You can take the rings off when the buns start getting a light golden color. The result will be buns with the exact same shape and very plump. Perfect for a Big Mac copycat!
Baking schedule for a 74F/23C room temperature
If you’re planning hamburgers for lunch my suggested schedule for an environment of 74F is the following
The day before:
- 10 pm: Mix the ingredients and knead the dough
- 11 pm: Start bulk fermentation
The next morning
- 7 or 8 am: deflate and shape
- 7:15 or 8:15 am: Proof
- 10:45 am: Preheat your oven
- 11:15 am: Bake the buns
- 11:50 am: Take the buns out of the oven and cool down before consuming them
- 12:30 pm: Enjoy!!
I’ve tried this recipe on hotter and colder days. At 74F/ 23C it took about 9-10h to rise, at 68F/ 20C it took 11-12h. The dough should at least double or almost double before you divide it. Plan accordingly to your schedule and how early you’re willing to get up the next morning 😉
Do these burger buns have yeast?
No, they do not. They’re made with a 100% sourdough starter. However, if for whatever reason your starter is not ready, or you find yourself with a lot of sourdough discards. You can absolutely turn these buns into “sourdough discards hamburger buns”. Add the same amount of starter, and 5g of active dry yeast. The procedure is the same, only the fermentation times will vary. Instead of starting in the evening, you will have to start in the morning of the same day you’re planning to eat them.
But what if I want to make them using yeast?
If you don’t have sourdough, you can just substitute it with flour and water and use just yeast. If you wanted to replicate a sourdough recipe but using yeast you can prepare the dough using a very little amount of yeast (maybe 1g or even less), but yeast is still much faster than sourdough, so I cannot assure you the dough won’t overproof if you leave it all night fermenting. You might need to experiment a bit to find out a schedule that works for you.
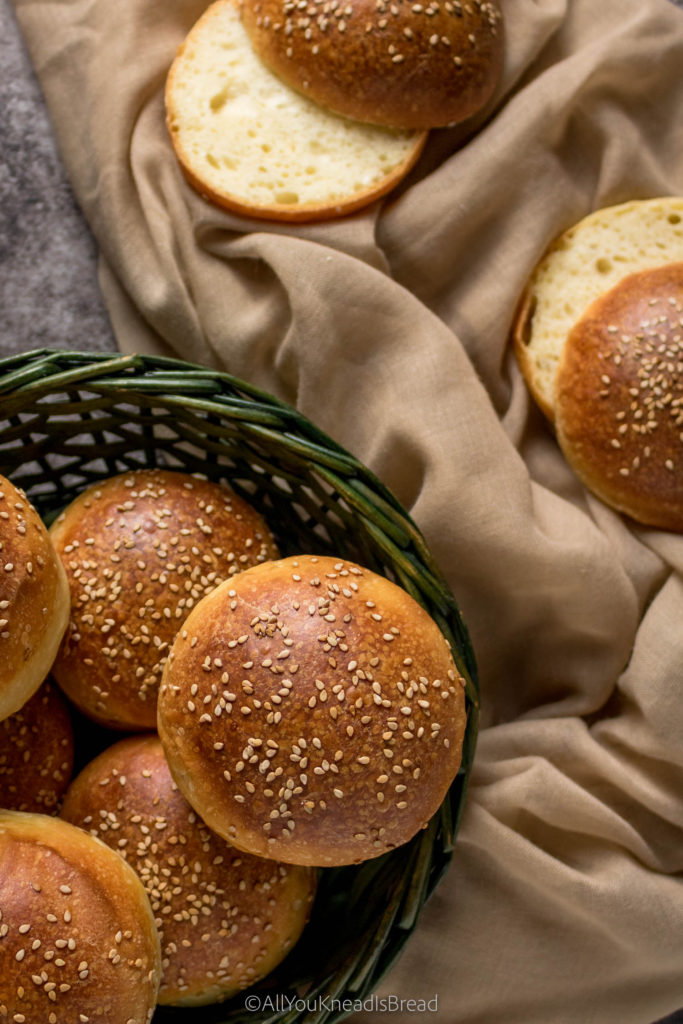
Can I make dairy-free sourdough burger buns?
Absolutely yes! I’ve actually made this recipe with soy milk and plant-based butter and they were amazing too.
If you don’t use soy milk, try to use plant-based milk that has a thicker consistency and it’s a bit creamy. If it’s too watery you will probably need to reduce the amount of total liquid. You can also use no milk and make these with water, but again, be careful. It’s already a slightly sticky dough.
Can I make vegan sourdough burger buns?
Yes again! You just need to do a bit of math. A large egg is about 50g and 1/3 of the egg is the yolk. Egg white is more liquidy and the yolk has some fat. You can substitute 2/3 of an egg with water/plant-based milk, and the other third you can substitute it with some type of fat (vegan butter, olive oil…). This recipe for vegan Hokkaido milk bread can also be shaped into buns and used for hamburgers, although it uses yeast.
Let me know if you make these delicious sourdough burger buns and I hope this year we can start enjoying cookouts and bbq gatherings with friends and family. Don’t forget to tag me on Instagram and use #allyoukneadisbread so I can see what you bake!
If you want to see more bakes you can find me on Instagram, Facebook, and Pinterest, and you can also subscribe to my Youtube channel.
Happy baking!
This post contains affiliate links and any sales made through such links will reward me a small commission – at no extra cost for you – that allows me to keep running this blog.

Perfect Sourdough Burges Buns
These sourdough hamburger buns have a velvety crumb and they melt in your mouth. Designed to last through your last bite!
Ingredients
- 355 g bread flour 12.7% protein
- 100 g active sourdough starter 100% hydration
- 40 g water
- 90 g milk
- 2 L eggs
- 1 L egg yolk
- 25 g sugar
- 8 g salt
- 50 g softened butter
- 1 tbsp sesame seeds (optional)
Instructions
-
Mix the eggs, yolk, water, milk, sugar, and starter in a large bowl (or stand mixer bowl)
-
Add the flour and salt to the wet ingredients and combine until you have a messy dough
-
Cover and let rest for 30 minutes (if your kitchen is too hot, let it rest in the fridge)
-
After 30 minutes start kneading the dough and once it becomes less sticky incorporate the butter
-
Continue kneading until the dough is very elastic and the gluten is properly developed. If necessary, let the dough rest for a few minutes once in a while
-
Shape the dough into a ball and place in a lightly oiled container until it doubles or almost doubles in size *See notes
-
When ready (if you followed my schedule, this step would be the next morning), carefully deflate the dough and divide in 8 equal pieces for medium-size buns, or 6 for larger buns
-
Shape each piece into a little ball and place them on your baking tray. For taller and exact shape buns you can use English muffins rings to proof and bake them
-
Cover the buns with lightly floured plastic wrap and let them rise until they're puffy and have grown in size (they don't necessarily need to double)
-
Preheat your oven a 375F/190C when the buns are almost ready (reduce the temperature a little if you have a convection oven)
-
Brush each bun with the leftover egg white and sprinkle with sesame seeds (optional)
-
Bake for 30-40 minutes or until the buns have a nice golden brown color. Time will vary depending on the oven **See notes
-
Once the buns are the color you like, remove them from the oven and let them cool down in a cooling rack. If you like them a bit more humid, let them cool down covered with a dry cotton cloth
Recipe Notes
* Please refer to the post for a baking schedule and approximate fermentation times
** If you used English muffin rings make sure to oil the inside, you can remove them when the buns are halfway baked