
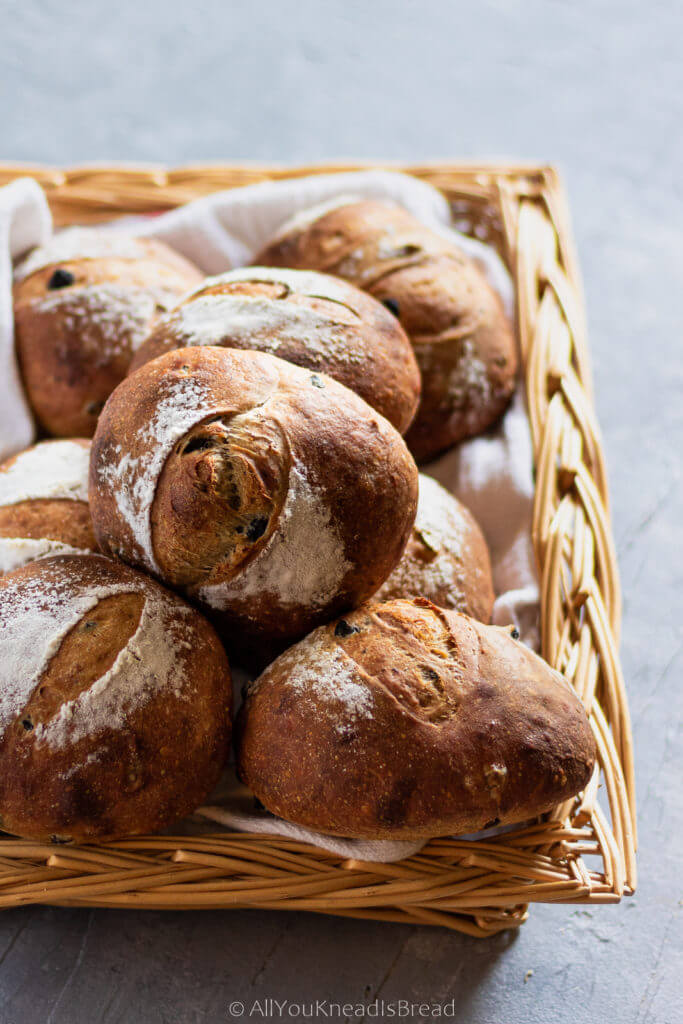
Hello friends! Today I bring my new favorite recipe: brie and olive sourdough rolls! Brie cheese and black olives balance each other perfectly and combine great with the aromas of sourdough. These rolls are pillowy and delicate and can keep fresh for several days.
Brie, olives, and buckwheat flour
Let’s talk a little about brie. It is a French soft cheese made of cow milk. It has a considerable amount of fat, so it melts easily while the rolls are baking and helps soften the structure of the bread. As a result, these brie and olive sourdough rolls turn out unbelievably fluffy and full of flavor.
I like black olives because they’re not as tangy as green or kalamata, and I think the flavor goes great with cheese in general, but brie in particular; however, you can experiment with other types of olives and try other types of cheese if you don’t like or don’t have access to brie. Cheese with at least 25% fat content will work better because the key of these rolls is in the fat melting.

The trick is using a strong enough flour that will hold the dough and all fillings and slightly weaken the gluten with flour that doesn’t have gluten. In this case, I used King Arthur AP flour (it is strong for an all-purpose flour, it has 11.7% of protein), and buckwheat flour. This combination not only gets the gluten where I want it to be, but it also enhances the flavor of the bread so it doesn’t get lost in the cheese and olive aromas. I used this buckwheat flour but I have also tried this one and I liked the results as well.
If you don’t have buckwheat, you can use other flours that have less or none gluten (whole wheat, teff…). Just keep in mind that you might need to change the amount of water on the recipe and the result could be a bit different.
About the dough
This dough isn’t very hydrated, so when it comes to incorporate the olives and the brie you will need to let it rest and stretch it little by little. Make sure you pierce large air pockets that you might catch while stretching the dough. These sourdough rolls shouldn’t have a dramatic open crumb, you should aim for smaller air pockets and pillowy structure.
How to incorporate the brie and olives
An easy way to add the brie and olives is to stretch the dough, add the chunks of cheese and olives and then fold the dough and shape it into a ball. However, when we fold the dough we also trap a lot of air that will affect the structure of our crumb, and thus, the dough doesn’t feel like it has naturally incorporated the fillings. It’d feel like it has layers and the chunks of cheese or olives will come out of the dough easily.
To avoid this you just need to 1) Pierce large air pockets, 2) Knead the dough a little after adding the chunks and let it rest for 10-20 minutes, and 3) Knead again for a couple of minutes. Doing this will help you distribute the filling better and have an elastic dough.
This kneading is not meant to strengthen the gluten, but to help incorporate the ingredients. The gluten should be well developed before we add the fillings.

The fermentation
Sourdough always takes more time to ferment, but if you live in a pretty warm and humid place, pay attention to the dough. Let it ferment until you start seeing signs of fermentation (small bubbles in the bottom, feels puffy, has grown a little…), but don’t wait until it doubles or the gluten can be compromised and you’ll end up with a super sticky dough and flat rolls.
Once it’s clear that there’s activity, deflate the dough a little and put it in the fridge. It can stay there overnight.
Since you’re not going to proof the dough in a banneton, you can keep the dough in the fridge before shaping. Then, once shaped, you won’t need too much time before the rolls go into the oven!
Get your sourdough starter ready
Sourdough can be a bit tricky, but it all boils down to science! If you want to know more about the science of your sourdough starter, check this post where I explain all the phases your starter goes through and how you can apply that knowledge into your baking.
Knowing the science of your starter will help you adapt your baking schedule depending on the weather conditions. This summer is especially challenging here in North Carolina, but understanding the bacterial behavior helped a lot!
Final proof
The final proof is easy and somewhat fast. Take the dough out of the fridge, divide it into 8 equal pieces and shape them into small dough balls.
Let them proof in the tray you’ll use to bake them while you preheat the oven at 400F. No more than 1h should be fine if your starter is healthy and strong.
Before putting them int he oven score the surface of the rolls and off they go! In 20 minutes approx (depends on your oven), you’ll have these delicious brie and olive sourdough rolls!

How to create steam in the oven
Steam is very important when you bake bread, specially rustic style. When I bake loaves, I use my dutch oven and it usually is enough to allow the bread to open up. In this case, I use an old baking tray that I keep in the oven as it preheats, and when I load the rolls I add 1 cup of boiling water into that tray and immediately close the oven door.
Don’t open the door for the first 10 minutes of baking, some of the steam inevitably will scape but it’s better to minimize it.
Guaranteed deliciousness!
Since these sourdough rolls turn out so soft and airy you can use them to make sandwiches, sliders… And worry not! Because they won’t fall apart or crumble when you’re trying to take a bite or spreading butter on it😊
The rolls last fresh several days, but you can put them in a ziplock bag and freeze them once they’ve cooled down. You can keep them frozen for a few weeks.
If you decide to freeze de rolls, take them out of the freezer and let them chill for an hour or so, then bake them at 300F until they’re nice and hot inside. However, if you only need one or two rolls, why would turn the oven on? What I like to do in this case is slice the rolls before freezing them and when I want to make a sandwich, I just pop them in the toaster! It’s faster and your power bill will thank you 😉
Let me know if you make these rolls or any other recipe! I love to see what you bake and what you experiment with. You can use #allyoukneadisbread on Instagram.
You can find me on Instagram, Facebook, and Pinterest, and you can also subscribe to my Youtube channel.
Other sourdough recipes
If you’re looking for some sourdough inspiration check these other recipes:
Tomato and rosemary sourdough bread
Gorgonzola and apple sourdough bread (video included!)
Sourdough donuts with rose cream filling
Sourdough chocolate banana bread
Happy baking!
This post contains affiliate links and any sales made through such links will reward me a small commission – at no extra cost for you – that allows me to keep running this blog.

Easy brie and olive sourdough rolls
Fantastic sourdough rolls with a twist. Your new favorite!
Ingredients
- 385 g strong all purpose flour (11.7% protein)
- 65 g buckwheat flour (or similar)
- 70 g active sourdough starter
- 7 g salt
- 80 g black olives (sliced)
- 100 g brie cheese (with or without the rind and cut into 0.5 in/ 1 cm pieces)
- 270 g water (room temperature)
Instructions
-
Dissolve the starter in the water and add the flours and salt. Let it rest, covered, 20 minutes
-
Add the salt and start kneading. Knead until the dough feels elastic, it's smooth and doesn't stick to your fingers. If you need to let it rest a few minutes, do so.
-
After kneading, and once the dough is well developed, let it rest 30-60 minutes in a lightly oiled bowl
-
Oil you rcounter lightly, just enough so the dough doesn't stick and carefully try to stretch the dough on the counter into a 18×18 in / 45×45 cm square. It doesn't have to be exact.
-
Distribute the olives and cheese evenly and carefully fold the dough and shape it into a ball. Pierce large air pockets that might've been trapped during the process. Let the dough rest 20 minutes.
-
Knead the dough a little to make sure the filling is well distributed and has been incorporated into the dough (so they won't come out). If you find it easier do some stretch and folds do so. Just make sure the add-ons don't come out easily.
-
Let the dough ferment until it feels puffy, it has grown a little and you see obvious signs of fermentation. Mine, at 74F took about 4 hours. Then carefully deflate the dough and plut it in the fridge over night.
-
The next morning turn the oven on at 400F with an empty pan in the bottom rack. If you have a pizza stone, place it in the middle rack and preheat the oven for 30-60 minutes (depends on your oven, if you have a stone etc.)
-
While the oven preheats, divide the dough into 8 equal pieces and shape them into balls. You can do a pre-shape and final shape, but since they're not going to proof for long, you might not need to preshape them.
-
Place the rolls in the baking tray and once the oven is hot score them with a blade or sharp knife and put the baking tray in the middle rack (or on top of the hot stone if you have one). Add 1 cup of boiling water to the empty tray in the bottom rack and close the oven door immediately.
-
Bake the rolls with steam, for at least 10 minutes and another 10 minutes without steam or a few more minutes if they're not golden brown yet.
-
Let the rolls cool down for at least 30 minutes to allow the crumb to set, and dig in!