
When you think of sourdough bread, you may just think of a rustic loaf, full of tangy flavors and a chewy, airy crumb. But what if I told you that you could take this classic favorite to the next level by just adding chocolate? That’s right, today we are making chocolate sourdough bread!

This recipe takes everything you love about sourdough and adds melty pockets of rich, semi-sweet chocolate, creating a bread that’s perfect for a special breakfast, a sweet snack, or even dessert. Because yes, chocolate belongs in breakfast 😉 In this post, I’ll walk you through the process of making this chocolate sourdough bread and explain some of the science behind what makes it so special.
Quick overview of this chocolate sourdough
You might be wondering why we’re adding chocolate to something as traditionally savory as sourdough. While chocolate might seem like an odd addition at first or something that belongs in a brioche dough, it’s actually a fantastic pairing for the natural tang of sourdough because their flavors balance each other out.
Unlike sweet breads which are loaded with sugar, this chocolate sourdough is only lightly sweetened (and the addition of sugar is completely optional) making it a great choice for those who want to enjoy a treat without the extra sugar.
Acidity and chocolate in sourdough
Chocolate, and especially dark chocolate, has a slightly bitter and astringent flavor, and typically, the best way to balance these flavors is with an acid. Sourdough fermentation provides those acids to counterbalance the chocolate. This chocolate sourdough loaf is simply delicious!
About the ingredients of this chocolate sourdough
Bread flour vs whole wheat
For this recipe, you’ll want to stick to bread flour. The higher protein content helps develop a stronger gluten network, and therefore better structure. This structure is necessary to hold the weight of the chocolate chunks. However, if you want more fiber in your bread, you can substitute some bread flour with whole wheat flour. This will give your bread a deeper flavor and enhance its nutritional profile. You will need extra water to help the dough become more elastic.
Don’t panic if you add a lot of whole wheat flour and the dough is not very stretchy, it’s normal. This happens when wheat bran is present, and it’s one of the quintessential challenges for bread scientists.
If you only have all-purpose flour, you can use it, but it’s important to adjust the water of the recipe according to your flour.
Chocolate vs. cocoa powder
To get the best chocolate sourdough bread, the type of chocolate you choose is key. I prefer to use semi-sweet or dark chocolate chips for a perfect balance. Semi-sweet chocolate chips contain a higher amount of cocoa, which means they’re not too sweet and still have a deep chocolate flavor. If you prefer a more chocolatey bread, you can use dark chocolate instead.
You can use your favorite chocolate bar, chop it into chunks of different sizes, or use chocolate chips. One of the great things about chocolate chips is that they hold their shape during baking. When the chips are heated they create little pockets of melty chocolate within the bread.
For this loaf, I used three different sizes of chocolate chips for a more interesting mouthfeel. You can use the ones you typically buy. I just happened to have different sizes because I had been using them for other things.
I wouldn’t recommend white chocolate because it tends to meld and sometimes burn, leaving the pockets empty and not that much flavor. And although tempting, I wouldn’t add cocoa powder either. Cocoa powder can change the flavor by turning the bread unpleasantly sour so the chocolate aroma is lost in the sourness, and it can also affect the dough by absorbing too much moisture.

Sourdough Starter
Your sourdough starter is probably the most important part of this bread; or any sourdough bread. An active and well-maintained starter will give your dough the fermentative power it needs and contribute to the aromas and flavors of the loaf. If you’ve baked sourdough before, you know that the starter’s health also plays a huge role in determining the final product’s texture.
Make sure your starter is well-fed and active before starting this recipe, as this will ensure a good rise and fermentation. If you want to know more about starters I have a series of articles about them. This one is about the science of your sourdough starter, this one is about feedings, and this one is all about understanding feeding ratios.
The long fermentation process helps develop volatile products that give sourdough its interesting flavor profile, I like my chocolate sourdough bread to have a relatively normal tang because I’m not going to eat the whole loaf in one day and it typically gets a bit sourer as the days go by. But if you prefer a very tangy loaf, then you will have to play with the fermentation times to adapt this loaf to your taste.
Adding sugar to chocolate sourdough bread
Adding sweeteners to your chocolate sourdough is optional. In this recipe, the chocolate chips provide enough sweetness for most people, but if you want a slightly sweeter loaf, you can add 1 or 2 tablespoons of the sweetener of your choice when you mix the ingredients. I prefer to dissolve sugar in the water; if you’re planning to develop the dough using stretch and folds, dissolving the sweetener in the water ensures a more homogeneous distribution.
Fats
Traditional sourdough bread doesn’t usually include any added fat and I wouldn’t recommend adding any on this loaf either. In this case, the chocolate has fat, and part of it will be absorbed into the dough. Your loaf might turn out a bit softer than plain sourdough bread thanks to this, and adding even more might change the consistency of the dough.
Other aromatics that can enhance the chocolate
This chocolate sourdough is perfect to try some interesting flavors. This time, I added a bit of cinnamon because I had just made an Aztec hot chocolate ice cream with cinnamon that blew my mind, but this sourdough bread is a white canvas and you can do whatever you want! Here are some ideas:
- Toasted nuts: all nuts go well with chocolate, but my favorites are hazelnuts (hello Nutella!), macadamia nuts, and pecans.
- Espresso powder: coffee can enhance the chocolate flavor when using cocoa powder, but when using chunks of chocolate you can get both flavors and make a spectacular mocha bread! This espresso powder is specifically for baking and I highly recommend it!
- Amarena cherries or other sweet and tart fruits: the combination of chocolate and amarena cherries is incredible. But if you don’t have access to them other tart and juicy fruits can work just fine. Remember what I said about chocolate and acidity?
- Spices: allspice, cardamom, chili powder, ginger, clove… warming spices usually pair very well with chocolate.
- Fruits: candied citrus, raisins, dry apricots, dry coconut, dry berries… And if you are feeling extra adventurous, you can semi-rehydrate the dry fruits with a touch of brandy or the liquor of your choice. Every bite of this chocolate sourdough bread will pack a punch!
When to add the chocolate to the dough
Unlike cocoa powder, which would fully blend into the dough and affect its water absorption, chocolate maintains its structure during baking. This means you get those lovely pockets of melted chocolate dispersed throughout the bread. This is also thanks to the fat in the chocolate, which melts and is partially absorbed by the dough, making the crumb very soft and velvety.
However, adding a solid ingredient like chocolate also adds weight to the dough, which can affect its rise. To counteract this, you’ll want to ensure that your dough is well-hydrated and strong enough to support the additional ingredients. And how do we do that? By kneading! You can use any technique, just make sure the gluten network is properly developed. And if you only use folds, you might want to add a couple extra more.
Another consideration is the timing of when you add the chocolate chips. If you add them too early, they can melt a bit or partially dissolve. And it might be difficult to distribute them evenly if you add them too late. The best time to add the chocolate chips is during one of the early folding stages.

Bulk fermentation and proofing
After developing the loaf the whole bulk fermentation took about 6h at 74F/23C. I didn’t see a change in the fermentation time, I don’t think the chocolate pieces affected it.
Since my baby was born, I’ve been trying to find the best schedule for my sourdough loaves. So far lunchtime seems to be the best time to mix the dough and knead it. I don’t have much time to do stretch and folds, and I need to make sure I will have enough time to shape and rest the dough before the fridge. So the bulk fermentation for this loaf happened in the afternoon and proofing happened overnight.
If you prefer a very tangy loaf, you can extend the bulk for a few hours. Try to start earlier in the day, and extend the proofing for as long as you can the next day.
Baking your chocolate sourdough bread
Preheat your oven to 450°F (235°C) and place a Dutch oven inside to heat up. When the oven is ready, carefully transfer the dough into the preheated Dutch oven. Bake for 20 minutes with the lid on, then remove the lid and bake for an additional 20-25 minutes, or until the crust is golden brown.
I have recently changed my Dutch oven for THIS ONE. I used to use a combo cooker upside-down but removing the lid was always challenging when you have the oven mitts. In fact, once it slipped and fell on the floor when it was hot and it was very difficult to pick it up. My floor didn’t burn, but you can see a slight mark when the sun shines through the window. Ever since that happened I panic a little when I bake but with this Krustic Dutch oven baking is so much easier!
Cool it before you dig it!
If you have been following for a while you know I’m not a fan of cutting the bread when it’s still hot because the crumb is still finishing outside the oven. And this still applies to this loaf with the particularity that the chocolate might be very hot and runny and you could get burnt. Wait a little before cutting it open, once it’s warm to the touch, you can enjoy this delicious chocolate sourdough!
Flavor Pairing Ideas
Somehow I always think that I should honor a good bread by finding a special way to eat it. It’s a small ritual, but it helps me enjoy my bakes to the fullest. Here is how you can pair this chocolate sourdough:
- Toasted with salted butter: for a delightful breakfast toast, slather some salted butter when the toast is still hot so it can melt and enjoy one of the most beautiful bites!
- Tahini and honey: this is a feast of flavors in your mouth! Sweet, savory, and bitter elements combined to perfection!
- Chocolate sauce: I have nothing else to add, maybe a good cup of tea!
FAQs about this chocolate sourdough bread
Can I use milk chocolate chips instead of dark chocolate?
Yes! Milk chocolate will create a sweeter bread with a creamier texture. However, I recommend using semi-sweet or dark chocolate for a better balance of flavors and textures.
How do I prevent the chocolate chips from burning?
If you’re concerned about the chocolate chips burning on the surface of the loaf, you can lightly tuck them inside the dough during shaping. You can also cover the bread with aluminum foil during the last 10 minutes of baking.
Final thoughts on this chocolate sourdough
Chocolate sourdough bread is a very interesting variation of a classic that brings together the best of both worlds. It’s indulgent without being overly sweet, and it maintains the heartiness and complexity that sourdough bakers love. The next time you bake a sourdough loaf, consider adding chocolate for a special treat that’s sure to impress. And remember, this recipe is endlessly customizable; experiment with different types of inclusions and spices like nuts, dried fruit, or cinnamon and make it your own.
Move, cookies and milk, chocolate sourdough, and milk is the next favorite thing!
Happy baking!
If you make any of my recipes let me know what you think! As always you can find me on Instagram, Pinterest, and Facebook. I also have a few videos up on my YouTube channel.
Starting on breadmaking but don’t know where to start? Check my Amazon store to see my favorite and affordable utensils you will need. You can make the best bread with simple and inexpensive tools!
(This post contains affiliate links, if you purchase something from these links I will make a small commission that helps me run this blog, but you will not be charged any extra money 😉 )

Ultimate chocolate sourdough bread
A luxurious twist on traditional sourdough that will make every bite an explosion of flavors.
Ingredients
- 360 g bread flour
- 40 g whole wheat flour
- 80 g active sourdough starter
- 300 g water
- 8 g salt
- 1 tbsp sweetener of choice optional
- 100 g semi-sweet or dark chocolate chips
- ½ tsp ground cinnamon or spices of choice optional
Instructions
-
In a large mixing bowl, combine water, sourdough starter, salt, and sugar (if using), and stir until dissolved.
-
Add the flour and spices (if using any) and mix until there is no dry flour. Cover and let the dough rest for 20-30 minutes.
-
Knead the dough using the slap-and-fold method for a few minutes, then let it rest for 5-10 minutes. Repeat this process a few more times.
-
Transfer the dough back to the mixing bowl and let it rest for 20 minutes.
-
Add the chocolate chips, gently incorporating them during the first set of folds.
-
Once the dough is fully developed and the chips are evenly distributed, cover and let it ferment at room temperature until it rises about 1.5x in size and feels puffy and airy (this took about 6 hours at 74°F/23°C).
-
Once the bulk fermentation is complete, gently pre-shape the dough into a round or oval loaf and let it rest for 20 minutes. Then, shape it one final time and place it in a proofing basket.
-
Cover and refrigerate for 8-12 hours.
-
When ready to bake, preheat your oven to 450°F (230°C) and heat a Dutch oven inside. Carefully transfer the dough into the preheated Dutch oven. Bake for 20 minutes with the lid on, then remove the lid and bake for an additional 20-25 minutes, or until the crust is golden brown. If you prefer a thicker crust, remove the lid after 10 minutes.
-
Let the bread cool completely on a wire rack before slicing. Enjoy!
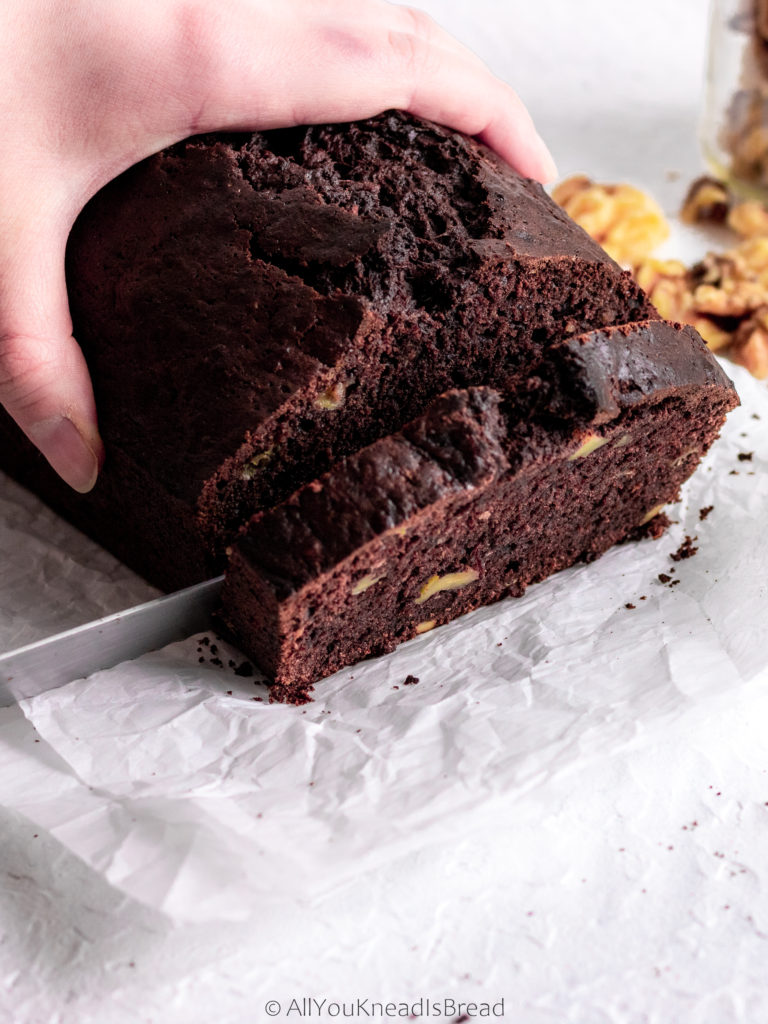
How to make sourdough chocolate banana bread

A year ago I was writing that dissertation, I was stressed, hypersensitive, anxious… Sometimes I’d be happy it’d soon be over, and sometimes I’d feel nostalgic for the very same reason. A year has passed and I’m just starting to rebuild myself and enjoy my guilt-free life… With this sourdough chocolate banana bread! That’s right! It’s all about using sourdough discards!
Using sourdough discards in your baking
Learning the science of bread is one of the reasons I started this blog. Because I find breadmaking an incredibly endearing process and yet so misunderstood. There are different methods to take care of your sourdough starter; some people generate discards, others don’t. I never throw away the discards, that’s sourdough that can be used on other things!! It’s pre-fermented flour that can bring flavor to yeast bakes, like this brioche recipe with sourdough discards. It also helps increase the shelf life of baked products by slowing down the staling process and controlling the pH a bit. This way spoilage microorganisms find it harder to grow on the food.
This year I also want to start implementing a new approach when it comes to food: ZERO WASTE. I know many people generate a considerable amount of sourdough discards. And I know using sourdough discards sounds like a crazy idea for many. But let me tell you.. once you make this sourdough chocolate banana bread with sourdough discards, you will be converted forever!!!
So today I inaugurate a new type of recipe: SOURDOUGH DISCARDS
I’ll upload different recipes using sourdough discards so you don’t just throw them away. Recipes with that extra kick of healthiness that only a sourdough starter can provide. As always, all recipes will be tested to ensure the best results!
To inaugurate this new batch of recipes I wanted to make something special. I’ve developed this sourdough chocolate banana bread that’s going to make you fall in love with it!
It’s moist but not too dense. It’s spongy, full of flavors, a nice chocolate kick that doesn’t overtake the banana taste. And it lasts fresh for days even if you don’t keep it in an airtight container! (You didn’t think that sourdough could only keep regular bread fresh for a longer time, did you?)
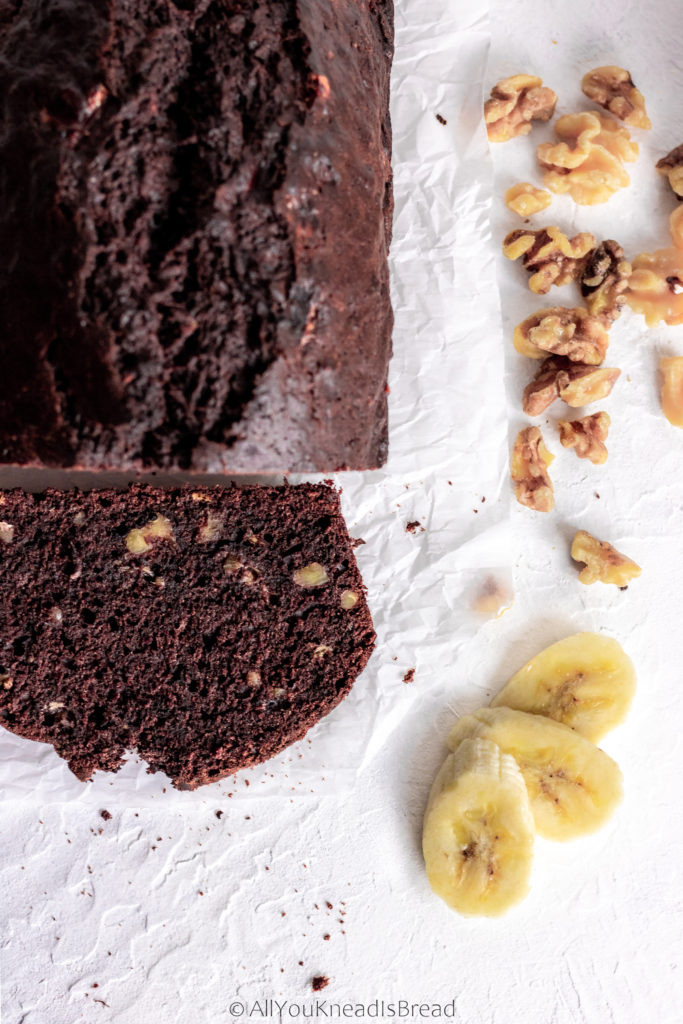
I did not add chocolate chips of any kind to this bread, just walnuts. Because I wanted to taste the banana. But if you prefer a more chocolatey flavor, customize those extras to your taste buds.
About this sourdough chocolate banana bread
It works best with very ripe bananas. Those brown mushy ones? Yeah, those!
If you’re not ready to bake banana bread but your bananas are getting too ripe to eat, just peel them, freeze them and use them whenever you’re ready! Just make sure you drain the water after they thaw. I think frozen bananas are the best for banana bread, they keep the moisture much better and they also enhance the flavor of the bread.
I collected the sourdough discards throughout 3 or 4 days of consecutive feedings and kept it in the fridge until ready to bake.

What if I have old sourdough discards?
I have tested this recipe with discards that were several weeks old. The only difference in flavor is that the chocolate banana bread was less sweet. Which makes sense, because the discards have been acidifying and part of the sugar is used to neutralize those acids.
So, depending on your taste buds, you may want to adapt the sugar. Although, this recipe has a considerable amount of it. But like always, you have the idea here, then you can customize it to your liking! 🙂
How long does it take to bake?
The baking time depends on your oven. Start taking a look at the bread after 50-55 minutes. The best way to know if your banana bread is ready is by inserting a toothpick (or a thin skewer) all the way down in the middle part of the loaf (that’s the part that takes the longest to cook). If it comes out clean, you’re good to go!
Don’t overbake this sourdough chocolate banana bread, you want it moist, not too dry, once the toothpick comes out clean, it’s ready!
Let me know if you make this chocolate banana bread using your sourdough discards and tag me on Instagram or Facebook so I can see your creations! And don’t forget to subscribe to my Youtube channel too, where once in a while I upload videos for some of my recipes.
Enjoy!

Sourdough chocolate banana bread
Ingredients
- 220 g all-purpose flour
- 40 g unsweetened dark cocoa powder
- 135 g sourdough starter discards
- 180 g brown sugar
- 2 eggs
- 115 g vegetable oil
- 3 very ripe bananas
- 1 tsp baking powder
- 1/4 tsp baking soda
- 1/4 tsp salt
- 1 tsp vanilla extract
- 1 cup chopped walnuts (optional and customizable)
Instructions
- Preheat your oven at 350F
- Grease a 9×5 in mold (or line it with parchment paper if you prefer)
- In a large bowl, combine all dry ingredients (flour, cocoa powder, salt, baking powder, and baking soda) and make sure the baking powder and baking soda don't have any lumps.
- In a smaller bowl whisk the eggs, add the vegetable oil and vanilla extract and combine until the eggs get a light color. Then add the brown sugar and mix for a couple of minutes.
- Add the sourdough starter and stir until it breaks down and it's incorporated (you might see some strands, it's ok, the starter had some gluten developed)
- Mash the bananas, add them to the egg mixture and combine everythng well
- With a spatula, lightly fold the wet ingredients into the dry ones
- Add the chopped walnuts and stir just until they're combined
- pour the batter into your mold and bake for 60 minutes or until a toothpick inserted comes out clean (time might vary depending on your oven temperature)
Cinnamon rolls with lievito madre discards
Hello everyone!
Today I bring something delicious! If you’ve been following me on Instagram or Facebook, you already know I’ve been experimenting with lievito madre, and I even made panettone with it! 🙂

Lievito madre is the stiff sourdough starter used by Italian bakers to make panettones the artisanal way. This method requires a lot of flour and a lot of refreshments during the first 15 days, and while the first-week discards are not suitable for baking, the rest are. Especially the 3 discards from the 3 preparatory refreshments before making panettone.
If you want to learn how to make your own lievito madre check this post!
Every time I did a refreshment, I had 150-200 g of lievito madre that I threw away. On day 9 or 10 of the process, I made a loaf of bread and it turned out great, so the next day I used the discards to make challah and it turned out great too. The taste was amazing, and it just had a pleasant hint of sourness.
Sourness in enriched dough has been my pet peeve and the reason I usually use commercial yeast. I can’t stand a bread that’s supposed to be sweet and yet the only thing you taste is a strong acidic flavor. I like that on country loaves, but not on brioche or a croissant.
That’s the whole point of working with lievito madre (either soaked in water or tied up in a cloth). In the soaked in water method, part of the acid is released in the water. Don’t forget that this sourdough starter is used in panettone, and real Italian panettones are not acidic at all. You shouldn’t be able to tell that the panettone was made with sourdough.
Baking with lievito madre
Working with lievito madre is addictive, seriously! I don’t even care how much time I’ve invested in creating it, or how much flour I’ve used. I can tell how differently the dough behaves, the different aromas compared to my regular sourdough starter, etc.
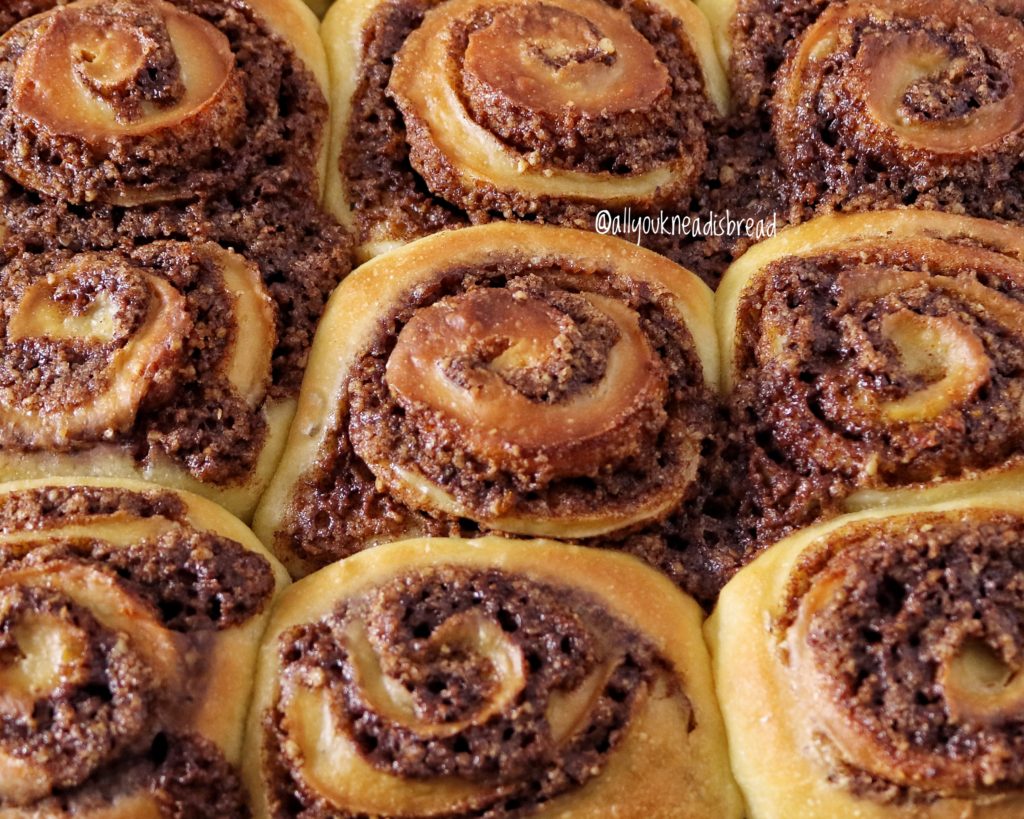
Based on the amazing flavor and incredible texture of the challah I baked, I decided to experiment a bit more and make cinnamon rolls. Because I have yet to find a recipe that doesn’t turn out into super dry rolls.
This recipe doesn’t have frosting because I wanted to taste the bread, the aromas from the lievito madre and how they combined with the ingredients on the recipe.
I did tweak the recipe a bit and I used orange syrup and orange blossom water in the dough, the filling has ground walnuts, ground cinnamon, and orange zest, and the icing has orange juice instead of milk or water.
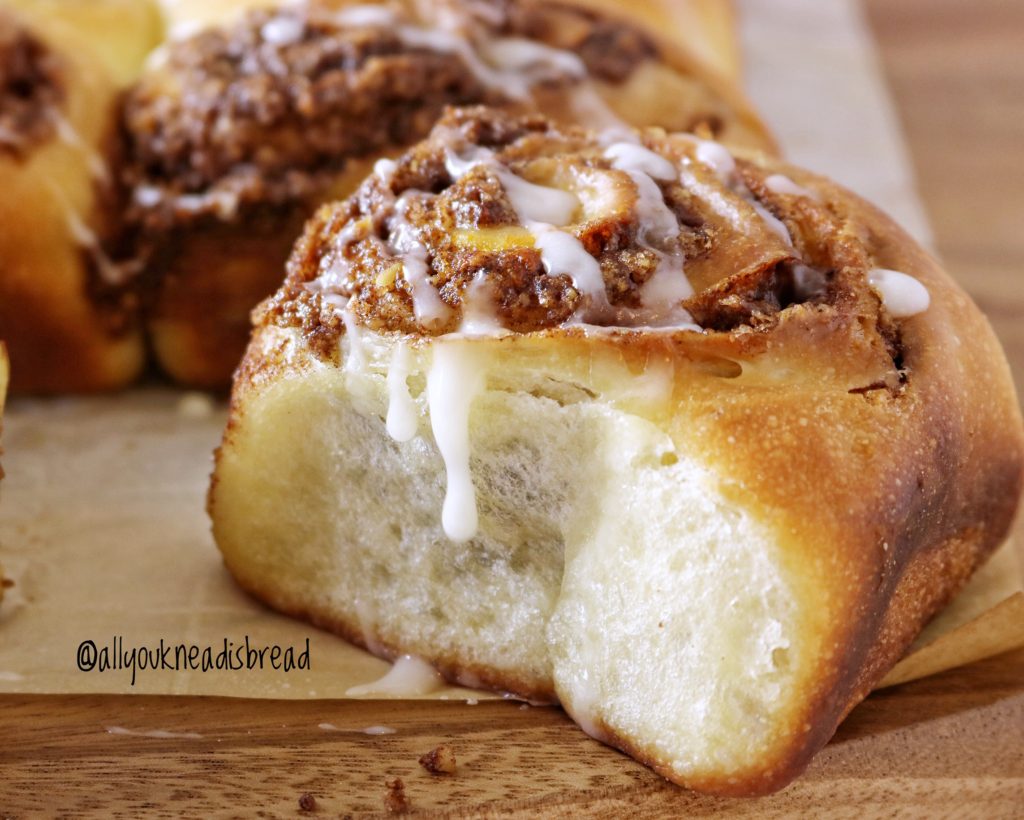
The result was amazing, the lievito madre helped to balance the aromas of the dough and significantly improved the texture of the rolls, they were soft and chewy and delicious! Even though I used lievito madre that had never been “purified” before (by doing a bagnetto, a technique to reduce the acidity of the dough when making panettone with lievito madre), and the dough fermented for 8h at room temperature and another 8 in the fridge, the rolls tuned out delicious with a pleasant hint of sourness, you could tell they were made with sourdough but the flavor was great.
I think the texture of the dough was also different, it was more forgiving, and I could develop the gluten with a much gentle kneading that using levain or commercial yeast.
Let’s get into the recipe!
After draining, squeezing and using part of the lievito madre to do the refreshment, take the discards, weight how much you need and cut it into small pieces (half an inch or so) so they can be absorbed into the dough faster.
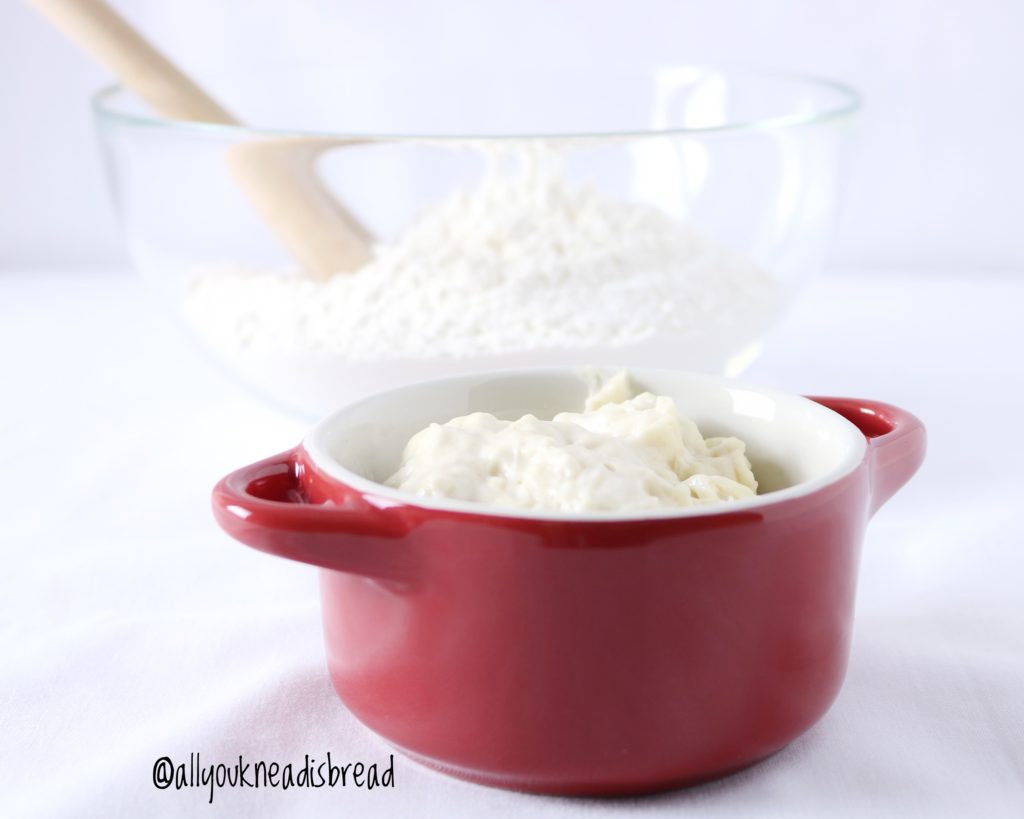
In your stand mixer bowl, add the wet ingredients and combine very well, then add the flour and the lievito madre in pieces.
Knead until the dough gets some elasticity and then add the softened butter. continue kneading until you have a perfect gluten development. You will have to stop a few times and let the dough rest for some minutes. You can check this post to learn how to knead enriched dough.
Once the dough is ready, shape it into a ball and place it in a lightly oiled container. Cover it and let it ferment at room temperature until it doubles in size. Mine took about 8h (the milk and the egg were cold). Place the dough in the fridge and let it ferment another 8h (I left it in the fridge overnight).
If you have enough time, you don’t have to leave the dough in the fridge overnight, although I do recommend you to let the dough chill for 1h before you shape the rolls, because this dough is stikier than the regular cinammon roll dough.
The next day, take the dough out of the fridge, deflate it very well and let it rest 10 mins before shaping.
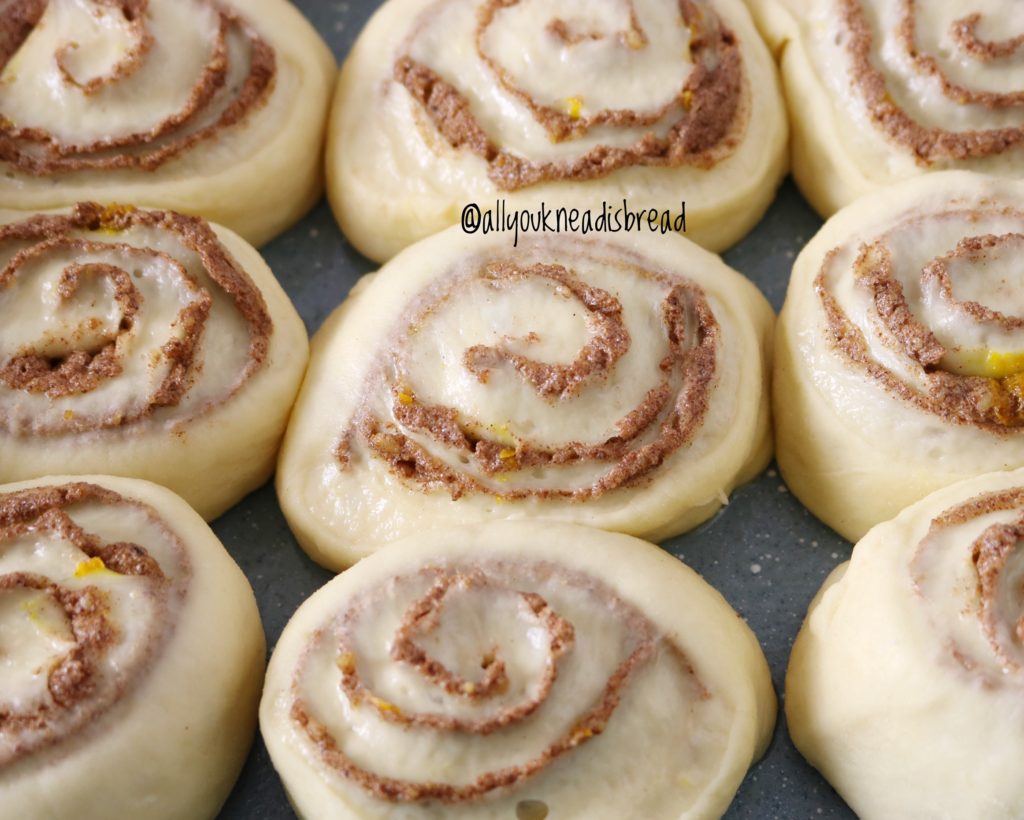
Roll the dough into a 35x45cm rectangle, spread the filling and starting from the longer side, roll the dough onto itself to make a log. Seal the log and cut it into 9-12 pieces.
Place the rolls into a lightly oiled 9x9in square pan and let them ferment, covered, until they touch each other.
Before they finish proofing, turn your oven on at 350F.
When ready, bake for 30 mins or until the rolls are golden brown. You can brush them with egg wash if you prefer.
Prepare the icing and wait until the rolls cool down a little before you drizzle the icing.
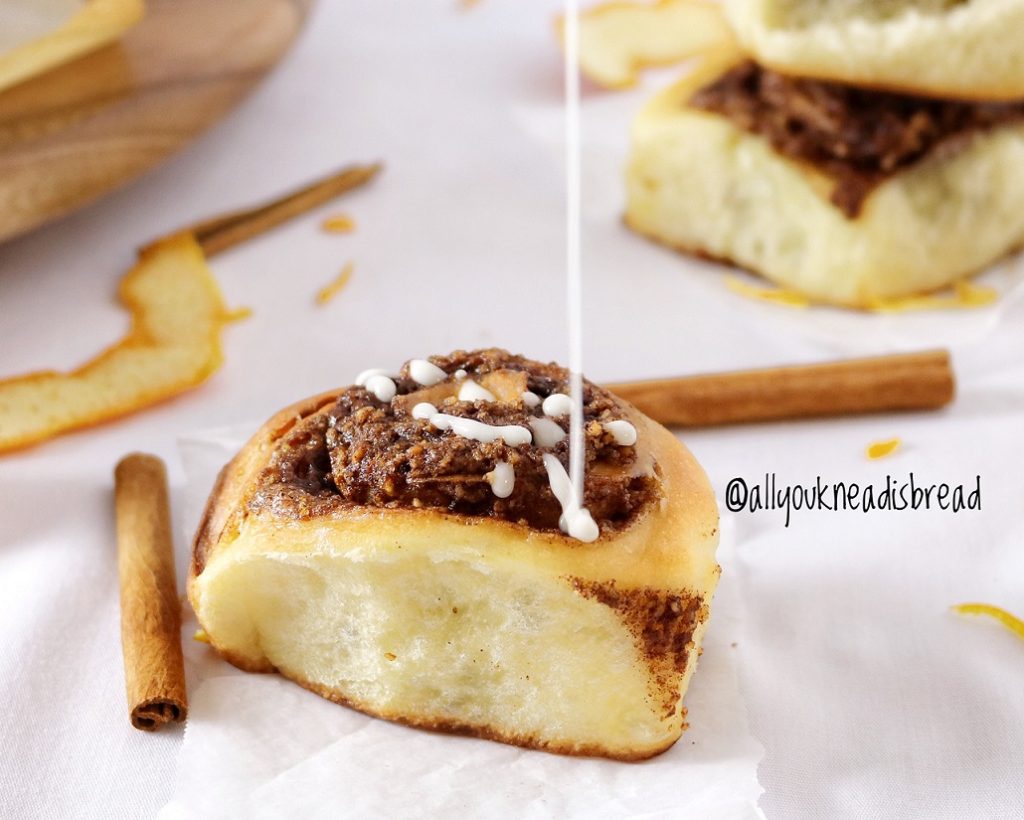
Enjoy!

Sourdough cinnamon rolls with stiff starter
Use lievito madre to make these chewy, soft, and moist cinnamon rolls. It's another level of sourdough goodness!
Ingredients
Dough
- 300 g bread flour
- 100 g lievito madre discards
- 135 g milk
- 50 g butter softened
- 4 g salt
- 2 eggs
- 1 tsp vanilla extract
- 1 tbsp orange syrup or honey optional
- 1/2 tbsp orange blossom water
- 50 g sugar
Filling
- 80 g ground walnuts
- 4 tbsp sugar
- 3 tbsp melted butter
- 2 tsp orange zest
- 1 tbsp ground cinnamon
Icing
- 1/2 cup powdered sugar
- 1-2 tbsp orange juice
Instructions
Dough
-
In the bowl of your stand mixer add the milk, eggs, salt, sugar, vanilla extract, orange blossom water, and orange syrup and combine very well
-
Sift 300 g of bread flour and add them to the wet ingredients
-
Take 100g of the discards from refreshing your lievito madre and cut small pieces and add them to the bowl of the stand mixer
-
Knead at low speed for a few minutes until the dough gets a bit elastic and add the softened butter
-
Knead until you have a perfect gluten development
-
Shape the dough into a ball and place it in a lightly oiled container. Cover it and let it ferment at room temperature until it doubles in size (about 8h in my kitchen)
-
Place the dough in the fridge and let it ferment at a cold temperature for up to 8 more hours
-
Take the dough out of the fridge, deflate it gently and with a rolling pin shape a 35x45cm rectangle
-
Spread the filling and start rolling the log starting on the wider side
-
Cut 9-12 pieces and place them in your 9x9in square pan (use parchment paper if it's not non-stick)
-
Let the rolls proof until they touch each other (about 2h)
-
Bake the rolls in a preheated oven at 350F
-
Drizzle the icing after they cooled down to room temperature
Filling
-
Combine the ground walnuts, sugar, cinnamon, and orange zest
-
Add the melted butter and mix well
Icing
-
Sift the powder sugar
-
Start adding the orange juice until you get the desired consistency
Best (and vegan!) pumpkin bread – Video
Hello friends!
Are you ready for some pumpkinlicious bread? Yeah, I just made a word up. But only because I couldn’t find one that fits this bread!
These days Instagram is packed with pictures of pumpkin bread and pumpkin buns and pumpkins in general and I couldn’t let it go, I had to post my recipe.
I’ve made different types of pumpkin bread before, but my favorite is the recipe I’m posting today.
Why, you may ask?
Because it’s full of flavor, it’s soft, it’s sweet and has a lovely shape!
And it’s accidentally vegan!
I say accidentally because I wasn’t really planning on making this bread vegan, it just happened! Lately, I’ve been using the Country Crock line of plant-based butter. I’ve tried them all and I love the result in bread! (This is not an ad, I’m just letting you know the dairy-free butter that I use)
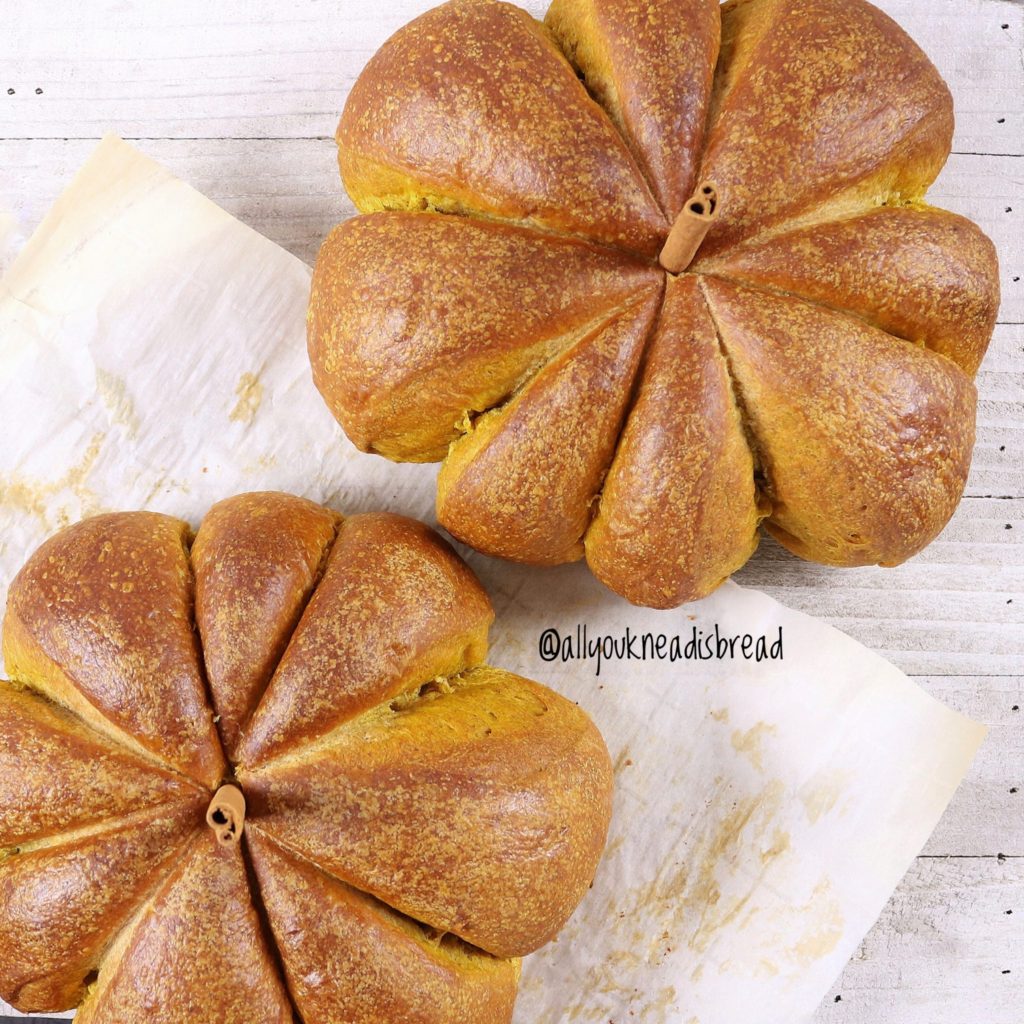
This recipe yields 2 medium pumpkin-shape loaves. You can divide it into more loaves, or you can make one larger loaf. Just keep in mind that you’ll have to adjust your oven temperature.
I personally prefer medium to large loaves using this recipe. Since the bread doesn’t have eggs, smaller shapes will dry out quicker.
This bread is very soft, you don’t even need a knife to cut through it, the shape makes it easier to pull a piece :o) It’s also sweet enough to enjoy with both savory and sweet food. Did I mention is super soft?
How come it is so soft… if it doesn’t have eggs?
Miracle pumpkin puree! The carbohydrates (fiber included!) of this orange vegetable play a significant role in keeping the moisture in the bread. Pumpkin has starch, and when you boil it, some of that starch is gelatinized and able to keep the moisture in. Also, the pumpkin particles are not too hard, and they do not disrupt the gluten network like cereal bran could do, allowing the dough to develop properly and become very elastic.
Oh, and pumpkin is PACKED with antioxidants, carotenes to be exact. It’s all goodies in here!
So, without further ado… Let’s carve this pumpkin!
You can watch the video for more details on how to make this bread.
The first thing you need to do is dissolve the yeast into 3 Tbsp of the total amount of water.
While you let the yeast activate mix the pumpkin puree and the sugar in a different bowl. When the yeast is ready, add it to the pumpkin mixture and combine everything well. Let it rest while you prepare the other ingredients
Mix the flour, the salt and the pumpkin spice powder in a larger bowl.
Grate the butter and mix it with the flour. If you don’t have a grater you can use a pastry blender or cut it in smaller pieces and use a fork. The idea is to have small pieces of butter mixed in with the flour.
This dough is not too hydrated so adding the butter later would be a bit difficult. I found that grating the butter makes the process easier while still having great results. The butter will be absorbed in the dough as you knead it.
Add the wet ingredients to the flour/butter mixture and combine everything. Start adding the leftover water 1 oz at a time. Depending on your flour you might not need all of it. I use King Arthur bread flour and I used all 115 ml of water.
NOTE: If you add too much water, the dough will be too hydrated and the pumpkin won’t hold the shape in the last proofing.
The dough should feel soft, slightly sticky but it should hold the shape for several minutes.
Alrighty! Once the dough comes together, let it rest for a few minutes and start kneading!
Knead until it’s soft and shiny and it doesn’t stick to your fingers or your working surface.
If you feel the dough is not coming together let it rest for a few minutes and continue kneading.
Shape the dough into a ball and place it in a lightly oiled bowl. Let it rise until it doubles in size. It should feel puffy and soft and smell yeasty.
Deflate the dough well, the crumb of this bread doesn’t have large alveoli so try to get rid of large air pockets.
Divide the dough into 2 pieces of similar weight and pre-shape them into a ball. Don’t worry if one is slightly larger than the other one. They don’t have to be perfect.
Cover them and let them rest for a few minutes.
In the meanwhile, prepare the thread.
Cut 8 pieces of 45 cm (18 in)
In a small bowl add 2 tbsp of vegetable oil and soak the threads well. This will avoid leaving thread debris on your loaves and it’ll make easier to take them off after baking.
Place 4 pieces of thread on the table, crossing each other by the middle part and making sure that there are 8 spaces of similar size, watch the video for better understanding.
Take one of the dough balls and shape it into a ball. Try to create some tension so it’ll hold the shape better, and place it on top of the threads.
Tight the threads, not too tight, not too loose, just enough. As the dough ferments, it’ll puff up and the pumpkin shape will become more obvious.
Do the same with the other piece of dough
Cover the pumpkins with plastic wrap and let them ferment until you see the pumpkin shape. Don’t worry if it is a bit asymmetric.

About 20 mins before the proofing ends, turn your oven on at 375 F.

If you want, you can brush the pumpkins with vegetable milk (or regular milk if you don’t mind about dairy). I used soy milk on mine.
Put the pumpkins in the oven, lower the temperature to 350 F and bake the bread for 35-45mins (time depends on your oven), or until they’re golden brown.
If the loaves are getting too dark but they’re not done yet, lower the temperature to 330F or cover the pumpkins with aluminum foil.
After they’re baked, let the pumpkins cool down in a cooling rack for 30 minutes to an hour before you take the threads off.
This is important, you have to let the crumb set before you take the threads out. If they get stuck in the crumb, carefully pull them, one at a time, and they will slip out of the bread.
OPTIONAL: When the bread has cool down completely, take 2 cinnamon sticks and insert them on the top of the bread, this way your pumpkins will look really cute and can decorate your table while your guests arrive! Or just look incredibly beautiful for your next Instagram post.
And now it’s the best part… It’s time to enjoy your pumpkin bread!
See you next bake!


Best Pumpkin Bread
Bun-like pumpkin bread with incredible aroma and delicate crumb
Ingredients
- 500 g bread flour
- 300 g pumpkin puree (canned or homemade)
- 80 g vegetable butter
- 4 g active dry yeast
- 120 g water
- 6 g salt
- 40 g sugar
- 3 tsp pumpkin spice (add as much/little as you want)
- 2 tbsp vegetable oil (to soak the threads)
- 8 pieces food grade thread (45 cm / 18 in)
- vegetable milk for brushing
- 2 sticks cinnamon for decoration
Instructions
-
Dissolve the yeast in 3 tbsp of the total amount of water and let it rest a few minutes
-
In a small bowl mix the pumpkin puree, the sugar, and the yeast solution
-
In a bigger bowl, add the flour, the salt, the pumpkin spice, and mix well
-
Grate the vegetable butter and add it to the flour. Using your hands, mix the flour and butter
-
Add the pumpkin mixture to the flour and combine
-
Add the leftover water and incorporate all the ingredients well until you don't see dry flour particles. Let it rest for 20-30 min (autolysis)
-
Knead the dough until it's soft and shiny. You can do it by hand or with a stand mixer
-
Lightly oil a bowl and place the dough inside. Cover it and let it rise until it doubles in size
-
Deflate the dough gently and let it rest a few minutes.
-
Divide the dough into 2 similar pieces, pre-shape them into balls, and let them rest 5-10 mins
-
In the meanwhile prepare the threads. Cut 8 threads (food grade) of 45 cm (18in) long and soak them into 2tbsp of vegetable oil
-
Put 2 threads making a cross on the table, and 2 more making an X (Try to put them as center as possible)
-
Take one piece of dough, shape it into a tight ball and place it on top of the threads
-
Tie the thread tight enough so they won't fall apart but loose enough you don't push the dough. Do the same with the other piece of dough.
-
Preheat your oven at 350F
-
Cover the pumpkins and let them rise until you see the pumpkin shape
-
When ready, brush them with vegetable milk and bake them for 35-45 minutes (depends on your oven)
-
Let the loaves cool for 30 mins before you take the threads out. And let them cool completely before cutting through them
-
OPTIONAL: Insert a cinnamon stick on top of the loaves for decoration
Recipe Notes
If your loaves are browning too quickly, lower the oven temperature to 330 F and put foil on top if necessary.
Delicious Nuts & Cardamom Babka – Video
It’s that time of the year again!
Fall is here and with it, all holidays and family & friends gatherings. Although, to be honest, sometimes I feel like I’m running out of ideas of what to bring to a party. Luckily for us all, I came up with a wonderful one!
Jump to Recipe
Babka!
You might think it’s not very original but this babka is different! I’ve developed a dough that keeps soft and fresh for many days, and a filling that’s unique and delicious! Oh, and also VERY customizable to fit everyone’s needs and preferences!
Nuts & cardamom babka!
In my opinion, babka is the perfect bread to play around with flavors and fillings. Firstly, because the dough it’s not too sweet and goes great with everything. Secondly, because it’s a beautiful bread!
Babka bread is a Polish Jewish bread (The non-Jewish babka is a cake rather than bread). The word “babka” comes from the Slavic word “babcia” which means “grandmother”.
Apparently, grandmas are worldwide known for making the yummiest food!
Babkas gained popularity after Polish people brought the recipe to New York City, and today is a very well known and loved sweet bread.
Although the original recipe called for a cinnamon filling, babka nowadays is made with plenty of other fillings, both sweet and savory.
On this recipe, I used pecans, hazelnuts, and almonds for the filling. I added cardamom powder and orange blossom water to make a paste with the ground nuts. And O EM GEE!
Note: You can find orange blossom water in Asian or Arabic stores. If you don’t live close to any, you can also find it on Amazon.
Okay, let’s talk nerdy for a minute!
One of the problems of bread (any bread) is shelf life. It dries out rather quickly (aka bread staling). However, when fats and sugar are added to the dough, the bread tends to last a bit longer because of how the fats and the gluten proteins attach to each other, and how the starch granules help give the gluten network elasticity and keep the moisture in the crumb. Okay, so what happens when we add nuts to the equation, especially when they are ground?
I’ve been thinking a lot about this, and although the dough ingredients and procedure definitely help, based on my reading and nerdy research, the oils in the nuts are released while cooking the paste, and during the baking process. The way babkas are shaped, they have several layers of filling. So, the layers of nut paste might stop the crumb moisture from leaving the bread so fast. Therefore, if it takes longer for the moisture to leave the bread, the bread will stay soft for longer time. Although I highly doubt this babka will last long!
There’s always a but…
But… adding nuts cannot make up for insufficient kneading. You still have to knead your dough well. The dough of this recipe is pretty sticky, but it does come together at the end. Check my brioche recipe to get directions on how to knead enriched dough.
You have to do it in batches. Knead a few minutes, let the dough rest a few minutes. You will see how after stopping for 5-10 minutes the dough is much more elastic and comes together much better. Don’t freak out if you spend a whole hour (with rests included) kneading. There’s nothing wrong with the dough. Eventually, it’ll become soft and elastic and shiny and it’ll have little blisters on the surface, and it won’t be sticky!
Never get intimidated by the time you spend kneading, it’s easier to not knead enough than to over work the dough.
Let’s start with this yummy recipe!
You can make this recipe with regular milk and butter, but I also tested a non-dairy version using soy milk and almond oil butter (it’s the one on the video) and it worked perfectly! If you use milk, just make sure you boil it first. Boiling the milk breaks down some enzymes that affect the development of the dough.
As always, activate the yeast first, then add the sugar and eggs and combine well.
Add the salt to the flour and mix the wet ingredients with the dry ingredients.
When you don’t see dry flour particles, cover the dough and let it rest a few minutes.
Start kneading and when you feel the dough is starting to get elastic add the butter or dairy-free spread.
I used Country Crock plant butter, the one with almond oil, and the dough turned out great! (Not an ad, I’m just letting you know what worked for my dairy free version ;] )
Incorporate the butter well and keep kneading. Let the dough rest as many times as you need, if you feel the dough is not coming together, stop, cover it, let it rest 5-10 mins and start again.

Avoid using too much flour while you knead, it will break the balance of the ingredients and your babka will end up drier. Trust in the power of gluten!
When the dough is elastic, it passes the windowpane test, it’s shiny and has blisters covering the surface it’s ready! You can stop kneading, shape it into a ball, and place it in a lightly oiled container.

Let the dough ferment until it is puffy and has risen about twice its volume. Then deflate the dough and let it rest a few minutes before dividing it into 2 equal pieces.
This recipe yields 2 loaves. So, while you work with one piece, make sure you cover the other piece of dough well. You can even place it in the fridge to slow down the fermentation.
While the dough is fermenting you can make the filling.
Grind the nuts thin enough they will make a paste. Add the cardamom powder, milk, and orange blossom water. If you want it sweeter you can add sugar too.
Cook at medium heat until the nuts get a paste-like consistency. Turn off the heat, add the butter and stir. The butter helps the paste be creamier.

Transfer the paste to a plate and let cool to room temperature. Remember that if you add the filling while it’s too hot you can kill the yeast.
When the dough has risen enough flour your work surface lightly and roll the dough into 12 x 17 in rectangle. You can roll it into a longer length, the thinner you roll it, the more layers your babka will have, but the slices will fall apart easier.
Spread the filling on the dough and roll it into a log. Cut the log lengthwise and twist both strands leaving the open part up.
Grease your baking pan and place the babka in it. Let it rise until it reaches the edges of the pan.

Before the fermentation time ends, turn your oven on at 335F
Brush the babka with the leftover egg white and bake until it’s golden brown (about 45 mins, it depends on your oven). If the babka is not dark enough, you can bake it 5 minutes at 350F but be careful, the top can burn quickly!
After baking, babka is usually brushed with a simple syrup
If you want to make the syrup mix 2 tbsp of water and 2 tbsp of sugar and bring it to a boil. Cook until it reaches syrup consistency.
If you don’t want to make the syrup, I found a shortcut: Maple syrup!
Mix 2 tbsp of maple syrup and 2 tsp of water and mix very well.
When your babka is cooked, brush it with the syrup immediately, you can even pour the leftover syrup through the gaps. This will also help keep the moisture in the loaf.

Let the babka cool down a few minutes in the pan an then transfer it to a cooling rack to cool completely… If you can wait that long!
The next step is to make a nice cappuccino an enjoy it with a slice of your babka!

Let me know what you think if you make this recipe and don’t forget to subscribe to my YouTube channel so you can receive a notification when I upload a video!
Enjoy!


Nuts and Cardamom Babka
Ingredients
Dough
- 500 g bread flour
- 225 g milk or vegetable milk
- 5 g dry yeast
- 80 g butter or dairy-free spread
- 2 L eggs
- 1 L egg yolk
- 50 g granulated white sugar
- 6 g salt
- 2 tsp vanilla extract
Filling (1 loaf)
- 200 g assorted nuts
- 70-100 g milk or vegetable milk
- 30 g sugar (optional)
- 2 tsp ground cardamom
- 2 tbsp orange blossom water
- 10 g butter or dairy-free spread (optional)
Instructions
Dough
-
Add the yeast to the lesser amount of milk and let it sit for 1o minutes to activate the yeast
-
Add the sugar, eggs, and vanilla extract and mix well
-
On a separate bowl sift the flour and add the salt
-
Add the flour to the wet ingredients, combine until you don't see dry flour particles, and let it rest 20-30 mins (autolysis)
-
Knead the dough until it's elastic, shiny and covered with small blisters. It should pass the windowpane test.
-
Let the dough ferment until it doubles in size and it's puffy
-
Deflate the dough well and divide it in 2 equal pieces
-
Roll one piece into a 12 x 17 in a rectangle. Spread the filling and roll the dough into a log
-
Cut the log lengthwise and twist each strand
-
Grease a 9in loaf pan and place the babka inside. Let it proof until the dough reaches the edges of the pan
-
Turn your oven on at 335F
-
Brush the babka with the leftover egg white and bake it for 45 minutes or until is golden brown
-
Prepare the syrup and brush it on the babka immediately after you take it out of the oven.
Filling
-
Grind the nuts in a food processor
-
Add the cardamom and sugar if you're adding any and stir well
-
Add the milk and orange blossom water and combine everything
-
Cook the nuts at medium heat until it gets a paste consistency
-
Add the butter for a creamier paste
-
Transfer to a plate and let it cool down to room temperature
Best Basic Challah
Finally! My first post!
I can’t believe it took me this long. Can you imagine that I spent most of the time deciding colors, styles, logos, etc?? It’s the first time for me to design something and let’s say that creativity is not my strength.
Anyways, here we are! Holiday time! A time where I’m sure Pinterest is on fire with people looking for recipes, décor ideas, centerpieces… When setting the table for any event, I like it to be more functional. I don’t like to have things between the people at the table that will make conversations or interactions difficult. I like to make the food be part of the ornaments.
Last week I went to a Friendsgiving dinner, and I was assigned the bread. We all came from different places around the world, many of the guests weren’t used to crusty bread ( as a Spaniard, that would’ve been my first option). So, I decided to make some soft bread. But dinner rolls seemed so not-holiday-worthy. There’s nothing wrong with dinner rolls, but I wanted something different, and tasty but not too sweet either. And I wanted edible decorations! Something to complement the table but that it’ll eventually disappear.
My solution? A nice challah!
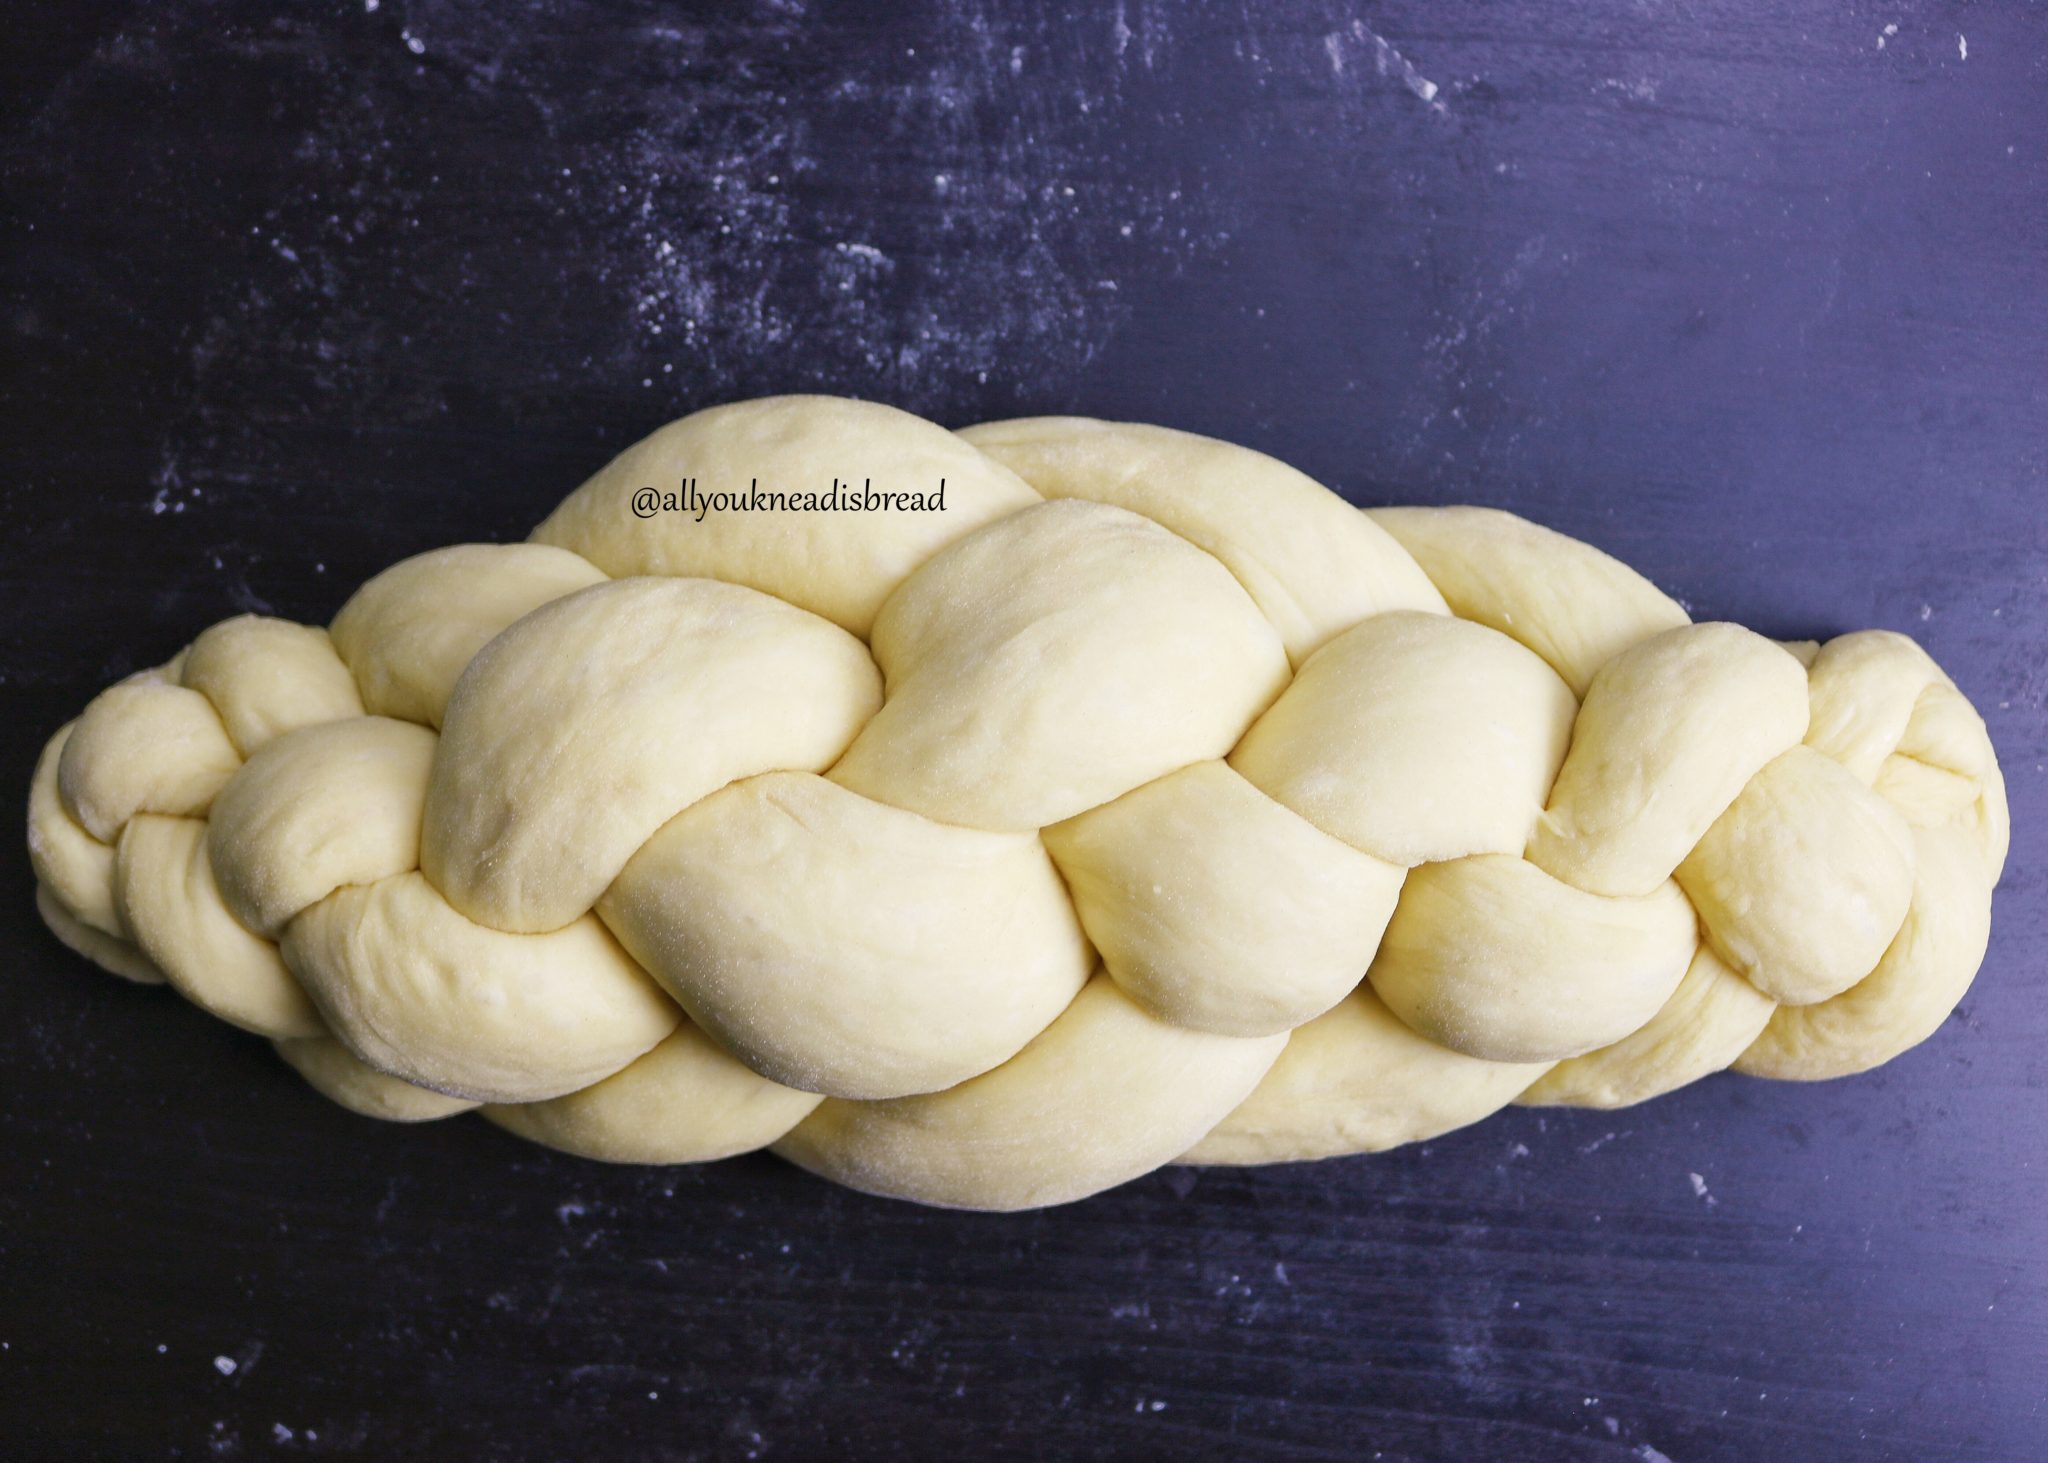
I love challah because with simple ingredients you can make amazing things! I particularly enjoy the shaping. The 6 strand braid is my favorite, I think. It took me a bit to learn because I kept getting lost midway!
The loaf was a success! Everyone was taking pictures; some people had never heard of challah before and they were pretty impressed. And all that just because of the shape! Of course, when they actually tried the bread, they were even more impressed with the taste!
This recipe is from “The bread baker’s apprentice”, by Peter Reinhart, it’s my go-to challah recipe. I love this book, it has many different recipes, from different parts of the world. The book has great tips and in general, the ingredient lists are simple. I think it’s a great book for beginners and home bakers.
I just changed the type of flour, the original recipe uses all-purpose flour, but I like bread flour better. Enrich doughs have to be strong to be able to “lift” all the eggs, fats, and sugar. And also, I always bake with the same type of flour, and I can anticipate the amount of water I’d need or how the dough will behave.
But this is up to you really. Changing the flour won’t make the bread better or worse, just different! 😊
The original recipe also calls for vegetable oil. I chose olive oil because I love the combination it makes with eggs. I think both ingredients complement each other perfectly! You can use other shortenings, but I wouldn’t recommend butter. The reason is that it has a strong taste, and challah is all about the egg, I don’t want the butter to hinder the taste of eggs. But again, this is my opinion. You can make it the way you enjoy it most!
To make this challah you’re going to need the following ingredients:

- First, you need to activate the yeast. I like to use active dry yeast, but even when I use instant yeast, I activate it as well. Just to make sure it’s working well.
If your kitchen it’s cold, you can use lukewarm water to activate the yeast. If it’s hot, room temperature water works well. You can even add a teaspoon of sugar to the water. The yeast will feed on it, so it won’t add any extra sweetness.
Your yeast will be ready after a few minutes, and you should see some bubbles on top (maybe not as many as in my picture, I like to use a whisk to make sure the yeast dissolves completely, and that adds extra bubbles).
- While you’re waiting for the yeast, you can sift the flour, sugar, and salt into a bowl and stir it well to mix everything.
- Then add the yeast mixture to your dry ingredients
- And incorporate the eggs. You can whisk the eggs into the yeast mixture, or in a separate bowl and pour them into the flour, or like me, add them directly to your flour and yeast mixture.
Now it’s time for one of the most important steps, the autolysis step.
- Mix everything thoroughly, until you don’ see dry flour particles anymore and you have a sticky mess. If you think your dough is dry, you can add a little bit more water. Just 1 tablespoon at a time. Cover your bowl and leave it there for 20-30 minutes.
This step is important because it’ll allow the flour particles to fully hydrate before you start kneading. That means that the flour will work at full strength and the gluten network will be developed much easier.

After the autolysis step, the fun starts! Kneading time!
- Knead the dough in your most comfortable way. By hand or using a stand mixer with the hook attachment. At the beginning the dough will be sticky but don’t add more flour, keep kneading.
The dough is sticky because it has lots of eggs and sugar, So they get between the water molecules and the gluten proteins. So you must keep kneading to ensure all the gluten proteins get to link with each other and form the gluten network.
Regardless of your kneading method, eventually, you should see your dough coming together, getting more elastic, and getting some consistency.
- Now it’s time to add the oil (or any other fat or shortening).
If you’re not very used to adding the fat content midway, I’d suggest you add the oil little by little. One tablespoon at a time if you have to. Otherwise, you might get very frustrated.
Once the gluten network is halfway developed, it’s difficult to add fats, you have to keep kneading and squeezing the dough. It’ll eventually absorb the oil.
I like to squeeze the dough and turn it around and squeeze it again. I found that by doing this the dough absorbs the oil much faster. Also, trying to knead while everything is covered in oil… is not easy!
- After adding all the oil, keep kneading until the dough is not sticky anymore and the surface is covered by small blisters. At this point, the dough should pass the windowpane test. Remember to let the dough rest 5 minutes before you try to stretch it.
It took me around 20-25 minutes to get the dough ready. Your kneading time can be different, don’t worry. Your kitchen temperature, your skills, the stand mixer you use, or even the flour, play a role in the development of the dough. So don’t aim for time, but for dough consistency.
Look at the difference!

- Now you just need to put your dough in a bowl, cover it and let it ferment until it rises enough to be all puffy and about 1.5 times its original size. If your kitchen is cold, you can put the bowl in the oven with a pot with boiling water to create a warm microenvironment. Be careful not to turn the oven on!
- After the fermentation, deflate the dough and let it rest for a few minutes. Cut 6 pieces of equal weight and make small balls with each one.
You can use a little bit of flour for dusting, but try not to incorporate too much flour or your challah might end up dry.
You can shape your challah the way you like the most, a simple braid, 4 strands braid… you name it!
- Let the dough balls rest for 5 minutes. These resting times are important to let the gluten relax. 5 minutes can make a HUGE difference on your dough and it’ll be much easier to shape.
- After 5 minutes, take the first ball, flatten it with your hand, and with the help of a rolling pin, roll it into a 25 cm long oval (10 in approx) and 0.5 cm thick (1/4 in). Now, with the help of your hands, and starting on the widest part, roll it back to form a log. Repeat with each ball.

- Once the logs are ready, you just need to stretch them and make the strands. They should be about 50 cm (20 in) long. Start with the first log you made, since that one should’ve had more time to rest.
If at any point you feel that the strands keep getting back to their original shape, let them rest and come back a few minutes later. Try to make the strands in a way that is thicker in the middle and thinner on the ends. This way, the challah will have a beautiful shape, bigger in the middle and thinner on the ends.
- Time to braid the challah! I did not include a tutorial on the braiding part because I think it’s easier to understand if you see it in a video, rather than if you read it.
To avoid your challah from having a weird oven spring (meaning: end up with a terrible shape), try not to braid it too tight so you leave some room for the strands to rise.
- Put the challah on a baking tray and cover it with lightly oiled plastic wrap.
If you like a crusty challah, you can brush now once with the leftover egg whites, and a second time right before going into the oven. If you prefer it softer, just brush it once before going into the oven.
- Let the challah rise again until it’s puffy. It doesn’t have to double in size.
- Preheat your oven at 350 F (175 C)
- Once the challah has risen enough, put it in the oven and bake for about 20-25 minutes. After that time, turn the baking tray 180 degrees, so it gets to bake homogeneously.
If you think the challah is browning too fast, you can put aluminum foil on top and reduce the heat to 325 F (165 C).
Depending on your oven, you might need a bit more time, it’s okay. Just make sure that the inside it’s completely cooked.
And here it is!
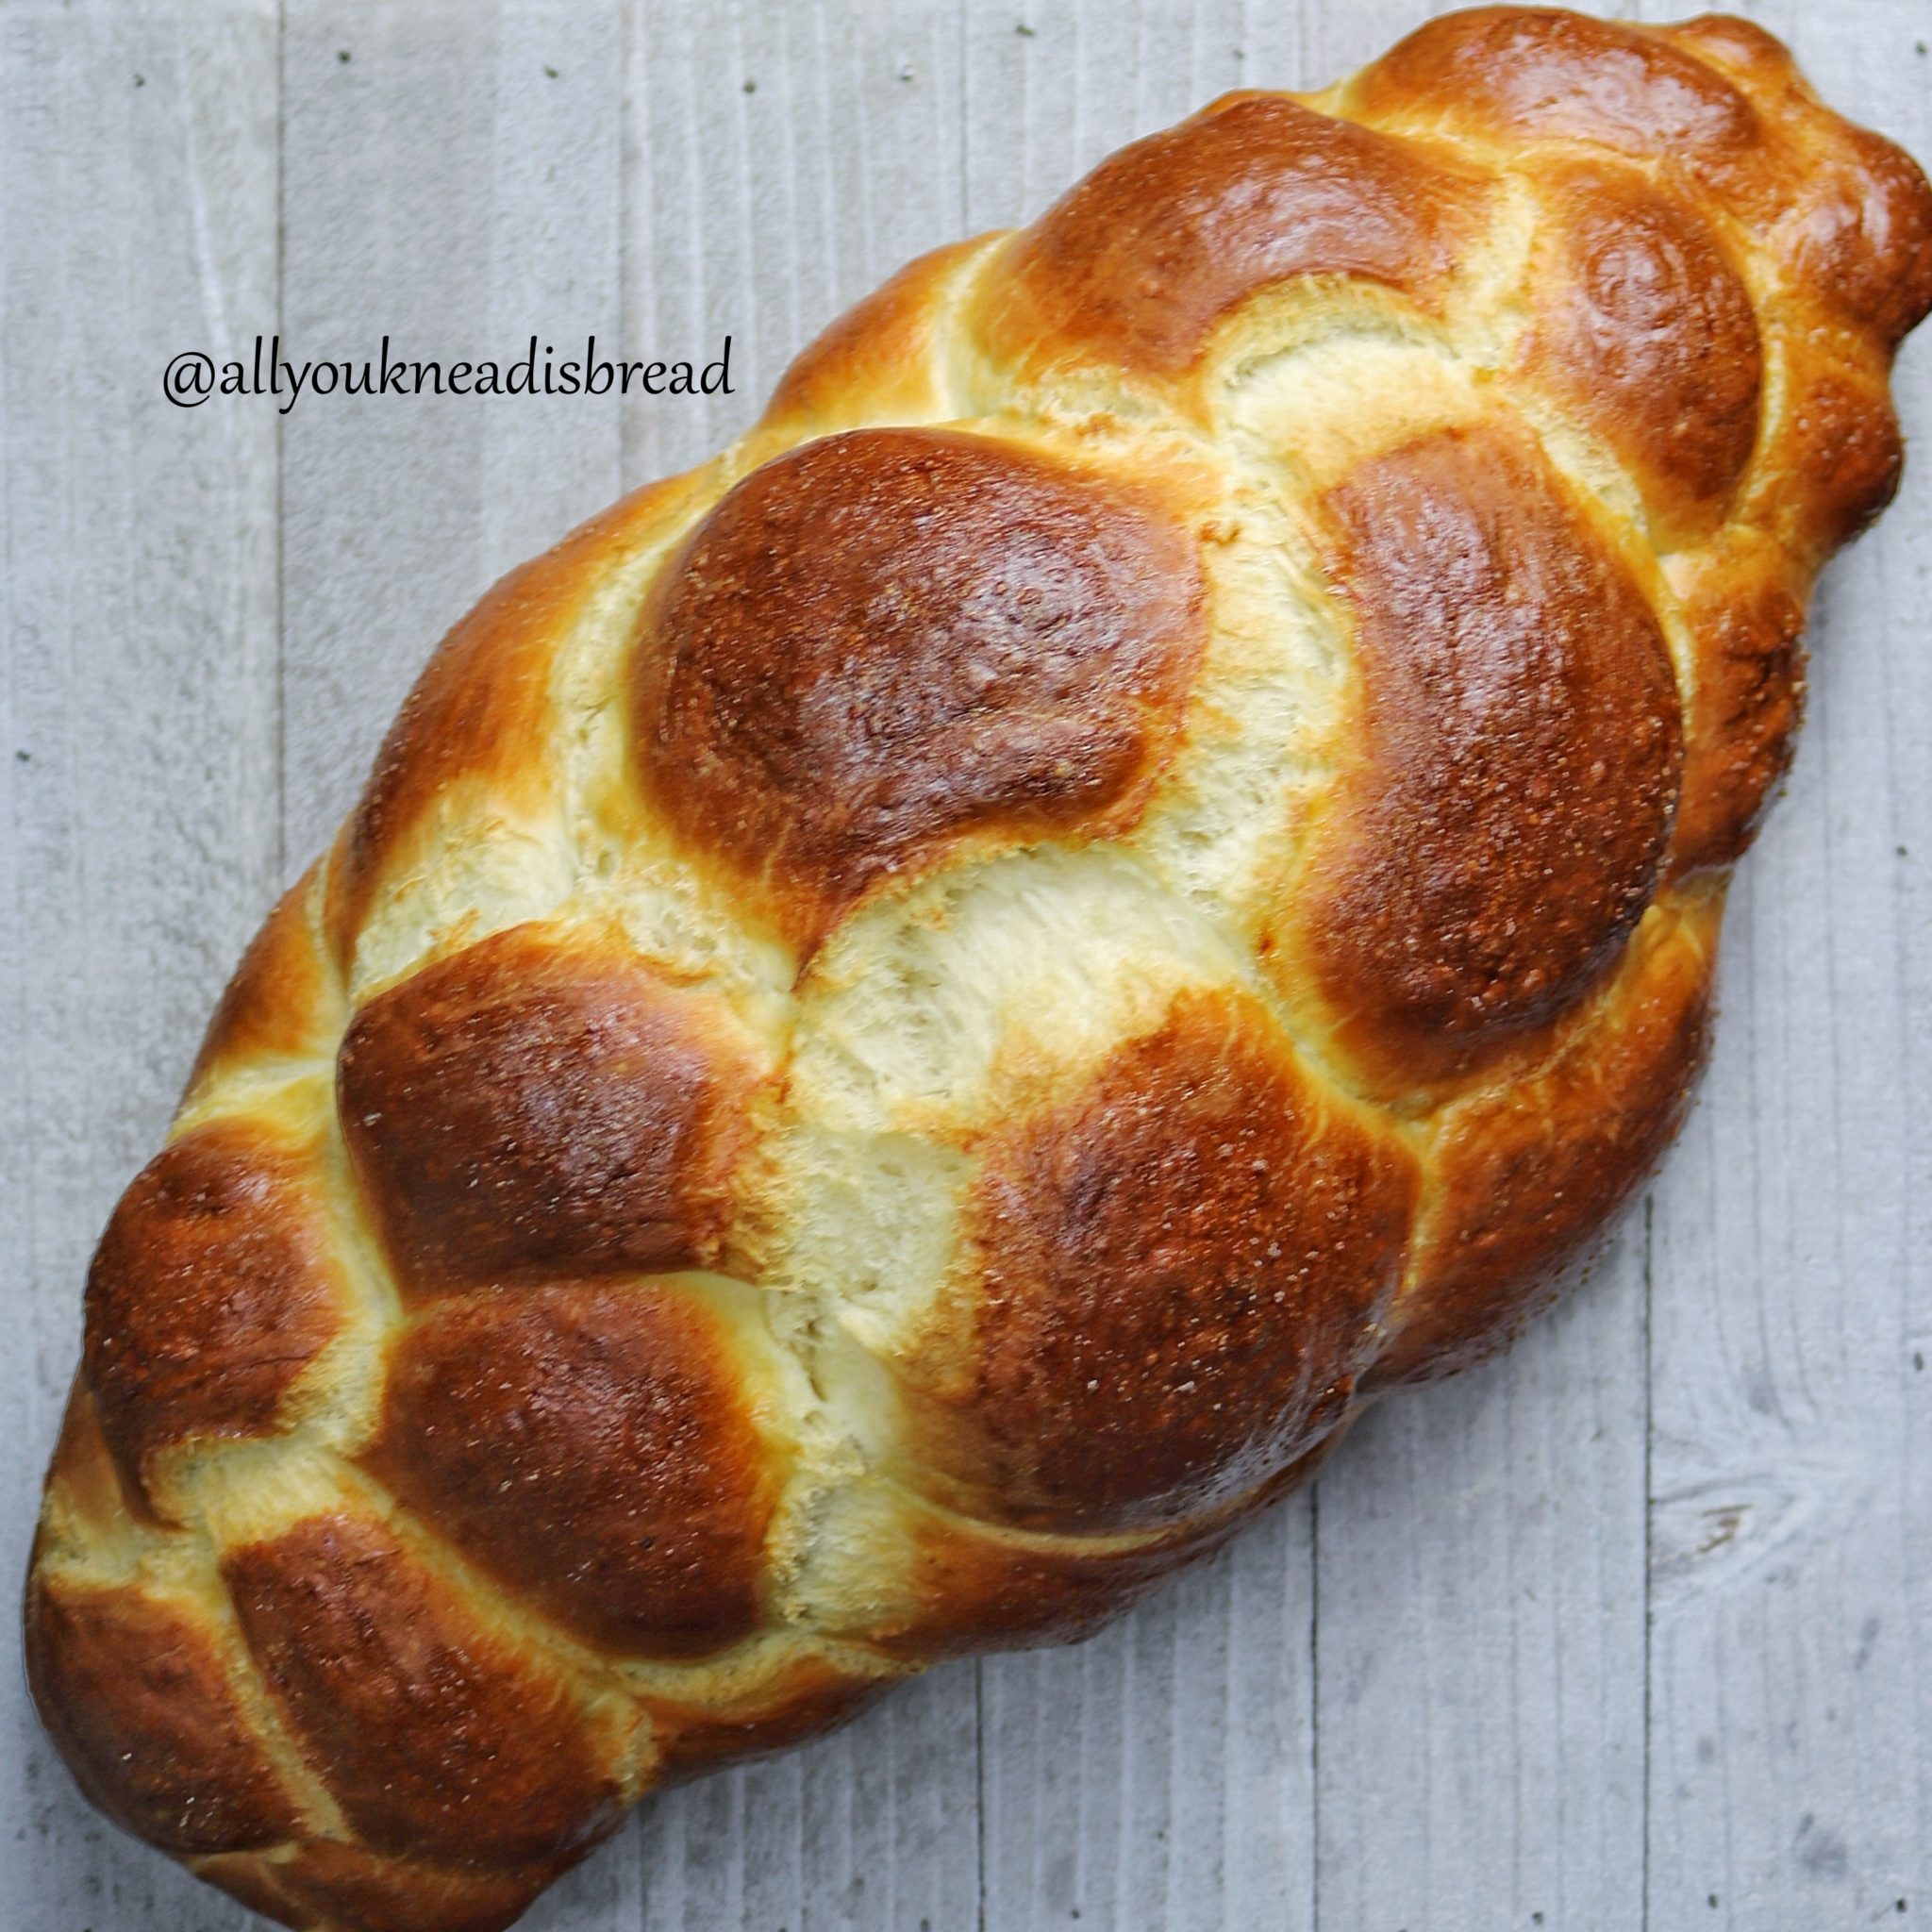
I’m sorry I cannot show you how the crumb looked, but I can tell you it was awesome! Very soft, cohesive, and beautifully yellow!
I hope you enjoy the recipe. Below you can find a printable version with a detailed step-by-step.

Best Basic Challah
Follow this recipe for a foolproof challah.
Ingredients
- 510 g bread flour (mine has 12.7% protein content)
- 30 g sugar
- 7 g salt *
- 4 g active dry yeast
- 30 g olive oil
- 2 large eggs
- 2 large egg yolks
- 215 ml water **
- 2 egg whites
Instructions
-
Add the yeast to the water and mix well. I like to use a wire whisk to make sure there are no lumps. Let it sit 5 mins to activate.
-
While the yeast is activating. Sift the flour into a bowl and add the salt and the sugar. Mix well with a wire whisk.
-
Once the yeast is active (you should see some bubble on top) add it to the flour mixture
-
Add the eggs and the yolks
-
Mix everything very well until you don’t see dry flour particles. If the dough is not cohesive, you might need to add a little bit more water. Do it half tbsp at a time. You don’t want to add too much water.
-
Let the dough rest for 20 minutes for a short autolysis. You can skip this step if you don’t have time, but I strongly recommend it since it’ll make your life easier when you have to knead the dough.
-
Start kneading the dough until it gets some consistency and elasticity.
-
Add the oil little by little until the dough absorbs it all.
-
Keep kneading until the dough is no longer sticky and you see small blisters covering the surface. It should pass the windowpane test.
-
Once the dough is ready, shape it into a ball. Lightly oil a bowl and place the dough inside. Cover the bowl and let the dough ferment for 1h approx. It doesn’t have to duplicate the size.
-
After 1h, deflate the dough, shape it again into a ball and let it ferment again until it’s about 1.5 times in size or until it’s puffy but not over fermented.
-
Remove the dough from the bowl, deflate it and let it rest 5 mins.
-
Divide the dough into 6 equal parts (if you’re doing a 6-strand challah)
-
Shape each part into a ball, cover them with plastic wrap and let them rest 5 mins.
-
Roll each ball into a 50 cm (20 in) log. Start making short logs and let them rest before rolling them to the final length. It’ll give the gluten time to rest and it’ll be easier for you.
-
Shape your Challah the way you’d like, line a baking sheet with parchment paper and place the Challah there.
-
Brush the Challah with the egg whites wash, cover it with lightly oiled plastic wrap and let it rise until it's puffy.
-
Preheat your oven at 350 F (175 C).
-
Once the Challah is ready, carefully remove the plastic wrap and brush again with the egg whites.
-
Bake in the middle rack for about 20-25 minutes and turn the baking sheet 180 degrees. Bake for another 20mins or until it’s golden brown (we turn the baking sheet halfway to ensure an even baking)
Recipe Notes
* You can omit the salt when you mix the dry ingredients and add it after the autolysis.
** You might need to adjust the water. The range should be anywhere between 200-250 ml.
Happy baking!
