

A year ago I was writing that dissertation, I was stressed, hypersensitive, anxious… Sometimes I’d be happy it’d soon be over, and sometimes I’d feel nostalgic for the very same reason. A year has passed and I’m just starting to rebuild myself and enjoy my guilt-free life… With this sourdough chocolate banana bread! That’s right! It’s all about using sourdough discards!
Using sourdough discards in your baking
Learning the science of bread is one of the reasons I started this blog. Because I find breadmaking an incredibly endearing process and yet so misunderstood. There are different methods to take care of your sourdough starter; some people generate discards, others don’t. I never throw away the discards, that’s sourdough that can be used on other things!! It’s pre-fermented flour that can bring flavor to yeast bakes, like this brioche recipe with sourdough discards. It also helps increase the shelf life of baked products by slowing down the staling process and controlling the pH a bit. This way spoilage microorganisms find it harder to grow on the food.
This year I also want to start implementing a new approach when it comes to food: ZERO WASTE. I know many people generate a considerable amount of sourdough discards. And I know using sourdough discards sounds like a crazy idea for many. But let me tell you.. once you make this sourdough chocolate banana bread with sourdough discards, you will be converted forever!!!
So today I inaugurate a new type of recipe: SOURDOUGH DISCARDS
I’ll upload different recipes using sourdough discards so you don’t just throw them away. Recipes with that extra kick of healthiness that only a sourdough starter can provide. As always, all recipes will be tested to ensure the best results!
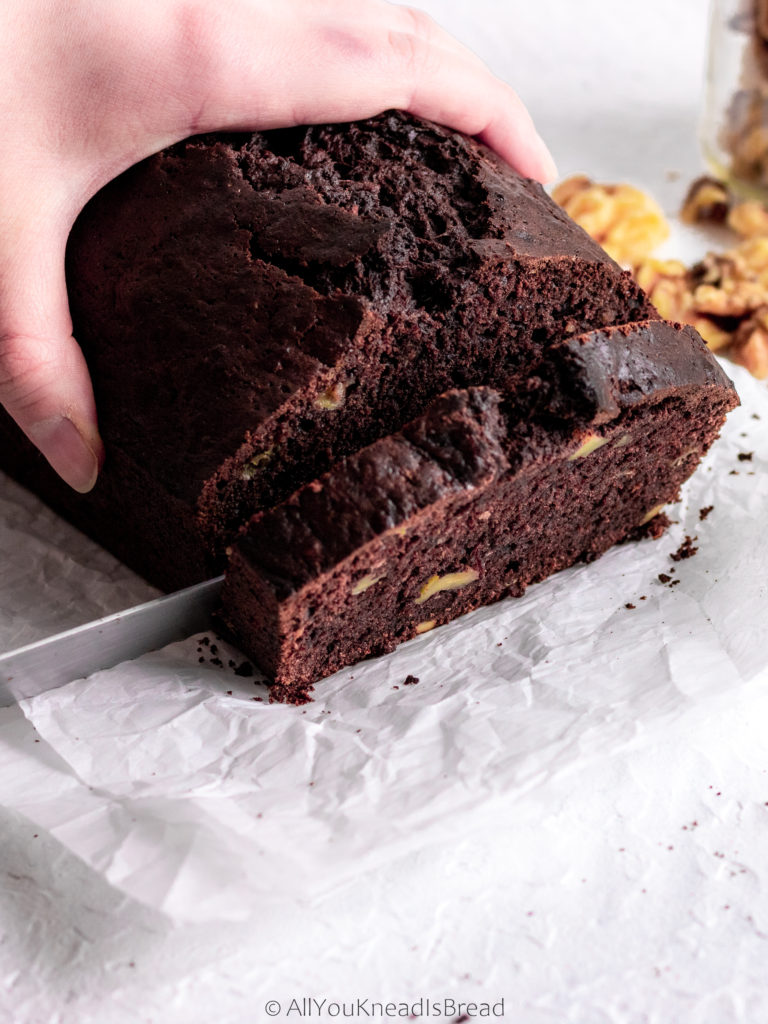
To inaugurate this new batch of recipes I wanted to make something special. I’ve developed this sourdough chocolate banana bread that’s going to make you fall in love with it!
It’s moist but not too dense. It’s spongy, full of flavors, a nice chocolate kick that doesn’t overtake the banana taste. And it lasts fresh for days even if you don’t keep it in an airtight container! (You didn’t think that sourdough could only keep regular bread fresh for a longer time, did you?)
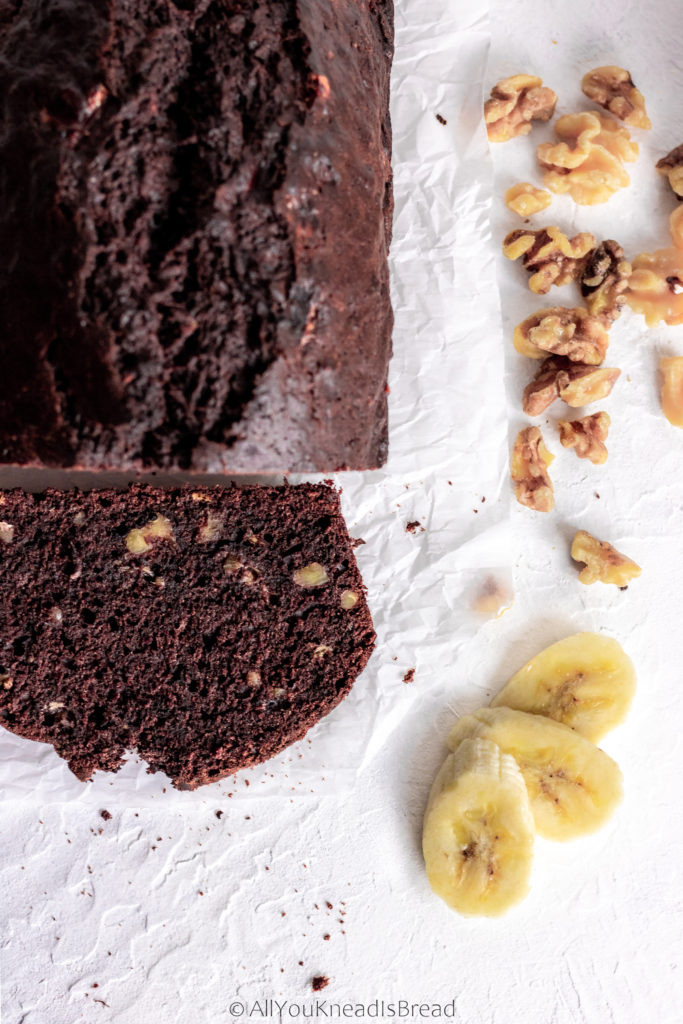
I did not add chocolate chips of any kind to this bread, just walnuts. Because I wanted to taste the banana. But if you prefer a more chocolatey flavor, customize those extras to your taste buds.
About this sourdough chocolate banana bread
It works best with very ripe bananas. Those brown mushy ones? Yeah, those!
If you’re not ready to bake banana bread but your bananas are getting too ripe to eat, just peel them, freeze them and use them whenever you’re ready! Just make sure you drain the water after they thaw. I think frozen bananas are the best for banana bread, they keep the moisture much better and they also enhance the flavor of the bread.
I collected the sourdough discards throughout 3 or 4 days of consecutive feedings and kept it in the fridge until ready to bake.

What if I have old sourdough discards?
I have tested this recipe with discards that were several weeks old. The only difference in flavor is that the chocolate banana bread was less sweet. Which makes sense, because the discards have been acidifying and part of the sugar is used to neutralize those acids.
So, depending on your taste buds, you may want to adapt the sugar. Although, this recipe has a considerable amount of it. But like always, you have the idea here, then you can customize it to your liking! 🙂
How long does it take to bake?
The baking time depends on your oven. Start taking a look at the bread after 50-55 minutes. The best way to know if your banana bread is ready is by inserting a toothpick (or a thin skewer) all the way down in the middle part of the loaf (that’s the part that takes the longest to cook). If it comes out clean, you’re good to go!
Don’t overbake this sourdough chocolate banana bread, you want it moist, not too dry, once the toothpick comes out clean, it’s ready!
Let me know if you make this chocolate banana bread using your sourdough discards and tag me on Instagram or Facebook so I can see your creations! And don’t forget to subscribe to my Youtube channel too, where once in a while I upload videos for some of my recipes.
Enjoy!

Sourdough chocolate banana bread
Ingredients
- 220 g all-purpose flour
- 40 g unsweetened dark cocoa powder
- 135 g sourdough starter discards
- 180 g brown sugar
- 2 eggs
- 115 g vegetable oil
- 3 very ripe bananas
- 1 tsp baking powder
- 1/4 tsp baking soda
- 1/4 tsp salt
- 1 tsp vanilla extract
- 1 cup chopped walnuts (optional and customizable)
Instructions
- Preheat your oven at 350F
- Grease a 9×5 in mold (or line it with parchment paper if you prefer)
- In a large bowl, combine all dry ingredients (flour, cocoa powder, salt, baking powder, and baking soda) and make sure the baking powder and baking soda don't have any lumps.
- In a smaller bowl whisk the eggs, add the vegetable oil and vanilla extract and combine until the eggs get a light color. Then add the brown sugar and mix for a couple of minutes.
- Add the sourdough starter and stir until it breaks down and it's incorporated (you might see some strands, it's ok, the starter had some gluten developed)
- Mash the bananas, add them to the egg mixture and combine everythng well
- With a spatula, lightly fold the wet ingredients into the dry ones
- Add the chopped walnuts and stir just until they're combined
- pour the batter into your mold and bake for 60 minutes or until a toothpick inserted comes out clean (time might vary depending on your oven temperature)
Pulp crackers – rich in fiber!

Hello guys! I am back!!!
These last few months have been a roller coaster. This is my last semester in my PhD program and I was full time writing. I never realized under how much stress I was until I finally defended my dissertation. It felt as if I took a heavy load off my shoulders. I can’t tell you how much better I’m sleeping now! And my bread-creative mind is starting to function again! I have this “to-bake” list that I carry with me everywhere and every time I have an idea, or I see a bread I want to make, I write it down. Welp… I haven’t written anything down in the last few months (I still have a long list of breads I want to make).
There’s this thing about me, when I’m anxious I crave weird things. And I had been craving horchata for the longest time!
Note: Do not mistake with Mexican horchata, which is a different beverage made with rice and milk.
Spanish horchata is a vegetable milk made from tiger nuts (also known as chufa seeds) typical from the south-east of Spain (Valencia). Chufas are naturally sweet with a very distinct flavor. A cold glass of horchata is one of the best beverages for hot summer days! I bought a small packet on amazon and I made my vegetable milk. It’s very easy to make, the only thing is that the seeds are very hard and dry, so you need to soak them for at least 24h (best results after 48-72h). Then put them in your blender with water and strain the mixture!
I was so happy with my horchata! Plus, tiger nuts are rich in resistant starch, which is a type of starch that is not digested and counts as dietary fiber (yeah!). With ½ pound of seeds, I made about 40 oz of this vegetable milk aaaand I had a bunch of leftover pulp!
Why you should use leftover pulp
The pulp is rich in dietary fiber too, so I didn’t want to throw it away because it’s the healthiest part. Throwing the pulp away (or cereal bran, fruit peel etc.) is like finding a diamond full of dirt, keeping the dirt and throwing the diamond away. Crazy right?! So, I used the pulp to make crackers! I had enough to make lots of crackers and they can last a long time in an airtight container 😊
The reason I am posting this recipe is because all of us, at some point, might have some “edible leftovers” that are packed with nutrients, but we toss them because we don’t know that to do with them. Not only this recipe will help you to use valuable leftovers, but also to reduce food waste.
Let’s make some crackers!
This dough is super easy to make, you don’t have to knead too much, just enough to have a good ball of dough. This might be one of the few cases were developing the gluten network very well its not crucial. You can also add whatever spices or seeds you like to the dough. And, of course, you can adjust this recipe to any type of pulp you have. You can use almond pulp, cashew pulp, okara… Or you can switch it for any cereal bran or fruit peels… Your choice!
In this recipe I use butter because I was looking for that flaky texture but if you don’t want to use butter, substitute it for shortening or any vegetable oil. If you want to make the crackers healthier, you don’t have to use any type of fat, maybe just a bit more water. But the crackers won’t be as flaky.
The only requirement here is to be able to make a nice dough ball. Not too sticky, not too dry. That’s it, that’s my secret

Start by mixing flour and the rest of the dry ingredients and then add the pulp and the butter.
Then blend the butter with the flour and pulp. You can use a pastry blender, a fork or your hands, whatever is more comfortable for you. I did it by hand.
You should have small pieces of solid butter

Then start adding the cold water. Do it little by little, controlling you don’t add too much. We’re not looking for a wet dough.

Knead the dough for a few minutes and with a rolling pin roll it on parchment paper to your desired thickness. My crackers were about 1/5 of an inch (0.5 cm). The thicker the crackers, the longer the baking time, just keep that in mind.

With a knife or a cookie cutter cut the crackers. Trim the edges and roll the dough again on another piece of parchment paper. By doing this you don’t need to transfer the crackers and mess their shape. And remember, you can use parchment paper several times before you discard it. You can do this as well using silicone baking sheets.

With a fork or a toothpick prick the crackers so during baking they won’t puff.

You can brush the crackers with oil or egg if you want, I didn’t. Sprinkle your favorite toppings and bake the crackers!
I like to sprinkle coarse salt or black pepper, but you can use whatever you like.
Baking time: it depends, bake the crackers at 400 F (205 C) and after 5-7 minutes (less time if your crackers are thinner) Check the crackers, if they’re not ready let them bake a bit longer but keep an eye on them. When they start getting some color they’ll be almost ready! Don’t let them bake too long or they will get hard and the taste might not be good.
NOTE: keep in mind that because of how the heat is transferred in your oven and the thickness of the crackers, some might take longer time than others. So don’t worry if you need to take some out of the oven while others are not fully cooked yet.
Now, go make some hummus and enjoy these crackers!


Tiger nuts pulp crackers
An easy way to use leftovers packed with nutrients!
Ingredients
- 300 g bread flour
- 150-200 g finely ground tiger nut pulp (any other pulp works too)
- 75 g butter (optional)
- 100-160 g water
- 2 tsp salt
- 1 tbsp baking powder
- 1/2 tbsp sugar (optional)
- 2 tbsp sesame seeds (optional)
Instructions
-
Preheat your oven at 400 F (205 C)
-
Mix dry ingredients, spices, seeds and pulp
-
Add cold butter and blend it in with your hands or a pastry blender until you have small pieces of butter evenly distributed
-
Start adding cold water little by little until you have a cohesive ball of dough. Not too dry and not too wet
-
Knead the dough a little bit and let it rest 20 mins
-
Roll the dough onto a piece of parchment paper to the desired thickness and with a cookie cutter or a knife cut the crackers.
-
Trim the edges, roll them out again and keep cutting crackers
-
Prick the crackers with a fork or a toothpick and add your toppings (salt, black pepper, dried onion…)
-
Bake for 5-7 minutes keeping an eye on them. After that time take out the crackers that have a nice brown color and keep baking the rest.
-
Enjoy!
Recipe Notes
You can customize this recipe as you wish. Add spices, herbs… Change the tiger nuts pulp for something else.
Keep in mind that the pulp I used was moist and that affects the total water I used. If you use cereal bran you might need more water.
