
I am back with this series of do’s and don’ts of sourdough starters to help you understand the science behind them so you can make more informed decisions in a time where everyone seems to have “the ultimate recipe and process” for sourdough. Spoiler alert: sourdough is not a one-fits-all kind of thing. This week’s topic is: feeding ratios.
Last time we talked about the age of our sourdough starter and why claims that a starter not working because it was too young were probably wrong, and the issues had more to do with how often the sourdough starter was being fed.
After learning how often we should feed our starter, the next question is “How much should I be feeding my starter?” So let’s dive into Feeding Ratios!

Buy this mango kiln wooden tray on BE HOME
What is a feeding ratio?
Feeding ratio refers to the proportions of sourdough starter, water, and flour we use to refresh our starters. Typically, everything is based on the amount of starter. I’m sure you’ve seen 1:1:1 ratios, or 1:2:2, or 1:10:10… It’s usually given as starter:water:flour, so a 1:1:1 ratio means 1 part starter, 1 part water, and 1 part flour. 1:2:2 means 1 part starter, 2 parts water, and 2 parts flour, and so on.
What happens if I change the feeding ratio?
Nothing, just that your starter will peak at different times. You can adjust feeding ratios to your needs and to whatever your starter needs. In the first post of this series, we talked about how a 1:1:1 ratio might be more convenient if you’ve been feeding your starter too often. But maybe your kitchen temperature and overall conditions allow you to keep a starter at room temperature and feed it at a 1:1:1 ratio once or twice a day. Or maybe you live in a very warm and humid area, where a 1:1:1 ratio is too limited and the starter peaks too fast. If that’s the case, you will probably benefit from a 1:10:10 ratio.
If you like to keep your starter in the fridge, maybe you prefer to refresh it a few times before baking and, in this case, you can use the standard 1:2:2 ratio. Maybe you prefer a “no discard approach” and just take a little bit of starter from your jar and feed it at a 1:10:10 or 1:15:15 ratio to end up with the exact amount of starter you will use on your recipe.
Ideal feeding ratios
The ideal feeding ratio is the ratio that works for your schedule and/or needs is the ideal ratio for you. And this ratio can change at any time. Sourdough is alive, but we have a certain control over how fast or slow we want it to grow.
For a given temperature
The smaller the ratio, the faster it’ll grow because the amount of food for the bacteria is more limited. A larger ratio will result in a starter that will take its sweet time to peak.
Example 1: You have a few slow hours in the middle of the day and it’s the only moment you can prepare your dough. Then feed your starter a 1:1:1 ratio early in the morning and it’ll be ready around the time you’re free.
Example 2: You are having an extremely busy week. You can only prepare your dough tomorrow sometime during the morning but you only have time for your starter today. Then maybe a 1:10:10 feed today in the afternoon will work.
For a given feeding ratio
The higher the temperature the faster your starter will peak. And the lower the temperature, the longer it’ll take to peak.
Example 1: It’s winter and your kitchen is usually at around 66-68F (19-20C), you can feed your starter a 1:2:2 ratio on Friday evening and it’ll be ready in the morning. You can start preparing your dough on Saturday morning.
Example 2: You live in a very hot and humid place. Maybe higher feeding ratios (plus using fridge cold water) is what works for you. Feed your starter in the evening at a 1:15:15 ratio and it’ll be ready the next morning, or feed your starter at a lower ratio in the morning, and you can probably start your dough early in the afternoon.
All these are examples, of course, you know your starter better than anyone and can probably anticipate how it’s going to behave. But what if you are new to sourdough? Then let’s experiment a bit!

How to get familiar with your sourdough starter
If you don’t know your starter very well, you need to record its behavior for a little while. For that follow these simple steps:
- Kitchen temperature: Record your kitchen temperature, I usually just follow my house thermostat, but you can use any thermometer.
- Feeding ratios: Based on your temperature choose a feeding ratio. Unless you live in extreme cold or heat conditions, I would go for a 1:2:2.
- Time to peak: Record the time of the feeding and keep an eye on your starter until it peaks, then record that time and calculate how long it took.
Anything from 8-12h cycles using a 1:2:2 ratio falls under normal behavior for my starter. During winter it grows slower, during summer it grows faster. My house has AC, in winter we keep it from 66-69F (19-20C), and during summer we keep it 70-74F (21-23C), but when we are not home we let the temperature increase a bit, so during North Carolina’s hot summer days, I sometimes use 1:10:10 feeding ratios.
Can I adjust the water?
A typical liquid sourdough starter is a 100% hydration dough. But sometimes it’s interesting to play with the hydration levels of our starters. For example, if you’re working with Lievito Madre, you know it is a starter at 40% hydration (ish). Dryer starters tend to be a bit sweeter and less acidic and they’re fabulous for sweet breads. But they do take a bit of extra elbow grease to maintain. On the other hand, liquid starters at 100% hydration are very easy to maintain. But can you use 85% hydration? or 125%? of course! You’ll have to calculate how much water you need.
How do I calculate the water for feeding ratios?
If you want to experiment with other water contents in your starter, you need to know just a basic concept. If you want LESS water than flour, you will have to multiply the flour content by 0. something and if you want MORE water than flour you will have to multiply by 1.something
Example 1
If you want a starter at 75% hydration, then you decide the ratio of starter and flour, calculate the flour, and finally, multiply that amount by 0.75
Let’s start with a 1:3 ratio of starter:flour and 10 g of starter. This means we have 30 g of flour (3 times the amount of starter). To calculate the water we multiply the flour by 0.75:
30 x 0.75 = 22.5g of water
Example 2
If you want a starter at 125% hydration, then you decide the ratio of starter and flour, calculate the flour, and finally, multiply that amount by 1.25
Let’s start with a 1:5 ratio of starter:flour and 15g of starter. This means we have 75 g of flour (5 times 15g). To calculate the water we multiply the flour by 1.25:
75 x 1.25 = 93.75g of water
(you can round it up to 94 or 95 and it will be fine)
Can I use volume instead of weight for feeding ratios?
Working with weights allows you to be more precise and it makes the process easier to repeat. Weights are much more accurate to measure than volume. At least with regular home equipment. If you’re new to sourdough, bread baking, or baking in general, I would strongly suggest you use weight instead of volume. This way you’re already avoiding possible differences between feedings that could potentially lead to different outcomes. You will have a better picture without doubting if the differences you see come from off feeding ratios or something else. If you want an affordable scale I use THIS ONE, I’ve used it for many years and I think I’ve changed the battery once. Baking doesn’t need to be expensive!
With this being said, you do what works for you, if you are comfortable using volume measurements, use them. Just try to be as precise as possible (Can you tell I’m a scientist? 😉 )
How do feeding ratios work with other flours?
As far as bacteria go, the same! However, different flours make different doughs so you might not see your starter peak as a wheat starter would. You will have to find how the peak looks for different flours. Also, some flours absorb a lot more water than others, and a 100% hydration starter might look very different depending on the flour.
All this might seem a bit complicated but I assure you that once you start, you’ll understand right away and you will start to understand your starter much better!
One last thing about sourdough starters
You don’t have to put yourself in a box and follow exactly what others are doing. Use the feeding ratio that works for you, the hydration that works for you, and the measurements that work for you (volume vs weight). The idea of this series of posts is to give you enough information so you can make an informed decision that will work for your particular needs. Don’t be afraid of experimenting!
Here are a few recipes that you can try if you’re starting in the art of sourdough!
Sourdough burger buns (cookout time is here!)
Sourdough marble rye bread (one of the blog favorites!)
Sourdough Challah (another favorite!)
Happy Baking!
Sourdough starter troubleshooting – Feedings
Lately, I’ve seen people saying things like “a 4-week-old sourdough starter is too young” to justify someone’s problems with their bread or starters. This statement is just wrong and very discouraging for new bakers, or people on a budget who can’t just throw flour every day for feedings.
Two weeks (as a rule of thumb) should suffice to have an active and powerful starter. Let alone 4 weeks!. In fact, depending on the method you used to create your starter, you might be able to make bread in just a week!
Chances are that the age of your sourdough starter has nothing to do with the problems you might be having. In this series of posts I’m going to delve into the science of your starter so you can troubleshoot whenever you need. Although, I hope you only need to troubleshoot it once!

WHAT DEFINES THE STRENGTH OF YOUR SOURDOUGH STARTER?
It’s not time, it’s THE NUMBER OF ACTIVE BACTERIA present in your starter. If your sourdough starter is not ready after 2 weeks (and depending on the method, maybe just a week), your feeding schedule probably needs adjustment. Either you’re following a fixed schedule instead of refreshing the starter when is ready, or you’re using the wrong ratio and not introducing enough nourishment for all the microorganisms to reproduce. Let’s dive into it:
BASICS OF SOURDOUGH BACTERIA
Bacteria in sourdough follow a 4-phase growth curve: Lag phase, exponential phase, stationary phase, and death phase, (For more of this go check this post where I tell you all about it). During the lag phase, they’re not multiplying yet; they’re just checking the environment and synthesizing the proteins and products they need to start multiplying (growing). At this stage, whichever ratio you used to feed your sourdough starter introduced some nutrients for the bacteria.
The second phase involves the exponential growth we’re all familiar with; the duration of the second phase(how much the starter is going to grow) purely depends on how much food there is available for the bacteria. Or better said, how many grams of food per bacteria were introduced. Let me explain:
Imagine a family of 4 people that has 4 cupcakes; they get one cupcake per person, they will run out of cupcakes fast, and they are not going to get a lot of weight because they only ate one cupcake each. Now let’s say we have the same family, and instead of 4, we have 12 cupcakes; then they get 3 cupcakes per person, it’s going to take longer to finish them all, and they will gain more weight because there was more food, right?
Same with your sourdough starter! Smaller ratios mean that the food is going to run out faster, and the growth (bacteria multiplying) is going to take place for a shorter period of time. Now let’s say you used a 1:3:3 ratio (like the family), the bacteria have a lot more food, so they’ll be eating for longer; therefore, it’ll take a longer time to finish all food.
What happens after the bacteria eats all the food? Bacteria multiply as long as they have food (energy), once all the food is depleted, they can stay active for a while, this is what we call the “peak” (the stationary phase), and the reason we say this is the best moment to use your sourdough starter is that it’s when there’s the largest number ALIVE AND ACTIVE bacteria.
After the peak, bacteria start going dormant; some die too (death phase). When using a 100% hydration starter (Keep in mind that gluten-free flours behave a bit differently because of the lack of gluten), this moment usually occurs at the same time the gluten network starts breaking down. That’s when we see the starter collapsing (there are more variables involved in this, but for now, let’s imagine the kitchen is at around 20C, not too cold, not too warm, so neither the bacteria growth nor the gluten in the starter is compromised because of the temperature).

WHY IS MY SOURDOUGH STARTER NOT DOUBLING?
One of the main problems I see is that people refresh their sourdough starters based on time (fixed schedule) and not when it’s ready. So when you take part of your starter out too early and introduce new flour and water, what you’re really doing is reducing the number of active bacteria before they have a chance to multiply. What you’re doing is bringing more cupcakes to the family but taking away a few members, so yes, there are lots of cupcakes, but not enough people to eat them in a reasonable time. And the more you do this, the more you feed your starter too early, the more bacteria you’re taking away, and the more you’re reducing the fermentative power of your starter by introducing unfermented flour. It might get to a point where the number of bacteria is so low that you might not see any growth in maybe 12 hours! (Even though they’re still working hard multiplying!)
Basically, you are keeping your sourdough starter in a continuous lag phase or a very early exponential phase.
HOW CAN I FIX MY SOURDOUGH STARTER?
Easy, just WAIT!, leave the starter at room temperature for a whole day; it’s not going to grow mold, and it’s not going to go bad (if it does, then your starter was already contaminated with other microorganisms). If the problem is a very low number of bacteria, they need time to get out of the lag phase and get well into the exponential phase. Wait, and most likely, you’ll see some growth, maybe in the form of small bubbles, maybe you can smell it, or maybe you can even see the dough growing a tiny bit.
If you don’t keep a large amount of starter (less than 40 g total), you can add more flour and water without discarding anything and wait for it to grow again; then you can start with regular feedings. If you keep a larger amount, you can discard some and refresh it. At this stage, since the problem was (most likely) the low number of bacteria, you don’t want to give it too much food all at once because that might take too long to ferment, and you’re going to get frustrated. I would aim for a 1:1:1 ratio for a couple of feeds until you see obvious signs of activity and the starter growing. Then wait for it to peak, and decide which ratio works better for your situation.

Wrapping up
Feeding ratios are another big thing when it comes to sourdough starters, in part II I’ll tackle feeding ratios and some outrageous advice I’ve seen people tell newbies. Things like “if your starter doesn’t double in 4 hours then it’s not powerful enough”. If you’ve heard that before, stay tuned! And if you have questions write them in the comments so I can try to respond as best as I can.
You can find me on Instagram, Facebook, and Pinterest, and you can also subscribe to my Youtube channel.
Happy baking!
This post contains affiliate links and any sales made through such links will reward me a small commission – at no extra cost for you – that allows me to keep running this blog.
Whey bread: my new favorite
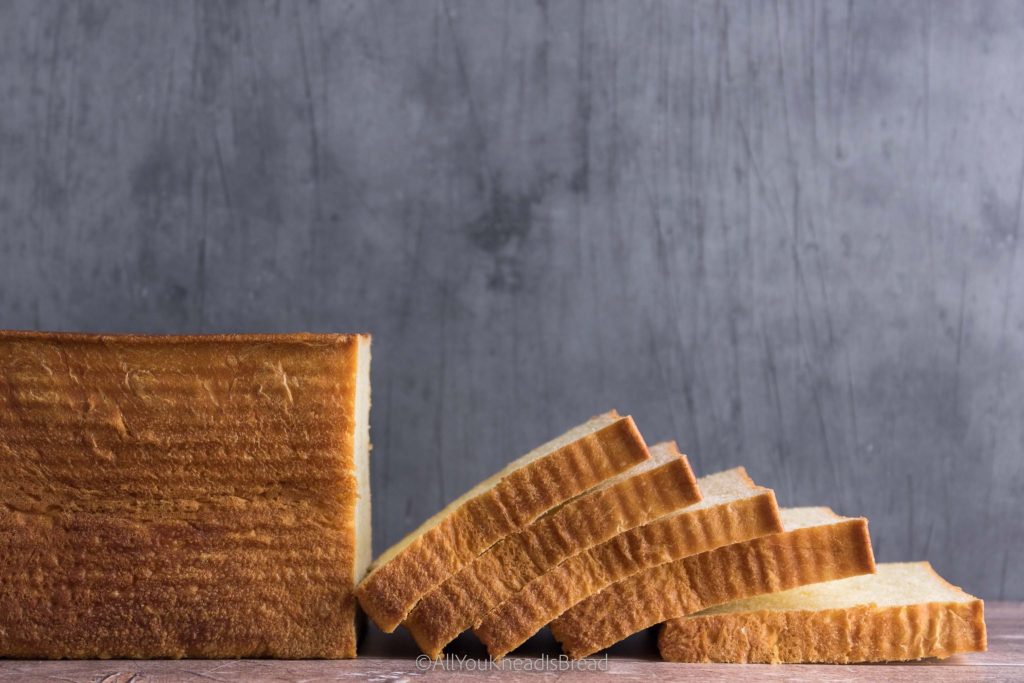
How on earth did you come up with a whey bread recipe? I’m glad you ask! A few months ago I started to make my own yogurt. But with homemade yogurt came leftover whey. I don’t like throwing away things that I can use, especially something that 1) I know it’s an industry waste very difficult to deal with and 2) is not milk but smells like it and therefore could give great aroma to my bakes. I thought I could find a good use for it, and the most obvious one for me was to try my hand at a whey bread. Spoiler alert: it’s AMAZING!
For this recipe, I decided to use active dry yeast (you can also use instant if that’s what you have). I know I know… I’ve been on a sourdough roll for quite a while but because I wasn’t sure if making a 100% whey bread was possible, I wanted to try first using yeast. Then, during the recipe development, I realized that I needed to reconnect with my beloved yeast. The challenge of making something with sourdough is exciting but yeasted bread is delicious too and more convenient when you don’t have the time or patience for sourdough. And honestly, I think this recipe is perfect the “whey” it is *pun intended* 😉
Check the notes in the recipe box for the baker’s percentage, the measurements are for a large loaf pan.
What is whey?
For those who don’t know what whey is, it’s a by-product of the yogurt-making process. Once the milk is curdled and the yogurt is set, the yogurt is strained to get a creamier texture or Greek-style yogurt. The leftover liquid is known as whey or yogurt whey. It’s yellowish and it can be clear or a bit cloudy, it has a milky smell and it’s acidic. If you want to know more about the composition check this scientific article.
This whey is not the same whey protein powder has, they’re called the same, but they’re different. Protein whey is also known as “sweet whey”.
When I make yogurt I make 2 liters at a time; There’s a lot of whey in 2 liters of yogurt! I didn’t want to throw it away before I at least tried to do something with it. I also know whey is a huge problem in the dairy industry. It’s a by-product that pretty much goes to waste and it really poses an environmental problem. You can’t just throw it away because it has a lot of microorganisms and nutrients for other microorganisms that can lead to algae growth. The low pH can acidify the surroundings and thus affect the ecosystem where it’s dumped. It’s a big no-no.
Making the most of whey waste
Many researchers are looking into possible uses for whey in an attempt to relieve the industry from this problem and to minimize environmentally dangerous practices. Believe it or not, the Greek yogurt industry creates billions (billions with a b!!) of liters of whey. This article explains it very well, it’s an interesting read if you’d like to know more about this issue.
But we, bakers of the world, home cooks, kitchen creatives, zero waste enthusiasts… always find a use for everything! So, to your question “Can you make bread with whey?” The answer is YES, YOU CAN! And whey bread is actually now one of my favorite things to bake!

Using whey in bread
For this recipe, whey is the only liquid I use. Even for the yudane (which we’ll cover later). If your whey is clear or cloudy is not going to affect the bread. I’ve tried with both and they work the same.
I was a bit worried at the beginning because I wasn’t sure if the lower pH would affect gluten development or the final texture. But good news! The dough behaved beautifully! It’s very aromatic and you’re going to fall in love with this whey bread! And you can even keep the whey in the fridge for a couple of weeks before you use it. Its low pH and good microorganisms can extend its shelf life for quite some time!
About this whey bread recipe
Let’s get into the tidbits of the recipe! After testing different ingredient ratios, I decided to introduce some precooked flour. Some of you might have heard about tangzhong and yudane methods. Both are based on the same idea: the gelatinization of starch. Tangzhong is a roux and it’s made with a 1:5 flour to water ratio. Yudane, however, is a 1:1 flour to water ratio, and instead of gradually increasing the temperature and cook the mixture, you boil the liquid and pour it on top of the flour.
I’ve worked with both methods and I love them both. The gelatinized starch in the precooked flour makes quite a difference in the texture of the bread. I always mention how important gluten development is, but gluten development doesn’t only mean building the gluten network. It means incorporating all the necessary elements into the network. And that includes starch granules that will gelatinize during baking. These gelatinized starch granules give the crumb some springiness and elasticity, which are key for soft and fluffy bread.
How to make the yudane for this whey bread
If you have a stand mixer or some machine to knead the dough, I’d recommend you prepare the yudane with it. Measure the flour and keep it in the bowl. Boil a bit more whey than the amount you’ll need because some of it will evaporate. When it comes to a boil turn on your stand mixer, quickly measure the weight of the whey you need in another container, and pour it into the stand mixer bowl and knead it until you can touch it without burning yourself.
If you do it by hand, also measure the flour and keep it in the bowl, proceed to heat the whey in the same manner, and when it comes to a boil measure the amount you need directly on the bowl where you have your flour. Place the bowl on the scale, add the whey, and quickly, with a spatula or a wooden spoon mix the dough well and knead it until you have a sticky dough ball.
If you can, use a heavy bowl, so it doesn’t move around while you’re stirring and pouring the boiling water.
The yudane method explained
Usually, people make the yudane the night before baking and let it cool down in the fridge. However, I think that approach is not the best if we want to maximize the possibilities of adding gelatinized starch to our dough. Why? Because of something called starch retrogradation.
Starch is made of two monomeric units: amylose and amylopectin. At room temperature, these two compounds have a crystalline structure (not that they’re crystals per se, but their atoms are arranged in the space as crystals). In presence of heat and water, the starch granules swell and burst. When this happens, the crystalline structures of amylose and amylopectin are lost, the chains can interact with even more water, and the mixture becomes a gel, thus the “gelatinization” part.
However, the gelatinization process is not 100% irreversible. The moment heat is no longer applied and the temperature of the gel starts going down, some of the monomers start re-crystalizing. That means that as they go back to their original structure, they start losing the gel properties and become solid again. This process is called retrogradation.
Starch retrogradation is quite a big deal in starch science and it does have a role in bread staling. It’s also one of the main reasons bread gets hard and crumbly when we put it in the fridge.
Why I don’t put my yudane in the fridge
The retrogradation process is accelerated at cold temperatures. That’s why sauces or custards that have flour or starch harden in the fridge. If we put the yudane in the fridge, the starch retrogradation will go faster than if we just leave it at room temperature. We can keep more gelatinized starch and our bakes will be even better if there’s no cold involved.
Keep in mind that even if we let the cold yudane come back to room temperature, the retrograded starch won’t gelatinize again. Gelatinization starts at high temperatures (>65C/150F)
This is my personal preference when making yudane. I find it’s also more convenient because I always forget to prepare things the day before. But obviously, you can leave it in the fridge if that’s what you prefer.
When your yudane is ready and it’s not too hot, you can either start right away, or you can wrap it in plastic until you start making this whey bread.
How to ferment this dough
Since this is a yeasted dough, it’s going to be a 1-day bread. And in just a few hours you should be able to enjoy a nice slice of this whey bread that’s going to enamor you!
The bulk fermentation will take about 2-3h, proofing will take a bit less. These are just a guide, the total fermentation time depends on how hot your kitchen is, etc etc. Proofing is where things can be different depending on what type of loaf pan you have.
Proofing on a Pullman loaf pan with lid
I have this Pullman loaf pan with a lid. I must say… it’s large. I underestimated the size when I bought it some years ago. At the time I was baking just for myself. But now this size is very convenient because it makes a loaf large enough to last the whole work week and feed 2 people. I’m talking breakfast toasts, lunch sandwiches, mid-afternoon snacks…
Make sure you oil the pan and the lid. After you shape the dough, let it ferment until the dough is 1cm from the top. Then put it in the oven. If you bake the loaf when the dough is already touching the lid and is filling almost all the pan, the dough won’t have enough space and might pop the lid. As the bread keeps rising the first few baking minutes it might push the lid and you might hear a little explosion. Nothing major, but if you’re not expecting that it might scare you. I know because I almost had a heart attack when I heard that myself!
If this happens though, carefully put the dough back in the tin with the lid and everything (it will deflate after the shock) and continue baking. The worst that can happen is that the loaf will have a wonky shape. It might even be a bit smaller than you wanted. But it’ll be totally edible.
Proofing on a loaf pan without a lid
In this case, there isn’t any risk of “explosion”, but there’s a risk of mushroom shape loaf. If this happens it’s possible the bread gets stuck in the edges of the pan and it will not come out of the tin after it cools down. The best you can do is control the proofing and start baking when the center of the loaf is, at most, 1-1.5cm above the edge of the pan. This dough is very elastic, so it’ll have a nice oven spring. For smaller loaves, I use this loaf pan and it serves me well. It’s very versatile and useful for small cakes, banana bread, etc.
How to shape this whey bread
Deflate the dough gently and well by kneading it for a couple of minutes, let it rest for 5 minutes, and then roll it into a rectangle slightly narrower than the length of your loaf pan and as long as your dough allows you while keeping at least ½ inch thickness (if it’s thinner it might get stuck on your counter and be easier to trap air as you roll it). Shape the dough into a log and put it in the pan. If you’re using a Pullman loaf, close the lid. If your loaf pan doesn’t have a lid, cover the dough with plastic wrap or put the pan inside a large enough plastic bag.
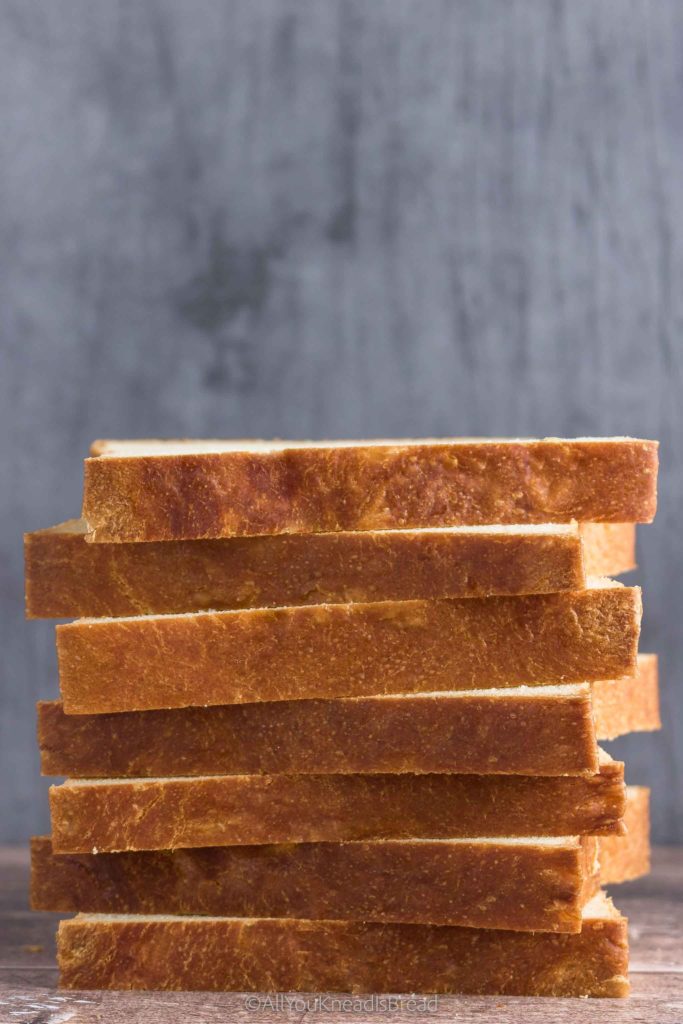
How to bake this sandwich whey bread
Whey has significant levels of galactose, a monosaccharide that’s also considered a reducing sugar. These types of sugars are the ones responsible for Maillard reactions. To the already happening Maillard reactions in bread, we’re adding more reducing sugars, thus your loaf will brown faster than usual. This will make a bit more difficult to test the doneness because the color can be misleading. You take the bread out of the oven when it’s still not fully baked, yet the outside is pretty dark.
For this, it’s better to test the temperature in the middle of the loaf. Once the temperature hits 96C, the bread is done! I have this thermometer and I am very happy, it’s fast and you can also put the probe at an angle, so you don’t burn yourself with the top side of the oven.
Baking with a lid
Here you have two options: you can bake the bread half the time with the lid on. When it starts browning remove the lid and continue baking until it’s done (by testing the inside temperature). Or you can bake with the lid on until it’s fully baked. If you remove the lid halfway, the loaf can get a slightly domed shape that will disappear after it cools down. However, there’s some risk for getting a weirdly shaped loaf. On the other hand, if you bake with a lid, the top might get a concave shape after it cools down.
This all pure aesthetics, it’s not a big deal and it’s not going to affect the flavor or fluffiness of the bread. But sometimes we just want that perfect square toast. I find it easier to bake with the lid at all times, and then I have my process to cool this whey bread down to keep the square shape.
Baking without a lid
If you don’t have the Pullman-style loaf pan, your bread will have a lovely round top and you won’t have to worry about losing the shape while it cools down.
How to cool down your whey bread
One little issue that I’ve encountered when making Pullman loaves is the concave shape the loaf gets after it cools down. It’s a bit hard to find the exact moment to take the Pullman loaf pan lid off. If you take it off too early, the loaf might have a convex shape (like a mountain), but if you take it out too late, it’ll have a concave shape (like a valley).
My strategy is to bake the bread with the lid on at all times and I cool it down upside down for the first 30 mins. First 10mins in the tin, and the rest 20 out of the tin (otherwise the steam will condense on the bread and leave it wet and soggy). If you’re up for the challenge, you can keep turning the loaf upside down every 20 minutes until it’s room temperature. It worked for me, but that’s not something I’ll do all the time. Mostly because I forget about the loaf after it’s baked 🙂
How to store this whey bread
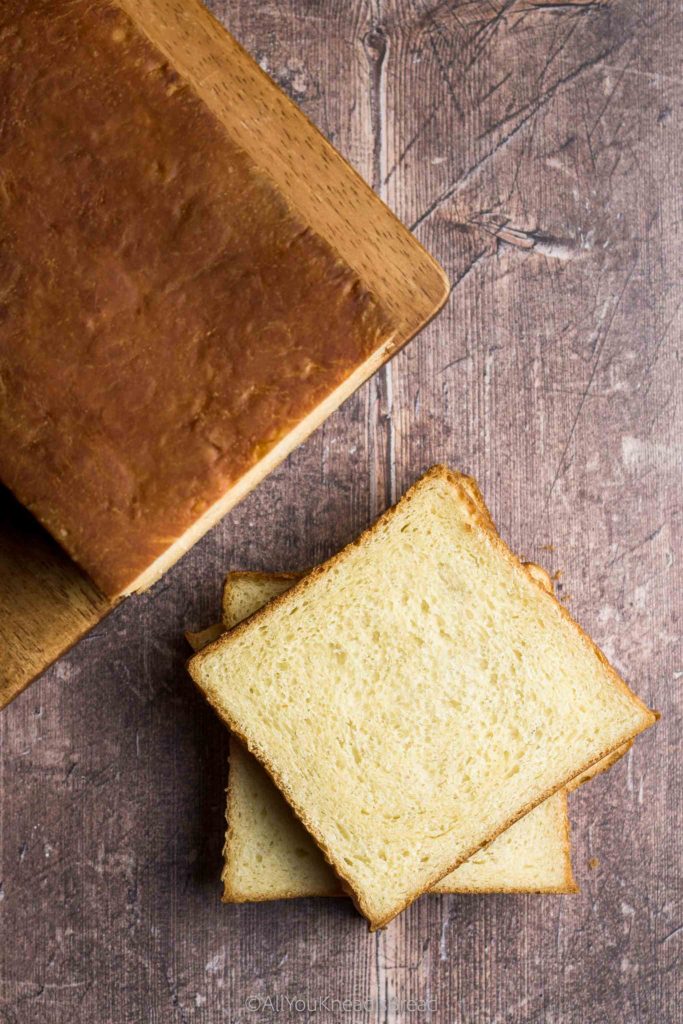
The yudane helps a lot keeping this whey bread fluffy for a longer time. I’ve tested this recipe with and without yudane and there’s a big difference (it stays fluffier with yudane). I’ve kept this whey bread at room temperature as is (not in a bag) for 5 days, just keeping the open side on the plate so it doesn’t get extremely dry. The crumb did dry out over time, but the bread was totally edible and after putting a couple of slices on the toaster it was perfect. The fats (from butter and eggs) kind of seal the crust of this bread, keeping the moisture inside. So while the crust might dry, the crumb remains nice and soft.
Now, this was an experiment, I don’t recommend leaving the loaf as is on the kitchen counter. If you have a square plastic container, you can slice the loaf up and place the slices there. You can also keep it in a ziplock bag and slice it as you need. You can cut the slices and freeze them and then just pop them in the toaster for 1 or 2 cycles when you want a slice.
If you make homemade yogurt I encourage you to try adding whey to your loaves, especially enriched ones! I am stunned by its versatility and incredibly milky aroma! I’d go as far as to say that if you use whey, you might even be able to skip powdered milk in some recipes!
Frequently asked questions
If you follow me on Instagram you might have seen me playing around with this bread. And I received several questions while I was developing this recipe. I hope they can be useful for you too!
Can I use whole wheat flour to make this whey loaf?
Yes, you can, always keeping in mind that cereal bran will alter the dough a little. The more bran, the more liquid you will need and the less smooth your bread will be. I have this recipe for a whole wheat loaf that you might like to try using whey.
Can I use gluten-free flour?
I get this question quite often, and the answer is no. A gluten-free bread requires a lot more testing and different ingredients to make sure you can mimic the properties of the gluten proteins. So you can’t just substitute one flour for the other. If you have experience with gluten-free bread, then you can probably twitch some of your recipes to add whey.
Can I make my whey bread in a Dutch oven?
I haven’t tried it, but I don’t see why not. As long as you control the temperature and you don’t mind the shape of the bread. Still, keep an eye on the dough, because it’s possible it’ll rise more in the oven than a lean dough would, you don’t want to get the dough stuck in your dutch oven.
Can I use parchment paper in the loaf pan?
I don’t see why not! my Pullman loaf pan doesn’t need it, even if I don’t spray oil. But if you’ve had problems before, parchment paper won’t affect your bread.
Can I use oil instead of butter?
If we were talking about other recipes I might not recommend you to do so. Butter and oil behave differently and can lead to very different results. Even solid and melted butter behave differently (You can read about that in this brioche with sourdough discards recipe).
But for this recipe, butter is not the key ingredient so you can substitute it for oil. I have tried using olive oil and it also makes delicious bread!

Whey bread: Your new favorite loaf
This sandwich whey bread is super flavorful, soft, and perfect for sandwiches and toasts. It's also a great way to use your leftover whey!
Ingredients
Yudane
- 130 g bread flour **Check notes for the baker's % to scale down this recipe to a smaller loaf pan**
- 130 g boiling whey
Whey bread dough
- 260 g yudane
- 520 g bread flour
- 150-190 g whey * See notes
- 10 g active dry yeast
- 2 eggs
- 90 g sugar
- 12 g salt
- 80 g softened butter
Instructions
Yudane
-
Add 130g of bread flour to your bowl.
-
Heat a bit over 130g of whey and when it comes to a boil weigh 130g and quickly add it to the flour.
-
With a wooden spoon or with a stand mixer mix the flour and whey until it forms a sticky dough. If you're not ready to bake wrap it in plastic and keep it at room temperature until you're ready to start your bread.
Whey bread dough
-
Mix the room temperature whey, the yeast, and the eggs and let the mixture sit for 10 minutes.
-
Add the sugar to the egg mixture and give it a whisk.
-
In the bowl where you have your yudane add the egg mixture and break up the yudane a little bit.
-
Add flour and salt to the bowl where you have the yudane and the wet ingredients and mix everything until you don't have dry flour particles. Cover and let it sit for 20 minutes.
-
After 20 minutes start kneading, if the dough feels too stiff and you didn't add all the liquid whey, add a bit more. Once the dough starts coming together add the softened butter and continue kneading to incorporate it.
-
Knead until the dough becomes smooth and elastic. It shouldn't stick to your fingers and it should feel nice to the touch.
-
Place the dough in a lightly oiled container, cover it and let it ferment at room temperature for 2h or until it at least doubled in size.
-
deflate the dough gently and let it rest, covered, for 10 minutes.
-
Dust the dough and the counter lightly with some flour and with a rolling pin roll your dough into a rectangle slightly narrower than your loaf pan. Roll the dough into a log and place it in your oiled loaf pan.
-
Let the dough ferment a second time until it's 1-1.5 cm from the edges of the loaf pan (if baking with a lid), or until the dough is at most 2cm above the edges of the loaf pan (if baking without a lid). This should take about 1.5h at a room temperature of 74F/23C. Check the post for more detailed information about this.
-
Before the dough finishes fermenting preheat your oven at 350F/175C.
-
When the dough is ready bake at 350F/175C for 35-45minutes or until the inner center temperature reads at least 205F/96C (Time will depend on the oven).
-
Take the loaf out and let it cool down for 10 minutes in the pan before you remove it from it. If using a Pullman loaf pan cool it down with the lid on upside down for 10 minutes and another 20 minutes without the lid (Check the post for detailed information about the cooling process).
Recipe Notes
(For detailed instructions, explanations, and FAQ refer to the post)
* The amount of whey depends on how much your flour can absorb. My flour has 12.7% protein content and I can comfortably add 170-180g, with stronger flour (14% protein) I need 190g of whey.
**Baker’s Percentage:
Yudane Flour: 20%
Yudane Whey: 20%
Dough flour: 80%
Dough whey: 29.2%
Eggs: 15.4%
Sugar: 13.8%
Yeast: 1.5%
Salt: 1.8%
Butter: 12.3%
If you liked this recipe you might also like:
- This super easy kefir bread (video included!)
- This sourdough marble rye loaf, perfect for sandwiches
- These sourdough burger buns that don’t fall apart
- These delicious sourdough blueberry muffins
- These tasty brie sourdough buns
You can find me on Instagram, Facebook, and Pinterest, and you can also subscribe to my Youtube channel.
This post contains affiliate links and any sales made through such links will reward me a small commission – at no extra cost for you – that allows me to keep running this blog.
Happy Baking!
The science of your sourdough starter
Welcome to a new section of my blog: Bread Science Fridays! In this section I will be indulging on my nerd side and talk about the science of many things behind your beautiful bakes. This week’s post is dedicated to our beloved sourdough starters and the science behind them!
Ever since the pandemic started, more and more people jumped into sourdough. So, I thought it could be fun to explain scientifically what happens when you feed your starter (or build your levain).
A sourdough starter it’s just a culture of microorganisms that are alive and perform their own biological activity. These cultures are composed, mostly, by different strains of lactic acid bacteria (LAB), saccharomyces yeasts, and some candida yeasts among others.
In this post, you will learn the phases your starter goes through during a feeding cycle, why using your starter at its peak of activity is important, and the science behind it!
A couple of things about biology
In microbiology, a strain of a certain type of microorganism is like a subtype of named microorganism. For example, the lactic acid bacteria type would be the lactobacillus but there are many subtypes (Strains). Lactobacillus Acidophilus, Lactobacillus Sanfranciscensis, Lactobacillus Reuteri… They’re all LAB but with some differences (from shape to optimum living conditions).
Each strain has its specific optimum living conditions. That is the optimum temperature, water activity, pH… that will make the fermentation rate the fastest. The fact that a microorganism is “happy” at 28C, for example, doesn’t mean that it cannot perform its biological activities at 29C or at 20C. It means that the performance will not be the best. As you know, it slows down at cold temperatures. However, it’s higher temperature that pose a threat to the microorganisms. Too high temperatures will inhibit and eventually kill the bacteria.
The bacterial growth curve
Bacteria, as living organisms, grow, multiply, and die. The reason our sourdough starter is resilient is not because the bacteria are indestructible, its’ because there are millions of them and not all of them are the same age. They are in different growth phases. While maybe most of the bacteria are dying, some might have just been born.
Bacteria and yeast multiply by dividing themselves into two. 1 becomes 2, 2 become 4, 4 become 16, etc. This mechanism is called binary fission. Therefore, their growth is exponential. In microbiology, this growth is depicted using growth curves.
Bacterial growth curves are specific for each strain of bacteria in a specific set of conditions (Changing the temperature will change the curve). In these curves we can see the 4 phases bacteria undergo from the moment they’re born to the moment they die. A generic bacterial growth curve would look similar to this one:
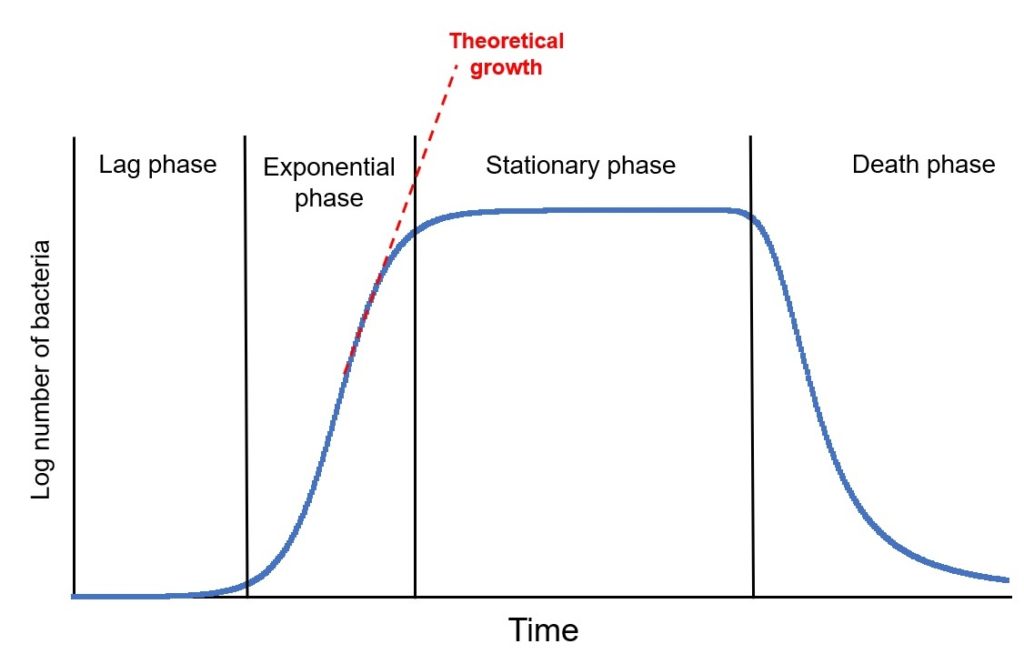
Our starter will follow this growth cycle too. Understanding what happens in each phase will help us understand our starter and when we should use it for baking to prevent a excess of sourness
The phases explained
Phase 1: Lag phase. This is the very beginning of the curve. At this stage, the microorganisms have enough nutrients and are active but they’re still not multiplying. What they’re doing is synthesizing proteins and getting things ready to start the division. It’s also an adaptation period to the culture conditions.
Phase 2: Exponential phase. Once things are ready, the bacteria start multiplying (by binary fission). The metabolic activity on this stage is high and increases as the number of bacteria increases (optimal growth). Some bacteria might die too, but overall, there are more bacteria multiplying than dying.
Phase 3: Stationary phase. This phase is a plateau the bacteria reach because of the depletion of nutrients or accumulation of waste (the acids they produce can inhibit their own activity). Less food means less activity and therefore fewer bacteria dividing. At this point, the growth and death rates are equal, and the overall number of microorganisms remains constant.
Phase 4: Death phase. At this point, nutrients are decreasing and bacteria continue to produce waste from their biological activities (bacterial poop if you may 😉 ). The environment becomes harsh and bacteria start dying (some also go dormant). In this phase, the death rate is faster than the growth rate, so the overall number of microorganisms decreases.
Theoretical growth: it portrays how the curve would continue growing if the bacteria had an endless supply of nutrients.
When you add sourdough starter to your dough, the exponential phase will be much longer because the bacteria:nutrients ratio is much larger. The curve would, to certain extent, follow the theoretical growth because there are lots of nutrients!
How does this apply to your sourdough starter?
Knowing in which phase your starter is, will be very helpful for your baking. The fermentative power of your sourdough will depend on the phase of the cycle it is on, and it is different in each phase.
Although the by-products of the fermentation are essentially the same in each phase, the aromas developed in the bread will be substantially different because every time we take some starter and mix it with flour and water, we’re resetting the growth curve. It starts again in the lag phase.
And depending on the length of the lag phase, more/fewer aromas will build up in the dough. Ideally, we should use the starter at its peak of activity. Which means the lag phase will be shorter.
But, what exactly is the peak of activity and what’s the best way to know it? Let’s dive deeper into this!
The peak of activity and what it means
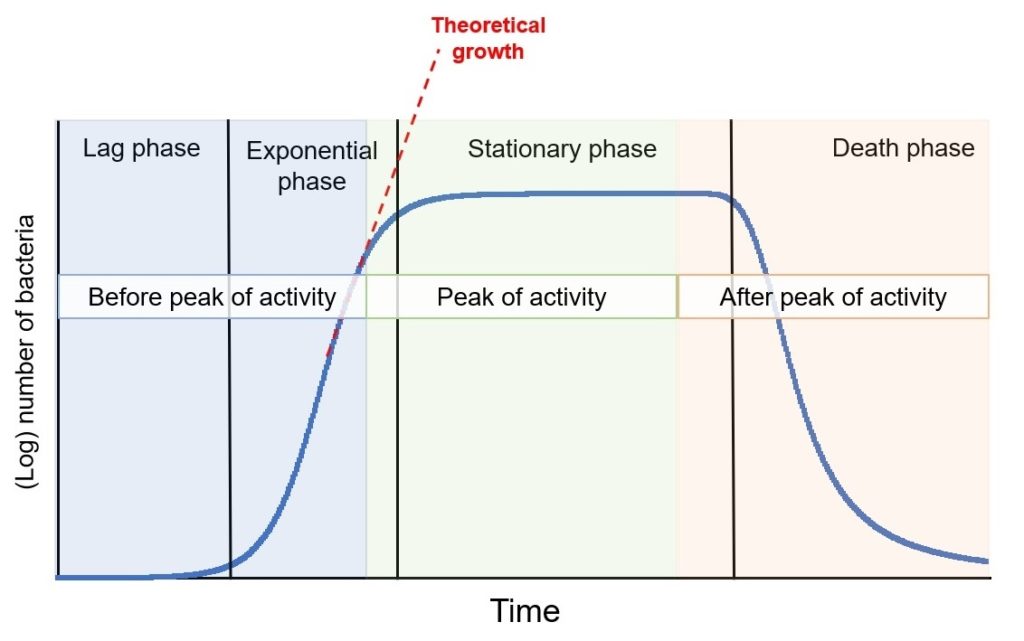
When it comes to sourdough it’s common to talk about the “peak of activity”; we understand that it represents the optimum conditions of the starter and it will work faster if it’s at the peak.
Based on the growth curve I showed you before, it’s easier to see that the peak of activity happens at the end of the exponential phase and throughout the stationary phase. During that time the sourdough starter is very active because 1) the number of alive bacteria is high because they still have lots of nutrients and 2) they’re all used to the environmental conditions, well past the lag phase where they’d be creating “waste” but not multiplying and growing.
Obviously, we are not going to do a bunch of experiments to determine when we should bake. However, once we’re familiar with our starters, we know when they reach the peak of activity (more on this later). We can, then, differentiate 3 stages in our starter:
1.- Before the peak of activity
2.- At the peak of activity
3.- Past the peak of activity
The dough fermentation will definitely be affected by the stage of the starter. Let’s analyze it a bit more how that translates into flavor and aromas of our bread and how it’s related to the growth curve.
The starter has not doubled yet after the last feeding

When we refresh our starter (or when we’re building the levain) what we’re doing is resetting the bacterial growth curve. The microorganisms need to adapt to the new conditions first (lag phase) and then eat and multiply (exponential phase).
If your starter has not even doubled since the last feeding, the microorganisms didn’t have enough time to reproduce; they are at the very beginning of the exponential phase and there is still a low number of them.
Basically, you’d be adding just flour and water with a low number of bacteria.
At this point, the fermentative power of the starter is not high enough because there aren’t enough bacteria to perform the job; which means your dough will need a longer time to ferment. This can be detrimental to your dough because longer fermentation times might lead to a more acidic dough.
Not only that, but you could also risk destroying the gluten network. If the fermentation is much longer than it should, your flour might not be able to resist and the gluten strands will start to deteriorate.
Maybe, flavor-wise, the bread turns out as tangy as you like it, but the structure could be compromised.
The starter has reached or almost reached the peak

People recommend using the starter at its peak of activity, but what many don’t know it’s why exactly this is the best condition for sourdough baking. Spoiler alert: It has nothing to do with your culture being hungry.
At least, not in the literal sense of the word, because the microorganisms eat when they have food, and when they don’t, they just change their metabolism pathway and go into “survival mode” (they become dormant). That’s why they can survive in the fridge for months without being fed, or they can be frozen or dried.
Every time we change the environment of the microorganisms, they need to adapt to the new conditions; so, they have to go through the lag phase again. If the starter has passed the peak or if it’s too early in the feeding cycle, this adaptation period is going to be longer. Either because the microorganisms need to get ready to increase the colony, or because they went into survival mode.
The idea of using the starter at the peak of activity is to reduce the lag phase as much as possible. Because longer lag phases can bring undesired aromas or weaken the gluten network.
The reason the bacteria are very active at this point is that they don’t have to use energy to get ready to multiply, and they’re not getting dormant or dying at a higher rate because there’s still plenty of nutrients.
A change of environment can be anything that makes the new conditions different from the culture. For example, adding salt to your dough, adding more/less water, adding more/less wholemeal flour, adding sugar, adding fats etc.
The starter passed the peak and it’s collapsing

If your starter has reached the peak and has started to collapse, it means that it’s either at the end of the stationary phase or at the beginning of the death phase already, and it already has accumulated a significant amount of fermentation by-products.
Among these by-products, there are several organic acids responsible for the acidity of the sourdough (lactic acid and acetic acid are the most common). If you used this starter, the fermentation would be slower at the beginning because:
1.- There are less alive bacteria, since many might have died already
2.- The acidification of the starter can inhibit the growth of the bacteria, so the fermentative power will be weaker. The extent of this inhibition depends on how acidic the starter became. That’s why when we try to revive a forgotten starter, it might take a couple of feedings until we see some activity.
3.- The bacteria that are still alive need a longer lag phase before they start growing again. During this lag phase they will get ready for the new environmental conditions (your dough) and will fix the pH of the dough that turned too acidic. And remember, during this phase, bacteria keep producing acids but they’re not reproducing.
Basically, if you don’t control de fermentation, your bread can be very sour. Once again, remember that longer fermentation times not only affect flavor, but also the structure.
Contrary to what many people think, though, you can still use a starter that has passed its peak of activity (by just a few hours) and still obtain a bread that has not soured too much, as long as you control the fermentation.
But.. What if I like my bread very tangy?
The sourness of sourdough bread comes from accumulated organic acids in the dough. So, in order to get the tangy flavor, we need to ensure that the dough has accumulated enough of these compounds.
We can do that by using slightly warmer temperatures during the bulk fermentation. Doing this, the bacteria will be closer to their optimum living conditions, and they will perform a faster fermentation. We could push the bulk a little to get that extra sourness.
How do I know my starter is ready to bake?
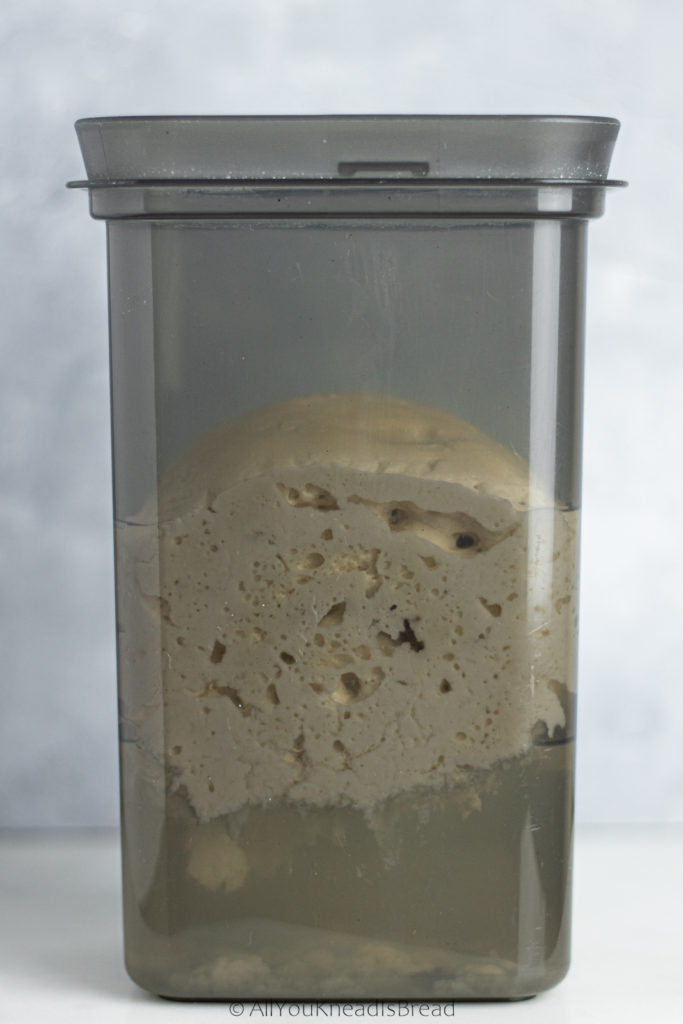
There are different ways to check when your starter is ready, and the more familiar you are with it, the easier it’ll be. I’m going to tell you my favorite way to check the peak of activity at home: The height test
I don’t know if this is how people know it, but it’s how I call it. The height test is, in my opinion, the most reliable way for the home baker to check their starter.
If you always feed your starter the same ratios of flour and water, or you build your levain in the same way, this test is great for comparisons; it will be very easy for you to know if it’s ready by just looking at how much it grew. It also prevents the “human factor” more than other tests and reduces the chances of making a mistake.
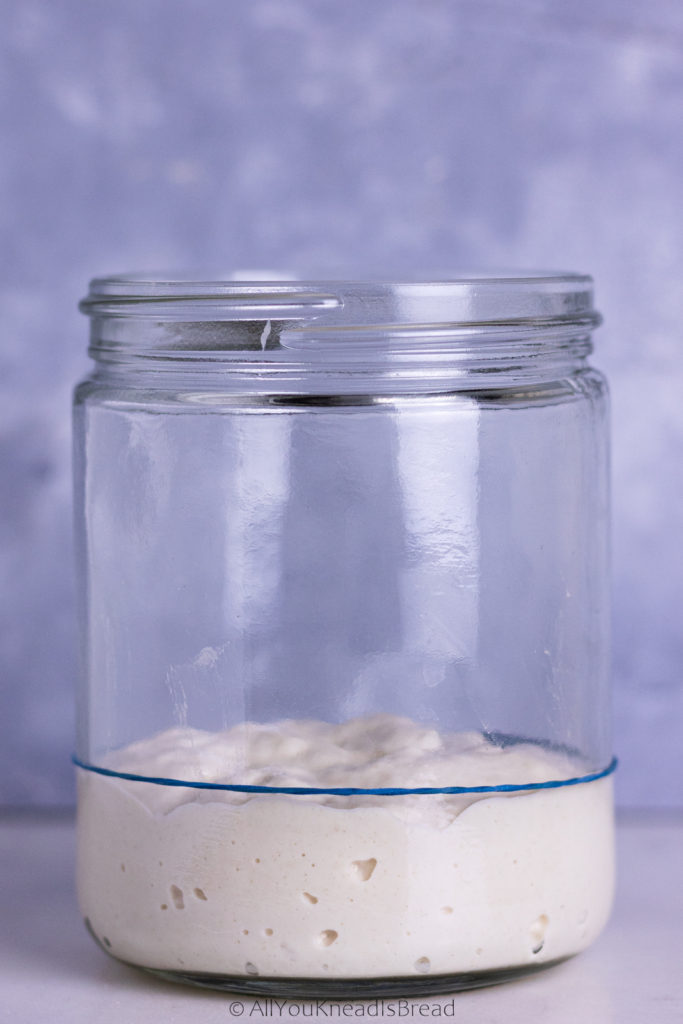
How to perform the maximum height test
As the name indicates, this test is to see how high the starter can grow (this applies to 100% or less hydration, more liquid starters can’t grow too much, for obvious reasons). The peak of activity coincides with the maximum height.
After reaching the maximum height, the starter will remain at that height for a few hours (stationary phase) before it starts collapsing (beginning of the death phase)
Let’s say you feed your starter with a 1:1:1 starter:water:flour ratio. Then you let it ferment and record the height (taking pictures might be even better!) after it reaches the maximum height you need to pay attention to how long it stays at that height and when it starts collapsing.
Imagine that right after feeding, your starter takes 5 hours to reach the highest height, and then it stays 2 more hours at that height. Those last 2h will be the best period to use your starter.
By doing this simple test, you will see how much your starter grows (double, triple, quadruple?). It’s important to know the temperature when you do this little experiment because in warmer days, your starter will grow faster. However, since you know more or less the highest height it will reach, you just need to keep an eye on it!
Always remember that the time your starter takes to grow will depend on the temperature of your kitchen. Warmer temperatures will make the starter more active because they’re close to their optimum growing temperature. Colder temperatures will make the starter grow slower, because these are far from the optimum conditions.
Let’s wrap this up
I’d like to finish my first Bread Science Fridays by highlighting a few concepts:
1.- Bacterial growth has four phases that can be applied to our sourdough starters. Knowing what happens in each phase will help us understand our starter.
2.- The starter works best when it’s used at its peak of activity because we’re reducing the lag phase and bacteria can use the energy more efficiently.
3.- The maximum height test is an easy experiment to know when a starter reached the peak of activity. It’ll help you understand at which phase your starter is and when it’s best to use.
I hope with today’s post you can understand better your starter and have a better idea of the science behind it! Isn’t the world of sourdough so amazing???
As always, if you ever have any doubts or would like me to talk about the science of something, let me know and I’ll try my best to answer your questions!
You can find me on Instagram or Facebook and you can also subscribe to my Youtube channel.
Happy Bread Science Friday!
Maria
Troubleshooting my lievito madre
The time has come! After several tests and experiments, I can 100% confirm that my lievito madre (or pasta madre, or LM or PM, you’ll see both in this post) is healthy and ready for the “grandi lievitati”!
This is a long post, so buckle up! Get some water, a couple of snacks, and let’s get to it!
In this post, you will find all the problems that I encountered with my pasta madre and how I fixed them one by one. You will also learn how certain factors affect the pasta madre and why from a scientific point of view.

After four months of insanity over the wellness of my lievito madre I have finally brought it back to full strength. It’s been a long journey full of troubleshooting and note-taking. I can now conclude that it wasn’t a single problem that was causing the LM to be weak, but several that I had to fix one by one.
A few pointers and clarifications
I started the LM with fermented apple water and from there I built a liquid starter (100% hydration). Then I converted it into a 35% hydration starter. You can check this post to see how I did it.
I’d like to remark that Pasta Madre is not just a stiff starter, it’s a low hydration stiff starter with very particular maintenance conditions and a very specific way to prepare it for baking. This method promotes very specific strains of bacteria and yeasts in a very specific ratio to keep a very specific pH.
Pasta Madre has an incredibly strong fermentative power that’s able to ferment dough with an incredibly high amount of sugar, butter, and egg yolk (substances that can inhibit the growth of bacteria and yeast and hinder gluten development)
Panettone, Pandoro, and Colomba di Pasquale are the holy trinity of pasta madre baking. They undergo long fermentations that due to the specific methods designed for pasta madre, the dough does not develop any acidity.
Pasta madre vs stiff starter
For example: If you’re reading this, I’m pretty sure you’re familiar with “the lievito madre must triple in 3-4h at 28C three consecutive times before it’s ready to make panettone”
If your lievito madre can do that, then it’s mature and ready to prepare the primo impasto (the first dough). However, let’s say that you prepare a stiff starter at 60% hydration. If you compare this stiff starter with pasta madre, you put both in a chamber at 28C and let them ferment, I assure you the fermentation speed will be COMPLETELY different.
Therefore, the “triple in three hours” rule for the pasta madre cannot apply to this 60% hydration stiff starter. And the triple in 12h rule for the primo impasto will not apply either because a 60% stiff starter does NOT behave the same as Pasta Madre. Keep in mind that artisan recipes and methods to make Panettone the Italian way are designed to be used with Pasta Madre.
Let’s start from the beginning
When I first started my LM I was using W380-400 Manitoba flour from Molino Caputo, but I ran out if it and I had to buy more. The new flour I received was W400 Manitoba flour from Molino Grassi.
When I changed the flour, the first thing I noticed was that the new flour needed more than 35% of water. It was impossible to incorporate all the flour. So, I started to add a little more water. Until I was using 40% of water. That extra 5% messed the whole bacteria/yeast ratio. Why? Let’s talk about “water activity”.
Water activity and what it means in food
In Food Science, water activity is a very important concept. The FDA defines water activity as “the ratio between the vapor pressure of the food itself, when in a completely undisturbed balance with the surrounding air media, and the vapor pressure of distilled water under identical conditions”.
The water activity of pure water is 1 and it’s the maximum possible value in a 0-1 range.
In essence, water activity is a way to quantify how much water there is in a particular sample, and based on that number we know which microorganisms could grow in that sample. This is particularly important for all fermentation operations, shelf-life studies, etc.
Water activity in my lievito madre
Back to my pasta madre; now you understand why that extra 5% of water I was adding created an unbalance between the Lactic Acid Bacteria (LAB) and the yeasts in the culture. The water activity changed and it either promoted other strains of bacteria to grow or a faster proliferation among yeast strains. Or maybe even both things happened.
What was clear was that the higher water activity wasn’t promoting the best environment for the microorganisms that should be in lievito madre. In a healthier LM this wouldn’t have been such a problem, but there were other factors affecting it.
Problem #1: Alterations in the water activity of the lievito madre
Cause of the problem: impatience while incorporating flour
Solution: patience! I started to let the PM rest for a few minutes after I managed to incorporate the flour. Like a little autolyse. I went from needing 40% of water and struggle to a 35% and no problems.
Effect of flour in my lievito madre
As I mentioned, I had to change the flour I was using because the website I was buying from changed the supplier. The new flour was SO STRONG! Strong flour must be the best for panettone, right? WRONG.
Manitoba flour comes from a type of hard wheat with higher protein content. However, in order to have that high protein content, the flour has to be very refined and stripped off as much bran as possible. But this process also takes some of the nutrients of the flour away. Nutrients that the bacteria need to be able to perform their biological activities… See where I’m going?
It seemed as if my LM wasn’t getting enough nutrients every time I refreshed it, which caused a progressive loss of fermentative power. I was, unknowingly, starving my LM to the point of almost zero strength.
The smell told me there was some fermentation going on, probably from the yeasts, but it barely grew, it didn’t have the crumb-like inner structure, and it didn’t even float in the bath after 24h.
Problem #2: starvation of my LM
Cause of the problem: lack of nutrients in the flour.
Solution: A mix of flours with a less refined flour that would provide more nutrients.
Lack of nutrients in the flour
Talking to my friend Kel (@wonky.loaf.of.sourdough), she pointed out that maybe the flour was, indeed, too refined. And she was right! That night, when I was about to throw away the LM and start from scratch, I decided to do one last experiment. I refreshed the LM and put it in the fridge, and with the discards, I created a sibling, which I fed 80% of Manitoba flour and 20% of King Arthur bread flour.
In about 12h it was floating and showing signs of life. 12h is a long time, but previously, my LM wouldn’t float after 24h. So, this was clearly the 1st win!
Since that moment I always feed my LM a mixture of flours. I tried 15% of bread flour but it showed lower activity, and I tried also 25% of bread flour but after a feeding cycle I lost a lot of LM, it disintegrated very fast. Once I ran out of bread flour, I started to use King Arthur High Protein flour or King Arthur AP flour, whichever I had at the moment.
The second feeding went even better, in 3-4h it was floating and happy. It smelled so well, it was spongy, it was getting healthier! Or so I thought… It was better, but not 100% there. While this was definitely the major problem, there were still lots of things I wasn’t doing right.
Small changes made all the difference
I used the LM to bake a few loaves and it worked well. I tried to make sandwich bread and the dough rose well too. But when I used it to make brioche it was extremely difficult to incorporate all the butter. This is usually a sign that something is not right.
I also noticed that the loaves I made with LM had large lumps that didn’t disappear after baking. The dough wasn’t absorbing the LM and it wasn’t fermenting, because the lumps didn’t puff up while baking.
At this point I was using the 80-20 mix of flours, 35-37% of water and I was rolling the dough with my pasta maker. The temperature of the house was around 66-69F. The temperature was adequate, the flour was adequate, the hydration was adequate…
Again, Kel to the rescue! She suggested that maybe I was rolling the dough too thin and I was working the gluten too much.
The reason I was rolling the dough with the pasta roller was plain laziness! At this point I had been refreshing the PM once a day for several weeks, it became a tedious task. The pasta maker made the process much faster, but I was compromising the gluten.

Effect of gluten in my lievito madre
The temperature, flour mix, and hydration were good, and in the conditions necessary to promote proper fermentation. However, the dough structure also plays a role.
When I started to roll the dough with the pasta maker, I developed to gluten too much. To the point were 1) the dough was too thin and extremely elastic, making it easier to roll it very tight before putting it in the water bath, and 2) the gluten was so developed that after a feeding cycle, the part touching the water was degrading much faster.
I believe that by working the dough with the pasta maker and rolling it too tight, the oxygen availability in the core of the LM was low, which probably led to a proliferation of yeast and a change in the metabolic pathway of the microorganisms; which led to the development of a different aroma profile and higher production of acetic acid. It was making the dough sourer than it should.
Gluten structure vs development of aromas
A tight LM also meant that all the volatile components released during the fermentation didn’t have a place to go, the dough was so tight that they couldn’t move much and they probably were kept in the core of the LM instead of flowing into the water bath. This too increased the acidity of the pasta madre.
The part that was touching the water, disintegrated much faster. The layers were so thin that after a few hours in the water they dissolved. So, the center part was too dry and the outer part too wet.
I learned that rolling the dough too thin and too tight is detrimental to the dough in the long run. At the beginning you might not feel the difference and the smell changes so very slightly that you don’t even realize it’s becoming sourer.
Once I started to roll the dough by hand, the smell started to change, and it got much better in just 2 feeding cycles. The looser structure helped the LM develop a much better crumb-like core.
Problem #3: The dough was still showing signs of weakness and the smell wasn’t great yet
Cause of the problem: machine rolling affected the fermentation by affecting the gluten structure.
Solution: go back to hand rolling
Effect of maintenance temperature
I had spent 4 months like a doctor trying to figure out the disease of the patient. I didn’t know what was happening, so I started to rule things out. At this point I was pretty confident the LM was healthy, and the best way to test how the LM is doing is by trying to make panettone.
Everything was looking right, the hydration, the flour, the rolling method… the house temperature was a bit higher but it shouldn’t be a problem, should it? WRONG but I didn’t know it yet…
One day I woke up early, I had done the bagnetto the night before, and I started to do the 3 refreshments to prepare the LM for panettone. So that day I prepared the primo impasto and let it ferment for 12h at 28C.
At most, the primo impasto should take 14h to triple. But mine barely doubled in 15h
Obviously, my lievito madre was not ready yet. I should have known, as 4h after the last refreshment it wasn’t even floating, it hadn’t tripled in size either, but I was so eager to try to make panettone that I ignored the signs. I didn’t proceed with the secondo impasto, there was no point (I made waffles with the dough, there’s no dough that a waffle maker can’t fix!)
Effect of pH on my lievito madre
After the panettone fail, I decided to taste the LM on each refreshment (I should’ve done it earlier and more often), it was the only thing I hadn’t test yet, the flavor. And OMG! The dough did smell acidic but nothing too weird. But the taste? It was spicy, vinegary… it was super sour!
As it appears, those warmer days, once again, disrupted the equilibrium between bacteria and yeast during the maintenance refreshments. And I believe the warmer temperatures helped in the proliferation of yeasts that led to a drastic increase in the production of acetic acid and a pH unbalance.
pH is one of the factors that affect the survival conditions of the microorganisms. If the pH changes, so will the strains of microorganisms that can grow in that environment.
In need of a deep cleanse
The LM needed to be purified. I decided to do a bagnetto and then I proceeded to do the refreshment as usual. But this time I added 4% of egg yolk to buffer the acidity and help reestablish the microorganism colony. It worked wonders! (This is a technique suggested by Italian Maestros)
I only used egg once, the following days I only use flour and water and I made sure the water bath was at 4C so with the warmer temperature in my house I could keep the LM temperature at bay. The acidic taste got milder and milder until one day I tasted the LM and it was just PERFECT. It had a hint of acid, and a hint of sweetness.
The smell was HEAVENLY. It smelled alcoholic, but with a little bit of acetic acid, and something sweet. Overall it was a very very very pleasant smell. The kind of smell that you just know is right.
Problem #4: a drastic pH change
Cause of the problem: higher temperature during maintenance feeding cycles disrupted the yeast:bacteria ratio again.
Solution: purification step with egg yolk in one refreshment and cold water for the bath to compensate for the warmer temperatures.

Finally: the panettone test
I tried to make panettone again, this time pretty confident because the smell was SO GOOD that I just knew that was how it was supposed to smell (and taste!)
It was just amazing how much better the LM grew during the 3 preparatory refreshments. Even more so when I made the primo impasto. It barely had any lumps of LM in the dough, and the ones it had were very small. The dough absorbed the butter and egg yolk beautifully! (if the pH is not where it has to be, it’s difficult to for the dough to absorb fats). Even the gluten was formed differently. I could tell the pH of the LM was exactly where it had to be.
I finished the primo impasto at 9:30 pm and left it at 28C overnight. Next morning, just 11h later, it had already tripled.

I cannot express the happiness I felt when I saw it. Every time I try to make panettone, the night of the primo impasto I can’t sleep. I’m nervous it won’t rise. But that night I slept well, because I knew the LM was healthy.
It worked! Panettone on the way!
So that day I proceeded with the secondo impasto and made the panettone. And I cannot tell you how amazing the secondo impasto was. The dough was super silky. I can tell it had been my very best gluten development so far. The windowpane test was just incredible (You can see it on my highlights on my Instagram).

After 4 months of frustration, experimentation, speculation, and research. I can finally say that I brought my LM back to its healthiest life. Actually, not back, because it has never been this healthy before.
If anything, working with my pasta madre has been a humbling lesson and a reminder that this is science. Once I started to work with my pasta madre as I would with a project in the lab, things started to change, I started to see the problems and mistakes I was making. And I’ve learned so much!
Acknowledgements
If you’ve made it this far, I’d like to thank you for reading all this. And if you’re struggling with your pasta madre, I hope my experience can help you in your journey.
Also, I’d like to say thank you so much to all of you who followed this journey and gave me ideas or simply asked about my LM. Brainstorming with others is always better! And thank you to my friend Kel. Without her nerdy mind, I probably wouldn’t be here today, with a healthy pasta madre!
#missionpanettone is now stronger than ever!!!
Happy baking!!
Maria
This post contains affiliate links and any sales made through such links will reward me a small commission – at no extra cost for you – that allows me to keep running this blog.
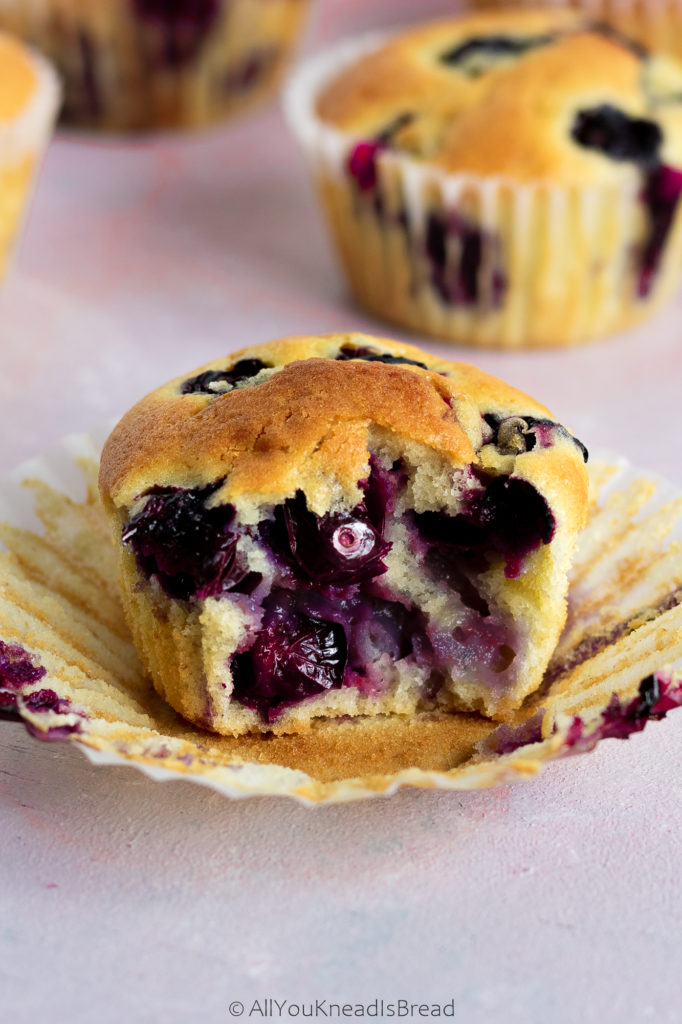
Sourdough Blueberry Muffins
Two words: blueberry muffins. It can’t get better than that. Nah, it can, with sourdough it can! Sourdough blueberry muffins, my friends!
I’m determined to use all my sourdough discards, it is painful to throw it away! So these days the new normal is something like this:
Feed starter – save discards – bake loaf -bake with the discards
The more I bake with sourdough discards, the more I get to test the effect on other food. So far, I can say that cakes and muffins made with sourdough last longer than those without. Nothing new really, sourdough bread also lasts fresh longer time
Isn’t it amazing? Although… after you make these muffins, I doubt you’ll need an extended shelf life, they’re INCREDIBLE!

Why do sourdough baked goods last longer?
Bread and other baked goods are usually discarded when they lose quality rather than when they get spoiled. Bread gets stale kind of quickly, cakes dry and get crumbly… Although there are many factors involved in why and how baked goods dry out, obviously, moisture content plays a key role.
When you mix your ingredients with water, the very first thing that happens is that those ingredients absorb the water. They start making hydrogen bonds and trapping the water within the matrix. Sugar and salt start dissolving, gluten proteins start hydrating, starch granules starch absorbing water and swelling (you see why autolysis helps to develop the gluten? Wink wink)… And all this takes a long time. Much more time than we think.
If we focus on the physical changes of food, rather than the biological changes of sourdough fermentation, we need to pay close attention to how the water is used in baked goods.
Moisture is key
There are two types of water in food: the bound water that’s forming some type of bond and the free water, that is simply stored within the food matrix.
After baking, the free water is going to be the first to go. It moves from the inside of the food (The crumb) towards the outside. Thus, why crust gets soggy over time, and then it finally evaporates and leaves the food.
Bound water, however, it’s somewhat trapped. It can be part of the gluten network, of swollen starch granules, it can be trapped within the fat matrix etc. The amount of bound water (among other things, of course) is one of the things that determines how long the food stays fresh; because its’ much more difficult to separate from the other ingredients. So the loss of quality related to water is slowed down.
Since sourdough baking needs lots of time, the levain preparation, long fermentation times etc. allow all ingredients to keep absorbing water and binding it to other molecules. The flour had many hours to ensure al the particles are saturated with water (I’m assuming a 100% hydration starter here). These bonds survive throughout the whole process; after the food is baked and starts cooling down, the food holds onto these water bonds.
And that’s one of the reasons food made with sourdough lasts longer!
If you’re interested in other food science facts, feel free to send me an email or DM on social media and I’ll try my best to write a post about it!
Back to the muffins!
Alrighty! About these muffins… I made them small for two reasons: 1) because the number of muffins I eat doesn’t depend on the size, so I’d better eat smaller portions now that the gym is close 🙂 and 2) because I don’t have a large muffin tin and if I buy more kitchen stuff my husband is going to make me sleep in the kitchen.
So obviously, feel free to make larger muffins or smaller. Whatever you prefer!
I like to whip eggs and sugar very well, this helps with the airy structure of the muffin and I think the texture turns out super delicate!
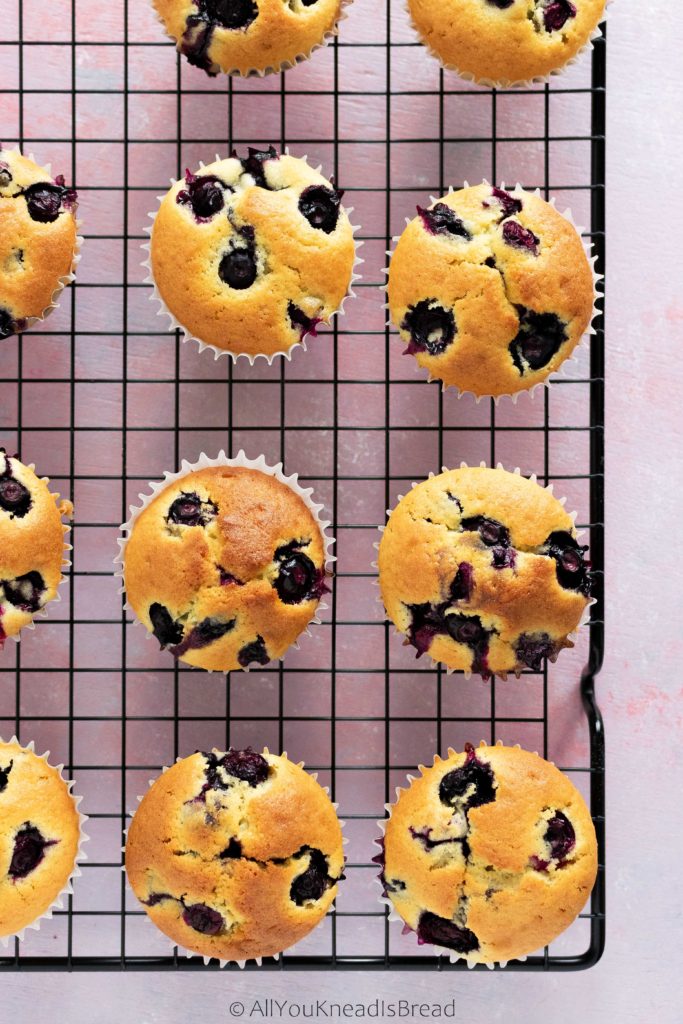
Usually, when you make blueberry muffins, they collapse a little after they come out of the oven, it’s normal, that’s because the water inside of the fruits turns into steam while the muffins are baking, and they swell. Some blueberries might burst, and the others, when they cool down, they collapse because the steam condenses. They also wrinkle because the heat affects the structure of the skin.
I like to let the batter chill in the fridge for at least a couple of hours to allow the baking powder and baking soda hydrate well. Their leavening power is activated by acids and moisture. You can leave the batter in the fridge overnight and bake the muffins first thing in the morning!

If you make this recipe, let me know what you think and tag me on your creations! I love to see what you guys do!
You can also follow me on Instagram or Facebook and you can also subscribe to my Youtube channel.
If you have any suggestions or would want me to make some recipes, adapt a yeast-based recipe into a sourdough one, etc, please contact me and I’ll try my best to respond and plan a recipe!
Happy baking!

Sourdough blueberry muffins
Use your sourdough discard to make these delicious muffins!
Ingredients
- 200 g all purpose flour
- 200 g sourdough discards (collected throughout a week)
- 1/2 tsp baking soda
- 1 tsp baking powder
- 1 pinch salt
- 3 L eggs
- 180 g caster sugar
- 1 tsp vanilla extract
- 1 tsp lemon extract (optional- to taste)
- 180 g heavy whipping cream
- 60 g olive oil (see notes)
- 1½ cups blueberries
Instructions
-
Preheat your oven at 375 F
-
Sift the flour into a large bowl. Take a tablespoon of that flour and reserve
-
Add the baking soda, baking powder and salt to the flour and combine
-
In the bowl of your stand mixer whip the eggs until they are fluffy and have a light yellow color
-
Add the sugar to the eggs and combine
-
Add the whipping cream, the oil, the sourdough starter, and the extracts and combine well. Use a spatula if you need to break down the sourdough blob
-
Change from the wire whisk to the paddle attachment, add the flour in 3 batches and combine at medium-low speed
-
In separate bowl toss the blueberries and the tbsp of flour you reserved and carefully stirr tso they blueberries get a nice coat of flour
-
Add the blueberries to the batter and with a spatula stir until just combined (you can put now the batter in the fridge if you want)
-
line a muffin tin with baking cups and fill them to about 3/4
-
Add some blueberries on top as decoration
-
Bake for about 30 minutes or until they have a nice golden color
Recipe Notes
I like to use olive oil because I think it gives muffins in general a really nice aroma. And it’s also how my mom taught me. But feel free to use melted butter or any other oil of your choice!
If you don’t have blueberries, you can make these muffins with any other fruit
How to do the 3 preparatory refreshments for panettone
The first thing to make panettone is to create the lievito madre (LM from now on 😉 ) and then what? Then we need to make sure the LM is ready, strong and not acidic before we mix the panettone dough. We achieve this by doing the bagnetto followed by the 3 preparatory refreshments.
To learn how to create a lievito madre from scratch check this post
Why do we need the bagnetto?
This technique is a way to purify, oxygenate and release of acidity the LM. It consists of a warm bath where we’ll put the LM for 30 minutes. Depending on its behavior, we can assess how our LM is doing. If it’s too acidic, if it’s too weak, or if it’s just good to go!
When do we do the bagnetto?
Only in two cases
- Before every maintenance refreshment
- Before the 3 preparatory refreshments for panettone
We shouldn’t overuse this technique because it will weaken our LM if we do it too often, as an exception, if you’re in the same situation as me, I built up my LM in 19-20 days instead of 15. If during those days you suddenly feel a change in your LM and you think it’s smelling much more acidic than the day before (if you can actually measure the acidity that would be even better), you can do a bagnetto, just make sure that you leave at least 2 days between this bagnetto and the bagnetto before the 3 refreshments.
How to do the bagnetto?
This is the procedure:
- Fill up a large bowl with water at 38C/100F (it must be 38C/100F)
- To the warm water add 2g of sugar per liter of water and stir until it’s completely dissolved.
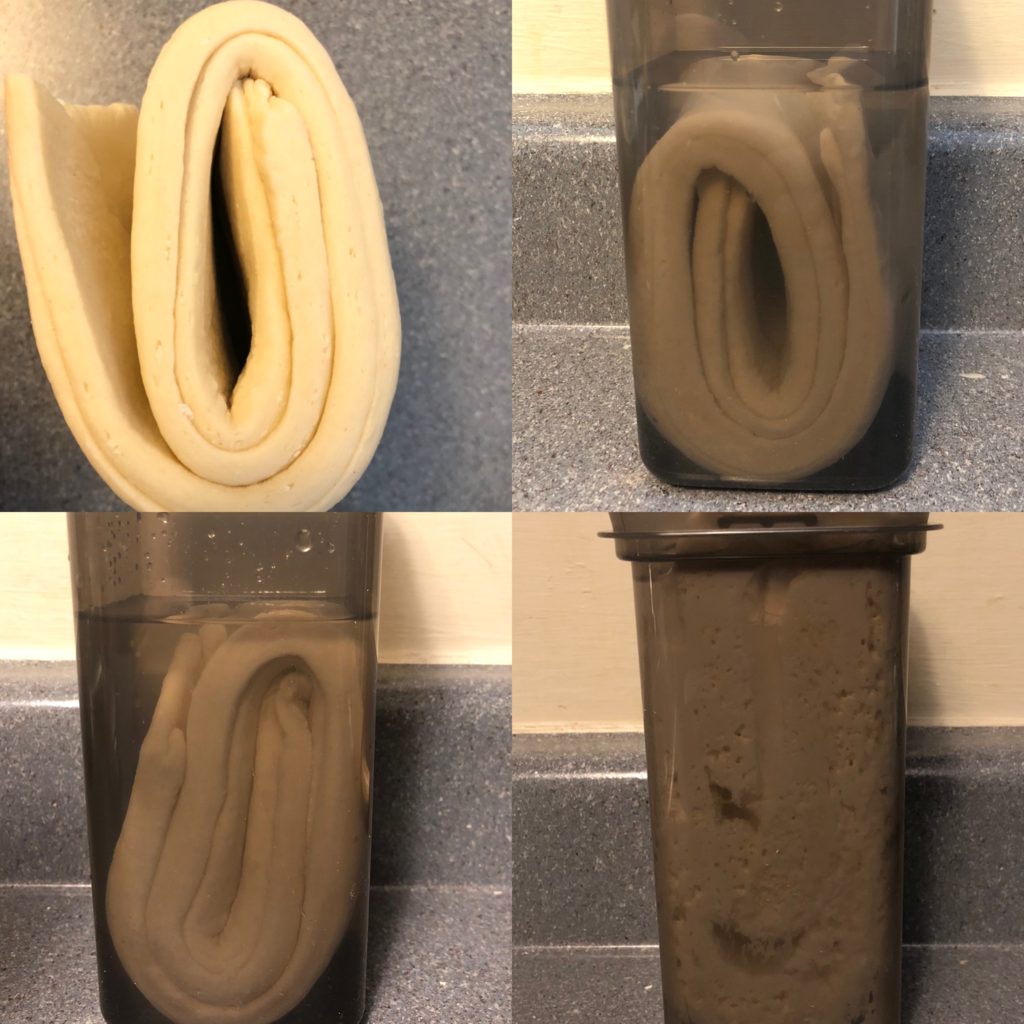
- Proceed to remove the LM from the container, drain the water, remove the mushy part and squeeze very well.
- Place the LM in the water bath and leave it there 30 minutes
Depending on the state of our LM, three things can happen now:
- Your LM floats right away: you either didn’t squeeze it well to remove all the air trapped inside or your LM is too weak.
- Your LM floats after 5-10mins (or within the bagnetto time, mine floated has floated between 7 and 15 mins): it’s perfect. It’ll start showing only the tip and by the end of the bagnetto more of it will be out of the water.
- Your LM doesn’t float after 30 minutes: It’s too acidic, it doesn’t mean it’s weak, it means there is lots of bacterial and yeast activity.
Once the bagnetto is over, proceed with a refreshment the same way you’ve done before:
- 200 g of lievito madre
- 200 g of Manitoba flour
- 30-50% of the weight of flour in water
Mix the dough, roll it until it’s smooth and place it in a water bath for 12-14h
What worked for me was to do the bagnetto in the evening and let the LM ferment overnight. So, the next morning I started the 3 refreshments and started the primo impasto in the evening.
How to fix your lievito madre
There are several techniques but I’m going to focus on the simplest ones
LM too weak
- Leave in the water bath for 5-10 minutes
- Remove it from the water bath an do the 3 refreshments as if you were going to bake panettone
- After the last refreshment let the LM ferment for 12h and do a bagnetto again. At this point, your LM should work fine and float after several minutes.
- If you wish to make panettone, you can proceed now with the 3 refreshments again.
LM too acidic
Since there is a lot of activity, the LM needs more time to get rid of all the acid accumulated.
- Leave the LM in the water bath until it shows signs of wanting to float. After 45-50 minutes it should float.
My LM usually weights somewhere between 250-350g, I used the bowl of my kitchenaid (5qt) and fill it up with 3 liters of water. Since the bowl is not transparent, I can see how the water turns murky during those 30 minutes of bagnetto.
Why do we have to do 3 refreshments?
As I mentioned above, these three refreshments are to ensure that our panettone will 1) Triple in size after 12h of mixing the primo impasto and 2) the aroma and flavor will not be sour or acidic.
When we do the 3 refreshments, we’re also testing how strong our LM is. If it doesn’t triple in 3-4 hours, it means it’s not suitable for panettone. In that case, we can fix whatever the problem is before wasting ingredients.
Also, these 3 refreshments are going to help keep the bacteria happy and in line before they start releasing acids. So we reduce the acidity significantly.
Does it have to be exactly 3 refreshments?
Yes, not 2, not 4, but 3.
Why? Because experience tells us (or better yet… told Italian pasticceri) that 3 is the magic number. Doing less than 3 refreshments does not get rid of the sourness and more than 4 can affect the LM by overfeeding it.
I never thought about this until I started my research for panettone, but sourdough can overeat just like we can. And sometimes, feeding it more won’t make it stronger.
When I learned this, I realized that I did exactly that when I created my sourdough starter, I was feeding it too often and it got to a point where it was lethargic. The moment I reduced the feedings, it came back to life.
So, refreshing the LM more than 3 times might not give you the results you look for.
When do we do the 3 refreshments?
After the bagnetto we have to do one more refreshment, then let the LM ferment in water for 12-14h and then we will start with the first preparatory refreshment, after 3-4h we’ll do the second, after another 3-4h we’ll do the third refreshment and it’ll be ready to add to the first panettone dough after 12-15h.
A mature LM should triple in size in 3 to 4 h, if it does it before 3h something is wrong, it might be too active.
How do we do the 3 refreshments?
The method is the same as to any other refreshment:
- 200 g of lievito madre
- 200 g of Manitoba flour
- 30-50% of the weight of flour in water
After the bagnetto you need to squeeze the dough well and get rid of that slimy layer. Then proceed as any other refreshment: mix the dough, roll it several times, place it in your container and add the water. Then wait 12-14 hours, probably overnight. and refresh the LM again following the same method.
After 3-4h, proceed to do the 3rd refreshment and let it ferment for another 3-4h, then it’ll be ready to add to the dough.
If your house it’s too cold, you should carry out the three refreshments in a controlled environment, somewhere around 26-28C / 80-84F, otherwise, the LM might not grow enough in 3-4h

Refreshment schedule
7:45 am (12h after the bagnetto) take the dough out of the container, squeeze it well and proceed with refreshment #1:
- 200 g of lievito madre
- 200 g of Manitoba flour
- 30-50% of the weight of flour in water
8:15 am Roll the dough and place it in the water bath. Let the LM ferment 4h
12:15pm take the dough out of the container, squeeze it well and proceed with refreshment #2:
- 200 g of lievito madre
- 200 g of Manitoba flour
- 30-50% of the weight of flour in water
12:45 pm Roll the dough and place it in the water bath. Let the LM ferment 4h
4:45pm take the dough out of the container, squeeze it well and proceed with refreshment #3:
- 200 g of lievito madre
- 200 g of Manitoba flour
- 30-50% of the weight of flour in water
5:15 pm Roll the dough and place it in the water bath. Let the LM ferment 4h
9:15 pm PANETTONE TIME!
Take the dough out of the container, squeeze it well, weight the amount of LM you need to your recipe and cut it into small pieces before adding them to the dough to avoid having lumps of LM in the panettone dough.
What’s the best Panettone recipe?
You can use any panettone recipe that calls for lievito madre. The ratios might vary depending on the amounts of egg yolks, butter, sugar, fruits… But if you follow the instructions of the recipe you shouldn’t have a problem 🙂
If you don’t have a recipe I encourage you to try Iginio Massari, Rolando Morandin, Alfonso Pepe, or Ezio Marinato’s recipes. They are well known Italian pasticceri and their panettones are some of the best.
As always, you can reach me through email, Instagram, or Facebook. I’ll be more than happy to help you out!
Cheers to best panettones, enriched dough, laminated dough and bread that you’ll ever make!
How to create Lievito Madre (Pasta Madre) for panettone
UPDATE: This post has been updated to add some modifications to the process of creating your own lievito madre or pasta madre. The new information will be in colored boxes like this paragraph.
Hello everyone!
As promised, here’s my guide to building a lievito madre or pasta madre to make panettone. I will use both names because it came to my attention that some people are using the term lievito madre to refer to liquid sourdough and it’s not the same. I want you to get familiar with both names so you know that lievito madre or pasta madre are the same thing 🙂
First of all, I want to say that all this is not my idea. I’ve been reading blogs and watching videos to have a better understanding of the whole process. Eva’s posts were full of information. I’ve been tracking down everything the Italian Pasticcieri had online and read scientific publications to understand better how bacterias work (surprisingly there’s not much research on this).
This guide is a summary of everything I’ve read and everything I’ve learned every day, and I hope it can be useful to you. It’s focused on building and training the lievito madre. The next step will be the 3 refreshments before making panettone, which I will write about once I’m more familiar with the process.
For a better understanding of how sourdough bacteria grow, I recommend you read this post first. It’ll help you understand how pasta madre works.
When I first heard about panettone, I never thought it was this incredibly challenging bread! It never even occurred to me that it was made with sourdough or how laborious the process was!
To be honest, I do have a panettone recipe here, and trust me when I tell you that I spent a lot of time trying to get the dough right, but now… I feel like I was cheating! (I still think it’s a good place to start getting familiar with very enriched dough and gluten development).
A few notes about pasta madre
First and foremost, is not just a firm sourdough starter. This stiff dough is indeed a sourdough starter, but a special one. It requires a very specific maintenance routine and it has a very specific purpose: to bake grandi lievitati products such as panettone, pandoro, colomba…
If you want to make some rustic Italian bread using sourdough, you can create a stiff starter, or use your own sourdough starter. You wouldn’t need lievito madre, because you wouldn’t need the specific characteristics of grandi lievitati products in a rustic loaf.
Grandi lievitati bakes also require very strong flour, and most likely, your regular bread flour won’t be enough. Also, I wouldn’t say that nobody uses whole wheat flour, but I believe that’s not the most common way to maintain pasta madre.
Things you need to know before you start
These are things that I’ve learned along the way and that I think everyone should know before making the decision to start this journey.
- Be aware that it’s going to take 15 days to get the lievito madre ready. There are two major parts in this process: building the stiff starter and training it.
- I encourage you to do a few experiments to see if you can find a place where you can keep a constant temperature of 30C/86F. This step is crucial in the first couple of days and also to ferment the panettone dough.
- Check your schedule and plan accordingly. Don’t start making the starter on a Saturday at 1 pm if you won’t be home at 1 pm during the week because the cycles are either of 12 or 24h.
- Gather all your ingredients before you start and make sure you have enough flour. You will need it. I bought 15lb and it’s enough to prepare the pasta madre, train it and make at least 1 batch of panettone (probably more).
- If the quality of your water is not good, buy water (you don’t need a high mineral concentration in the water). If the quality is fine, I suggest you filter the tap water.
- Get your mind in the right place. Some days you will be tired and will want to go to bed, but you’ll have to feed your pasta madre, this is very important when you’re training it. The whole point of this is to reduce the acidity. Once is matured, you can put it in the fridge and feed it once a week.
- Be patient. Use your eyes and, especially, your nose to let the dough tell you what’s happening.
The process of creating your lievito madre
| Building period | |
| Day 1 | Make apple yeast water |
| Day 2 | Create a 100% hydration sourdough |
| Day 3 | Convert into a stiff starter and start anaerobic fermentation (wrapped log) |
| Day 4 | Wait. Nothing to do |
| Day 5 | Collect the core of the log, refresh it with flour and water and start fermentation in water |
| Training Period | |
| Days 6-10 | Refreshments using same amounts of flour and starter +30-50% of the weight of flour in water |
Building the lievito madre: 5 days
The first step of the building period is to activate the wild microorganisms found on apples. In other words: create an apple yeast water.
As you know, vegetables, fruits, cereals, etc have lactic acid bacteria and yeasts that are dormant and need to be activated.
These microorganisms, in general, proliferate better when their environment is moist. In science, we refer to this as “water activity”. This number ranges between 0 and 1 (pure water being 1), so the higher the water activity, the easier it will be for the microorganisms to wake up and grow.
Temperature is also crucial. Fermentation can occur at different temperatures, but not all microorganisms are activated at the same temperature. For panettone purposes, we should make sure our culture is at 28-30C (82-86F) so we promote the fermentation of specific strains of lactic acid bacteria.
A typical sourdough culture can have dozens of different strains of bacteria and many different types of yeast. So we can select which ones we prefer by controlling the temperature, moisture content, pH…
Day 1: Start the apple yeast water
You will need:
- 1 or 2 pesticide-free and untreated apples (I bought organic and they worked great, they shouldn’t have wax or anything, the more natural the better. If you can go to an orchard even better!)
- A glass container with a lid
- A grater
- Water at 30C/86F ( I used tap water filtered with my Brita)
- A scale
- A knife
- A thermometer
- A warm place where you can maintain a temperature between 28-30C/82-86F (my oven with the light on is enough, if it’s too cold and the temperature drops in the evening I put a glass with hot water on the other corner of the oven before I go to bed or when I wake up)
- Cut the apples in 4 and remove the core. You don’t need to clean the apples because if you do, you’ll probably wash out lots of nice microorganism. If there’s dirt on the stem area, just cut that part out.
- Grate the apples and keep the peels
- Weight 200g of grated apples and peels an place them in the glass container
- Weight 200g of water at 30C/86F
- Add the water to the glass container and close it tightly. You can shake it a little bit if you want
- Place the container in your oven or fermenter and wait for 24h
That’s it for now!
Day 2: create a sourdough starter with the apple yeast water
After 24h you might see small bubbles in your container, it can make a fizzy noise when you open it, it can smell like cider or maybe you can’t tell if something happened in there. That’s why this step is important. If after 24h, your starter doesn’t show activity, start with the apples again because something went wrong.
You will need:
- Fermented apple mixture from day 1
- A strainer
- A tall and transparent container*
- A spatula or a spoon
- 200g of Manitoba flour
- A scale
- Sharpie or rubber band to mark the container
Today is an easy day, enjoy it, because things get more complicated!
- Strain the apple mixture from the day before and collect the liquid. In my case, I didn’t see small bubbles, but it did smell like cider.
- In a medium bowl weigh 200 g of Manitoba flour and add 200 g of the fermented apple water. With a spatula mix well until you don’t see dry flour particles. It should look like a regular 100% hydration starter.
- Carefully transfer the starter to the tall container. And let it ferment at 30C for 24h. I put it in the oven with the light on. After 24h the starter will raise and collapse. At the very least it should double in size. That’s why it’s important to not leave dough stuck on the container wall because while the starter rises and collapses it’ll leave a mark on it, so you’ll be able to tell how far it rose. If there was anything there before, you might get confused.
NOTES:
You don’t have to put a lid on the container, you just need to place a napkin on top it there is any risk of something falling inside.
If you have it in the oven, try not to open the door all the time. That way you avoid streams of colder air coming inside and changing the temperature. The more constant the temperature the better. I checked my oven before going to bed and in the morning if the temperature changed too much overnight or I felt the house very cold.
Make sure the container you use for this is tall enough that can hold the dough even if it quadruples in size. Also, just in case some starter overflows, put a plate or a tray underneath.
*my container is a coffee canister that I bought in Walmart for less than $2. It’s 10x9x20 cm (4×3.6×8 in)
Day 3: Convert the starter into a stiff starter and do an anaerobic fermentation
Today is when you should start seeing activity in the sourdough. After 24h at 30C, your sourdough should’ve grown and collapsed. There should be some debris on the walls of your container that indicates how high the starter rose. It should’ve, at the very least, doubled in size. If it didn’t, at least, double, I’d start again. There aren’t enough bacteria or the ones that are in the culture, are not strong enough.
You must always keep in mind that making panettone is a difficult task and fermenting all that dough full of sugar, butter and egg is difficult too. So, we need to make sure that the bacteria we select and will train is the strongest.
The starter should be very runny, the same as a 100% hydration starter that has reached the peak and collapsed. It should have small bubbles on the surface and a pungent aroma. Don’t freak out if it smells like something rotten, so far, it’s normal. The bacterial colonies are fighting against each other, everything we do is to promote the survival of the ones we want.
The second time I built my LM I didn’t wait until it completely collapsed (24h), instead, I decided to proceed with the next step after 12h. This way most of the bacteria were still in the stationary phase, which means that I collected more live bacteria. Ultimately, my PM was more active than the previous one.
You will need
- 200 g of yesterday’s starter
- 200 g of flour (more if needed to achieve desired consistency)
- A rolling pin
- A scale
- A Ziplock bag
- 2 cotton cloths
- 1 meter/1 yard of some strong rope or string
- Collect 200g of the starter and add 200 g of flour.
- With your hands mix everything well. The dough should be dry and relatively hard, it shouldn’t stick to the counter but should be soft enough to work with a rolling pin. It is OK if you need to let it rest a few times to relax the gluten.
- Once you’ve incorporated the flour, with a rolling pin start working the dough until it gets a little bit more elastic. It doesn’t have to be extremely soft and smooth, but it shouldn’t have lots dry flour or chunks of dry flour either.
- Shape the dough into a rectangle-ish that’s about 20cm long and 15cm wide and roll it into a log. Place it into the ziplock bag and wrap it well. Wrap the packet with a cotton cloth and then with another cotton cloth and tie it with the rope or strings you have. It doesn’t need to be too tight, just enough to keep the cloths in place.
- Put the dough in an empty pot and put the pot inside of your oven (this is precaution, it can explode due to the built-in pressure). You don’t need to leave the light on. Just make sure that nobody turns the oven on and burn your pasta madre.
- Let it ferment for 48h. As time goes by the log gets harder and harder. That’s a good sign. It means that it is fermenting and as a result, the pressure is increasing.
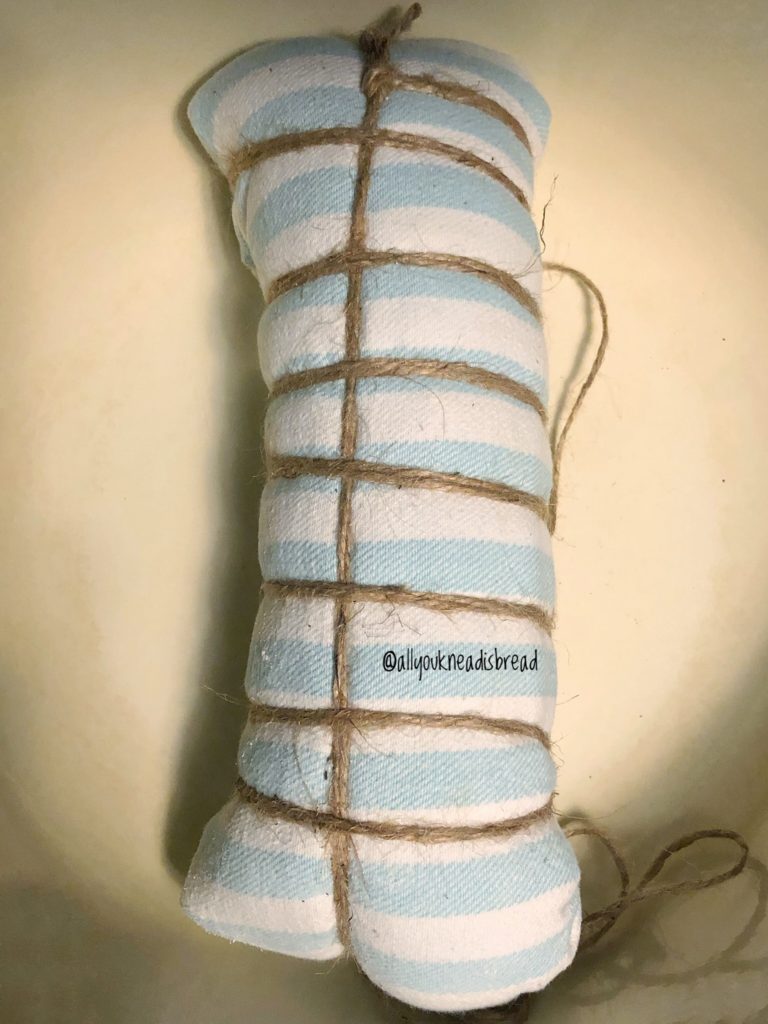
Day 4: No need to do anything
Day 5: Collect the fermented stiff starter and begin the fermentation in water
After 48h the log might not feel as tight as after 24 or it might still feel a bit tight. Anyhow, today we’re going to unwrap the whole packet. Be careful because it can explode. Most likely, you’ll see how, due to the pressure built inside, the dough tore apart the plastic bag and some of it came out and it’s dry and stuck on the cloth. Don’t worry, it’s absolutely normal.

You will need:
- A knife
- A scale
- 200 g of stiff sourdough
- 200 g of flour
- 60-100 g of water at 30C/86F
- Mixing bowl
- Rolling pin
- A tall and transparent container
- Water for the bath
- Unwrap the log carefully
- With a knife cut the bag and open the log lengthwise. You should see small alveoli. The dough should have a dark color (from the apple water) and it should smell better, more of a fermentation smell than in the previous step.
- With a clean spoon, collect the inside part of the log (the “cuore” as Italians say). The strongest bacterial colony is in the core of the log. The bacteria undergo a very rough 48h where an anaerobic fermentation takes place and only the strong survive, and those are the ones we want.
- Collect 200g of dough or as many as you can.
- In a bowl add 200g of dough, 200g of flour and 30-50% of the weight of flour in water at 30C/86F. That is 60-100 g. Start by adding 30% and move up if needed. The dough should be dry and hard, it shouldn’t stick to the counter but should be soft enough to work with a rolling pin.
- Roll the dough into a rectangle, fold it in 2 or 3 and roll it again. The procedure is very similar to working with laminated dough.The dough should get smoother and smoother. It shouldn’t have pieces of dry flour in the middle.
- Roll the dough into a long rectangle that is slightly narrower than your container and about 1cm/0.5 in thick.
- Fold the rectangle into 3 or 4, put it inside of the plastic container and fill it with water just to cover the dough.
NOTES:
If your kitchen is:
- Cold-Very cold: you can use room temperature water for the bath
- Not too cold, not too warm (around 20-23C, 69-73F): you can use room temperature water and check how it evolves, you might be able to do refreshments every 12h or every 24.
- Warm-very warm: use cold water. Keep a bottle of water in the fridge, or cool it with ice cubes and when it’s cold enough add it to the container.
Pay attention to how the dough behaves. Warmer temperatures will accelerate the fermentation process and colder will slow it down. Avoiding over fermentation is crucial.
In my case, my kitchen was not too warm and not too cold, but since I’m not home all day, I didn’t want to risk the dough to over ferment and lose a lot of it, so I started using cold water. The dough didn’t show much sign of fermentation in the first 12h. After 16h it was floating and after 24 it had clear signs of fermentation (alveoli), the layers weren’t visible anymore and it had developed a dry skin on top.
Something I realized was that this sourdough starter likes routines, so try to always do the same thing and keep it at the same temperature. During this process, there was a night when the temperature dropped a lot and the pasta madre didn’t rise as usual. In my experience, consistency is key!
The reason the container and the dough should be almost the same width is that when the dough starts fermenting and the layers get thicker, the container will retain the dough and prevent it from expanding to the sides. Therefore, the dough doesn’t have a choice but to grow upwards.
Training your pasta madre: 10 days
Days 6-15: refresh the lievito madre every 12 or 24h
According to the Italian regulations for Artisanal Panettone, the lievito madre has to be trained for at least 7 days. In our case, it’ll be trained for 10 days.
From now on you need discipline because you must feed your LM at the very least every 24h. Whether you’re tired or sleepy. Therefore, you need to think well about which schedule works for you best.
For example, I leave my house around 8:45 am, and come back home around 8 pm, that’s my window. I started the process at 8:30 pm and then I was doing the refreshments at 8:30 pm every 24h. I chose this time because not only is it when I’m home, but it’s also a time that works for me on the weekends. Because your pasta madre doesn’t take weekends off!
I’m saying this because if you start working very early, you might do refreshments at 5 or 6 am, but… will you wake up that early on a weekend? If you will, then it’s fine! I know I wouldn’t, I’d probably turn my alarm off and regret it later.
You will need:
- A knife
- A scale
- 200 g of stiff sourdough
- 200 g of flour
- 60-100 g of water at 30C/86F
- Mixing bowl
- Rolling pin
- Tall and transparent container
- Water for the bath
- A large bowl to discard the water or the kitchen sink
I changed my container to a shorter but wider one after day 6 or 7. It allowed me to control and shape the dough better.
The procedure is similar to day 5.
After 24h, the lievito madre should’ve risen to the top of the container and probably developed a dry skin. In the bottom, you will see some flour. Your pasta madre will be very soft and slimy on the outer parts. What we need is the core of the dough.
- Remove the dry skin that developed on top. It might not be completely dry, but even so, remove it. It’s the part that has been exposed to dust and particles falling on top of it.
- Hold the container with one hand and with the other try to separate the dough from the walls of the container so the water to come out but you can hold the dough, and remove the water.
- Squeeze the dough to drain water out of it and massage it so the slimy mushy part falls out and you only keep the dough that was not degraded.
- In another bowl weigh 200g of Manitoba flour, add 200 g of the drained pasta madre and add 60-100 g of water at 30C/86F
- Knead everything and incorporate all the flour. If you need to let the dough rest, do so.
- Roll and shape the dough the same way you did the day before
- Place the dough in the container and add water to cover it.
Repeat this every day for the next 10 days paying attention to how the dough smells, how the alveoli look after the fermentation cycle etc. Also, smell everything. The dough, the water you discard… Your nose will let you know how the lievito madre is doing more than your eyes will.
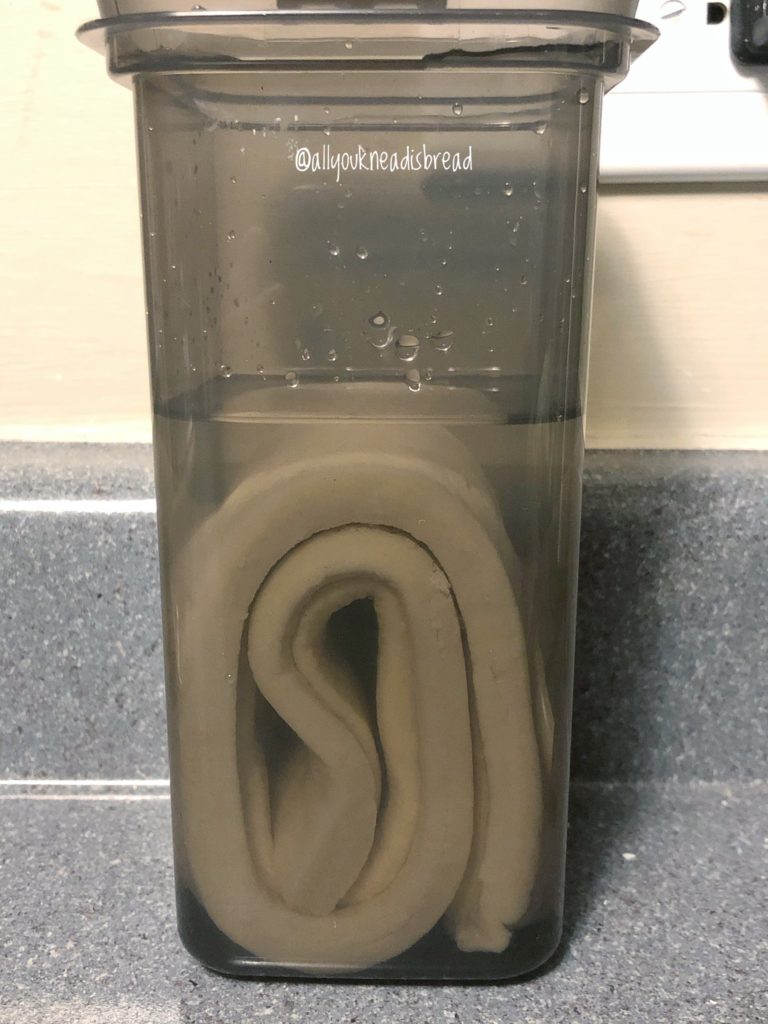
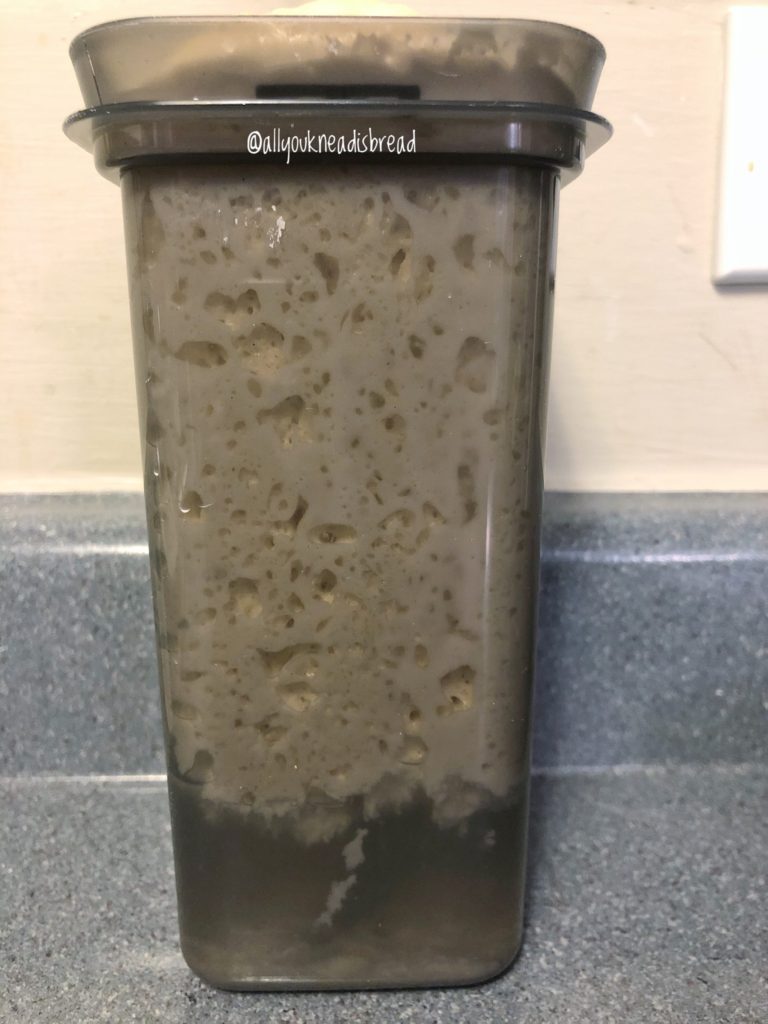
Things you need to know
- You need to keep everything extremely clean to reduce the chance of cross-contamination.
- Keep in mind that you’re going to use a lot of flour just to build your starter. If you’re a pro at this, probably you can use smaller amounts of flour and LM because you can tell how the dough is doing just by looking at it. But if you’re like me, in the learning process, you might want to keep relatively large amounts of flour for each refreshment until you learn to feel the dough and see if it needs more or less water, 24 or 12h refreshment cycles, etc. I learned this method this way and larger amounts are easier to deal with and to avoid over-degradation of the dough. This is especially handy when you’re not home all day. I see this as an investment, from now on I’ll take care of my lievito madre and, hopefully, I won’t have to do it again!
- Your hand will suffer, keep your moisturizing lotion close by! After a few days I noticed my hands were getting very dry. I guess it’s normal, you’ll be washing your hands all the time, and let me tell you… this dough is difficult to get rid of! Warm water is your best friend here. Also, you’re going to be working every day with a slightly acidic dough. So yeah, keep the lotion close by.
- If you can find/afford 2 containers with the same dimension, get them. It’ll make the process a bit faster because you don’t have to stop to wash it to put the dough back in.
That is all for now!
This is all for now. If you have any questions you can contact me through email, DM on Instagram, or send me a message on Facebook and I’ll try my best to help you!
Let’s start a movement for homemade artisanal panettone! Tag your pics with the hashtag #missionpanettone so we can all see how everyone’s lievito madre is doing.
You can find me on Instagram, Facebook, and Pinterest, and you can also subscribe to my Youtube channel.
This post contains affiliate links and any sales made through such links will reward me a small commission – at no extra cost for you – that allows me to keep running this blog.
I hope you all have a wonderful weekend and if you are celebrating Thanksgiving… Happy Thanksgiving!
Maria.
How to make brioche with sourdough discards

Hello friends!
I hope you’re having a wonderful summer! I’m definitely enjoying my well-deserved break! Since I have time, I’m baking almost every day. Nothing makes me happier than having fresh bread on the table!
I’m also taking this time to look for new recipes, try flavor combinations… And also, to look into how bread science can help your baking.
Lately, I’ve seen several brioche recipes and from the pictures, I could tell that the crumb wasn’t what brioche crumb should be. In other words, most likely, the dough wasn’t developed properly.
Why is brioche usually labeled as a “difficult” bread to make? Well, adding solid butter is challenging, and developing dough with that amount of fat takes extra time. So, it’s easy to give up
But let me tell you something, brioche = patience, that’s it. That’s the secret.
Sometimes we’re tempted to melt the butter and make the whole process easier
Or we stop kneading because we’re just tired of waiting for the dough to be ready…
Both butter and kneading, are strongly related when we make brioche.
On this post, I explain why we should use solid butter and how to knead brioche to achieve the PERFECT texture.
I hope that once you understand the science behind, it’ll be easier for you to achieve better results and not to get discouraged when handling enriched dough.
Also, on this recipe, I show you a way to use sourdough discards.
If you’re beginning your brioche journey, this recipe is for you because the butter content is not too high. Practice with this recipe and feel free to increase the amount of butter later on.
This is not a 100% sourdough brioche, it also has commercial yeast. But the sourdough enhances its aroma, and the long fermentation times improve its texture considerably. Speaking of texture….

How to get the best texture in your brioche
First things first. When making brioche we need to have one thing in mind: the fat content is very high, not just because of the butter, but also the eggs, therefore, developing the dough is going to take time and patience.
Although this brioche has a relatively low flour:butter ratio, all the explanations apply to higher butter content brioche and other enriched doughs.
How does fat affect the dough?
The first thing you need to know is that melted butter and softened butter (which is still in solid-state) are two completely different things.
The structure of solid butter is made of little crystals that interact with other ingredients and are essential for developing a nice gluten network. When you melt butter, those crystals are destroyed, so the structure of the butter is different, therefore, the way it interacts with other ingredients it’s also different.
Although the role of solid fats is not fully understood yet, scientists have agreed in a three-parts mechanism to explain what happens when we add butter or shortening to bread dough:
- Wheat proteins have bound phospholipids in their structure which are essential for gluten elasticity. These lipids interact with the crystals found in the butter to create gluten-fat complexes (structures) that strengthen the gluten network and give it more elasticity.
- Butter (or solid fats) can act as a lubricant between the gluten structure and starch matrix, improving the gas retention capacity of the dough. As a result, dough that has a higher content of solid fat has the ability to rise more due to an improved gas retention capacity.
- Solid fat melts during baking and seals pores that are present in the dough through which the gas would, otherwise, scape. CO2 eventually leaves the dough, but the butter retards this process and, again, helps the expansion of the dough during baking, the famous “oven spring”.
You can see that a proper redistribution of the fats within the dough is very important. And the way to achieve it is…. By kneading! Of course 😉
How to knead dough with high-fat content
Developing the gluten network of enriched dough consists of two major steps: One is the development of the gluten-starch matrix the other is the development of the gluten-butter complexes.
First, we need to develop the gluten-starch matrix, so then, the butter has a place to start forming the complexes I mentioned before. That’s why we don’t add the butter at the beginning, we knead the dough a little bit until it has a good consistency.
After that is when we start adding the butter.
Think of it as building a house. First, you need the main structure, then you start building up the walls.
However, how many times have you tried to develop the dough and it looks as it will never come together?
That’s because the long strands of gluten proteins, as they form, they get all tangled. If you force them too much (knead too much) you might end up breaking them, or in other words: over-kneading the dough. There’s a simple solution though… Let the dough rest!
Letting the dough rest while kneading can go a long way and reduce the kneading time. Whenever you have troubles to bring the dough to full development stop for 5-10 minutes so the gluten strands have time to detangle.
What do you achieve with this?
- You avoid over-working the dough having better control over it.
- You can develop a better gluten network, with organized gluten strands that are more elastic. This will improve the cohesiveness and strength of the final product. The crumb of your bread will be AMAZING!
- You avoid increasing the temperature of the dough to the point where the fats will melt. Either if you’re using your hands or a stand mixer.
The texture of your brioche should NOT look like cake or banana bread. It should NOT be crumbly. It should be cohesive, soft, spongy and springy. You should be able to pull apart strands of crumb. If not, most likely, the dough wasn’t properly developed
Although there can be many other reasons to explain why the texture didn’t come out right, I believe dough development is, usually, the main cause.
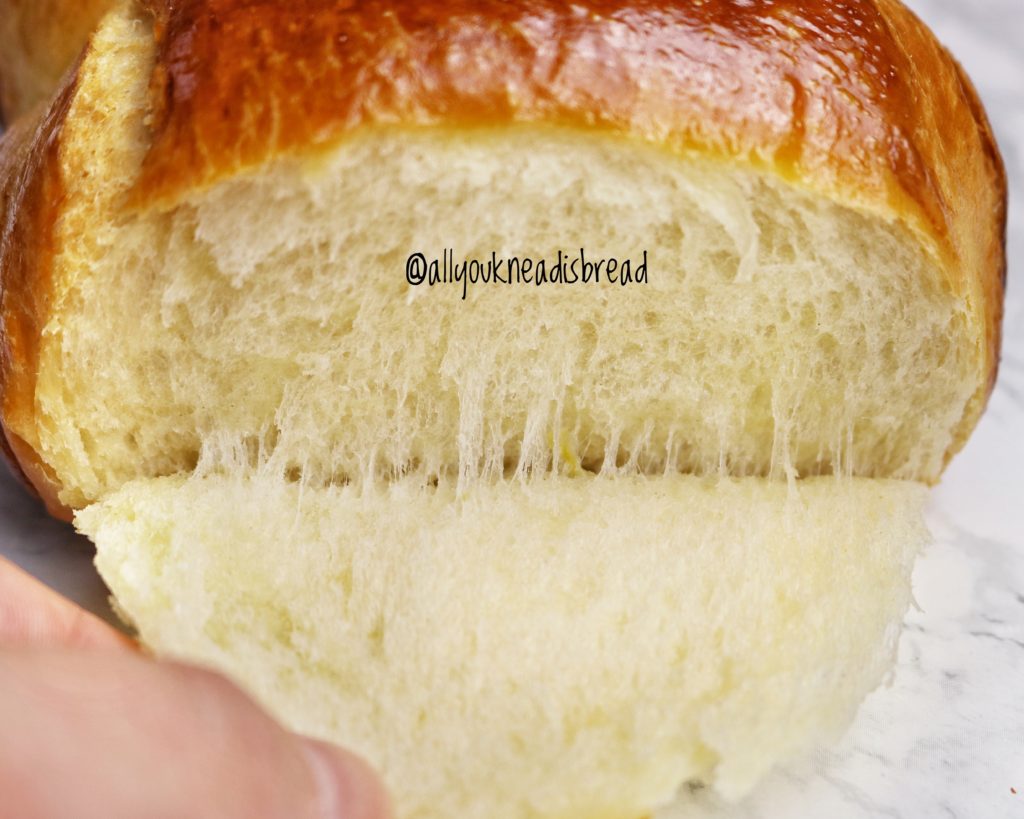
As you can see, breadmaking is pure science. And I hope that by understanding better what goes on when you mix the ingredients, you can succeed and make better and better brioche!
And now… let’s go to the recipe!
For this brioche, I wanted to play with aromas a little bit because one of the loaves was going to be a gift. So I added blossom water, orange syrup, and lemon zest. But feel free to skip these ingredients or add other you like better
POSSIBLE SWAPS
- If you don’t have sourdough starter, just add half of the weight in milk or eggs and the other half in flour. You can also make the day before “pâte fermentée” (also known as old dough).
- If you don’t have orange syrup you can substitute if for honey, molasses, agave… Whatever you have at home.
- If you don’t have lemons, you can add any other type of citric zest.
- If you don’t have orange blossom water, you can add orange juice or brown liquor (rum would give a really nice aroma).
DAY 1 – Late Afternoon
In the morning I fed my starter to bake a sourdough loaf, I always make more than I need just in case! So, I use some for the loaf, some to keep and the rest… I used it in this recipe.
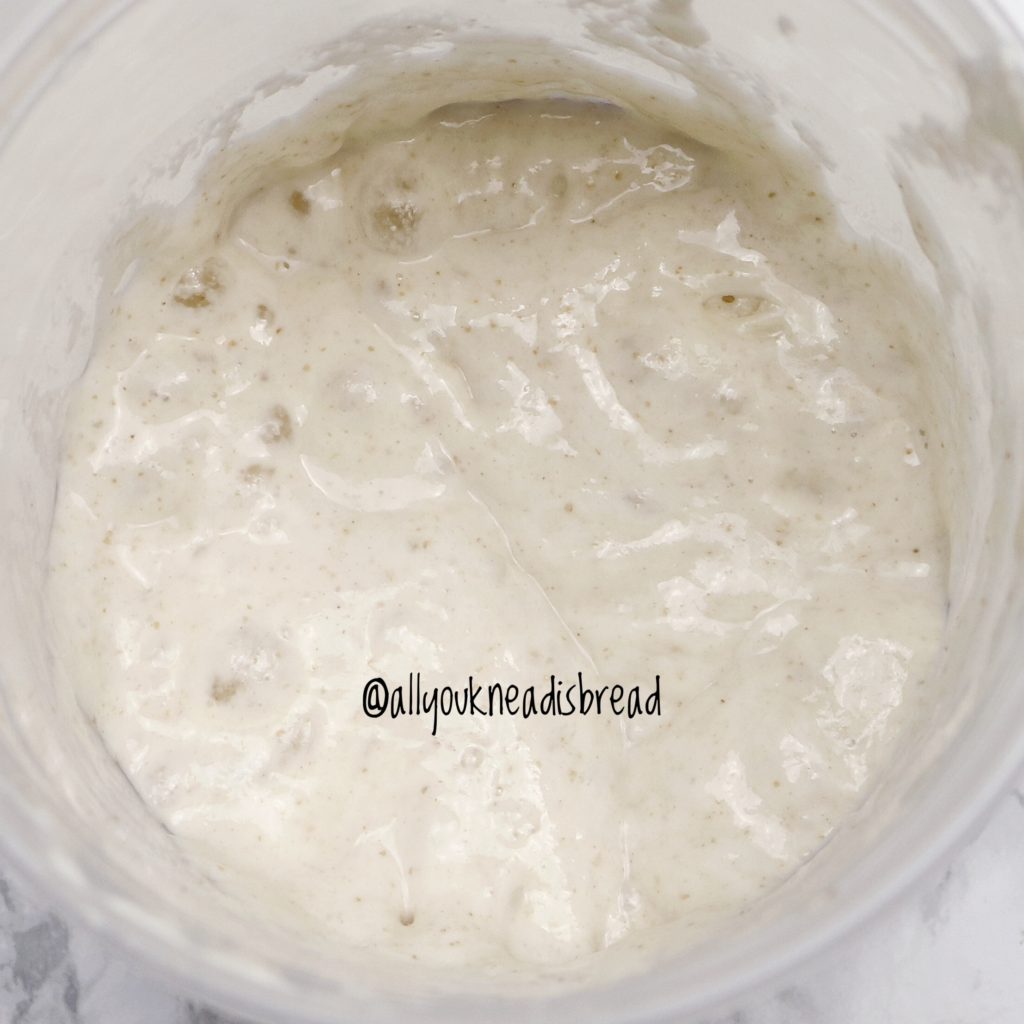
I started mixing my ingredients at 3 pm.
First, I mix all the wet ingredients and the sourdough discards to dissolve them a little. Then add the sugar and the yeast, combine everything well and let it rest a few minutes.

Sift the flour and add it to the wet ingredients along with the salt and lemon zest. Mix everything until you don’t see dry flour particles and let it rest for 20-30 minutes to allow the hydration of the flour.


After the autolysis period, start kneading the dough until it reaches certain consistency.

Start adding butter little by little. It’s better to use it at room temperature (softened butter) so it can be incorporated easier. Otherwise, you might have chunks of butter in the dough and it will be difficult to incorporate it.
I find easier to incorporate the butter by hand, what I do is squeeze the dough and twist it until the butter is absorbed. You can see how I do it on my Belgian waffles video
Then continue kneading the dough at low speed. After 15 minutes stop, cover the bowl and let it rest for 5 minutes. Knead again for another 10 minutes, stop and let it rest for 5 minutes. Continue again for another 10 minutes, stop and let it rest 5 minutes.
At this point your dough should be almost ready, it should start coming up the dough hook of your stand mixer and separating from the sides of the bowl. After this last resting period, keep kneading until the dough is ready, it shouldn’t take much longer.
If you live in a cold and dry environment, you might need more time. So pay attention to your dough, let it tell you what it needs 😊
It took me almost 50 minutes to have the dough fully developed (without resting time).

A fully developed dough should not be sticky, should come out of the bottom of the bowl without tearing and should pass the windowpane test.
To check the windowpane test, let the dough rest a few minutes first. Otherwise, you coul have a “false negative”. The dough could tear because the gluten strands are tangled, not because they’re not ready.
When your dough is ready, let it ferment at room temperature until it almost doubles in size, after that, put in the fridge, and leave it there overnight. Mine was in the fridge for 18 h
Turn the dough onto your work surface and deflate it. Be gentle, but make sure there aren’t big air pockets.
This recipe yields one 9 in (22-23cm) springform pan and one 9.75 x 6 in (25 x 15 cm) loaf pan. If you just want the brioche in the circular pan, multiply all the ingredients by 0.75
Separate 8 pieces of 130-140 g each and shape them into balls and place them into the pans. Then shape the rest of the dough in 4 logs as wide as your pan or 2 longer logs and cut them in half (this is what I did 😉)


And now time to wait! Let the dough rise until it’s puffy; if you poke it with your finger, the dough will spring back but not immediately. That means the dough has enough gas trapped inside. Sometimes, the dough can be ready but does not necessarily double its size.


20 minutes before the brioche is ready, preheat your oven at 350 F (175 C)
Before baking, brush the brioche with egg wash. I like to use an egg yolk and a Tbsp of milk. This egg wash helps soften the crust and the brioche it’s like the one you buy in the store, but better because you made it!

Bake the brioche for 30 – 40 mins, keeping an eye on it. Bake it until it has a nice golden-brown color.


Before you dig into this tasty treat, let the brioche cool down to room temperature. This step is very important because to let the crumb finish baking, set aromas, etc. But after it cools down… oh boy!
If you can see these strands, you worked the dough well. The gluten was properly developed, the fats were successfully incorporated, and the structure of the baked brioche is very cohesive.


Brioche with sourdough discards
Ingredients
Dough
- 500 g bread flour
- 2 eggs large
- 140 g milk
- 160 g 100% hydration SD starter
- 4 g active dry yeast
- 100 g sugar
- 5 tsp orange blossom water
- 2 tbsp orange syrup optional
- zest of 2 lemons
- 10 g salt
- 1 ½ sticks unsalted softened butter
Egg wash
- 1 egg yolk
- 1 tbsp milk
Instructions
Day 1 – late afternoon
-
Add the eggs, milk, sugar, salt, dry yeast, orange blossom water, orange syrup, and the sourdough discards to your stand mixer bowl and give it a good whisk.
-
Sift the flour and add it to the wet ingredients. Combine until there are no dry flour particles.
-
Let the dough rest for 20-30 minutes to allow the flour particles to hydrate.
-
Start kneading the dough at low speed for about 10 minutes or until the dough gets a bit elastic
-
Add the butter in 3 or 4 times, making sure it's completely incorporated before you add more.
-
Knead the dough at medium speed until it's very elastic, shiny, the surface has blisters and it's not sticky. You shouldn't need to add more flour. It should pass the windowpane test
-
Cover the bowl and let the dough rise at room temperature until it doubles in size
-
Place the dough in the fridge for a cold fermentation for at least 15 h. You can leave the dough in the fridge for up to 2 days
Day 2
-
Remove the dough from the fridge and gently deflate it. Cover it and let it rest for 10 minutes
-
For the round pan: take 8 pieces of dough of 130 – 140 g (4 – 5 oz) shape them into balls, and place them into your round baking pan.
-
For the rectangular pan: divide the rest of the dough into 4 equal pieces. Flatten them and roll them into logs as wide as your baking pan.
-
Cover the two pans and let the dough rise unti it's almost at the border of the pans.
-
Preheat your oven at 350 F
-
Before baking, whisk the egg yolk and the milk together and brush the brioche with it.
-
Bake the brioche until it's golden brown or has an internal temperature of at least 96C
-
For best results, let the brioche cool down to room temperature before cutting through it.
Recipe Notes
- Let the dough rest for 5-10 minutes before performing the windowpane test.
- You can shape the brioche in any way you prefer. Just make sure that the dough fills half of the container you use.
Happy baking!

Super Soft Hot Cross Buns – Video
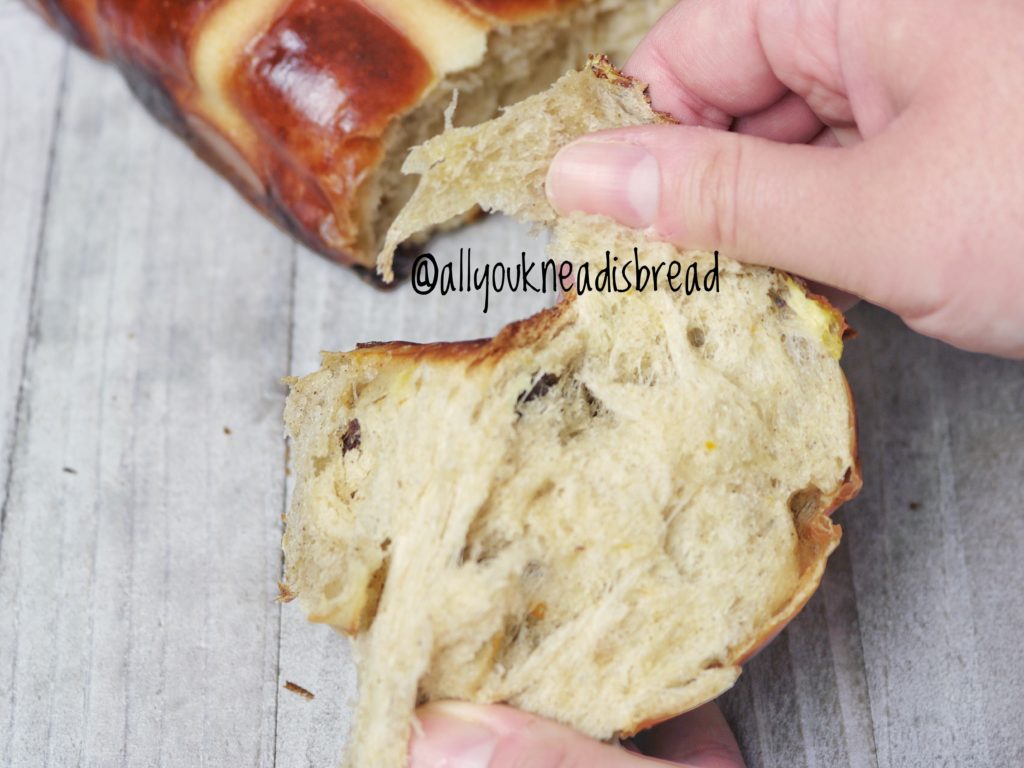
Easter is here!
When I was a kid I was always looking forward the next special occasion because I knew my mom and my grandma would cook something good and I’d get to be the official taster 😊 Now, as an adult, I do the same, I look for recipes for every occasion!
I discovered hot cross buns about 3 years ago. The moment I saw the recipe I was already in love. The combination of spices, the fruits… so aromatic! I LOVE these buns! Bread, sweet fruits and spices all together? Uhmm.. yeah!
I have seen many videos and recipes and I have found a common “problem”, and that’s the lack of a proper gluten network. The tricky part of this recipe, in my opinion, is the kneading process. It takes a bit of time to develop the gluten network, it’s an enriched dough and therefore, not easy. This recipe has a good amount of wet ingredients, I found that increasing the liquid and fat content a little bit can go a long way. It’s a bit of a long process to get the dough ready, but boy! The result is AMAZING! The buns are SUPER SOFT and they last fresh much longer.
HOW SHOULD YOU KNEAD ENRICHED DOUGH?
Well… being patient is a must, with butter, eggs, and sugar in the middle, developing the gluten network is more difficult, so take your time. If you’re using a stand mixer, don’t knead too fast. You can start with the paddle attachment until the dough starts to come off the bowl sides and rolls upon the paddle, then change to the hook attachment. My stand mixer has 10 speeds and I use the paddle attachment at speed 2-3 and then the hook attachment at speed 3-4.
I’d suggest you knead for 10 minutes and then let the dough rest for 3-5 minutes. Then knead again, and rest again. It helps the gluten proteins 😉
WHY DOES GLUTEN NEED TO REST?
Gluten proteins get tired of being kneaded, basically. And it’s difficult for them to keep linking each other. When we knead the dough, we facilitate the interactions between the gluten strands, but at the same time, the long chains get somehow tangled. So, when we let the dough rest, what happens is that these chains reorganize and realign. It’s like a ball of yarn, when it’s tangled you can’t do anything with it, but when it’s properly rolled you can keep taking the yarn out of it.
Enriched doughs need longer kneading times, that means the gluten proteins are going to be under a lot of stress. Let them rest a little and save time in the long run.
WHAT ABOUT THESE BUNS?
Jump to Recipe
Let’s get into this delicious recipe!
NOTE: if you’re using cow milk, boil it for a couple of minutes and let it cool down until it’s lukewarm. Boiling the milk will break down some enzymes that, otherwise, could weaken the gluten network. Boil more milk than the amount in the recipe because some of it will evaporate as it heats up.
As always, dissolve the yeast in the lukewarm milk and let it sit for a few minutes. You can add a pinch of sugar and when the mixture is frothy, the yeast is active!
Add the eggs, sugar, and spices to the yeast mixture and give it a good whisk. I like to add the spices to the liquid ingredients because I think they can infuse more aromas this way. But if you prefer to mix them with the flour it’s fine too.
Then add the sifted flour and combine everything until you don’t see dry flour particles. You should have a sticky mess, a bit runny even.

Cover the dough and let it rest for 20-30 minutes. This step will allow the flour particles to hydrate so the gluten proteins are at full strength when you start kneading.
After the autolysis period, add the salt and start kneading.

When the dough starts being elastic add the softened butter and keep kneading.

When the dough is elastic enough (it should be smooth), add the dry fruits and knead just enough to integrate all the fruits.
Make a ball with the dough and place it in a lightly oiled container. It’s better to use vegetable or canola oil, because they have milder flavors than, for example, olive oil.

NOTE: the dough should pass the windowpane test. Let the dough rest 5 minutes before checking it. If you can see some of the fruits through the dough and it doesn’t tear apart, that’s a good sign of proper gluten development.
HOW TO PREPARE THE FRUITS
Typically, this recipe calls for raisins, but I like to add a bit of everything. You can add candied orange, dry apricots, candied green cherries…
The night before (preferably), or at least a few hours before, mix the raisins (and other very dry fruits you might use) with about ¼ cup of some liquid. You can use tea, freshly squeezed orange juice, or even rum or sherry if you don’t mind the alcohol. Close the container and shake it every now and then to make sure all the fruits get to soak some liquid. Strain the fruits before adding them to the dough. You don’t want to incorporate too much liquid to the dough.

ROOM TEMPERATURE VS. OVERNIGHT FERMENTATION
If you want to bake the buns the same day, let the dough rise at room temperature until it has almost doubled in size, deflate it very well and knead it for 1 minute to get rid of big air pockets.
If you prefer to do a cold fermentation let the dough ferment at room temperature for about 30 minutes and then transfer it to the fridge and let it rise overnight. The next morning take the dough out of the fridge and let it warm up a little bit (30mins to 1h, depending on the temperature of your kitchen), deflate it very well and knead it for 1 minute.

Line a 16x12in (40x30cm) with parchment paper. Divide the dough into 12 pieces of similar weight.
NOTE: I had to use a smaller pan and bake the other 3 buns apart because I forgot my 16×12 pan was in the freezer! 😊

Cover it with plastic wrap and let the buns rise until they look puffy and they increased in size. They don’t need to double in size necessarily, just make sure the dough feels puffy, not hard. The buns should touch each other too.

MAKE THE CROSS AND PREPARE THE BUNS FOR BAKING
***preheat your oven at 375F (190C)***
To prepare the paste just mix the all-purpose flour, icing sugar and milk. It must be a pest. So, it’s better to add the milk little by little until you have the right consistency. The amount of milk depends on the flour you use, play around with the ratio as long as you end up with a paste.

Now that the paste is ready, let’s finish up these buns! Prepare the egg wash, and brush the buns with it BEFORE you pipe the cross. I emphasize before, because I didn’t do it and brushing the buns when the cross was already there was tricky, to say the least!

With a piping bag, make the crosses. Don’t be afraid! I know there’s a lot of pressure but don’t let the piping part intimidate you 😊
Place the buns in the preheated oven and let them bake until they have a nice golden brown color. If your oven doesn’t bake evenly, turn the pan 180 degrees halfway.
When ready, take them out of the oven and let them cool down for 5 minutes before you take them out of the pan.


Enjoy!


Super Soft Hot Cross Buns
Ingredients
Dough
- 500 g bread flour
- 280-320 g lukewarm milk depends on the protein content of your flour. Start with the lesser amount and add more if needed.
- 1 L egg
- 1 L yolk
- 90 g softened butter
- 50 g brown sugar
- 1 tsp salt
- 7 g active dry yeast
- 1 tsp ground cinnamon
- 1 tsp ground allspice
- 1/4 tsp nutmeg optional
- 1 1/2 tsp vanilla extract
- zest of 1 orange
Fruits
- 100 g dark raisins
- 50 g golden raisins
- 50 g glazed green cherries optional
- 2 tbsp dark rum
- 2 tbsp orange syrup
- 1 tbsp water
Cross paste
- 60 g all purpose flour
- 24 g icing sugar
- 80-90 g cold milk amount could vary
Instructions
Dough
-
Combine yeast and lukewarm milk, mix until the yeast is dissolved and let it sit for 10 minutes to activate the yeast.
-
Add the eggs, spices, vanilla extract, orange zest, and salt to the yeast mixture and combine very well.
-
Sift the flour and add it to the wet ingredients. Combine everything until you don’t see dry flour particles. Let it rest for 20-30 minutes
-
Start kneading with the paddle attachment until the dough starts coming off the sides of the bowl.
-
Change to the hook attachment and knead for a few minutes or until you see it’s starting to be elastic and add the butter little by little
-
Keep kneading until the dough is no longer sticky, it comes off the bowl completely and it’s very elastic. It should pass the windowpane test.
-
Add the drained fruits and knead just until they are incorporated into the dough
-
Place the dough into an oiled container, cover and let it ferment until it almost doubles in size.
-
Deflate the dough very well and divide it into 12 portions of equal weight.
-
Roll each portion into a ball an place them into a 16x12in pan lined with parchment paper. Cover and let them rise until they’re puffy and touching each other.
-
Preheat your oven at 375F
-
Brush the buns with egg wash and with a piping bag make the crosses.
-
Bake the buns for about 22 minutes or until they’re golden brown. Keep an eye on them after 20 minutes.
-
Take the buns out of the oven and wait 5 minutes before taking them out of the pan.
Fruits
-
The night before combine the fruits with the rum, syrup, and water in a container. Close it and shake it once in a while to redistribute the liquid
-
Drain the liquid before adding the fruits to the dough
Cross paste
-
Mix the flour and the icing sugar
-
Start adding the milk little by little until you get the right viscous consistency. Whisk the mixture well until there are no lumps.
Recipe Notes
The glazed cherries are completely optional, I like to add them because of their intense color.
The nutmeg is optional too. I like how it can intensify other aromas, but the buns can be perfectly fine without it too.
For best storage wait until the buns cooled down completely and put them into a sealed plastic bag. Keep at room temperature