
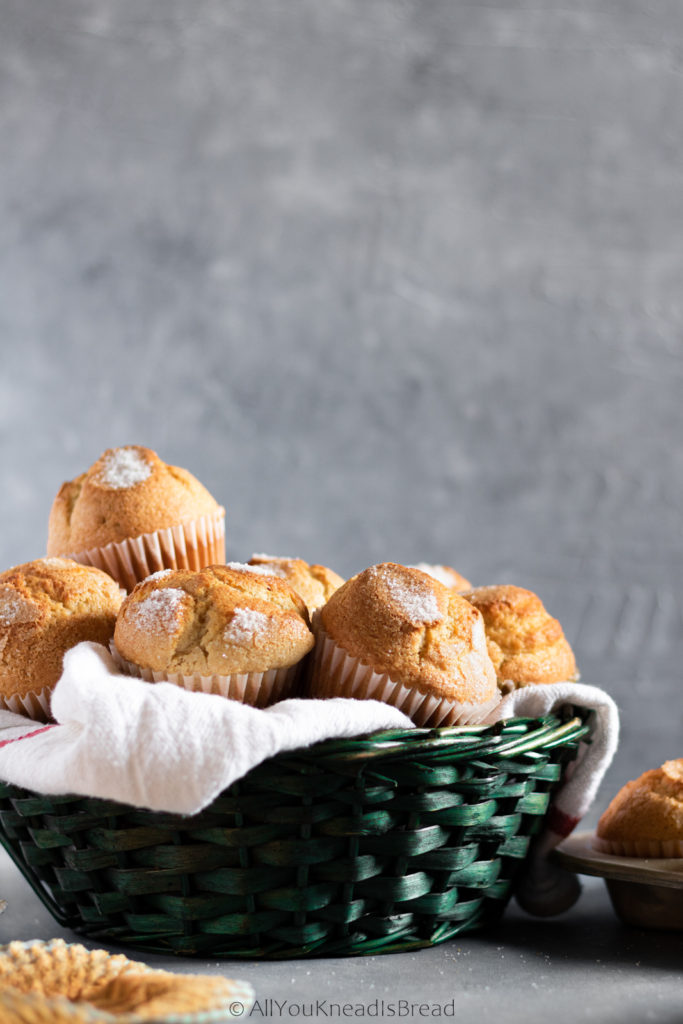
Is your sourdough discard jar full and you don’t know what to do with it? Look no further than these soft and moist sourdough discard banana muffins. Packed with flavor, these sourdough banana muffins are a must-try recipe! They are soft, moist, and full of banana flavor. The subtle tang from the sourdough discard adds complexity to every bite. If you have never baked with sourdough discard this is the perfect recipe to start! And I am very confident, that these will be the best sourdough banana muffins you’ll ever make!

Baking Sourdough Discard Banana Muffins
If you’ve never used sourdough discard in baking, it can seem intimidating at first but it’s actually quite simple. Using a 100% hydration starter is usually more convenient because you know that half is water and the other half is flour. With this, you can customize any recipe you want as long as you replace moisture elements (like egg whites, milk, water…) for the corresponding amount of discard.
Another thing to keep in mind is that sourdough discard is acidic, even more so if you use an old one. The acidity can affect the texture of your baked goods, for cakes and cake-like things, the acidity is actually helpful because it can help soften the baked goods.
Why Choose Sourdough Discard for Banana Muffins?
Sourdough discard banana muffins are, in my opinion, the best muffins. And I am always trying to make them better. For me, better means soft and moist with a great flavor and aroma profile.
Baking with sourdough discard not only helps reduce food waste but also adds flavor and texture to your muffins and can increase their shelf life. You can use the leftover sourdough you have after making your weekly loaf, or some old discard that’s been in your fridge for a few weeks. Older, and thus sourer, sourdough discard might produce less sweet muffins because part of the sourness is neutralized by the sugars in the recipe. But the texture will still be great and you can always add more sugar if you want your sourdough discard banana muffins sweeter.
How Sourdough Discard Affects Muffins
The acidity of sourdough discard helps break down the proteins in flour, making the crumb more tender and creating a moist texture in your muffins. It also reacts with leavening agents like baking soda, which gives your muffins a nice lift, making them fluffy and light.
While the tangy flavor of sourdough is very subtle in these muffins, it adds a depth that complements and balances out the sweet bananas. That’s what makes these sourdough discard banana muffins a delicious blend of flavors, creating a balanced and complex taste that sets them apart from traditional banana muffins.
Benefits of using Sourdough Discard in Banana Muffins
Using sourdough discard in baking comes with several benefits. Since sourdough is a fermented product, it can aid in digestion and offer a lower glycemic index compared to traditional baked goods. This makes sourdough discard banana muffins a better alternative to regular banana muffins. Plus, it’s a great way to add more nutrients to your diet, such as B vitamins, thanks to the fermentation process. You can try other recipes like these sourdough blueberry muffins or this sourdough chocolate and orange bundt cake
Ingredients for Moist and Soft Sourdough Discard Banana Muffins
One of the key features of these muffins is how incredibly moist and soft they turn out. This is largely thanks to the unique combination of ingredients. Instead of using milk and butter, this recipe calls for buttermilk, Greek yogurt, and oil. Here is why these ingredients make all the difference:
1. Buttermilk
The acidity of the buttermilk also helps tenderize the muffins by hindering the formation of too-long gluten chains. It also reacts with baking soda, creating tiny air bubbles that will make these sourdough banana muffins fluffier. In essence, the acidity of buttermilk reinforces the effect of the acidity of the sourdough discard.
2. Greek Yogurt
Greek yogurt is thicker than regular yogurt and adds a rich creaminess to the batter. It locks in moisture, keeping these sourdough discard banana muffins tender and moist for longer.
3. Vegetable Oil
The absence of water in oil allows it to coat the flour particles more uniformly and lock in the moisture and preventing these sourdough discard banana muffins from drying out. Oil can also coat the gluten proteins and limit gluten development yielding a much softer texture than butter-based recipes. You can use any oil of your choice that is liquid at room temperature; avocado oil is a good neutral oil, but if you want to give your banana muffins an extra kick you can use olive oil or a mixture.
These ingredients ensure you get the moistest and softest sourdough banana muffins you’ve ever tasted. Whether you’re baking these muffins or other recipes, these ingredients will always help you elevate your muffins.

Role of Overripe Bananas in Sourdough Discard Banana Muffins
When it comes to banana muffins, overripe bananas are a must. The ripening process of bananas brings significant chemical changes that enhance the flavor, sweetness, and texture of your sourdough banana muffins.
Chemical Changes in Overripe Bananas
As bananas ripen, the starches in the fruit break down into sugars. This conversion makes overripe bananas much sweeter and softer compared to green or just-ripe bananas. The sugar content in an overripe banana can be up to 80% higher than in an unripe one, contributing to the overall sweetness of your banana sourdough discard muffins without the need for extra sugar.
Overripe bananas are also softer, which means they integrate more easily into the muffin batter. This creates a smooth, cohesive batter that bakes into a uniformly moist sourdough banana muffin.
What if I don’t have overripe bananas?
If you don’t have overripe bananas you can bake the bananas you have for a few minutes at a low temperature, but personally, I don’t like this method, I prefer to let my bananas ripe naturally. So to ensure that I always have overripe bananas, I just let a bunch go very ripe and then peel and freeze them and collect every overripe banana that nobody would want to eat. I always keep a bag of frozen bananas in my freezer, in our house not a single banana goes to waste!
Frozen bananas can be used for many things such as smoothies, banana bread, oatmeal, or even homemade ice cream! Next time your bananas get too ripe, don’t throw them away. Keep them in the freezer and enjoy them later in these delicious sourdough banana muffins!
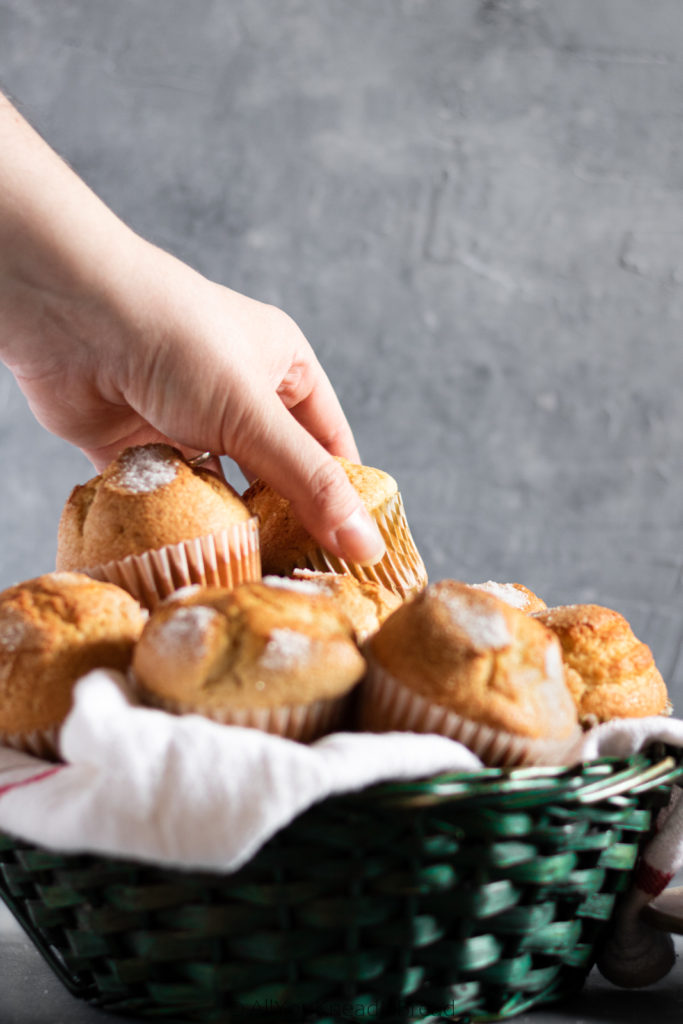
How to get tall sourdough discard banana muffins
Achieving tall, bakery-style muffins with a beautiful domed top can be tricky, but it’s all about the technique. Here are my tips for getting your sourdough banana muffins (or any kind of muffin) to rise tall and look professional.

Let the Batter Rest Overnight
Letting your batter rest in the fridge overnight is a game-changer. This rest period allows the flour to fully hydrate and gives the baking soda and baking powder time to activate. It also thickens the batter, which means the muffins will rise more evenly and reach new heights when baked.
Fill the Muffin Cups
To get tall sourdough banana muffins, don’t be afraid to fill your muffin cups almost to the top. Many muffin recipes suggest filling them ⅔ of the way, but for tall muffins, you want the batter to have more volume. Especially if you are not letting the batter rest overnight in the fridge.
Bake at a High Temperature Initially
Start baking your muffins at a high temperature (around 425°F/220°C) for the first 5–10 minutes. The temperature contrast will give the batter a quick burst of heat, helping the muffins rise rapidly. After 10 minutes, reduce the heat to 350°F/180°C to finish baking. This also works with cold batter.
If you’re short on time, feel free to use cold ingredients. The batter will be chilly, but starting with a higher temperature for the first few minutes will help your sourdough discard banana muffins rise taller.
I baked these banana muffins in a jumbo-size pan but you can use any baking pan you have. Just be mindful of the baking time; smaller muffins will bake faster.
These tips will help you achieve tall, bakery-worthy muffins, whether you’re making these sourdough muffins overnight or a fresh batch of blueberry sourdough muffins. So, grab those overripe bananas, pull out your sourdough discard, and get baking!
If you liked this recipe…
You might enjoy these:
Chocolate & orange sourdough discard bundt cake
Sourdough chocolate banana bread
Sourdough Spanish style muffins
If you make any of my recipes let me know what you think! As always you can find me on Instagram, Pinterest, and Facebook. I also have a few videos up on my YouTube channel (which I hope I can resume soon!)
Starting on breadmaking but don’t know where to start? Check my Amazon store to see my favorite and affordable utensils you will need. You can make the best bread with simple and inexpensive tools!
(This post contains affiliate links, if you purchase something from this link I will make a small commission that helps me run this blog, but you will not be charged any extra money 😉 )

The best sourdough banana muffins
Moist, soft, and decadent muffins using your overripe bananas and sourdough discards
Ingredients
- 300 g all purpose flour
- 100 g sourdough discard
- 300 g overripe bananas
- 180 g brown sugar
- 2 eggs large
- 100 ml vegetable oil
- 100 ml buttermilk
- 85 g full fat Greek yogurt
- 5 g vanilla extract
- 10 g baking powder
- 2 g baking soda
- 3 g salt
- 75 g chopped walnuts optional
Instructions
-
Preheat your oven to 425°F (220°C). Line a muffin tin with paper liners.
-
In a medium bowl, whisk together the flour, baking powder, baking soda, and salt.
-
In a separate large bowl, mash the overripe bananas. Add the sourdough discard, brown sugar, eggs, oil, buttermilk, Greek yogurt, and vanilla extract. Mix until smooth.
-
Gently fold the dry ingredients into the wet mixture until just combined. Avoid overmixing.
-
Fold in the chopped walnuts if desired.Fill the muffin cups almost to the top with the batter.
-
Bake at 425°F for 5-10 minutes, then lower the temperature to 350°F (180°C) and bake for another 10-15 minutes, or until a toothpick inserted in the center comes out clean. See notes**
-
Let the muffins cool in the pan for 5 minutes before transferring them to a wire rack to cool completely.
Recipe Notes
** This baking time is for jumbo size muffins. If you are baking smaller muffins, the baking time will be shorter. Always bake until the toothpick comes out clean, even if it means the baking time is different than the recipe’s.
Sourdough Magdalenas
Hello friends! Today I bring one of my mom’s very best recipes: Magdalenas! But I adapted it to sourdough, it’s a great way to use your discards, #zerowaste people! These sourdough magdalenas are super simple to make. And if you have kids around it’s a great activity to do with them. Especially now, that we need to stay indoors as much as possible.
How do I know this? Because magdalenas are the highlight of my childhood! They’re the thing my mom would bake every time we had a potluck at school, or when we were fuzzy at home because we were bored. My sister and I loved filling the cups and licking the spatula at the end. I have great memories of being in the kitchen making magdalenas!
Magdalenas are the Spanish version of a muffin, but airier. They’re very soft and spongy and not too sweet. My mom never used vanilla extract or anything else to enhance the flavor, and I don’t either. I like to taste the olive oil and the eggs. At most, I add orange zest, but I usually keep it simple.
Magdalenas, the perfect snack
In Spain we eat 5 times a day, aside from breakfast, lunch, and dinner, we also cherish our snacks. So much, that they are considered a meal and even have their own name! One is the “almuerzo” which is the morning snack. And the other (my favorite!) is the “merienda“, which is the afternoon snack. Considering we have pretty late dinners (9-10 pm) a good afternoon or early evening snack sounds like a great idea!
About these sourdough magdalenas
Something that it’s characteristic of magdalenas is their shape. When they grow tall we say they have “copete” and for many people, this is something difficult to achieve. However, I’ve learned that the secret is in letting the batter rest in the fridge before baking. Since the batter is cold, the raising agents (now fully active) can act for a bit longer before the crumb is set, thus giving the madgalenas that final rise.
Letting the batter rest also allows the sourdough ferment. Even though it won’t make the magdalenas sour, some fermentation will increase their nutritional profile and make them easier to digest (The wonders of sourdough, guys!). However, if you don’t have the time, you can bake them right away, the texture won’t change much, you’ll still get delicious magdalenas!
If you’re going to let the dough rest more than 6h, add a little bit more sugar since part of it will be used to neutralize the acids from the sourdough fermentation and won’t contribute to the sweetness of your magdalenas.
The last touch
To get the traditional look of a magdalena, you just need to sprinkle some sugar on top right before baking. It’ll develop a little crust while baking and it’s also a way to decorate the magdalenas.

After baking, let them cool down a little. It’ll help to set the aromas and the structure. And after they cool down you can keep them in an airtight container for a few days.
I did some experiments at home and I tested how the sourdough helped the magdalenas to keep fresh longer. So, I left some outside on the counter overnight (with and without sourdough). The ones with sourdough barely dried out, and overall, they lasted fresh longer than the regular ones.
If you want to know more, check this post where I talk a little about the science behind why sourdough helps in keeping baked goods fresh for longer periods of time.
This recipe yields 18-22 magdalenas (depending on your liners and how much you fill them), but if you want to double or triple it, do so. The recipe is very easy to scale up!
If you don’t have a muffin pan don’t let that stop you! My friends in Bella Cupcake Couture got you covered! Check the post to learn how to bake muffins without a pan or liners!

Let me know if you make these sourdough magdalenas, I’d love to see your creations! You can tag me on instagram or use the hashtag #allyoukneadisbread.
You can find me on Instagram or Facebook and you can also subscribe to my Youtube channel.
Happy baking!
This post contains affiliate links and any sales made through such links will reward me a small commission – at no extra cost for you – that allows me to keep running this blog.

Sourdough Spanish magdalenas
The sourdough version of one of the most typical Spanish muffins
Ingredients
- 300 g cake flour or weak all purpose flour
- 200 g sugar plus more to sprinkle (see notes*)
- 100 g heavy whipping cream
- 100 g olive oil
- 4 eggs see notes**
- 200 g sourdough discards 100% hydration collected throughout a week
- 1 tbsp baking powder
- 1 tbsp orange zest optional
Instructions
-
Whisk the eggs and sugar until fluffy and light in color.
-
Add the starter and break down the blob a little (do it manually if you use your stand mixer, or the starter will curl up the whist attachment)
-
Add the heavy cream and the oil and whisk everything until it's combined.
-
Sift the flour and the baking powder and add the mixture to the wet ingredients in 2 or 3 times to avoid flour flying everywhere.
-
Mix the flour just to incorporate it. If you want to let the batter rest, now it's the time. Cover it with film and keep it in the fridge up to 12h. If you don't want to wait, preheat your oven at 350F.
-
When the oven is ready, line a cupcake pan and fill the cups about 3/4 of the way full, sprinkle with sugar in the center (about 1/2 tsp or so).
-
Bake the magdalenas until they're golden brown and let them rest in the pan for a few minutes.
-
Transfer the magdalenas to a cooling rack and let them cool down to room temperature.
Recipe Notes
* Use a weak all-purpose flour, if it has a high protein content mix it 50/50 with cake flour or your magdalenas will turn out a bit dry.
** You can use eggs straight from the fridge, especially if you are going to let the batter rest for a while in the fridge.
Sourdough chocolate and orange bundt cake
Oh, hey there! I’m glad you’re here because I have a wonderful sourdough chocolate orange bundt cake recipe for you! I know… the name it’s kinda long, but trust me, this cake is so delicious, it won’t last long! And I like to think of it as a zero waste recipe. Why? Because I used orange peels and sourdough discards that I collected during the week.
My new challenge in life is to generate less food waste, and that goes to sourdough too. So I’m developing recipes that allow me to do so. The world of sourdough it’s endless! I realized that I can use it in so much more than bread.
I have different sourdough starters that I use for different things. And not long ago I made a chocolate sourdough bread with my chocolate sourdough starter. And that’s pretty much how this cake was born!
If you don’t have a chocolate starter discard, don’t worry, use your regular discards and then substitute 20g of flour with 20g of cocoa powder.
I love the contrast between chocolate and orange and the sourdough starter makes this cake moist and extends its shelf life significantly! It doesn’t taste or get sour; the orange peels are boiled and aren’t bitter and the chocolate flavor is just enough so you can enjoy all flavors.
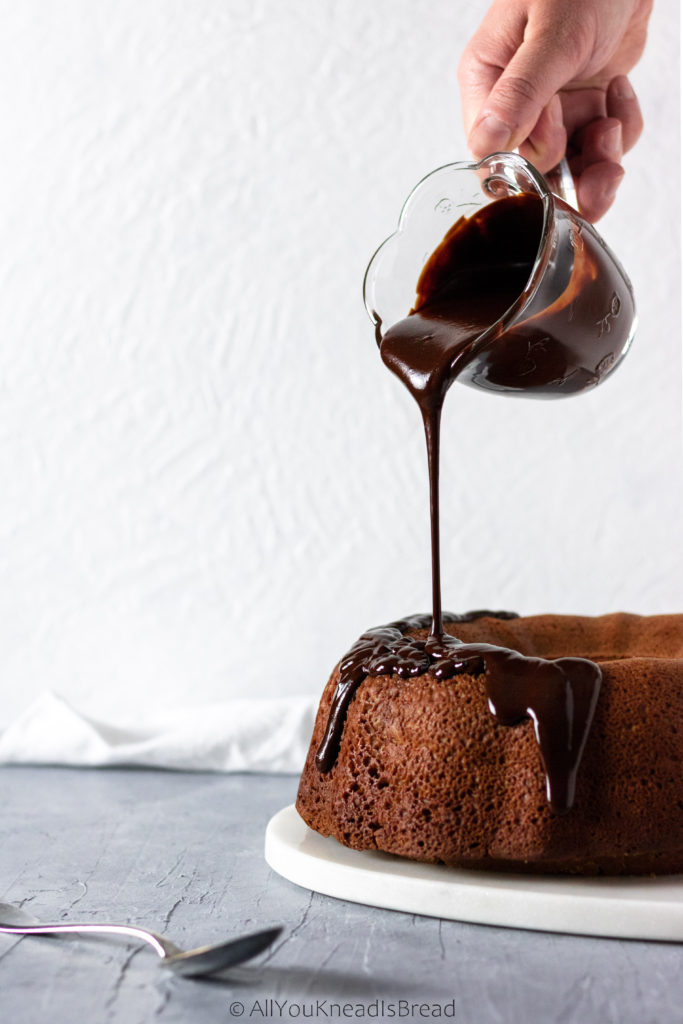
I made a ganache to add a little something to the cake and topped it with walnuts, but you can use anything you like.

How to prepare the orange peels
The first thing you need to do is to make sure the orange peels are not bitter or they will ruin your cake. You need to put the peels in a sauce pan and add enough water to cover them. Turn the heat to medium-high and cook them until they start boiling. Let them boil for a minute. Drain and rinse them until they’re not too hot. Put them back in the saucepan and repeat 2 or 3 more times (Until you bite a piece and it isn’t bitter).
It’s important to cool down the peels between boils, otherwise, they might disintegrate completely before they are ready.
Once the orange peels are ready, let them cool down and then chop them either manually or with a food processor. They will last in the fridge for a week and you can use them anywhere!
The rest of the steps are similar to any other cake. I used my KitchenAid to mix the batter, but if you don’t have a stand mixer, you can use something else or even do it by hand. Just make sure when you beat the eggs and the sugar, the mixture is foamy. Otherwise, the cake can turn out a bit dense.
Amazing results!

The results are spectacular! This cake is rich, moist and spongy. The flavors come together perfectly, the chocolate flavor complements the tangy orange flavor, and it’s not overly sweet. The sourdough enhances the aromas and really improves the shelf life of the cake. It can stay fresh for several days and I just covered it with foil, I didn’t put it into a plastic container or anything.
Let me know what you think of this recipe and please, tag me on your creations! I love to see what you guys do! You can follow me on Instagram or Facebook and you can also subscribe to my Youtube channel.
If you have any suggestions or would want me to make some recipes, please contact me and I’ll try my best to respond and plan a recipe!
Happy baking!

Sourdough chocolate & orange bundt cake
Use your sourdough dicards and orange peels to make this scrumptious dessert!
Ingredients
Cake
- 340 g all purpose flour *see notes
- 325 g sourdough starter – 100% hydration (about 2 cups)
- 20 g cocoa powder 1
- 300 g white sugar
- 200 g vegetable oil
- 4 L eggs
- 100 g boiled and ground orange peels **see notes
- 70 g milk ***see notes
- 1 tbsp baking powder
- 1/2 tsp salt
- 1 tsp vanilla extract
- 1/2 tsp ground cinnamon optional
Chocolate Glaze
- 3/4 cup semi sweet chocolate chips
- 4 tbsp butter
- 1 pinch ground cinnamon
- 1/4 cup chopped walnuts optional – decoration
Instructions
Cake
-
Preheat your oven at 350F
-
Grease your a bundt cake pan that can hold at least 12 cups
-
On a bowl, mix all dry ingredients and set aside
-
On your stand mixer bowl,add eggs and sugar and beat using the whisk attachment until they're fluffy and the color is lighter
-
Add milk, vegetable oil, orange, and vanilla extract and beat until incorporated
-
Add the sourdough starter and incorporate it at medium speed, you might need to pause or even use a spatula to break it down a little
-
Add the dry ingredients and with a spatula or the paddle attachment incorporate them into the batter. Don't over mix. If possible, don't add all the dry ingredients at once, add them in 2 or 3 times to avoid lumps
-
Bake at 350 for 55-65 minutes or until a toothpick inserted in the middle comes out clean. If needed, tent the cake with aluminum foil to avoind the top from burning
-
When ready, take it out of the oven and let it cool down in the pan for 5-10 minutes, then transfer onto a wire rack
Chocolate glaze
-
When the cake is already baked, melt the butter and the chocolate chips at a very low temperature
-
Add the cinnamon combine it well
-
Pour on top of the cake and decorate with walnuts or any other nut you prefer
Recipe Notes
*I’ve tried both, chocolate sourdough starter and regular sourdough starter. If you have chocolate starter, use it and avoid the cocoa powder and just add 20 more grams of all purpose flour.
**You need to boil the peels 2 or 3 times to get rid of the bitterness. Please, read the paragragh where I explain how to do it 🙂
***If you don’t have enough orange peels, you can use orange juice instead of milk, but 100g or orange peels give this cake a really nice orange flavor.
**** I collected my starter for several days and kept it in the fridge until I baked the cake
How to make sourdough chocolate banana bread

A year ago I was writing that dissertation, I was stressed, hypersensitive, anxious… Sometimes I’d be happy it’d soon be over, and sometimes I’d feel nostalgic for the very same reason. A year has passed and I’m just starting to rebuild myself and enjoy my guilt-free life… With this sourdough chocolate banana bread! That’s right! It’s all about using sourdough discards!
Using sourdough discards in your baking
Learning the science of bread is one of the reasons I started this blog. Because I find breadmaking an incredibly endearing process and yet so misunderstood. There are different methods to take care of your sourdough starter; some people generate discards, others don’t. I never throw away the discards, that’s sourdough that can be used on other things!! It’s pre-fermented flour that can bring flavor to yeast bakes, like this brioche recipe with sourdough discards. It also helps increase the shelf life of baked products by slowing down the staling process and controlling the pH a bit. This way spoilage microorganisms find it harder to grow on the food.
This year I also want to start implementing a new approach when it comes to food: ZERO WASTE. I know many people generate a considerable amount of sourdough discards. And I know using sourdough discards sounds like a crazy idea for many. But let me tell you.. once you make this sourdough chocolate banana bread with sourdough discards, you will be converted forever!!!
So today I inaugurate a new type of recipe: SOURDOUGH DISCARDS
I’ll upload different recipes using sourdough discards so you don’t just throw them away. Recipes with that extra kick of healthiness that only a sourdough starter can provide. As always, all recipes will be tested to ensure the best results!
To inaugurate this new batch of recipes I wanted to make something special. I’ve developed this sourdough chocolate banana bread that’s going to make you fall in love with it!
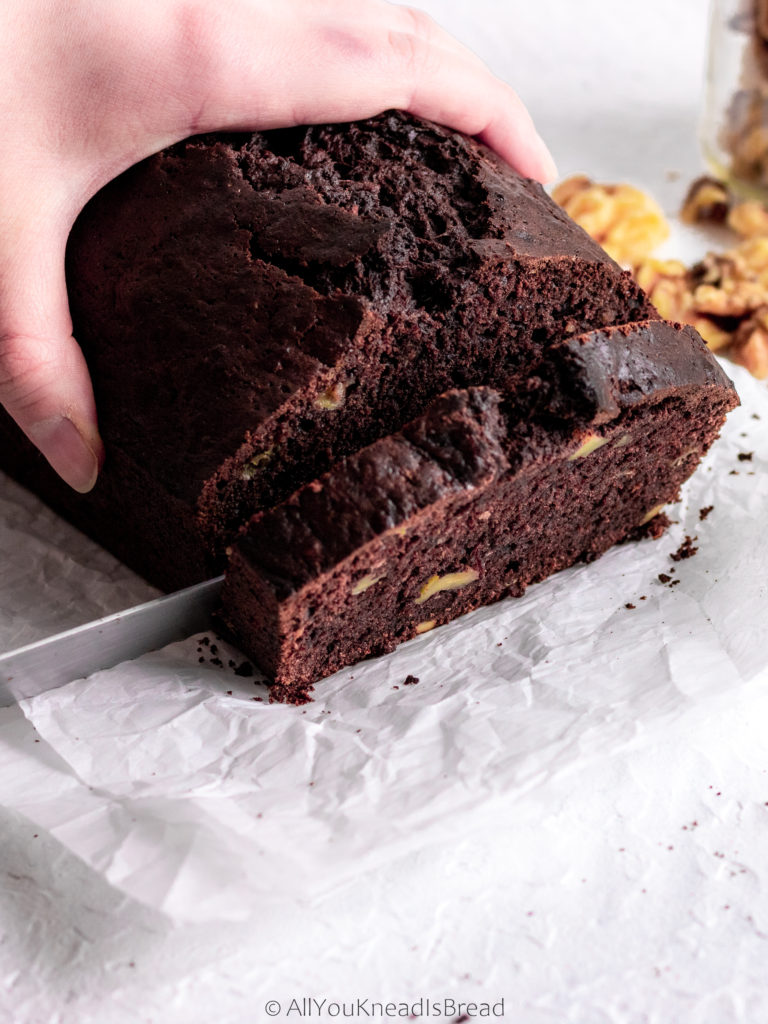
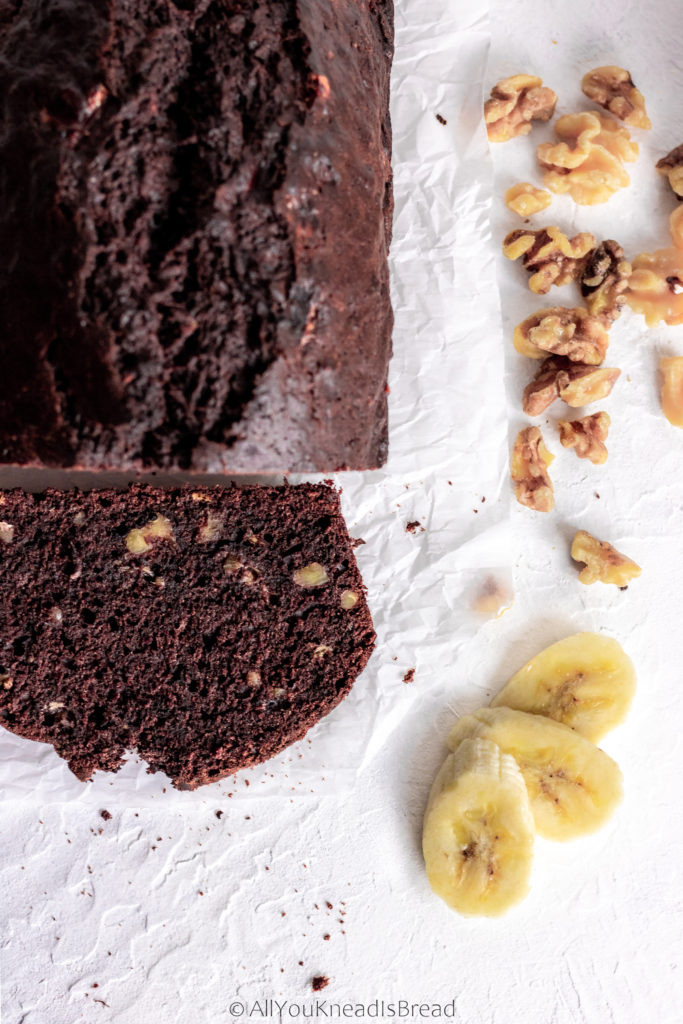
It’s moist but not too dense. It’s spongy, full of flavors, a nice chocolate kick that doesn’t overtake the banana taste. And it lasts fresh for days even if you don’t keep it in an airtight container! (You didn’t think that sourdough could only keep regular bread fresh for a longer time, did you?)
I did not add chocolate chips of any kind to this bread, just walnuts. Because I wanted to taste the banana. But if you prefer a more chocolatey flavor, customize those extras to your taste buds.
About this sourdough chocolate banana bread
It works best with very ripe bananas. Those brown mushy ones? Yeah, those!
If you’re not ready to bake banana bread but your bananas are getting too ripe to eat, just peel them, freeze them and use them whenever you’re ready! Just make sure you drain the water after they thaw. I think frozen bananas are the best for banana bread, they keep the moisture much better and they also enhance the flavor of the bread.
I collected the sourdough discards throughout 3 or 4 days of consecutive feedings and kept it in the fridge until ready to bake.

What if I have old sourdough discards?
I have tested this recipe with discards that were several weeks old. The only difference in flavor is that the chocolate banana bread was less sweet. Which makes sense, because the discards have been acidifying and part of the sugar is used to neutralize those acids.
So, depending on your taste buds, you may want to adapt the sugar. Although, this recipe has a considerable amount of it. But like always, you have the idea here, then you can customize it to your liking! 🙂
How long does it take to bake?
The baking time depends on your oven. Start taking a look at the bread after 50-55 minutes. The best way to know if your banana bread is ready is by inserting a toothpick (or a thin skewer) all the way down in the middle part of the loaf (that’s the part that takes the longest to cook). If it comes out clean, you’re good to go!
Don’t overbake this sourdough chocolate banana bread, you want it moist, not too dry, once the toothpick comes out clean, it’s ready!
Let me know if you make this chocolate banana bread using your sourdough discards and tag me on Instagram or Facebook so I can see your creations! And don’t forget to subscribe to my Youtube channel too, where once in a while I upload videos for some of my recipes.
Enjoy!

Sourdough chocolate banana bread
Ingredients
- 220 g all-purpose flour
- 40 g unsweetened dark cocoa powder
- 135 g sourdough starter discards
- 180 g brown sugar
- 2 eggs
- 115 g vegetable oil
- 3 very ripe bananas
- 1 tsp baking powder
- 1/4 tsp baking soda
- 1/4 tsp salt
- 1 tsp vanilla extract
- 1 cup chopped walnuts (optional and customizable)
Instructions
- Preheat your oven at 350F
- Grease a 9×5 in mold (or line it with parchment paper if you prefer)
- In a large bowl, combine all dry ingredients (flour, cocoa powder, salt, baking powder, and baking soda) and make sure the baking powder and baking soda don't have any lumps.
- In a smaller bowl whisk the eggs, add the vegetable oil and vanilla extract and combine until the eggs get a light color. Then add the brown sugar and mix for a couple of minutes.
- Add the sourdough starter and stir until it breaks down and it's incorporated (you might see some strands, it's ok, the starter had some gluten developed)
- Mash the bananas, add them to the egg mixture and combine everythng well
- With a spatula, lightly fold the wet ingredients into the dry ones
- Add the chopped walnuts and stir just until they're combined
- pour the batter into your mold and bake for 60 minutes or until a toothpick inserted comes out clean (time might vary depending on your oven temperature)