
Hello everyone! Happy New Year even though it’s mid-January already! 😊
I hope you all had a wonderful holiday time! I sure did! We spent Christmas in NYC and it was so pretty! It was a great trip, we disconnected from the routine and eat some delicious food! (I’m looking at you, Queens Chinatown!). We walked, walked, walked… My fitbit was so happy!
Unfortunately, the holidays are over, and we have a new chance to start living a healthier life. Less sugar, more veggies, more FIBER.
For those who don’t know, I do research on high fiber bread, so I know a bit about the importance of eating fiber and I know how difficult it is sometimes to eat the 25g/day that the FDA recommends.
This is what 25g of fiber looks like:
- 1.2 kg of boiled kale OR
- 240 g of old fashioned oats OR
- 2.7 Kg of grapes OR
- 1 kg of broccoli
It’s very possible you’re not eating enough fiber. But what if you change your bread slices for whole grain bread? Bread is an excellent way to increase our fiber intake because it’s everywhere! Morning toasts, lunch sandwiches, dinner rolls, garlic bread, snack crackers… you name it!
Easy, right?
NOPE
If you’ve baked a few loaves, you might now already how difficult it is to bake with whole wheat flour, and more so if you want to add more grains or a mixture of flour with less (or none) gluten.
I could literally go on a full essay on why this happens (currently writing my dissertation, it’d be a copy/paste lol), but long story short: THE GLUTEN NETWORK.
A little bit of nerdy talk.
What happens when there’s fiber in the bread dough?
We all know that gluten is what makes the dough elastic, what helps the dough retain the gas the yeast releases and what helps the baked bread have that particular structure and soft crumb. When we add fiber (as cereal bran, whole grains etc.) there are three major things that happen in the bread:
1.-The replacement some of the flour with some cereal bran, grains etc. that DON’T have gluten, so for the same weight of bread,
2.- Competition for water between gluten proteins and fiber. Gluten proteins need water to bind to each other and create the gluten network. Without enough water, the network can’t be developed properly, and it’d be weaker. BUT fiber loves water too and can take it faster than the gluten proteins, so they cannot build a good gluten network.
3.- We’re still not sure about how it works, but some molecules present in the cereal bran might interact with the gluten proteins and weaken the gluten structure, making the dough more prone to collapse during fermentation and/or baking.
Basically, everything that makes bread healthier, destroys its structure (and texture, and quality).
OH, THE IRONY!
With this recipe, I had to face another problem: whole rye flour. Rye flour has a different type of gluten and it works a bit different. It’s going to affect the dough and the final bread.
Lucky for us, we can add a bit of magic to our dough, that is: vital wheat gluten.
For those who are not sure about adding “weird” things to your bread I’ll say this: Unless you have a gluten allergy or sensitivity, adding extra gluten to your bread it’s perfectly safe. If you do have a problem with it, you probably wouldn’t be eating bread anyway.
You can make this recipe without the extra gluten, but the dough will be less elastic and the bread will have a denser crumb. I’ve tried with and without and the difference is palpable!
Why is fiber so healthy?
We all know fiber is good, but why?
You know fiber helps us… ehm… to go to the toilet more regularly! And this is important because that’s the way our body has to get rid of toxins and sometimes even cells that are acting weird and could become cancerous. Fiber also helps us regulate the bad cholesterol, it makes us feel full for
FIBER FEEDS THE GUT MICROBIOTA! Fiber is super important to keep your gut bacteria healthy and balanced. And gut bacteria is EVERYTHING! Everyday there are new studies that link our gut bacteria to something unexpected like mental health or neurodegenerative diseases. It’s an amazing field of research by itself.
Seriously, I cannot stress enough how important fiber is for the proper functioning of our body. So please, please, please… today more than ever: eat your veggies!
Now, this doesn’t mean that eating all the veggies and all the fiber is going to fix all our problems. But it will significantly reduce the probability of developing other problems or suffering other diseases, and help you have a healthier lifestyle 😉
This bread is also vegan, so if you’re lactose-free, egg-free, vegan or taking part in Veganuary this is your bread!
Without further ado, here are my notes on the recipe!

The very first thing to do is to soak the grains that would take up lots of water. Oats, chia seeds, wheat grains and millet in my case. But feel free to add whatever you want!
Boil some water and add it to where you have your grains. Don’t worry about the amount, just make sure there’s plenty. You’ll rinse the water later on.
Let the grains soak until the water is at room temperature or lukewarm. In the meanwhile, you can prepare the rest of the ingredients.
Mix all the flours, the salt and the vital wheat gluten ( I like to add the salt now because this dough is a bit reluctant to absorb it later on. But you can perfectly add the salt later if you prefer).
Take 300 g of water and dissolve the sugar and the yeast in it. Start with just 300g you’ll add more water with the grains that are soaking and your flour might not have as much protein as mine, so start with 300 and add more gradually if needed.
Once the temperature of the soaking grains is okay, use a colander and get rid of as much water as you can. It should be viscous and the grains should be swollen
To the yeast mixture add the soaked grains and mix well.

Then add the sesame and flax seeds.

Add the wet ingredients to the flour mixture and mix until you don’t see wet particles. If the dough doesn’t come together add more water, 1 tbsp at a time. I used 350 g of water.

Let the dough rest for 25mins to make sure the water can be absorbed by the flour particles.
After the autolysis period, start kneading the dough and when it starts getting a bit of consistency, add the oil little by little and knead until the dough is no longer sticky and has a good elasticity.

You can replace the oil with whatever other fat of your choice. I like to use olive oil because it’s a good source of omega 3 and I love the taste . Plus, I wanted to make this bread vegan because I am doing veganuary! 😊
I love this dough! The extra gluten works wonders. You’ll see how great it is to knead!
When the dough is ready, place it in a lightly oiled container and let it ferment until it doubles in size. This recipe yields 2 loaves.

Deflate the dough and separate it into two equal balls and let them rest, covered, for 5 minutes

Shape the dough and use either a metallic mold or a banneton. I used bannetons because I wanted a “rustic” loaf.

Let the dough rise until is puffy. Follow the “poke” test to know how your dough is.
Turn on your oven at 450F. If you’re using a pizza stone or a dutch oven let them heat up inside of the oven.
Before placing the dough in the oven score it (Make a deep cut), you can even practice a bit your scoring skills, this is a very nice dough to do so because it’s easy to cut through.

Put the bread in the oven and let the magic happen!
If you’re using a pizza stone, make sure you generate enough steam inside to allow a proper oven rise. If you use a dutch oven, you can spray a bit of water on the dough or even put a little piece of ice inside.
If you’re using a dutch oven, take the lid off after 25mins of baking and keep baking until it gets a nice brown color.
Take the bread out of the oven and let it cool down. Right after baking the bread might feel a bit hard, but the crust will soften. This bread is perfect for sandwiches!


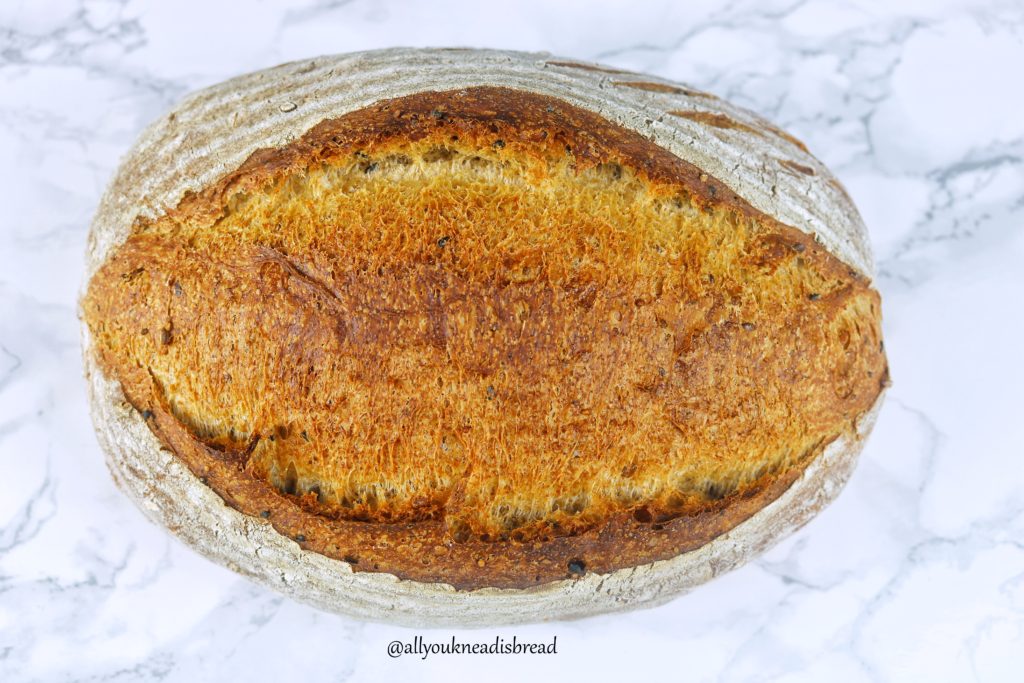
Fiber packed loaf
Ingredients
- 140 g whole wheat flour
- 60 g whole rye flour
- 360 g bread flour
- 17 g vital wheat gluten
- 20 g extra virgin olive oil
- 14 g brown sugar
- 10 g salt
- 1/2 cup mixed grains (millet, oats, wheat, chia seeds)
- 2 tbsp white sesame seeds
- 2 tbsp black sesame seeds
- 2 tbsp flax seeds
- 7 g active dry yeast
- 300-350 g water
Instructions
-
Soak the grains with boiling water and let them rest until they cool down to room temperature.
-
Mix the whole wheat flour, bread flour, rye flour, vital wheat gluten, and salt.
-
Dissolve the yeast and the sugar in 300 g of water and let it rest for 5 minutes to activate the yeast.
-
When the soaking grains are at room temperature use a strainer or colander to drain the water and add them to the yeast mixture.
-
Add the seeds to the yeast and grains mixture and mix thoroughly.
-
Add the wet ingredients to the dry ingredients and mix with your hand until you don’t see dry flour particles. Adjust water if needed 1 tbsp at a time.
-
Cover the dough and let it rest for 25 minutes.
-
Start kneading the dough and when it starts to be elastic add the oil little by little.
-
Keep kneading until the dough is no longer sticky and it’s very elastic.
-
Place the dough in a lightly oiled container and let it ferment, covered, until it doubles in size (about 2h in a cold kitchen – approx time).
-
Deflate the dough and separate it into 2 equal parts.
-
Roll each part into a ball, cover them and let them rest for 5 minutes.
-
Shape each loaf and place it in a floured banneton or a couche or a lightly oiled Pullman pan.
-
Let the loaves ferment until they’re puffy (about 1h in my kitchen). They don’t have to necessarily double in size.
-
Preheat your oven at 450 F with the pizza stone or dutch oven inside if you’re using any of those.
-
When the loaves are ready, take them out of the bannetons, score them (avoid scoring if you’re using a Pullman pan), and put them inside of the dutch oven or on top of the pizza stone.
-
Bake for 25 minutes and remove the lid of the dutch oven if using it. If no, bake for 45 minutes or until the loaves have a nice brown color.
Enjoy!

28 thoughts on “Fiber packed loaf”
Comments are closed.
Getting ready to make this fiber packed bread for the first time. I would like to push the limits on how much of the soaked whole grains I can put in. Do you think I should reduce flour amounts if I do?
Hi Shirley, sorry for the delay.
Before you change the amount of flour (in any recipe, not this one only) first play around with the water content. depending on how many soaked grains you add you might need more or less water. You can start adding about 75-80% of the liquids in a recipe and gauge if you need more or that’s enough by feeling the consistency of the dough. Different flours behave differently and sometimes adjusting the water is all we need!
I hope this helps 🙂
Came across this, that you might find interesting: https://www.hindawi.com/journals/ijfs/2020/8867402/ Keen to explore this recipe once have masted standard sourdough bread with no fat content, just starter, water, flour and salt .. . but, ultimately, want to try this high-fibre version. Great suggestion of adding gluten flour! From my first few attempts, think I’ll autolyse the flours with water to start the gluten development . . . then add the mix of starter with soaked/drain grains. For example, another recipe that looks interesting suggests: 220 g of water + 250 g of white wheat flour + 250 g of whole grain rye flour + 100 g of yogurt . . .to which I’m thinking add the 17g of gluten flour, during autolyse. Then add 100 g of sourdough 100% hydration starter . . . I’m wondering if I add in the drained/soaked grains at that point. Then, I’m also preferring the slow, no-kneed approach of pull and stretch over first couple hours of bulk fermentation. Then, shaping, proofing, etc. If you have any suggestions, especially on ratios of ingredients, I’d be most grateful. May not get to this experiment for a few weeks . . . but, love dreaming about it!! Thanks for helping me dream.
Hi Emily! Every flour mix behaves differently so you need to think what type of bread you want first. Is it a pan loaf? Is it a regular sourdough loaf? How much whole grain etc.. Always keeping in mind that wholegrains, rye, other flours with delicate or no gluten will affect the dough and probably make it more difficult to work with or difficult to develop the gluten. Even if you add vital wheat gluten, some compounds present in the bran of cereals can affect and disrupt the gluten. for example, a 100% whole wheat dough will never have the same smooth and super stretchy texture as a 100% white dough. Then you’ll need to think about the liquids in your recipe, if you’re not sure, add liquid little by little until you have the consistency you like. If you’re introducing soaked grains, also keep in mind that you’ll be introducing moisture and maybe you can cut back on the water etc. There’s no right or wrong as long as you know where the limit is 🙂
Just made this bread for the second time with sourdough, it was super easy! Thought I would share my modifications in case it’s helpful.
I reduced the bread flour by 50g and the water by 50g. Used 100 g bubbly, active sourdough starter. Fed it and let it ferment for 24 hours to increase the sourdough flavor intensity.
The first time I made this, I doubled all the rising times (let it rest for 1 hour instead of 25 mins, then 4 hours for first rising and 2 hours for second rising). The second time, I forgot about it during the first rising and left it for almost 4 hours. By that point it was too late to bake it that evening, so I put the dough in the fridge and let it do the second rise overnight. The results were terrific! Delicious, springy dough with a lovely, but subtle sourdough tang. My husband loves this bread and so do I! Thank you, it’s an excellent recipe.
Thank you so much for sharing your sourdough process!! I’m glad you liked this loaf!!
@sophie, did you use yeast and sourdough starter, or did you omit the yeast entirely?
Could this bread be made with a sourdough starter instead of the yeast?
Of course! Just keep an eye on how much water you’re adding with the starter 😉
So happy I found your website. This recipe is exactly what I was looking for. Can’t wait to make it tomorrow. Thank you, thank you, thank you!!
You’re so welcome! I hope it turned out great! 🙂
Yummy! Just what we needed in my family right now. Karma. You’re a great teacher. Thanks, Jan
Thank you so much! I hope you enjoy it!! 🙂
Thanks for the great recipe and accompanying science – it’s great for a geek like me! Made it with a bit more rye and wholemeal, plus oats, pumpkin and sesame seeds. Very tasty and perfect consistency thanks to your guidance. I’d love to get it to rise even more and make a taller loaf – is there a way to do that?
I’m sure those changes turned out beautifully!! If you want a taller loaf maybe you can try baking the bread in a tin? That way it won’t be able to spread and can only grow upwards! I have several tins, but for sandwich bread, I use my meatloaf pan and put more dough than I probably should, then let it rise until the center is about 0.5-0.75 inches above the edge and then bake it. It usually turns into a nice wide and tall loaf, great for sandwiches!
This bread has become our family’s everyday bread! Yesterday I experimented with making a double batch, since we love the bread so much and we wanted MORE haha.
I doubled all the ingredients EXCEPT with the yeast, I used 2 tsps , and with the salt, I used about 1.5x the amount (rather than double). It worked wonderfully.
I bake the two (very large) loaves at the same time, one on a pre-heated pizza stone, and one in a pre-heated cast-iron dutch oven. Since my dutch oven’s knob is plastic, I decided to experiment by just leaving the lid off. It totally worked – the dutch oven loaf just needed about 3-4 minutes extra time to get well-browned.
The bread keeps very well at room temp in a large ziploc bag, and seems to taste better after a day or two, and I think the texture improves as well. A very firm and easy to slice bread.
My husband and I are so excited about all this – we are eating delicious homemade bread and saving money compared to buying commercially made high-fibre bread.
We can’t thank you enough, Maria! <3
I’m so glad to hear that! And to know you have developed your own method! My recipes should be used more like a guide, every oven is different, every person has different tastes, so it’s great you adapted it to yours 🙂 Thank you so much for your kind comment!
My teen daughter and I just made this. We didn’t have a Battone or couche but shaped hers into a heart and mine a circle. No eye flour but used chick pea flour. We also forgot the salt! Despite our missteps, very very tasty. Not as big as the picture but again that may be our fault as I had to translate grams. Will try again now that I know more.
Nothing beats homemade bread! You can use a cotton cloth as a couche or a bowl lined with a cloth as a banneton (in case you want to do it that way but don’t want to buy the things), however, it’s YOUR bread, and you shape it how you want! I’m glad you are enjoying bread baking with your daughter! <3 🙂
I made this bread yesterday and just had some beautiful toast! The dough was very wet/sticky after step 6 (I used 300 g water plus 1 Tbsp extra), so when it came time to knead, I ended up having to add quite a bit of flour as I kneaded (approx 1-2 cups) and was a bit worried. But it ended up quite tasty and well-risen. I baked one loaf in an oiled loaf pan and the other in an oiled square corning-ware dish (didn’t pre-heat the baking vessels), and placed a pie-plate of hot water in the oven for the first little while. It was a long process, but now we have bread for a week. Thank you!
That’s awesome! You’re so welcome! The water content can always change because it depends on the type of flour you use, and even using the same brand, sometimes different batches have slightly different properties. Now that you have a feel of it, you can customize it to what works for you 🙂
Thank you – just made a second batch today, and have experimented a bit with not soaking the grains, adding oil with the yeast, preheating baking vessels etc. More great bread! Thank you for the very detailed and informative recipe 🙂
You’re so welcome! All my recipes can be customized to your needs. Maybe you need more flour? Or you like it with more oil, or grains etc… As long as you know how things can affect your dough and you get the results you want, customize away! 🙂
Hi Maria
This recipe looks great and I can’t wait to try it. I loved reading about all the science behind the baking!
Just to clarify, are all the risings done on the countertop/at room temperature instead of a “warm place”?
Thank you
Violet
Sorry I missed this! I’d only recommend the “warm place” if your kitchen is too cold (below 70F). The aromas in bread develop better the longer the fermentation and by speeding it up you might lose flavor. If you’re in a rush or something, of course, but if you have the time, slower is always better!
Got it!
Would this work in a bread maker? If not what can I do to make it work.
You can absolutely knead it in a bread maker and I guess you can also bake it. I haven’t tried it myself but I don’t see why it wouldn’t work. The only thing that comes to mind is the size of your bread maker. You might need to adjust the recipe 😉