
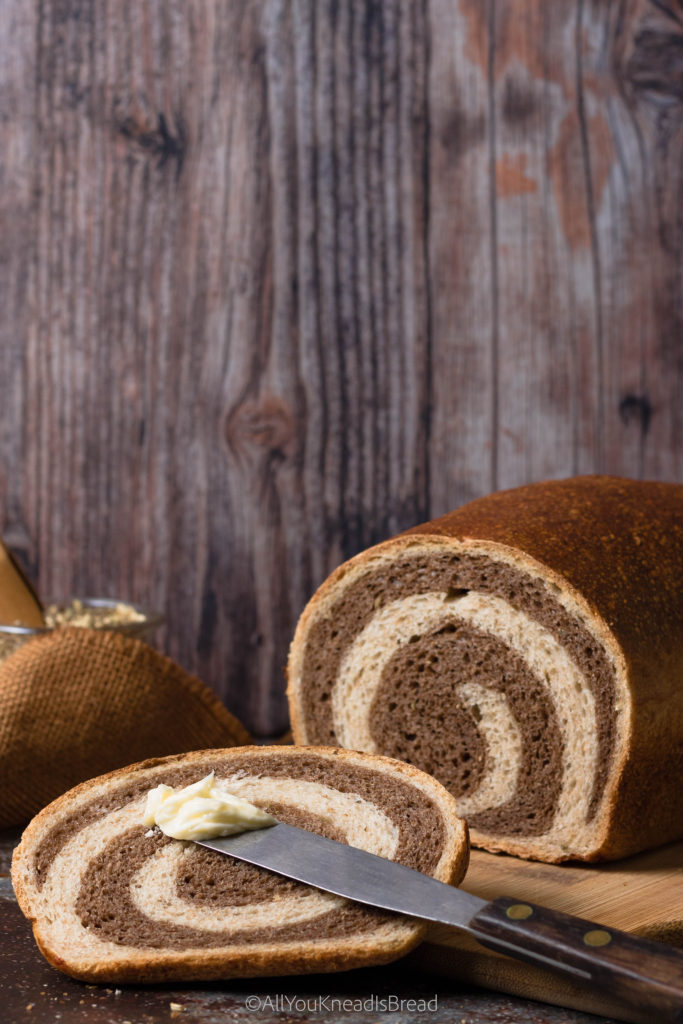
I have a soft spot for sourdough marble rye bread, especially during the hot southern summers. I love to pair it with a simple tuna salad to make one fo the most delicious sandwiches! I have updated this post to create a full guide that will help you make the most delicious and beautiful sourdough marble rye bread!
What is marble bread?
In case you don’t know this bread, sourdough marble rye is a delicious classic deli-style loaf made by combining a lighter dough with a darker one and shaping them together to create a swirl pattern when sliced. In this version the bread is naturally leavened with sourdough starter, which not only adds depth of flavor and improves shelf life but also helps control rye amylase activity through acidity (more on this later).
Unlike 100% rye bread, which is dense and depends largely on rye’s pentosans for structure, marble rye typically contains a substantial proportion of wheat flour. This allows for stronger gluten development, better oven spring, and a lighter crumb while still preserving rye’s distinctive flavor. Compared to standard light rye, marble rye is primarily about contrast (both visual and structural) rather than a dramatic increase in rye content.
In the sections below, I’ll walk you through the important steps:
- How to achieve a clean swirl
- How to balance the rye percentage
- Why the pattern sometimes fades during baking
- Understanding the fermentation and readiness
- Troubleshooting your loaf
If you want a refresher on your sourdough knowledge, I recommend you read my posts about feeding ratios, sourdough science, and troubleshooting your sourdough starter. Here you will find all you need to know to start your sourdough journey!

What creates the marble effect in Rye Bread?
Balancing Hydration Between Doughs
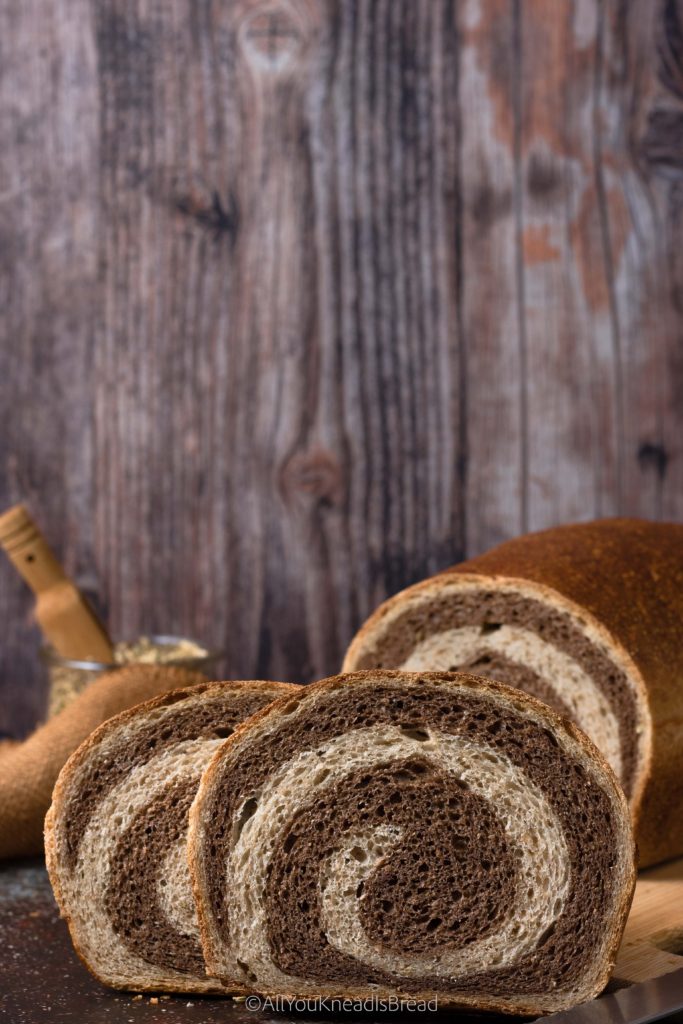
The marble effect is the result of combining two separate doughs with contrasting colors (usually a lighter dough and a darker one) and shaping them together before the final proof. When the loaf is sliced after baking, the layers reveal the characteristic swirl pattern that runs through the crumb.
However, getting a clean contrast is not just about choosing very different colors. It’s about balance.
Both doughs need to have a similar hydration level and a comparable degree of gluten development.
Gluten Development and Dough Strength
If one dough is significantly wetter or weaker than the other, they won’t stretch and expand at the same rate during fermentation. When that happens, the swirl can blur, tear, or disappear altogether.
In darker doughs, part of the flour is often replaced with cocoa powder. Cocoa doesn’t contain gluten, and it absorbs moisture differently than flour, so even small changes in water can create noticeable differences in consistency between the two doughs.
How Rye Flour Affects the Structure
Rye flour also plays an important role. Unlike wheat, rye doesn’t contain glutenin and gliadin, the proteins responsible for forming a strong gluten network. Instead, rye contains secalins and pentosans, which absorb water and create a sticky, more viscous dough. Increasing the rye percentage too much can make the dough denser and less elastic. These structural differences can also affect fermentation speed, causing one dough to ferment faster than the other and increasing the risk of over- or under-proofing.
In other words, the marble pattern holds best when both doughs are structurally compatible: similar hydration, similar strength, and shaped at the same stage of fermentation.
Is Marble Rye Bread Always Sourdough?
Marble rye bread can be made with either commercial yeast or sourdough starter. The marbled appearance comes from combining light and dark doughs, not from the leavening method itself.
That said, rye-based breads almost always benefit from some level of acidity. Rye flour contains higher amylase activity than wheat flour. These enzymes break down starches into sugars during fermentation, which is helpful to a point. However, excessive activity can weaken the crumb structure and lead to a gummy texture.
Acidity slows amylase activity, helping stabilize the starch network and support a cleaner, more structured crumb. This is one reason sourdough is particularly well suited for rye breads, even though it isn’t strictly required.
How Much Rye Flour Should You Use?
Recommended Rye Percentage for Structure
The ideal rye percentage in marble rye bread depends on the texture you’re aiming for. Most deli-style marble rye loaves contain between 20% and 40% rye flour, with the remainder coming from wheat flour.
At around 20–30% rye, the bread retains good gluten structure from the wheat flour. The crumb is lighter, the loaf rises well, and the rye flavor is present but not dominant. This range produces the soft, sandwich-style texture many people associate with classic marble rye.
What Happens if You Add Too Much Rye
As the rye percentage increases beyond 40%, the dough becomes denser and stickier. Rye’s secalins and pentosans begin to dominate the structure. You may notice reduced oven spring and a tighter and wetter crumb.
It’s also important to note that the darker portion of marble rye is not always significantly higher in rye flour. In many cases, like this recipe, the contrast comes from molasses or cocoa powder rather than a dramatic difference in flour composition.
In this formula, I use about 31% rye flour, which balances flavor and structure while maintaining a well-defined swirl and good oven spring. You can modify this percentage based on the strength of your bread flour. If your bread flour is on the weaker side, maybe it will be beneficial to reduce rye content.
The Formula and Ingredient Breakdown
Why This Flour Ratio Works
This formula is designed to balance rye flavor with reliable structure. Each dough contains approximately 30% rye flour and 70% wheat flour (including the flour contributed by the sourdough starter). This ratio provides enough rye to deliver its characteristic flavor, while allowing the wheat flour to develop sufficient gluten for good oven spring, great texture, and a well-defined swirl.
Sweeteners and Color Development
Both the light and dark doughs use a similar flour composition. The contrast comes from added cocoa powder and molasses in the darker portion, not from an increase in rye content. Keeping the flour percentages consistent ensures that both doughs ferment at a similar rate and have comparable strength, which makes shaping cleaner and helps preserve the marble pattern during baking. The darker the cocoa powder, the higher the contrast between both doughs. I recommend you use dark cocoa powder for a more dramatic effect.
The Role of Sourdough Starter
The sourdough starter contributes not only leavening but also acidity, which helps moderate rye’s naturally high amylase activity. This acidity supports starch stability during baking and reduces the risk of a gummy crumb, a common issue in rye-heavy breads.
Bread flour is used here to strengthen the overall structure. While all-purpose flour can work, it may produce a slightly softer dough and less oven spring due to its lower protein content. Because rye already weakens gluten development, maintaining adequate wheat protein helps compensate for that structural limitation.
Depending on where you live, your all-purpose flour might be strong enough or slightly weak. If you’re not sure or don’t have access to bread flour, bake a test loaf and adjust from there.
Every component in this formula serves a structural purpose. The goal is not simply to create contrast, but to produce a loaf that slices cleanly, rises predictably, and maintains its shape while still delivering true rye character. For a dough like this one, it’s important to weigh the ingredients; a kitchen scale is always very helpful in bread baking, especially when sourdough is involved.
Understanding Fermentation in Sourdough Marble Rye Bread
How Rye Ferments Differently Than Wheat
Fermentation in sourdough marble rye behaves slightly differently than in wheat-based breads because rye flour affects both the dough structure and the way enzymes act during fermentation. While wheat relies on gluten development to trap gas and create structure, rye contributes more viscosity than elasticity due to its pentosan content and secalins (lower gluten-forming proteins).
Because of this, fermentation needs to be monitored carefully. Rye-containing doughs can appear ready before the gluten structure is fully developed, and they are also more sensitive to overproofing. If fermentation goes too far, the weakened gluten network may not be able to support the expanding gases in the oven, resulting in a dense or collapsed loaf.
Why Acidity Is Critical in Sourdough Rye Fermentation
Acidity plays an important role in rye doughs. The organic acids produced during sourdough fermentation help regulate rye’s naturally high amylase activity. These enzymes break down starch very quickly, which can lead to structural issues if left unchecked.
Starch gelatinizes during baking, which is essential for creating a soft and pillowy crumb. However, excessive starch breakdown results in a gummy, dense texture. By slowing down enzymatic activity, acidity helps preserve starch integrity and improves overall crumb quality.
If you are interested in stronger or more controlled fermentation, you might also enjoy learning about pasta madre (lievito madre), and how to make it from scratch.
Signs Your Dough Is Ready
For this marble rye, the goal during bulk fermentation is to allow the dough to gain strength and expand moderately without pushing it too far. You should see a noticeable increase in volume and a slightly aerated texture, but the dough should still feel elastic and easy to handle. If the dough becomes overly slack, sticky, or fragile, it may be approaching overproofing.
If you use a dark enough cocoa powder, the slight composition difference between the light and dark doughs shouldn’t create a big difference in the consistency of the doughs. And since both doughs are very similar, they should ferment at a similar rate. This helps keep the layers balanced when shaping and prevents one portion of the loaf from expanding faster than the other during baking.
Shaping the Dough and Preserving the Swirl
Shaping marble rye is fairly straightforward, but a few small details make the difference between a clear swirl and a loaf where the pattern disappears during baking. This is the part where most people accidentally lose the swirl, so it’s worth taking your time here.
How to Layer the Doughs
After bulk fermentation, the two doughs are gently degassed and shaped into rectangles of similar size. One side of each rectangle should be slightly shorter than the length of your baking pan. Since both doughs have nearly identical compositions, they should feel very similar in your hands and handle in much the same way during shaping. Keeping their texture and elasticity consistent helps the layers expand evenly in the oven.
Rolling Without Blending the Layers
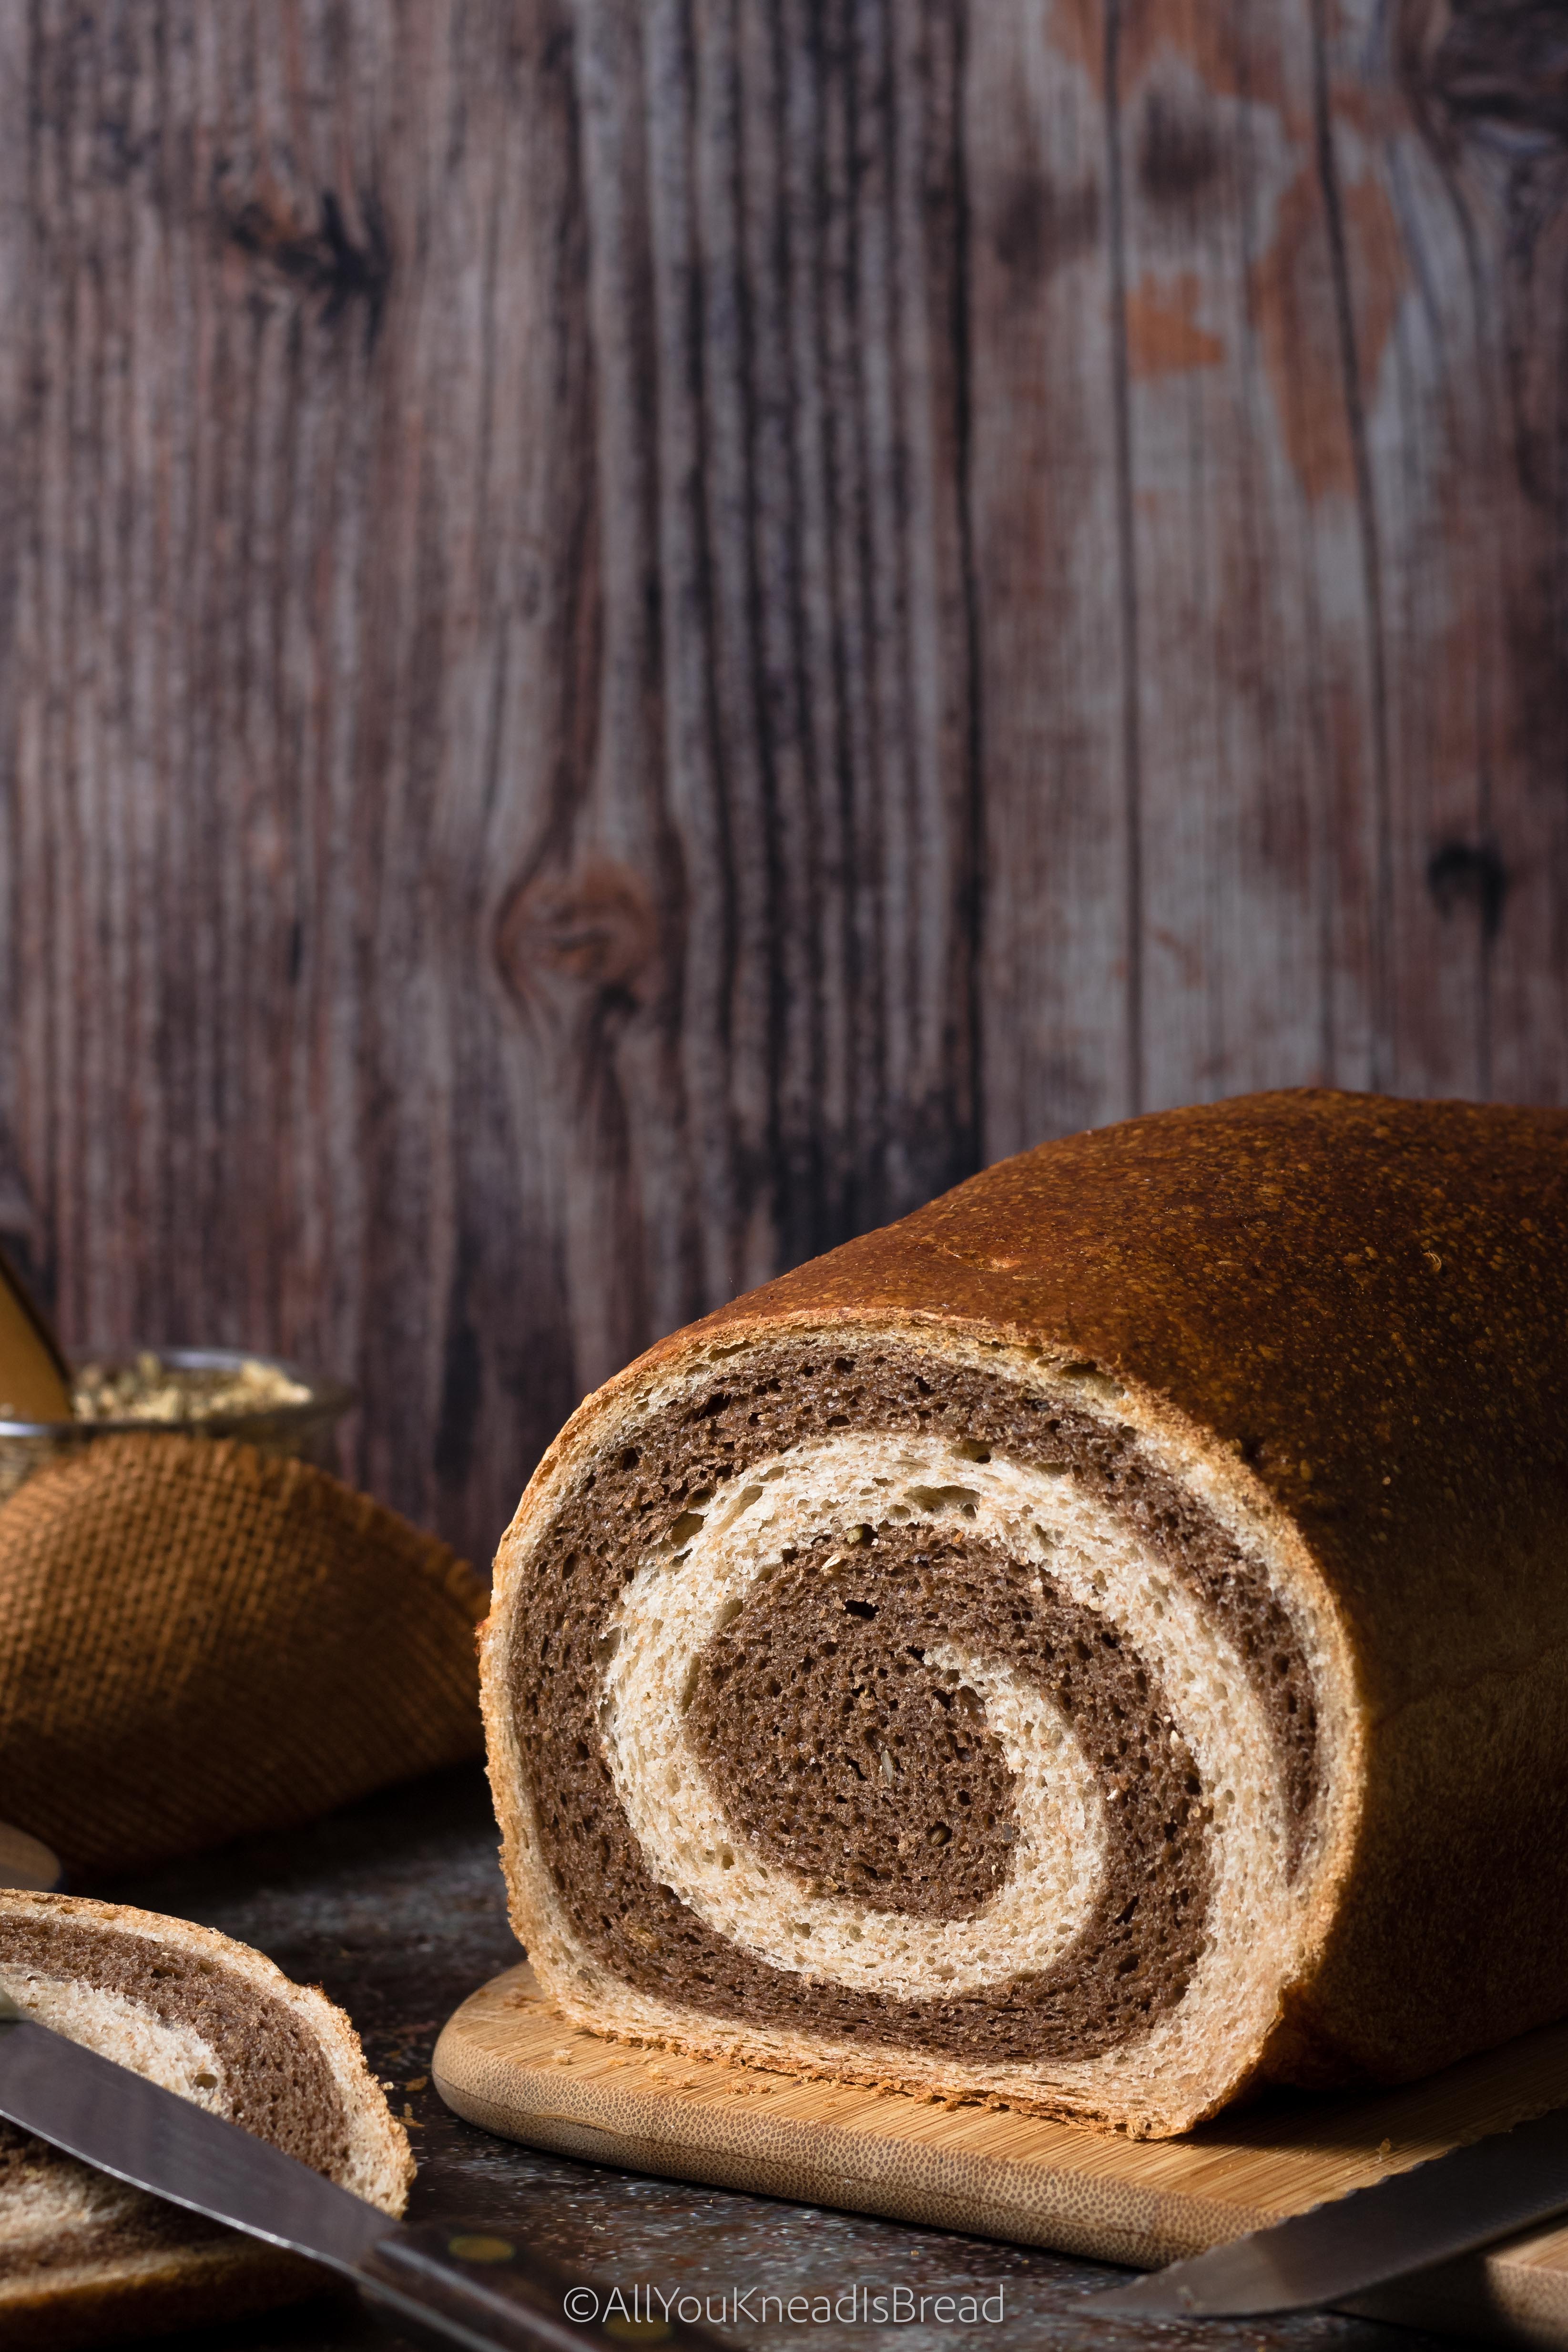
To create the marble effect, the two rectangles are layered and then rolled together into a relatively tight log. Tight enough to avoid leaving air pockets between the layers, but not so tight that the dough cannot expand while baking. The goal is to bring the doughs together without overworking them. Excessive rolling, stretching, or laminating can blend the doughs or create areas that are too thin and prone to tearing, which weakens the visual contrast once the loaf is sliced.
Bench flour should be used sparingly during shaping. Too much flour between the layers can prevent the doughs from bonding properly, causing gaps in the baked loaf.
How to place the dough in the loaf pan
Once you finish shaping the log, pinch the seam closed and place the loaf in the pan seam-side down, as centered as possible. The dough may shift slightly during proofing and baking, so keeping the seam centered reduces the chance that it will open along the side of the loaf. A tight final shape also helps preserve the pattern. Gentle surface tension supports good oven spring while keeping the internal layers compact and defined.
Because rye doughs are naturally slightly stickier than wheat doughs, it helps to handle them with light, confident movements rather than excessive flour. If the dough is properly fermented and well-balanced, shaping should feel controlled rather than fragile. If your swirl has ever disappeared in the oven, the shaping is usually why.
If you still struggle with sticky dough, lightly oil your hands. Oil wil prevent the dough from sticking and you can handle it more comfortably.
Final Proof and Baking
After shaping, the loaf should undergo a final proof until it becomes slightly puffy and shows a noticeable increase in volume. The dough should feel lighter and more aerated, but it does not need to double in size. Because rye weakens gluten structure, overproofing can cause the loaf to lose strength and collapse during baking.
How to Know When It’s Ready to Bake
Unlike wheat breads, the poke test is not always reliable with rye-containing doughs. Instead, look for visual cues: the surface should appear gently expanded and smooth, and the dough should still feel resilient rather than fragile or wobbly when you gently move the pan.
When the dough is approaching the rim of the pan, begin preheating the oven. The loaf should be baked once it rises about 1 cm above the rim.
Steam and Oven Spring
When the loaf is ready, bake it in a well-preheated oven with steam during the first part of the bake. Steam helps keep the crust flexible so the bread can expand before the crust sets, improving oven spring and overall loaf volume.
Marble rye typically produces moderate oven spring rather than the dramatic rise seen in high-wheat sourdough loaves. Bake the bread until the crust is well browned, and the internal temperature reaches about 205–208°F (96–98°C).
Once baked, allow the loaf to cool completely before slicing. Cutting too early can compress the crumb and make the interior appear gummy, especially in breads that contain rye flour.
I bake my marble rye bread in a standard meatloaf pan with dimensions of 9 × 5 × 3 inches (about 23 × 13 × 7.5 cm). If your pan has different dimensions, adjust the dough quantity or baking time accordingly.
Storage and Shelf Life
Thanks to the combination of rye flour and sourdough fermentation, marble rye bread tends to stay fresh longer than many wheat-based loaves. Rye’s natural ability to retain moisture, together with the acidity produced during sourdough fermentation, helps slow the staling process and keeps the crumb softer for longer.
Once completely cooled, the bread can be stored at room temperature for about 2–3 days. To maintain freshness, I like to keep the loaf cut-side down on a cutting board and, depending on the weather, cover it with a ziplock bag. You can also store it loosely wrapped in a cloth or paper bag. If you use plastic bags, keep an eye on the bread, as moisture can accumulate and make it easier for mold to develop. Avoid sealing the bread tightly in plastic while it is still warm, as this can trap moisture and make the crust soggy.
For longer storage, marble rye freezes very well. Slice the loaf once it has fully cooled, place a piece of parchment paper between the slices, and store them in a freezer-safe bag or container. The bread can be frozen for up to 2–3 months. Individual slices can be thawed at room temperature or toasted directly from frozen.
Frequently Asked Questions
Can I make marble rye bread without sourdough?
Yes, marble rye bread can also be made using commercial yeast instead of sourdough starter. In that case, the dough typically ferments faster and has a milder flavor. However, sourdough fermentation provides acidity that helps control rye’s enzymatic activity and improves crumb stability, which is why it works particularly well in rye-based breads.
Can I make marble rye bread without caraway seeds?
Yes. Caraway seeds give marble rye its traditional deli-style flavor, but they are not essential for the structure of the bread. If you prefer a milder flavor, you can simply leave them out. The bread will still ferment and bake exactly the same way, and the rye flavor will be slightly more subtle.
Why is one side of my marble rye loaf denser than the other?
This usually happens when the two doughs do not ferment or expand at the same rate. Differences in hydration, gluten development, or shaping tension can cause one layer to rise more than the other. Keeping both doughs similar in composition and handling them gently during shaping helps the loaf expand more evenly.
Can I increase the rye percentage in this recipe?
Yes, but increasing the rye percentage will change how the dough behaves. Higher rye content makes the dough stickier and reduces gluten strength, which can lead to a denser crumb and less oven spring. If you want a stronger rye flavor, it’s usually best to increase the rye gradually and adjust hydration accordingly.
Making marble rye bread at home might look a bit intimidating at first, but once you understand how the dough behaves and how the layers come together, it becomes a very rewarding process. The combination of flavors, textures, and that distinctive swirl makes it a truly special loaf. If you give this recipe a try, I’d love to hear how it turns out for you or if you experiment with different variations!
You can find me on Instagram, Facebook, and Pinterest, and you can also subscribe to my YouTube channel.
Happy Baking!
This post contains affiliate links and any sales made through such links will reward me a small commission – at no extra cost for you – that allows me to keep running this blog.

Sourdough Marble Rye Bread
Delicious and aromatic sourdough marble rye bread, perfect for sandwiches and toasts!
Ingredients
Light Dough
- 85 g rye flour
- 165 g bread flour
- 55 g mature sourdough starter
- 130 g water
- 5 g salt
- 15 g butter
- 10 g honey
- 1 tsp caraway seeds
Dark Dough
- 85 g rye flour
- 165 g bread flour
- 55 g mature sourdough starter
- 130 g water
- 5 g salt
- 15 g butter softened
- 10 g molasses
- ½ tsp cocoa powder (use dark cocoa powder for a darker color)
- 1 tsp caraway seeds
Instructions
Light Dough
-
Dissolve the sourdough starter in the water to help distribute it evenly.
-
Add all the remaining ingredients except the butter and mix until no dry flour remains. Cover and let the dough rest while you prepare the dark dough.
-
After a short rest, knead the dough and incorporate the butter. Continue kneading until the dough becomes smooth and only slightly tacky.
-
Place the dough in a lightly oiled container, cover, and let it ferment until it roughly doubles in size. This may take about 8–9 hours at 69°F (20°C) or 4–6 hours in a warmer environment (do not exceed 79°F / 26°C). See notes.
Dark dough
-
Dissolve the cocoa powder in about 50 g of the water until smooth and free of lumps.
-
In a separate bowl, dissolve the sourdough starter in the remaining water.
-
Add the cocoa mixture and the rest of the ingredients (except the butter) and mix until no dry flour remains. Cover and let the dough rest while you knead the light dough.
-
Once the light dough is finished and set to ferment, knead the dark dough and incorporate the butter. Continue kneading until smooth and slightly tacky.
-
Place the dough in a lightly oiled container, cover, and let it ferment under the same conditions as the light dough. This may take about 8–9 hours at 69°F (20°C) or 4–6 hours in a warmer environment (do not exceed 79°F / 26°C). See notes
Shaping & Proofing
-
Once both doughs have finished bulk fermentation, lightly flour your work surface. Using a rolling pin, roll each dough into a rectangle about ½ inch thick and roughly as wide as your baking pan. Thicker dough will create a more defined swirl pattern.
-
Try to keep both rectangles similar in size (approximately 9 × 17 inches / 22 × 40 cm). Lightly prick the surface of each dough with a fork to prevent large air pockets from forming between the layers.
-
Lightly brush the surface of the light dough with water (or use a spray bottle), then place the dark dough on top. Use just enough water to help the layers adhere.
-
Gently press the doughs together to ensure full contact. Starting from the shorter side, roll the dough into a log and pinch the seam to seal.
-
Place the dough seam-side down in a lightly oiled 9 × 5 inch (23 × 13 cm) loaf pan. Cover with plastic wrap or a shower cap.
-
Let the dough proof until it becomes puffy and rises to about the height of the pan or slightly above. At 73°F (23°C), this may take about 4 hours. See notes.
-
When the dough is approaching the rim of the pan, begin preheating the oven to 350°F (175°C).
Baking
-
Once the dough has risen about 1 cm above the rim of the pan, gently brush the surface with milk or egg wash.
-
Bake for 35–45 minutes, or until the internal temperature reaches at least 204°F (96°C) and the crust is well browned.
-
Remove the bread from the oven and let it cool in the pan for about 10 minutes, then transfer it to a rack to cool completely.
Recipe Notes
* If your kitchen is cold and you need a longer fermentation, it’s best to extend the bulk fermentation rather than the final proof. I don’t recommend cold-proofing after shaping, as the dough may not rise sufficiently and can result in an underproofed loaf. Avoid excessively warm temperatures, as they can weaken the gluten structure.
** It’s important to use an appropriately sized loaf pan. If the pan is too wide, the dough may need to overproof to reach the proper height, which can negatively affect the final structure.
Can you substitute the molasses for honey or maple syrup?
Absolutely! Molasses add bit of color, but other sweeteners work just as fine.
Are you using just a normal bread flour starter or a rye flour starter?
My plain white starter. You can use whichever starter you have or you can specifically make a rye one for this bread. Flavors with change a bit, experiment and see which one you prefer! 🙂
The bake time seems off… every other loaf of sourdough I’ve ever made has had to be baked at 450 for at least 40 minutes.
This is an enriched dough for a sandwich style bread. The baking is at lower temperature to avoid drying too much the loaf. IF a sandwich style bread is baked for too long, it doesn’t create a crispy crust, it dries out the crumb and it’ll affect the shelf life and texture. However, you’re more than welcome to experiment.
I don’t know what I did wrong but it came out suuuuper dense 🙁
Different ryes and bread flours behave differently, it could be a matter of gluten being a bit weaker. Where I live, wheat flours are quite strong and can handle the rye I incorporated into this recipe. Also, it could be a matter of fermentation. If you have more information, I could try to make a better guess 🙂
What size loaf pan do you use?
9×5 in, regular meatloaf pan.
While the dough is fermenting in the container, should it be covered or uncovered?
always covered or it can dry out too much and that will prevend oven expansion.
Would it be possible to bulk ferment this in the fridge overnight? Thank you
you could retard overnight if time is an issue but it won’t really ferment much in the fridge once the temperature is low
Just baked mine this morning! First ever loaf of Rye and the spiral is gorgeous😍 Great recipe, will be trying again!
So many compliments on this bread when I made it and requests for more. Very easy recipe to follow and such a pretty swirl. Thanks!
I baked mine today and it’s delicious! The crumb is perfection but it took about 55 mins to reach 204F.
I added about a tsp of fennel seeds. Looking forward to having a Reuben, which is the reason I wanted to bake this loaf.
Wish I could share a pic. 😂
Making this now, just adapted recipe to be all light rye as I was limited on time etc- excited to see how it comes out! Could you bulk ferment in fridge overnight then shape and bake next am?
The bread smells good and tastes good but mine burst at the sides when i baked it. Idk why. Im new to baking sourdough so im not really sure what i could be doing wrong. 😭
It could be that you roll it too tight, it happens sometimes! Or it could be it needs a bit longer bulk fermentation
1/2 tsp cocoa powder seems really low – I used that and the dough was barely colored. 1/2 tsp came out to 1g. Other recipes call for 10g, so I upped it to that afterwards… Has anyone made this with only 1/2 tsp, and was it as dark as it should be?
I use extra dark cocoa powder. You can modify the quantities but don’t forget to adjust the flour on the white dough, the idea is to have similar consistencies 🙂
Could you make this bread as a boule?
You could, I’m just not sure how the layers might look 🙂
Hello there Maria, Can you please give a link to the pans you used for these SD Marbled Rye loaves? I’m trying to figure out how I can do the same. However, all I have are straight edges loaf pans. So how did you get your marbled rye loaves to have such lovely rounded edges all the way to the bottom of the loaves?
Hi Sheryle, Happy New Year!
I have used this pan for quite a while, I bought it in a store, but this is the closest I could find on Amazon. Recently I got this other one it’s a bit larger and I need to adapt the recipe for it but I really like it because it’s taller and it’s better for sandwiches!
Can you use Dutch processed cocoa? Thanks
Hi Jeanette!
I have not tried Dutch processed cocoa powder, since it’s a small amount I’d say it’s okay, but it’s better to try. Pay attention to the dough consistency, if it gets too sticky or to hard etc.. I don’t think it should affect the leavening though.
Let me know if you try! I’m very curious now! 🙂
Maria. I love, love, love this bread and so do some of my bread customers. My first attempt was terrible but I’m not a quitter. I know that rye flour can be tricky so I paid close attention to what I was doing : time & temperature most importantly. I’m getting better at the shaping and proofing but dang if I can get mine to dome like yours. Are you using a special pans?
I’m using Dutch processed chocolate (3 g). That was the only way I could get a good contrast. I also add ground anise, fennel & caraway (6g) to the whole batch and everyone that loves deli rye love this flavor. I also make it using just the caraway as you prescribe. I just baked 2 loaves today and my house smells amazing. Thanks so much for developing and sharing this recipe.
Hi Jeanette, so sorry for the late response!!
Thank you so much for giving this recipe a try! I used to make my loaves with a 9×5 loaf pan, a very simple one I found in a store, something like this but now I use this other one because it’s a bit taller and works better for sandwiches, although I have to increase the recipe a bit for that pan. If you’re having issues with the shape, maybe you can try something a bit narrower so the dough doesn’t have other place to grow but upwards. Something like this could work!
Hope this helps!
I tried this recipe and it turned out the bread came out so good!!!
So good to hear!!! 🙂
Could you use chocolate sourdough starter for the dark
You could just make sure both starters are equally active so both doughs ferment at the same rate.
I am about to make marble rye for the first time, and want to try your recipe. It looks great. But can you be more specific about what size baking pan to use?
It’s a 9×5 inches loaf pan, you can use one that’s a bit narrower or a bit longer too. As long as it’s not too long (like a 13 in loaf pan), you should be fine ☺️