

Well well well… Looks like summer is already here! One of the things I like of the crazy weather we have in NC is the summer storms. I find rain quite relaxing, the trickling sound of the water, the smell of wet soil, the sunset of a stormy day… And baking while raining? That’s a complete spa day!
I guess many of you will go on a vacation this summer, but if for some reason you won’t, I’d like to take you on a little trip without leaving your kitchen! I’d like to take you to the Caucasus region!
This region is well known for their kefir. A fermented milk drink made from kefir grains. These grains are a combination of yeasts and bacteria that you add to milk. The culture ferments overnight, and the next morning you have your fresh fermented drink! The consistency is similar to drinkable yogurt. A little bit sour because of the lactic acid bacteria. While I’m not an expert on homemade kefir, I believe you can control the sourness by controlling the fermentation temperature and times.
Kefir has gained much attention in the last years because it’s a probiotic, so it’s very healthy for your gut microbiota and digestive system. Now you can find it in almost all grocery stores!
I came to realize that almost every country and region have a bread recipe that uses local ingredients or cooking techniques, so in Eastern European countries, kefir is sometimes used to make “батон” (baton) bread. I guess the name comes from the shape of the bread.
I’ve been doing some research on this recipe, I’ve looked for blogs and videos (Thank you Google translate!) and I finally found a recipe that I like, although I’ve made a few changes.
This bread is very easy to make and it the perfect candidate to start kneading by hand. This dough is on the dry side, therefore comes together pretty fast. It’s great to try different kneading techniques and develop your own style. I think making this bread can also be an excellent activity to do with your kids, the recipe it’s simple, they can help you knead, and they won’t make a mess because the dough is not very sticky! 😉
You can eat this kefir bread with savory dishes, or jam, or just plain! And it makes wonderful French toasts too! The flavor is rich and delicate, and the kefir really gives the bread an interesting kick and aroma! The crumb is perfectly fluffy and cohesive, and the crust is not too thick, so you can use this recipe to make homemade subs! The crust will get softer after a few hours. And in my opinion, the aroma of the bread is better after it cooled down completely.

The recipe yields 3 large loaves or 4 medium loaves, so if you’re not going to eat them all you can freeze some and keep the rest in a Ziplock bag for a few days.
Let’s start with the recipe!
As always, activate the yeast in the water and let it sit for a few minutes.
Once the yeast is active, add sugar, salt, kefir and butter and give it a good whisk. Don’t worry if there are chunks of butter.
Then add 1/3 of the flour and combine everything very well until you have a thick paste. By doing this, incorporating the butter will be easier and you don’t have to melt it. Bread usually turns out better if you don’t melt the butter.

Add the paste to the rest of the flour (previously sifted) and combine all the ingredients together until there are no dry flour particles.
Let the dough rest for 20-30 minutes to allow the flour particles to hydrate. This is a pretty dry dough, since the gluten doesn’t have much moisture, it’s important to start working the dough after the gluten proteins had some time to hydrate.
Knead the dough until it’s soft and elastic. Knead it the best way you can with the technique you’re more comfortable with. The dough feels a little hard at the beginning, use the heel of your hand to apply pressure and eventually it’ll become more elastic. Be patient, it’ll take about 15 minutes to have the dough ready.

After autolysis After kneading


You shouldn’t need extra flour to knead the dough, it’s not sticky, but if you do, try not to add too much or your bread will turn out too dry.
When the dough is ready, let it ferment until it doubles in size and it’s puffy. In a warm environment it will take between 1 h and 1 h 30 mins.
After that, deflate the dough very well, we’re not looking for big alveoli in the crumb, but a bun-like crumb.
Divide the dough into 4 equal pieces (or as many as you want! It depends on how large you want the loaves). Shape them into balls and let them rest, covered, for 10 minutes. During this time the gluten strands will relax, and it’ll be easier to shape the loaves.
To shape the loaves, flatten each dough ball with your hand and with a rolling pin roll them into a rectangle as wide as you’d like the loaves. The rectangle should be about 1/3 or 1/4 of an inch (0.5-0.8 cm).

You can use some flour while you shape the loaves to avoid the dough from sticking on the counter.
Once you have the rectangle start rolling the dough from the narrowest side, tugging the ends inside of the log.


Let the loaves rest, covered, until they double in size. Before the proofing time is over, preheat your oven at 375 F (190 C).

Right before baking the loaves, make cuts through them and brush some water. This step is optional, the water will help develop the crust but if you prefer a softer crust, don’t brush it.

Bake the loaves for 25 minutes or until they are golden brown
NOTE: you might need to bake at lower temperature to make sure the loaves are fully cooked. You know your oven better!
When the loaves are ready, let them cool down on a cooling rack. I know it’s tempting but try to wait until the bread is at room temperature so the crumb finish baking and the aromas finish developing.

Enjoy!
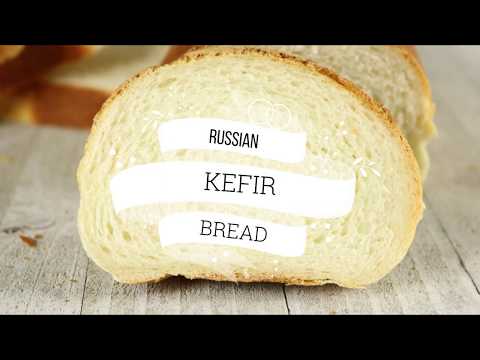

Russian Kefir Bread
A delicious and easy bread recipe
Ingredients
- 600 g bread flour sifted
- 175 g plain kefir
- 175 g water room temperature
- 6 g dry yeast
- 10 g salt
- 30 g white sugar
- 50 g unsalted butter softened
Instructions
-
Dissolve the yeast in the water and let it sit for 10 minutes
-
Add to the yeast mixture the salt, sugar, kefir, butter, and 200 g of flour and combine everything until you get a paste.
-
Add the paste to the leftover flour and incorporate all the ingredients until there are no dry flour particles. Let it sit, covered, for 20 minutes
-
Knead the dough until it's elastic and soft
-
Place the dough on a lightly oiled bowl and let it ferment, covered, until it doubles in size and it's puffy.
-
Deflate the dough and knead it for 1 or 2 minutes to make sure you get rid of big bubbles
-
Divide the dough in 4 equal pieces. Shape them into balls, cover them and let them rest for 10 minutes.
-
With a rolling pin roll the balls into a rectangle and shape the loaves.
-
Let the loaves rest, covered, until they double in size and they are puffy.
-
Make cuts on the loaves, brush them with water (optional) and bake them at 375 F for 25 minutes or until they're golden brown
Homemade Christmas Panettone
Christmas is here! Finally! I’ve been really looking forward to the holidays. I can’t wait to turn the laptop off and completely disconnect from anything lab related!
My husband and I decided to go to NYC to spend the holidays instead of going to our home countries. And to be honest, I think it was the best decision. 2018 has been an eventful year, good and bad stuff happened, tears of joy and tears of sorrow. We need a break, a real one. Like a big apple break! Which means I’m not cooking anything for Christmas!
However, I know many people will, and you’ll be looking to impress your guests.
So *guest* what?? (Did you see what I did there? Lol)

It’s panettone time!!!!
Okay, let me say this. It’s NOT the original recipe and I didn’t use any type of
I’ve been working on this recipe for quite a long time. This dough was difficult to handle. But there was something I was NOT going to give up on. And that’s the eggs and sugar content. Which is exactly what makes this dough so difficult to handle. But panettone has to have a strong aroma of eggs, and the yellow color, and it has to be sweet and rich and full of flavor! And it has to last fresh for a long time! Because, let’s be honest. We don’t want to go through all this work for just a couple of days of fresh panettone.
NOPE!
Now.. you do need a strong flour for this: A protein content of at the very least 14-15%.
I could’ve bough the flour online. But I wanted to try something that could be a solution for when you need high gluten flour and you forgot to order it online or you want to save some money in the long run.
I made my own high gluten flour. How? By adding more gluten!
I have wheat gluten at home because I use it to make plant base “meat”. So, what I did was: I first calculated the total amount of gluten in my recipe using a 15% protein flour. Then I calculated the actual protein content of my flour and the gluten I have. And finally, I calculated how much gluten I had to add to my flour.
I know, it sounds weird all these calculations. Don’t worry, I did the calculations for you, so you don’t have to do it. I’ll add another post on how to do it.
Once I adjusted the ingredients to the size of my molds, I tried the recipe with my flour that has 12.7% protein content. It didn’t go very well, I ended up with a cake-like crumb rather than bread.
I tried again adding the gluten. based The quality of the crumb really improved, and the panettones were fresh for 2 weeks at least! (We didn’t have any left after 2 weeks!).
WHAT’S WRONG WITH YOUR FLOUR?
Nothing. Absolutely nothing. However, think about the amount of eggs and sugar and butter panettones have. There are so many things in between the gluten molecules that it’s extremely difficult to develop the gluten network. If you do it by hand it’s going to take you forever. If you use a stand mixer you’ll have to knead the dough for a long long time, and that means that the stand mixer will transfer heat to the dough and make it too soft, and you’ll also take the risk of over kneading the dough. Because stand mixers don’t knead homogeneously. So, chances are that some parts of the dough won’t have good gluten development while other parts will be over kneaded. Long story short, the whole structure will be destroyed.
That’s why we need more protein! If there are more gluten proteins, there are more chances they’ll find each other among all the sugars and fats. Which means, you don’t have to put in such an arduous work to knead the dough, and you reduce the risk of over-kneading it
Don’t smile, it’s still gonna be tough enough lol
BACK TO THE RECIPE!
A panettone is a masterpiece. And you have to do it step by step. No rush. So pick a day that you’ll be home and you’ll have time. You can also make this bread a couple of days ahead of time. Just keep it in a plastic bag so it won’t dry out.
My recipe has two pre-ferments and the final dough. In a warm kitchen you can get it done the same day. Or you can even retard the bulk fermentation overnight in the fridge.
NOTE 1: If you don’t have the high protein flour and you decided to add gluten, make sure you mix it very well with the flour first, otherwise the moment it gets in contact with a liquid it’ll start forming the network and you won’t be able to properly mix the ingredients.
SOAKING THE FRUITS
For this recipe I used golden and dark raisins, candied orange and dried apricots.
I make the candied orange at home and I made this batch barely 1 month ago, they’re still soft, so I did not soak the orange, but I did soak the rest.
In a
I like to start soaking the fruits 1 day in advance, but if you don’t have time or forgot about it, just start soaking the fruits when you start the process. They’ll have enough time to get soft. Plus, the moisture of the dough will also help during the fermentation.
PREFERMENT 1
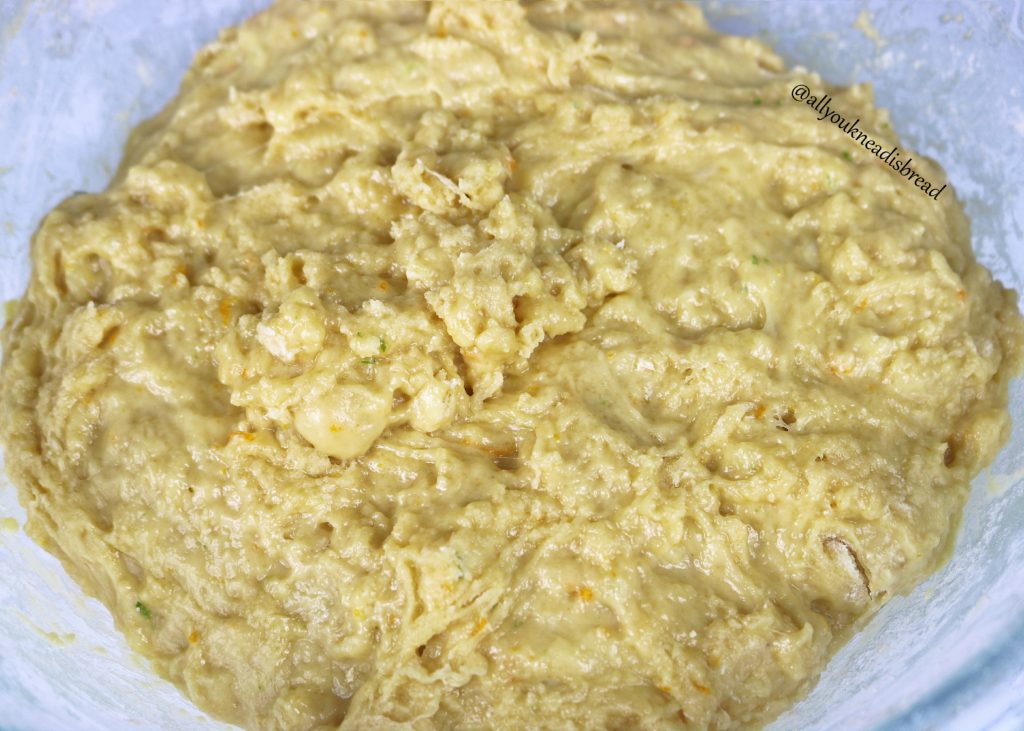
Once you have your flour ready, add the yeast to the water and let it sit while you whisk the eggs. Then mix the eggs, and the yeast mixture and give it a whisk. It must be very homogenous. Then add the flour and mix very well.
You should have something like a thick pancake batter. Not quite a dough.

When everything is well mixed transfer it to a tall pitcher, mine is 2.5 or 3 qt. And let this preferment rise until it triples or quadruples in size. Look for a place in your house where it’s not too cold. It’ll take some time to start growing. Be patient!
When you see the preferment is all the way to the edges of your pitcher, use your wire whisk or a spatula and try to deflate it a bit. Mine took about 1h 30 mins to 2h approx.

PREFERMENT 2
On another big bowl add the egg yolks and the sugar and mix it very well until you see the eggs getting whiter and fluffy. Then add the honey, the orange syrup (if you have) and the orange, lime and lemon zest and mix thoroughly. Then add the flour (with the gluten mixed already if using this method) and mix again.

Now add the preferment 1 and mix everything very well until you don’t have big lumps and both batters are well integrated. Cover the bowl and let it rise until it triples or quadruples in size. I left mine go up to the bowl edges. This preferment rises quicker

When preferment 2 is ready, time to roll up our sleeves and start working the dough!
FINAL DOUGH
On this
Now… start the workout! I used my stand mixer first. I used the paddle attachment on speed 3 (of 10 total speeds) for about 20 minutes or maybe a bit more. For doughs this sticky, I find the paddle attachment much more efficient to start developing the dough.
NOTE 2: If you’re using a stand mixer, be careful, when the dough starts getting some consistency, it can come up through the hook and get in between the moving parts. Just keep an eye on it!
NOTE 3: The paddle attachment is going to speed things up because the dough is too soft and somehow runny/sticky so the paddle will apply more pressure and will help develop the gluten network better at the beginning.
When I saw the dough was strong enough to pull itself from the bottom of the bowl I stopped and started to add the butter manually. Adding a bit of butter and squeezing it until it was absorbed.
You will notice the change in the consistency!
Keep kneading until the gluten has been developed properly. The dough should be very elastic and you should be able to stretch it without tearing it.

When the dough is good, let it rest 5 mins and then add the fruits. Don’t knead it too much, just enough to make sure the fruits are well distributed.

Put the dough in a lightly oiled bowl and let it ferment!
Look at how thin you can stretch the dough. That’s a sign of a proper gluten development

OPTIONAL STEP: If you think your dough is delicate you can do 3 sets of stretch and folds every 25 mins to improve the structure without destroying it.
At this point, you can place the dough in the fridge for
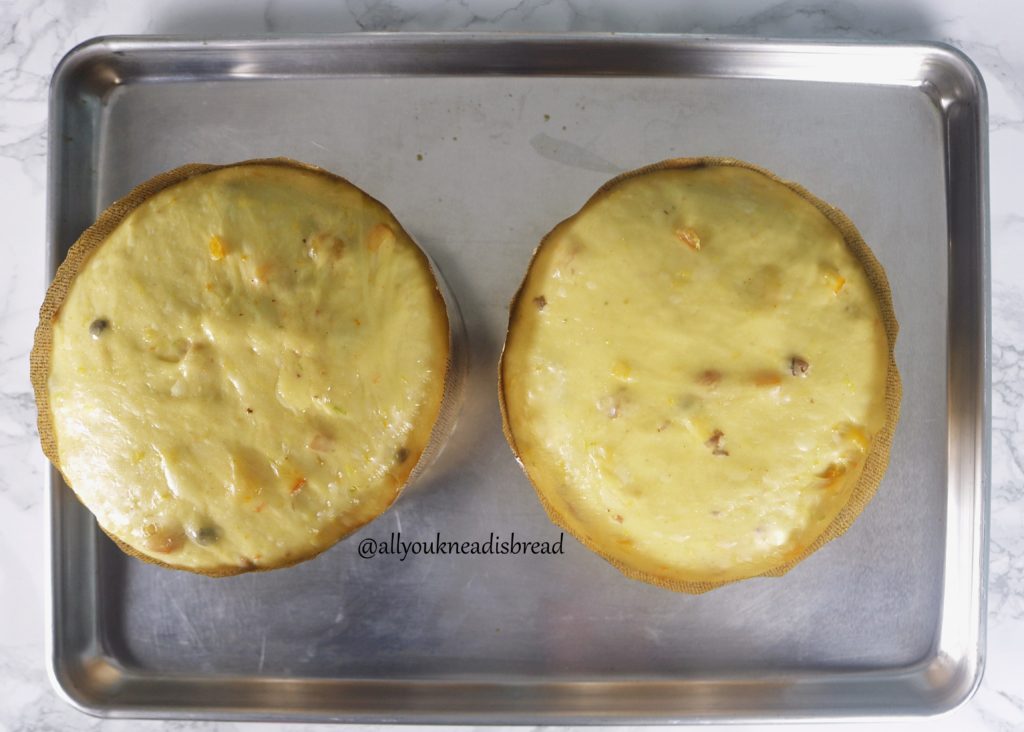
Let the dough rise until it doubles in size. Then deflate the dough and separate it in two equal parts.
Pre-shape each part into a ball to create some tension and put them in the panettone molds. My molds are the largest ones (6″ x 4½”). The dough should occupy 3/4 of the total volume of the mold.

Preheat your oven at 350F and, in the meanwhile, let the panettones rise until the dough reaches the rim of the mold.
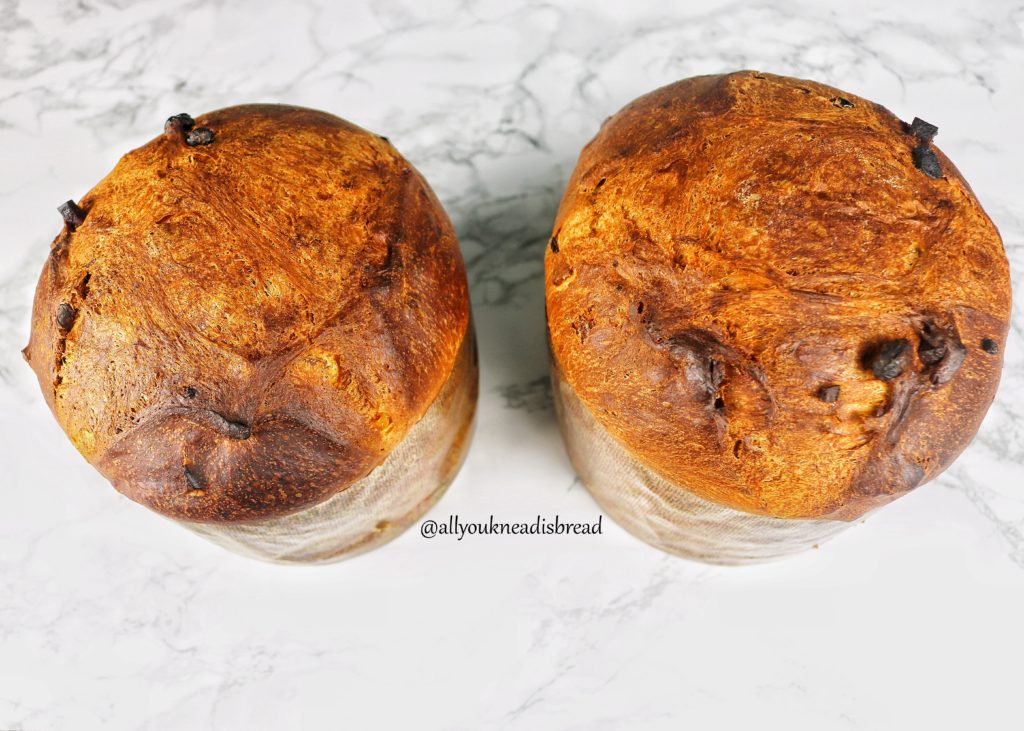
Make a cut on the top of each panettone and open it up a little bit
Now add a little bit of butter inside of the cut
Put the panettones in the oven and turn the oven down to 325F. This way the browning reactions won’t occur too fast.
Bake until they’re ready and immediately after baking insert a skewer in the bottom part of the panettones and hang them upside down until they cool down completely
This step is important because it’ll make sure the crumb and structure are not compromised. After baking the crumb is still finishing cooking, but it’s also too soft and too heavy, so you must be careful, or the panettones could collapse!
Once they cooled down… enjoy this Christmas delicacy! With all the work, I’m sure you’ll enjoy them even more!
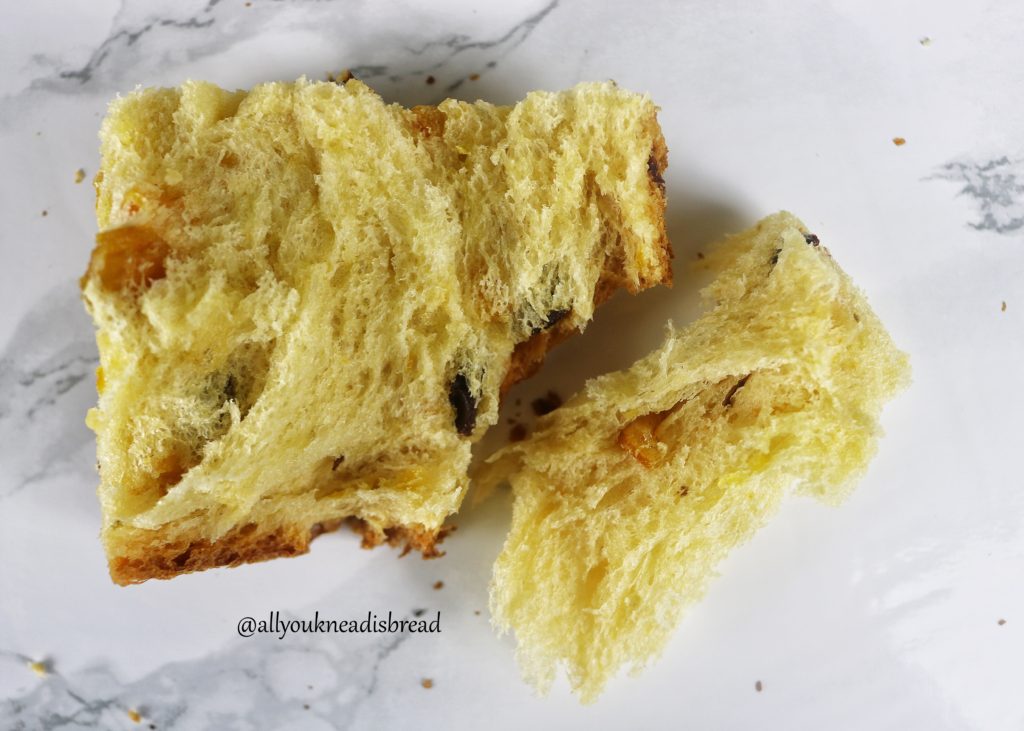
Look at this crumb! Fantastic! So cohesive and soft and yellow and it smells so good!
Let me know if you make these panettones or if you have any suggestion/ doubt etc.

Homemade Christmas Panettone
Ingredients
Dried fruits
- 180 g candied orange
- 110 g black raisins
- 110 g golden raisins
- 100 g dried apricots
- 40 g brown rum
Preferment 1
- 470 g bread flour
- 21 g vital wheat gluten
- 390 g water
- 3 L eggs
- 7 g active dry yeast
Preferment 2
- 200 g bread flour
- 10 g vital wheat gluten
- 5 L egg yolks
- 2 tbsp honey
- 2 tbsp orange syrup
- 100 g sugar
- 1 orange zest
- 1 lemon zest
- 1 lime zest
Dough
- 260 g bread flour
- 15 g vital wheat gluten
- 180 g sugar
- 10 g salt
- 227 g butter (2 sticks)
- 2 tbsp vanilla extract (or 2 vanilla beans)
Instructions
Dried fruits
-
Mix the raisins and apricot with the rum 24h prior baking. Shaking the container once in a while to make sure the liquid is distributed evenly.
Preferment 1
-
Mix the flour and the vital gluten
-
Dissolve the yeast in the water and let it sit for 10 minutes
-
Whisk the eggs into the yeast solution and mix very well
-
Add the flour mixture and mix until there are no dry particles
-
Let rise until it triples or quadruples its size
Preferment 2
-
Mix the flour and the vital gluten
-
Whisk the egg yolks until they thicken up a bit
-
Add the honey and orange syrup and mix them very well
-
Add the citrus zest
-
Add preferment 1 and mix very well until there are no big lumps
-
Let rise until it triples its size
Dough
-
Deflate the preferment 2 and add the sugar, vanilla extract. Mix everything very well
-
Mix the flour and the vital gluten
-
Add the flour mixture to the preferment 2 and mix thoroughly until you don’t see dry flour particles and let it rest 20 mins
-
Start kneading. About 20 mins on speed 3 with the paddle attachment of your stand mixer and later use the hook or by hand until the dough gets some consistency. I took 20-25 more minutes
-
Add the butter little by little and keep kneading until its elastic
-
Add the fruits and knead just enough to integrate them into the dough.
-
Place the dough in an oiled container and let ferment until it doubles in size (you can do this step overnight in the fridge)
-
Deflate the dough and separate it into 2 equal pieces
-
Preshape the pieces into balls and place them in the molds
-
Preheat your oven at 350 F
-
Cover the panettones with an oiled plastic wrap and let rise until it reaches the top of the mold
-
Make a cut on the panettones and add a little chunk of butter
-
Put the panettones in the oven and lower the temperature to 325F
-
Bake for about 55 minutes or until they’re brown outside and completely cooked inside.
-
Right after baking insert a skewer through each panettone and turn upside down. Let them cool down completely
Happy Holidays!
