
A year ago I was writing that dissertation, I was stressed, hypersensitive, anxious… Sometimes I’d be happy it’d soon be over, and sometimes I’d feel nostalgic for the very same reason. A year has passed and I’m just starting to rebuild myself and enjoy my guilt-free life… With this sourdough chocolate banana bread! That’s right! It’s all about using sourdough discards!
Using sourdough discards in your baking
Learning the science of bread is one of the reasons I started this blog. Because I find breadmaking an incredibly endearing process and yet so misunderstood. There are different methods to take care of your sourdough starter; some people generate discards, others don’t. I never throw away the discards, that’s sourdough that can be used on other things!! It’s pre-fermented flour that can bring flavor to yeast bakes, like this brioche recipe with sourdough discards. It also helps increase the shelf life of baked products by slowing down the staling process and controlling the pH a bit. This way spoilage microorganisms find it harder to grow on the food.
This year I also want to start implementing a new approach when it comes to food: ZERO WASTE. I know many people generate a considerable amount of sourdough discards. And I know using sourdough discards sounds like a crazy idea for many. But let me tell you.. once you make this sourdough chocolate banana bread with sourdough discards, you will be converted forever!!!
So today I inaugurate a new type of recipe: SOURDOUGH DISCARDS
I’ll upload different recipes using sourdough discards so you don’t just throw them away. Recipes with that extra kick of healthiness that only a sourdough starter can provide. As always, all recipes will be tested to ensure the best results!
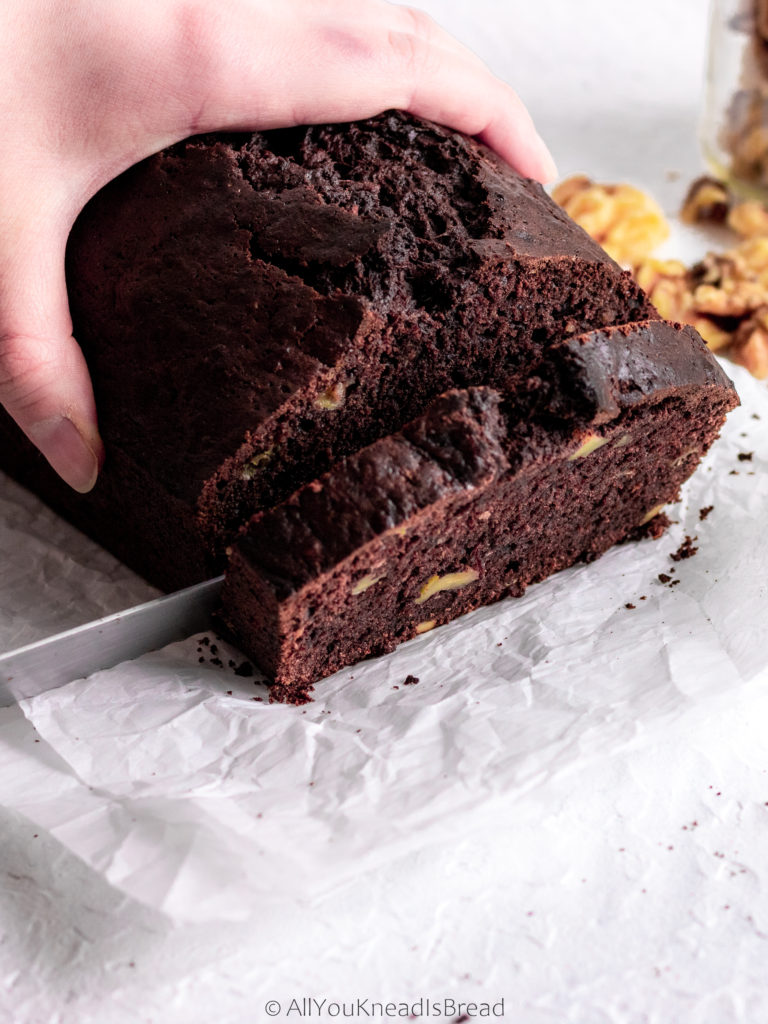
To inaugurate this new batch of recipes I wanted to make something special. I’ve developed this sourdough chocolate banana bread that’s going to make you fall in love with it!
It’s moist but not too dense. It’s spongy, full of flavors, a nice chocolate kick that doesn’t overtake the banana taste. And it lasts fresh for days even if you don’t keep it in an airtight container! (You didn’t think that sourdough could only keep regular bread fresh for a longer time, did you?)
I did not add chocolate chips of any kind to this bread, just walnuts. Because I wanted to taste the banana. But if you prefer a more chocolatey flavor, customize those extras to your taste buds.
About this sourdough chocolate banana bread
It works best with very ripe bananas. Those brown mushy ones? Yeah, those!
If you’re not ready to bake banana bread but your bananas are getting too ripe to eat, just peel them, freeze them and use them whenever you’re ready! Just make sure you drain the water after they thaw. I think frozen bananas are the best for banana bread, they keep the moisture much better and they also enhance the flavor of the bread.
I collected the sourdough discards throughout 3 or 4 days of consecutive feedings and kept it in the fridge until ready to bake.

What if I have old sourdough discards?
I have tested this recipe with discards that were several weeks old. The only difference in flavor is that the chocolate banana bread was less sweet. Which makes sense, because the discards have been acidifying and part of the sugar is used to neutralize those acids.
So, depending on your taste buds, you may want to adapt the sugar. Although, this recipe has a considerable amount of it. But like always, you have the idea here, then you can customize it to your liking! 🙂
How long does it take to bake?
The baking time depends on your oven. Start taking a look at the bread after 50-55 minutes. The best way to know if your banana bread is ready is by inserting a toothpick (or a thin skewer) all the way down in the middle part of the loaf (that’s the part that takes the longest to cook). If it comes out clean, you’re good to go!
Don’t overbake this sourdough chocolate banana bread, you want it moist, not too dry, once the toothpick comes out clean, it’s ready!
Let me know if you make this chocolate banana bread using your sourdough discards and tag me on Instagram or Facebook so I can see your creations! And don’t forget to subscribe to my Youtube channel too, where once in a while I upload videos for some of my recipes.
Enjoy!
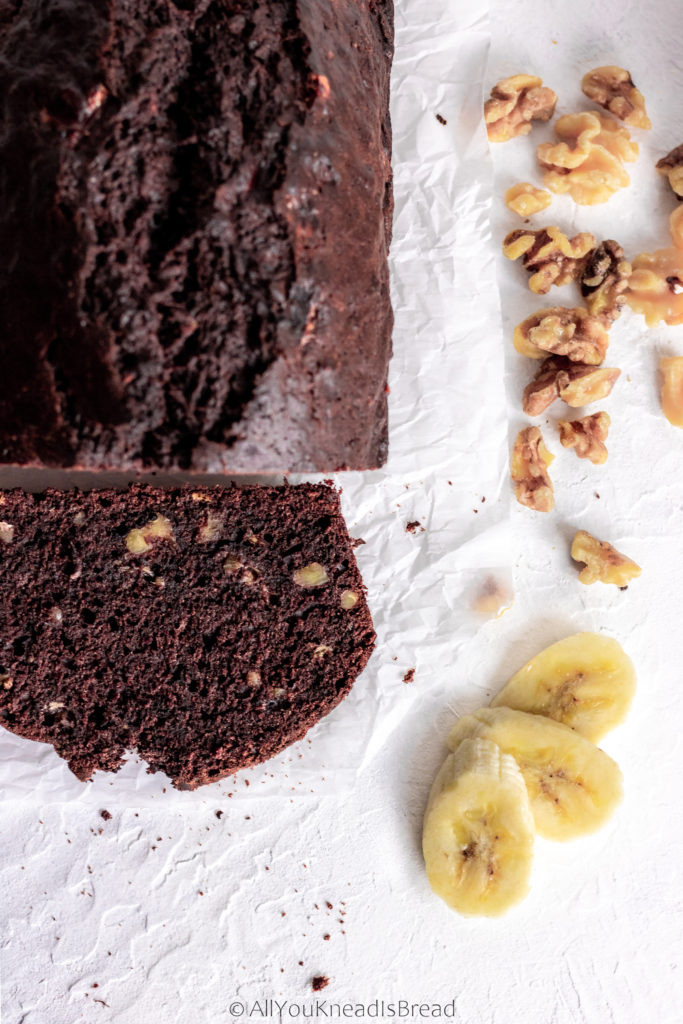
Sourdough chocolate banana bread
Ingredients
- 220 g all-purpose flour
- 40 g unsweetened dark cocoa powder
- 135 g sourdough starter discards
- 180 g brown sugar
- 2 eggs
- 115 g vegetable oil
- 3 very ripe bananas
- 1 tsp baking powder
- 1/4 tsp baking soda
- 1/4 tsp salt
- 1 tsp vanilla extract
- 1 cup chopped walnuts (optional and customizable)
Instructions
- Preheat your oven at 350F
- Grease a 9×5 in mold (or line it with parchment paper if you prefer)
- In a large bowl, combine all dry ingredients (flour, cocoa powder, salt, baking powder, and baking soda) and make sure the baking powder and baking soda don't have any lumps.
- In a smaller bowl whisk the eggs, add the vegetable oil and vanilla extract and combine until the eggs get a light color. Then add the brown sugar and mix for a couple of minutes.
- Add the sourdough starter and stir until it breaks down and it's incorporated (you might see some strands, it's ok, the starter had some gluten developed)
- Mash the bananas, add them to the egg mixture and combine everythng well
- With a spatula, lightly fold the wet ingredients into the dry ones
- Add the chopped walnuts and stir just until they're combined
- pour the batter into your mold and bake for 60 minutes or until a toothpick inserted comes out clean (time might vary depending on your oven temperature)
Cinnamon rolls with lievito madre discards
Hello everyone!
Today I bring something delicious! If you’ve been following me on Instagram or Facebook, you already know I’ve been experimenting with lievito madre, and I even made panettone with it! 🙂

Lievito madre is the stiff sourdough starter used by Italian bakers to make panettones the artisanal way. This method requires a lot of flour and a lot of refreshments during the first 15 days, and while the first-week discards are not suitable for baking, the rest are. Especially the 3 discards from the 3 preparatory refreshments before making panettone.
If you want to learn how to make your own lievito madre check this post!
Every time I did a refreshment, I had 150-200 g of lievito madre that I threw away. On day 9 or 10 of the process, I made a loaf of bread and it turned out great, so the next day I used the discards to make challah and it turned out great too. The taste was amazing, and it just had a pleasant hint of sourness.
Sourness in enriched dough has been my pet peeve and the reason I usually use commercial yeast. I can’t stand a bread that’s supposed to be sweet and yet the only thing you taste is a strong acidic flavor. I like that on country loaves, but not on brioche or a croissant.
That’s the whole point of working with lievito madre (either soaked in water or tied up in a cloth). In the soaked in water method, part of the acid is released in the water. Don’t forget that this sourdough starter is used in panettone, and real Italian panettones are not acidic at all. You shouldn’t be able to tell that the panettone was made with sourdough.
Baking with lievito madre
Working with lievito madre is addictive, seriously! I don’t even care how much time I’ve invested in creating it, or how much flour I’ve used. I can tell how differently the dough behaves, the different aromas compared to my regular sourdough starter, etc.
Based on the amazing flavor and incredible texture of the challah I baked, I decided to experiment a bit more and make cinnamon rolls. Because I have yet to find a recipe that doesn’t turn out into super dry rolls.
This recipe doesn’t have frosting because I wanted to taste the bread, the aromas from the lievito madre and how they combined with the ingredients on the recipe.
I did tweak the recipe a bit and I used orange syrup and orange blossom water in the dough, the filling has ground walnuts, ground cinnamon, and orange zest, and the icing has orange juice instead of milk or water.
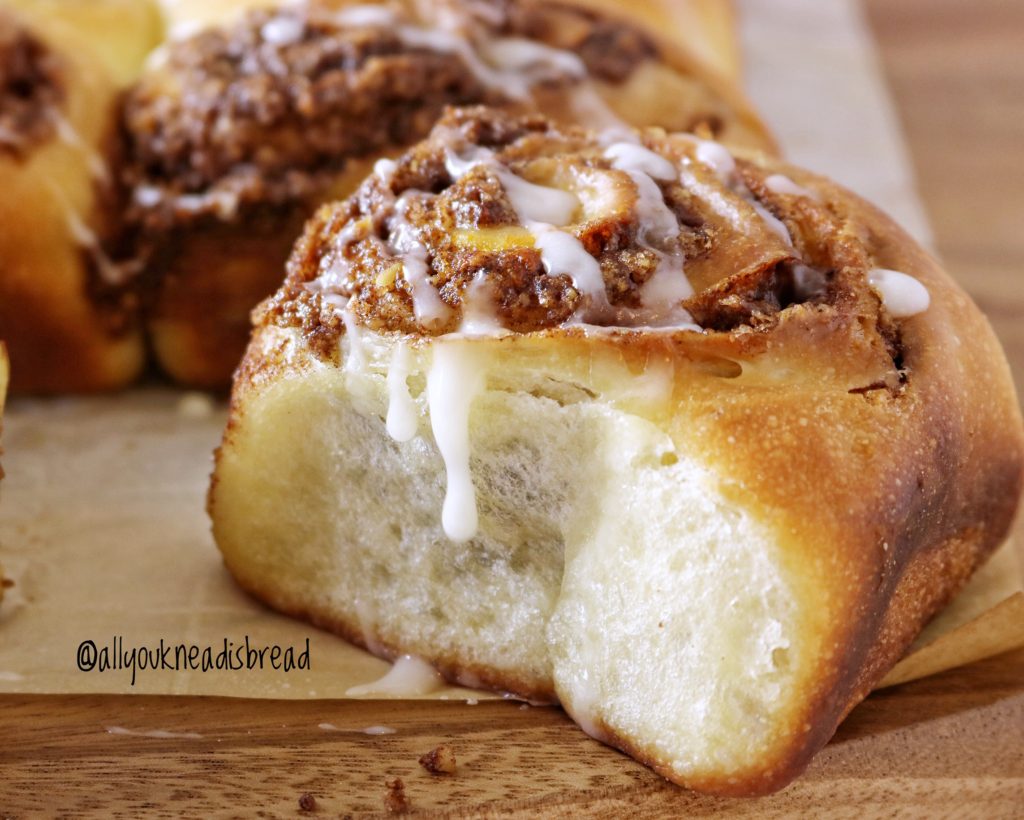
The result was amazing, the lievito madre helped to balance the aromas of the dough and significantly improved the texture of the rolls, they were soft and chewy and delicious! Even though I used lievito madre that had never been “purified” before (by doing a bagnetto, a technique to reduce the acidity of the dough when making panettone with lievito madre), and the dough fermented for 8h at room temperature and another 8 in the fridge, the rolls tuned out delicious with a pleasant hint of sourness, you could tell they were made with sourdough but the flavor was great.
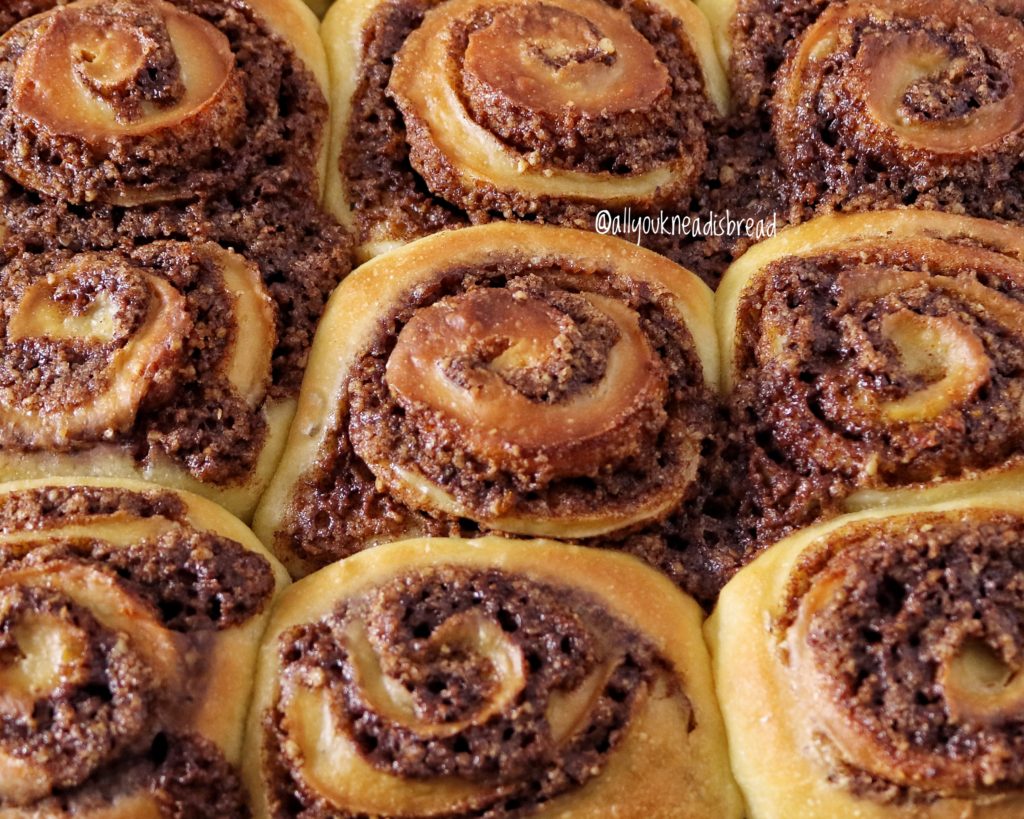
I think the texture of the dough was also different, it was more forgiving, and I could develop the gluten with a much gentle kneading that using levain or commercial yeast.
Let’s get into the recipe!
After draining, squeezing and using part of the lievito madre to do the refreshment, take the discards, weight how much you need and cut it into small pieces (half an inch or so) so they can be absorbed into the dough faster.
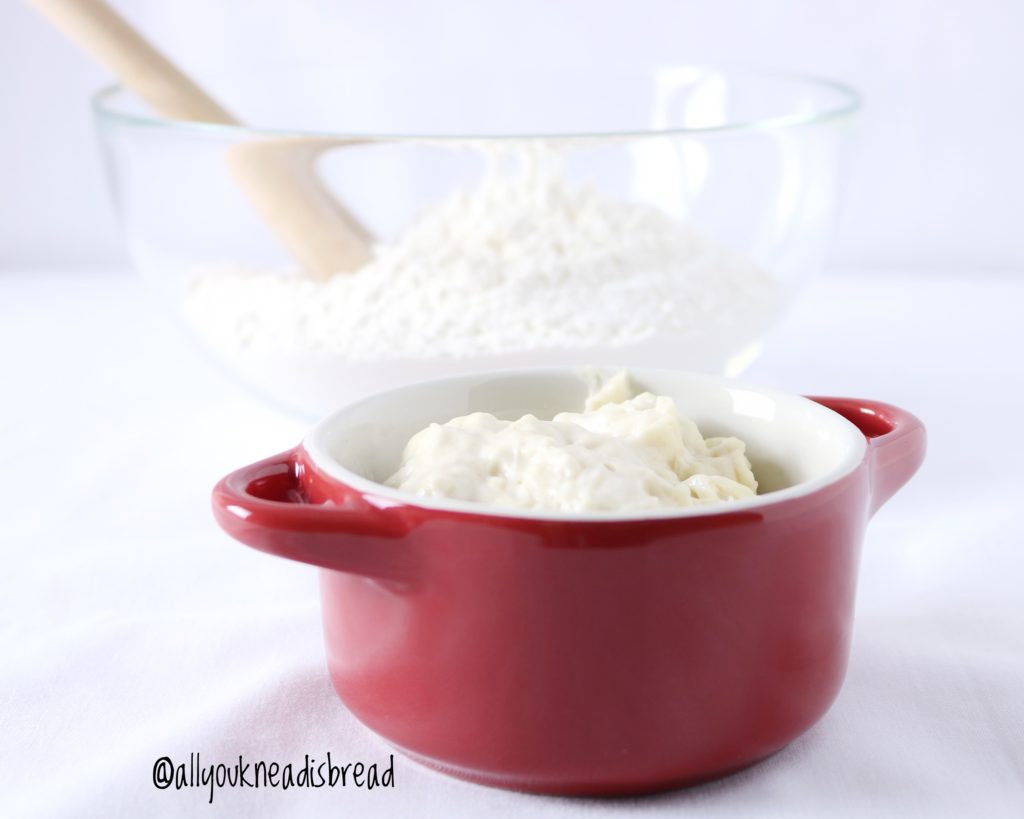
In your stand mixer bowl, add the wet ingredients and combine very well, then add the flour and the lievito madre in pieces.
Knead until the dough gets some elasticity and then add the softened butter. continue kneading until you have a perfect gluten development. You will have to stop a few times and let the dough rest for some minutes. You can check this post to learn how to knead enriched dough.
Once the dough is ready, shape it into a ball and place it in a lightly oiled container. Cover it and let it ferment at room temperature until it doubles in size. Mine took about 8h (the milk and the egg were cold). Place the dough in the fridge and let it ferment another 8h (I left it in the fridge overnight).
If you have enough time, you don’t have to leave the dough in the fridge overnight, although I do recommend you to let the dough chill for 1h before you shape the rolls, because this dough is stikier than the regular cinammon roll dough.
The next day, take the dough out of the fridge, deflate it very well and let it rest 10 mins before shaping.
Roll the dough into a 35x45cm rectangle, spread the filling and starting from the longer side, roll the dough onto itself to make a log. Seal the log and cut it into 9-12 pieces.
Place the rolls into a lightly oiled 9x9in square pan and let them ferment, covered, until they touch each other.

Before they finish proofing, turn your oven on at 350F.
When ready, bake for 30 mins or until the rolls are golden brown. You can brush them with egg wash if you prefer.
Prepare the icing and wait until the rolls cool down a little before you drizzle the icing.
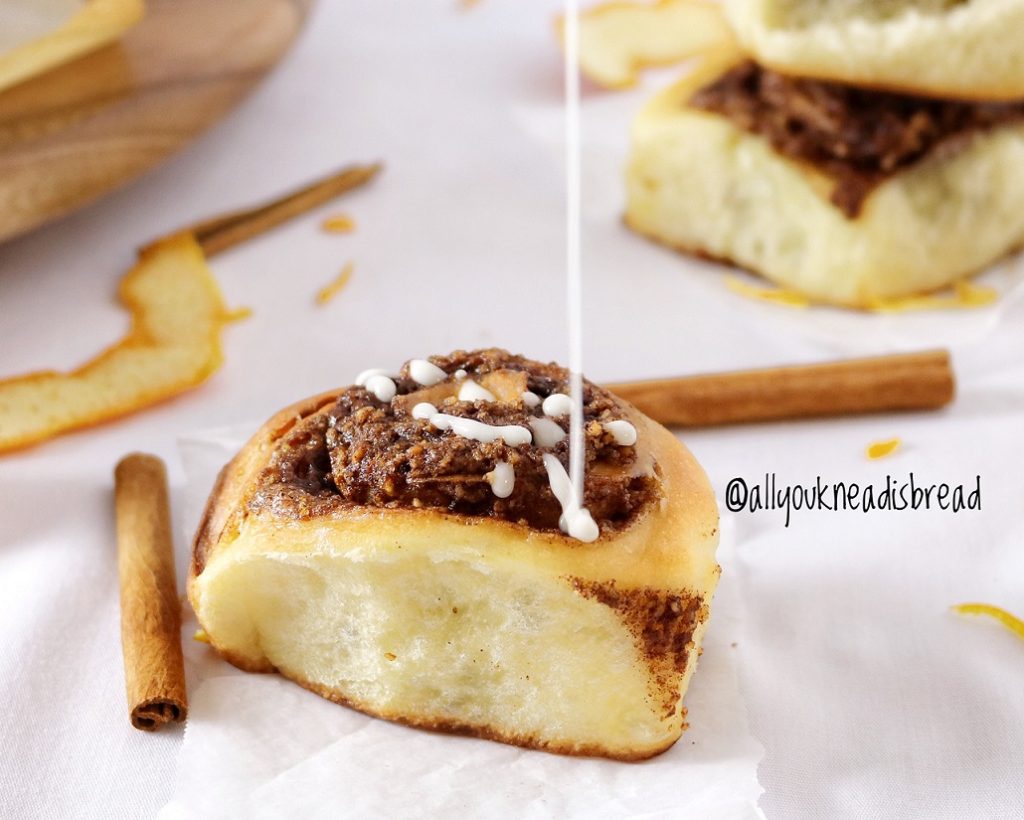
Enjoy!

Sourdough cinnamon rolls with stiff starter
Use lievito madre to make these chewy, soft, and moist cinnamon rolls. It's another level of sourdough goodness!
Ingredients
Dough
- 300 g bread flour
- 100 g lievito madre discards
- 135 g milk
- 50 g butter softened
- 4 g salt
- 2 eggs
- 1 tsp vanilla extract
- 1 tbsp orange syrup or honey optional
- 1/2 tbsp orange blossom water
- 50 g sugar
Filling
- 80 g ground walnuts
- 4 tbsp sugar
- 3 tbsp melted butter
- 2 tsp orange zest
- 1 tbsp ground cinnamon
Icing
- 1/2 cup powdered sugar
- 1-2 tbsp orange juice
Instructions
Dough
-
In the bowl of your stand mixer add the milk, eggs, salt, sugar, vanilla extract, orange blossom water, and orange syrup and combine very well
-
Sift 300 g of bread flour and add them to the wet ingredients
-
Take 100g of the discards from refreshing your lievito madre and cut small pieces and add them to the bowl of the stand mixer
-
Knead at low speed for a few minutes until the dough gets a bit elastic and add the softened butter
-
Knead until you have a perfect gluten development
-
Shape the dough into a ball and place it in a lightly oiled container. Cover it and let it ferment at room temperature until it doubles in size (about 8h in my kitchen)
-
Place the dough in the fridge and let it ferment at a cold temperature for up to 8 more hours
-
Take the dough out of the fridge, deflate it gently and with a rolling pin shape a 35x45cm rectangle
-
Spread the filling and start rolling the log starting on the wider side
-
Cut 9-12 pieces and place them in your 9x9in square pan (use parchment paper if it's not non-stick)
-
Let the rolls proof until they touch each other (about 2h)
-
Bake the rolls in a preheated oven at 350F
-
Drizzle the icing after they cooled down to room temperature
Filling
-
Combine the ground walnuts, sugar, cinnamon, and orange zest
-
Add the melted butter and mix well
Icing
-
Sift the powder sugar
-
Start adding the orange juice until you get the desired consistency
How to create Lievito Madre (Pasta Madre) for panettone
UPDATE: This post has been updated to add some modifications to the process of creating your own lievito madre or pasta madre. The new information will be in colored boxes like this paragraph.
Hello everyone!
As promised, here’s my guide to building a lievito madre or pasta madre to make panettone. I will use both names because it came to my attention that some people are using the term lievito madre to refer to liquid sourdough and it’s not the same. I want you to get familiar with both names so you know that lievito madre or pasta madre are the same thing 🙂
First of all, I want to say that all this is not my idea. I’ve been reading blogs and watching videos to have a better understanding of the whole process. Eva’s posts were full of information. I’ve been tracking down everything the Italian Pasticcieri had online and read scientific publications to understand better how bacterias work (surprisingly there’s not much research on this).
This guide is a summary of everything I’ve read and everything I’ve learned every day, and I hope it can be useful to you. It’s focused on building and training the lievito madre. The next step will be the 3 refreshments before making panettone, which I will write about once I’m more familiar with the process.
For a better understanding of how sourdough bacteria grow, I recommend you read this post first. It’ll help you understand how pasta madre works.
When I first heard about panettone, I never thought it was this incredibly challenging bread! It never even occurred to me that it was made with sourdough or how laborious the process was!
To be honest, I do have a panettone recipe here, and trust me when I tell you that I spent a lot of time trying to get the dough right, but now… I feel like I was cheating! (I still think it’s a good place to start getting familiar with very enriched dough and gluten development).
A few notes about pasta madre
First and foremost, is not just a firm sourdough starter. This stiff dough is indeed a sourdough starter, but a special one. It requires a very specific maintenance routine and it has a very specific purpose: to bake grandi lievitati products such as panettone, pandoro, colomba…
If you want to make some rustic Italian bread using sourdough, you can create a stiff starter, or use your own sourdough starter. You wouldn’t need lievito madre, because you wouldn’t need the specific characteristics of grandi lievitati products in a rustic loaf.
Grandi lievitati bakes also require very strong flour, and most likely, your regular bread flour won’t be enough. Also, I wouldn’t say that nobody uses whole wheat flour, but I believe that’s not the most common way to maintain pasta madre.
Things you need to know before you start
These are things that I’ve learned along the way and that I think everyone should know before making the decision to start this journey.
- Be aware that it’s going to take 15 days to get the lievito madre ready. There are two major parts in this process: building the stiff starter and training it.
- I encourage you to do a few experiments to see if you can find a place where you can keep a constant temperature of 30C/86F. This step is crucial in the first couple of days and also to ferment the panettone dough.
- Check your schedule and plan accordingly. Don’t start making the starter on a Saturday at 1 pm if you won’t be home at 1 pm during the week because the cycles are either of 12 or 24h.
- Gather all your ingredients before you start and make sure you have enough flour. You will need it. I bought 15lb and it’s enough to prepare the pasta madre, train it and make at least 1 batch of panettone (probably more).
- If the quality of your water is not good, buy water (you don’t need a high mineral concentration in the water). If the quality is fine, I suggest you filter the tap water.
- Get your mind in the right place. Some days you will be tired and will want to go to bed, but you’ll have to feed your pasta madre, this is very important when you’re training it. The whole point of this is to reduce the acidity. Once is matured, you can put it in the fridge and feed it once a week.
- Be patient. Use your eyes and, especially, your nose to let the dough tell you what’s happening.
The process of creating your lievito madre
| Building period | |
| Day 1 | Make apple yeast water |
| Day 2 | Create a 100% hydration sourdough |
| Day 3 | Convert into a stiff starter and start anaerobic fermentation (wrapped log) |
| Day 4 | Wait. Nothing to do |
| Day 5 | Collect the core of the log, refresh it with flour and water and start fermentation in water |
| Training Period | |
| Days 6-10 | Refreshments using same amounts of flour and starter +30-50% of the weight of flour in water |
Building the lievito madre: 5 days
The first step of the building period is to activate the wild microorganisms found on apples. In other words: create an apple yeast water.
As you know, vegetables, fruits, cereals, etc have lactic acid bacteria and yeasts that are dormant and need to be activated.
These microorganisms, in general, proliferate better when their environment is moist. In science, we refer to this as “water activity”. This number ranges between 0 and 1 (pure water being 1), so the higher the water activity, the easier it will be for the microorganisms to wake up and grow.
Temperature is also crucial. Fermentation can occur at different temperatures, but not all microorganisms are activated at the same temperature. For panettone purposes, we should make sure our culture is at 28-30C (82-86F) so we promote the fermentation of specific strains of lactic acid bacteria.
A typical sourdough culture can have dozens of different strains of bacteria and many different types of yeast. So we can select which ones we prefer by controlling the temperature, moisture content, pH…
Day 1: Start the apple yeast water
You will need:
- 1 or 2 pesticide-free and untreated apples (I bought organic and they worked great, they shouldn’t have wax or anything, the more natural the better. If you can go to an orchard even better!)
- A glass container with a lid
- A grater
- Water at 30C/86F ( I used tap water filtered with my Brita)
- A scale
- A knife
- A thermometer
- A warm place where you can maintain a temperature between 28-30C/82-86F (my oven with the light on is enough, if it’s too cold and the temperature drops in the evening I put a glass with hot water on the other corner of the oven before I go to bed or when I wake up)
- Cut the apples in 4 and remove the core. You don’t need to clean the apples because if you do, you’ll probably wash out lots of nice microorganism. If there’s dirt on the stem area, just cut that part out.
- Grate the apples and keep the peels
- Weight 200g of grated apples and peels an place them in the glass container
- Weight 200g of water at 30C/86F
- Add the water to the glass container and close it tightly. You can shake it a little bit if you want
- Place the container in your oven or fermenter and wait for 24h
That’s it for now!
Day 2: create a sourdough starter with the apple yeast water
After 24h you might see small bubbles in your container, it can make a fizzy noise when you open it, it can smell like cider or maybe you can’t tell if something happened in there. That’s why this step is important. If after 24h, your starter doesn’t show activity, start with the apples again because something went wrong.
You will need:
- Fermented apple mixture from day 1
- A strainer
- A tall and transparent container*
- A spatula or a spoon
- 200g of Manitoba flour
- A scale
- Sharpie or rubber band to mark the container
Today is an easy day, enjoy it, because things get more complicated!
- Strain the apple mixture from the day before and collect the liquid. In my case, I didn’t see small bubbles, but it did smell like cider.
- In a medium bowl weigh 200 g of Manitoba flour and add 200 g of the fermented apple water. With a spatula mix well until you don’t see dry flour particles. It should look like a regular 100% hydration starter.
- Carefully transfer the starter to the tall container. And let it ferment at 30C for 24h. I put it in the oven with the light on. After 24h the starter will raise and collapse. At the very least it should double in size. That’s why it’s important to not leave dough stuck on the container wall because while the starter rises and collapses it’ll leave a mark on it, so you’ll be able to tell how far it rose. If there was anything there before, you might get confused.
NOTES:
You don’t have to put a lid on the container, you just need to place a napkin on top it there is any risk of something falling inside.
If you have it in the oven, try not to open the door all the time. That way you avoid streams of colder air coming inside and changing the temperature. The more constant the temperature the better. I checked my oven before going to bed and in the morning if the temperature changed too much overnight or I felt the house very cold.
Make sure the container you use for this is tall enough that can hold the dough even if it quadruples in size. Also, just in case some starter overflows, put a plate or a tray underneath.
*my container is a coffee canister that I bought in Walmart for less than $2. It’s 10x9x20 cm (4×3.6×8 in)
Day 3: Convert the starter into a stiff starter and do an anaerobic fermentation
Today is when you should start seeing activity in the sourdough. After 24h at 30C, your sourdough should’ve grown and collapsed. There should be some debris on the walls of your container that indicates how high the starter rose. It should’ve, at the very least, doubled in size. If it didn’t, at least, double, I’d start again. There aren’t enough bacteria or the ones that are in the culture, are not strong enough.
You must always keep in mind that making panettone is a difficult task and fermenting all that dough full of sugar, butter and egg is difficult too. So, we need to make sure that the bacteria we select and will train is the strongest.
The starter should be very runny, the same as a 100% hydration starter that has reached the peak and collapsed. It should have small bubbles on the surface and a pungent aroma. Don’t freak out if it smells like something rotten, so far, it’s normal. The bacterial colonies are fighting against each other, everything we do is to promote the survival of the ones we want.
The second time I built my LM I didn’t wait until it completely collapsed (24h), instead, I decided to proceed with the next step after 12h. This way most of the bacteria were still in the stationary phase, which means that I collected more live bacteria. Ultimately, my PM was more active than the previous one.
You will need
- 200 g of yesterday’s starter
- 200 g of flour (more if needed to achieve desired consistency)
- A rolling pin
- A scale
- A Ziplock bag
- 2 cotton cloths
- 1 meter/1 yard of some strong rope or string
- Collect 200g of the starter and add 200 g of flour.
- With your hands mix everything well. The dough should be dry and relatively hard, it shouldn’t stick to the counter but should be soft enough to work with a rolling pin. It is OK if you need to let it rest a few times to relax the gluten.
- Once you’ve incorporated the flour, with a rolling pin start working the dough until it gets a little bit more elastic. It doesn’t have to be extremely soft and smooth, but it shouldn’t have lots dry flour or chunks of dry flour either.
- Shape the dough into a rectangle-ish that’s about 20cm long and 15cm wide and roll it into a log. Place it into the ziplock bag and wrap it well. Wrap the packet with a cotton cloth and then with another cotton cloth and tie it with the rope or strings you have. It doesn’t need to be too tight, just enough to keep the cloths in place.
- Put the dough in an empty pot and put the pot inside of your oven (this is precaution, it can explode due to the built-in pressure). You don’t need to leave the light on. Just make sure that nobody turns the oven on and burn your pasta madre.
- Let it ferment for 48h. As time goes by the log gets harder and harder. That’s a good sign. It means that it is fermenting and as a result, the pressure is increasing.
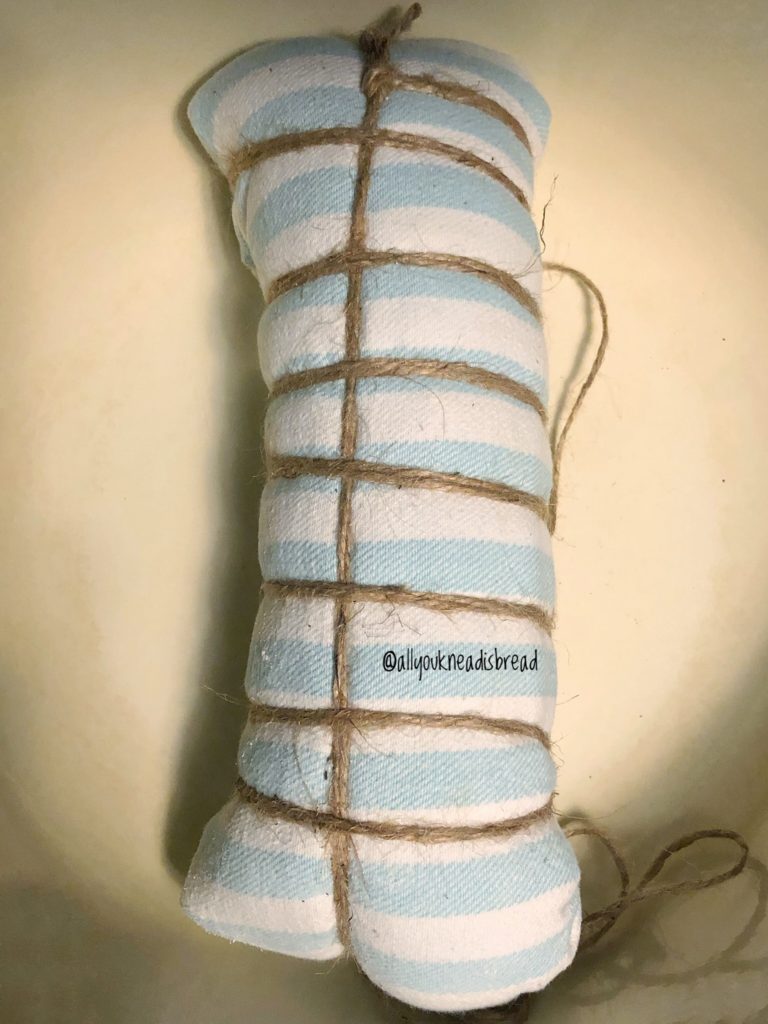
Day 4: No need to do anything
Day 5: Collect the fermented stiff starter and begin the fermentation in water
After 48h the log might not feel as tight as after 24 or it might still feel a bit tight. Anyhow, today we’re going to unwrap the whole packet. Be careful because it can explode. Most likely, you’ll see how, due to the pressure built inside, the dough tore apart the plastic bag and some of it came out and it’s dry and stuck on the cloth. Don’t worry, it’s absolutely normal.

You will need:
- A knife
- A scale
- 200 g of stiff sourdough
- 200 g of flour
- 60-100 g of water at 30C/86F
- Mixing bowl
- Rolling pin
- A tall and transparent container
- Water for the bath
- Unwrap the log carefully
- With a knife cut the bag and open the log lengthwise. You should see small alveoli. The dough should have a dark color (from the apple water) and it should smell better, more of a fermentation smell than in the previous step.
- With a clean spoon, collect the inside part of the log (the “cuore” as Italians say). The strongest bacterial colony is in the core of the log. The bacteria undergo a very rough 48h where an anaerobic fermentation takes place and only the strong survive, and those are the ones we want.
- Collect 200g of dough or as many as you can.
- In a bowl add 200g of dough, 200g of flour and 30-50% of the weight of flour in water at 30C/86F. That is 60-100 g. Start by adding 30% and move up if needed. The dough should be dry and hard, it shouldn’t stick to the counter but should be soft enough to work with a rolling pin.
- Roll the dough into a rectangle, fold it in 2 or 3 and roll it again. The procedure is very similar to working with laminated dough.The dough should get smoother and smoother. It shouldn’t have pieces of dry flour in the middle.
- Roll the dough into a long rectangle that is slightly narrower than your container and about 1cm/0.5 in thick.
- Fold the rectangle into 3 or 4, put it inside of the plastic container and fill it with water just to cover the dough.
NOTES:
If your kitchen is:
- Cold-Very cold: you can use room temperature water for the bath
- Not too cold, not too warm (around 20-23C, 69-73F): you can use room temperature water and check how it evolves, you might be able to do refreshments every 12h or every 24.
- Warm-very warm: use cold water. Keep a bottle of water in the fridge, or cool it with ice cubes and when it’s cold enough add it to the container.
Pay attention to how the dough behaves. Warmer temperatures will accelerate the fermentation process and colder will slow it down. Avoiding over fermentation is crucial.
In my case, my kitchen was not too warm and not too cold, but since I’m not home all day, I didn’t want to risk the dough to over ferment and lose a lot of it, so I started using cold water. The dough didn’t show much sign of fermentation in the first 12h. After 16h it was floating and after 24 it had clear signs of fermentation (alveoli), the layers weren’t visible anymore and it had developed a dry skin on top.
Something I realized was that this sourdough starter likes routines, so try to always do the same thing and keep it at the same temperature. During this process, there was a night when the temperature dropped a lot and the pasta madre didn’t rise as usual. In my experience, consistency is key!
The reason the container and the dough should be almost the same width is that when the dough starts fermenting and the layers get thicker, the container will retain the dough and prevent it from expanding to the sides. Therefore, the dough doesn’t have a choice but to grow upwards.
Training your pasta madre: 10 days
Days 6-15: refresh the lievito madre every 12 or 24h
According to the Italian regulations for Artisanal Panettone, the lievito madre has to be trained for at least 7 days. In our case, it’ll be trained for 10 days.
From now on you need discipline because you must feed your LM at the very least every 24h. Whether you’re tired or sleepy. Therefore, you need to think well about which schedule works for you best.
For example, I leave my house around 8:45 am, and come back home around 8 pm, that’s my window. I started the process at 8:30 pm and then I was doing the refreshments at 8:30 pm every 24h. I chose this time because not only is it when I’m home, but it’s also a time that works for me on the weekends. Because your pasta madre doesn’t take weekends off!
I’m saying this because if you start working very early, you might do refreshments at 5 or 6 am, but… will you wake up that early on a weekend? If you will, then it’s fine! I know I wouldn’t, I’d probably turn my alarm off and regret it later.
You will need:
- A knife
- A scale
- 200 g of stiff sourdough
- 200 g of flour
- 60-100 g of water at 30C/86F
- Mixing bowl
- Rolling pin
- Tall and transparent container
- Water for the bath
- A large bowl to discard the water or the kitchen sink
I changed my container to a shorter but wider one after day 6 or 7. It allowed me to control and shape the dough better.
The procedure is similar to day 5.
After 24h, the lievito madre should’ve risen to the top of the container and probably developed a dry skin. In the bottom, you will see some flour. Your pasta madre will be very soft and slimy on the outer parts. What we need is the core of the dough.
- Remove the dry skin that developed on top. It might not be completely dry, but even so, remove it. It’s the part that has been exposed to dust and particles falling on top of it.
- Hold the container with one hand and with the other try to separate the dough from the walls of the container so the water to come out but you can hold the dough, and remove the water.
- Squeeze the dough to drain water out of it and massage it so the slimy mushy part falls out and you only keep the dough that was not degraded.
- In another bowl weigh 200g of Manitoba flour, add 200 g of the drained pasta madre and add 60-100 g of water at 30C/86F
- Knead everything and incorporate all the flour. If you need to let the dough rest, do so.
- Roll and shape the dough the same way you did the day before
- Place the dough in the container and add water to cover it.
Repeat this every day for the next 10 days paying attention to how the dough smells, how the alveoli look after the fermentation cycle etc. Also, smell everything. The dough, the water you discard… Your nose will let you know how the lievito madre is doing more than your eyes will.
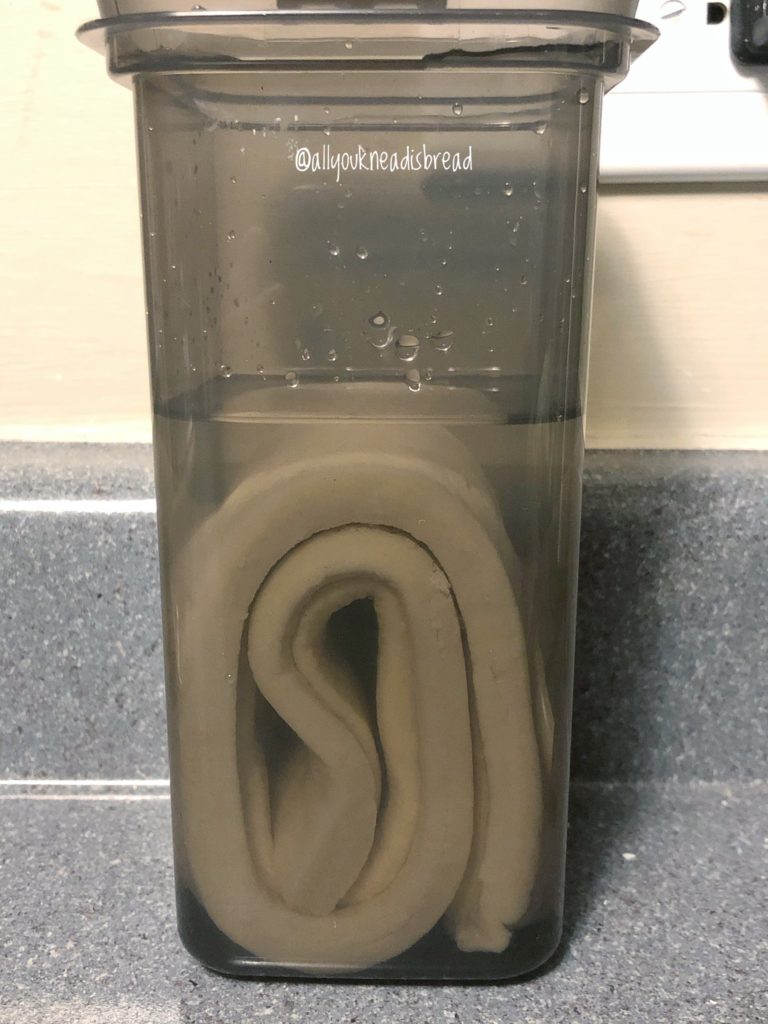
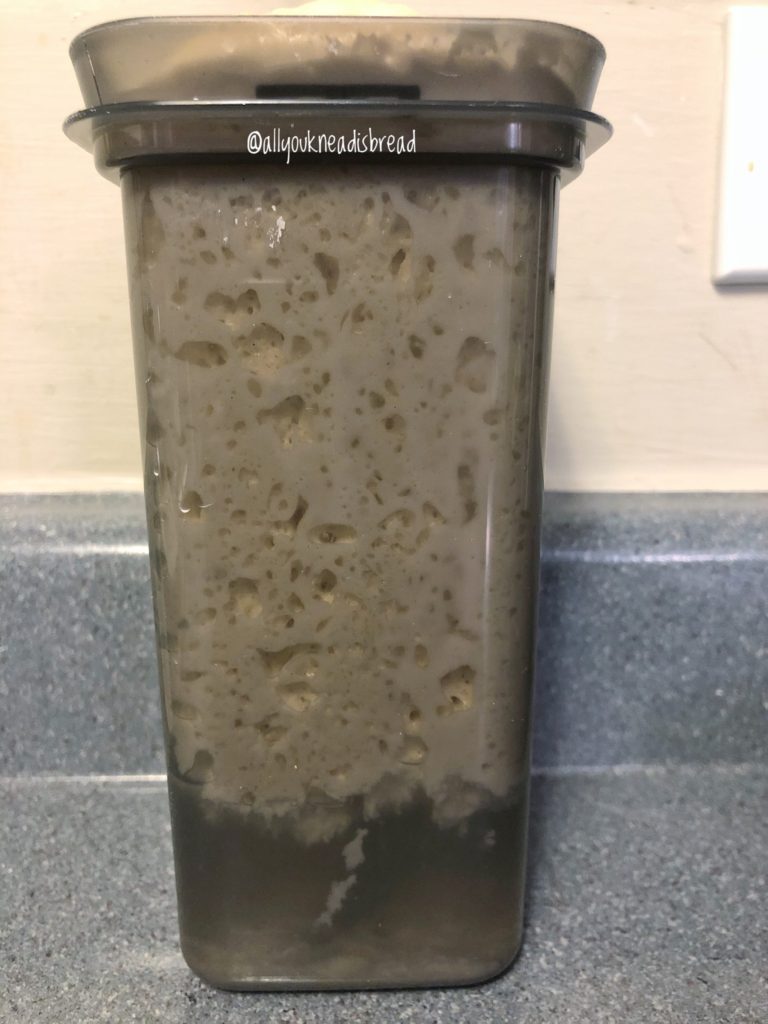
Things you need to know
- You need to keep everything extremely clean to reduce the chance of cross-contamination.
- Keep in mind that you’re going to use a lot of flour just to build your starter. If you’re a pro at this, probably you can use smaller amounts of flour and LM because you can tell how the dough is doing just by looking at it. But if you’re like me, in the learning process, you might want to keep relatively large amounts of flour for each refreshment until you learn to feel the dough and see if it needs more or less water, 24 or 12h refreshment cycles, etc. I learned this method this way and larger amounts are easier to deal with and to avoid over-degradation of the dough. This is especially handy when you’re not home all day. I see this as an investment, from now on I’ll take care of my lievito madre and, hopefully, I won’t have to do it again!
- Your hand will suffer, keep your moisturizing lotion close by! After a few days I noticed my hands were getting very dry. I guess it’s normal, you’ll be washing your hands all the time, and let me tell you… this dough is difficult to get rid of! Warm water is your best friend here. Also, you’re going to be working every day with a slightly acidic dough. So yeah, keep the lotion close by.
- If you can find/afford 2 containers with the same dimension, get them. It’ll make the process a bit faster because you don’t have to stop to wash it to put the dough back in.
That is all for now!
This is all for now. If you have any questions you can contact me through email, DM on Instagram, or send me a message on Facebook and I’ll try my best to help you!
Let’s start a movement for homemade artisanal panettone! Tag your pics with the hashtag #missionpanettone so we can all see how everyone’s lievito madre is doing.
You can find me on Instagram, Facebook, and Pinterest, and you can also subscribe to my Youtube channel.
This post contains affiliate links and any sales made through such links will reward me a small commission – at no extra cost for you – that allows me to keep running this blog.
I hope you all have a wonderful weekend and if you are celebrating Thanksgiving… Happy Thanksgiving!
Maria.
Best (and vegan!) pumpkin bread – Video
Hello friends!
Are you ready for some pumpkinlicious bread? Yeah, I just made a word up. But only because I couldn’t find one that fits this bread!
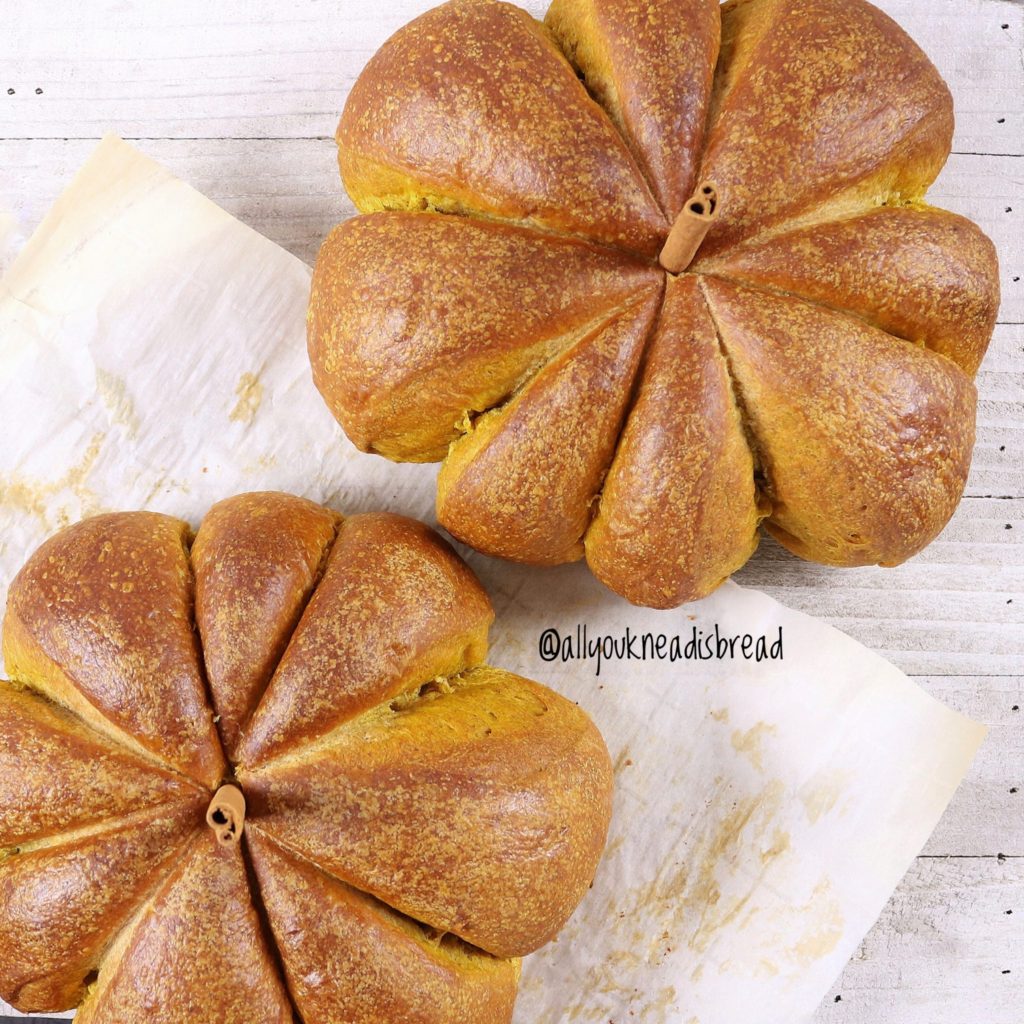
These days Instagram is packed with pictures of pumpkin bread and pumpkin buns and pumpkins in general and I couldn’t let it go, I had to post my recipe.
I’ve made different types of pumpkin bread before, but my favorite is the recipe I’m posting today.
Why, you may ask?
Because it’s full of flavor, it’s soft, it’s sweet and has a lovely shape!
And it’s accidentally vegan!
I say accidentally because I wasn’t really planning on making this bread vegan, it just happened! Lately, I’ve been using the Country Crock line of plant-based butter. I’ve tried them all and I love the result in bread! (This is not an ad, I’m just letting you know the dairy-free butter that I use)
This recipe yields 2 medium pumpkin-shape loaves. You can divide it into more loaves, or you can make one larger loaf. Just keep in mind that you’ll have to adjust your oven temperature.
I personally prefer medium to large loaves using this recipe. Since the bread doesn’t have eggs, smaller shapes will dry out quicker.
This bread is very soft, you don’t even need a knife to cut through it, the shape makes it easier to pull a piece :o) It’s also sweet enough to enjoy with both savory and sweet food. Did I mention is super soft?
How come it is so soft… if it doesn’t have eggs?
Miracle pumpkin puree! The carbohydrates (fiber included!) of this orange vegetable play a significant role in keeping the moisture in the bread. Pumpkin has starch, and when you boil it, some of that starch is gelatinized and able to keep the moisture in. Also, the pumpkin particles are not too hard, and they do not disrupt the gluten network like cereal bran could do, allowing the dough to develop properly and become very elastic.
Oh, and pumpkin is PACKED with antioxidants, carotenes to be exact. It’s all goodies in here!
So, without further ado… Let’s carve this pumpkin!
You can watch the video for more details on how to make this bread.
The first thing you need to do is dissolve the yeast into 3 Tbsp of the total amount of water.
While you let the yeast activate mix the pumpkin puree and the sugar in a different bowl. When the yeast is ready, add it to the pumpkin mixture and combine everything well. Let it rest while you prepare the other ingredients
Mix the flour, the salt and the pumpkin spice powder in a larger bowl.
Grate the butter and mix it with the flour. If you don’t have a grater you can use a pastry blender or cut it in smaller pieces and use a fork. The idea is to have small pieces of butter mixed in with the flour.
This dough is not too hydrated so adding the butter later would be a bit difficult. I found that grating the butter makes the process easier while still having great results. The butter will be absorbed in the dough as you knead it.
Add the wet ingredients to the flour/butter mixture and combine everything. Start adding the leftover water 1 oz at a time. Depending on your flour you might not need all of it. I use King Arthur bread flour and I used all 115 ml of water.
NOTE: If you add too much water, the dough will be too hydrated and the pumpkin won’t hold the shape in the last proofing.
The dough should feel soft, slightly sticky but it should hold the shape for several minutes.
Alrighty! Once the dough comes together, let it rest for a few minutes and start kneading!
Knead until it’s soft and shiny and it doesn’t stick to your fingers or your working surface.
If you feel the dough is not coming together let it rest for a few minutes and continue kneading.
Shape the dough into a ball and place it in a lightly oiled bowl. Let it rise until it doubles in size. It should feel puffy and soft and smell yeasty.
Deflate the dough well, the crumb of this bread doesn’t have large alveoli so try to get rid of large air pockets.
Divide the dough into 2 pieces of similar weight and pre-shape them into a ball. Don’t worry if one is slightly larger than the other one. They don’t have to be perfect.
Cover them and let them rest for a few minutes.
In the meanwhile, prepare the thread.
Cut 8 pieces of 45 cm (18 in)
In a small bowl add 2 tbsp of vegetable oil and soak the threads well. This will avoid leaving thread debris on your loaves and it’ll make easier to take them off after baking.
Place 4 pieces of thread on the table, crossing each other by the middle part and making sure that there are 8 spaces of similar size, watch the video for better understanding.
Take one of the dough balls and shape it into a ball. Try to create some tension so it’ll hold the shape better, and place it on top of the threads.
Tight the threads, not too tight, not too loose, just enough. As the dough ferments, it’ll puff up and the pumpkin shape will become more obvious.
Do the same with the other piece of dough
Cover the pumpkins with plastic wrap and let them ferment until you see the pumpkin shape. Don’t worry if it is a bit asymmetric.

About 20 mins before the proofing ends, turn your oven on at 375 F.

If you want, you can brush the pumpkins with vegetable milk (or regular milk if you don’t mind about dairy). I used soy milk on mine.
Put the pumpkins in the oven, lower the temperature to 350 F and bake the bread for 35-45mins (time depends on your oven), or until they’re golden brown.
If the loaves are getting too dark but they’re not done yet, lower the temperature to 330F or cover the pumpkins with aluminum foil.
After they’re baked, let the pumpkins cool down in a cooling rack for 30 minutes to an hour before you take the threads off.
This is important, you have to let the crumb set before you take the threads out. If they get stuck in the crumb, carefully pull them, one at a time, and they will slip out of the bread.
OPTIONAL: When the bread has cool down completely, take 2 cinnamon sticks and insert them on the top of the bread, this way your pumpkins will look really cute and can decorate your table while your guests arrive! Or just look incredibly beautiful for your next Instagram post.
And now it’s the best part… It’s time to enjoy your pumpkin bread!
See you next bake!

Best Pumpkin Bread
Bun-like pumpkin bread with incredible aroma and delicate crumb
Ingredients
- 500 g bread flour
- 300 g pumpkin puree (canned or homemade)
- 80 g vegetable butter
- 4 g active dry yeast
- 120 g water
- 6 g salt
- 40 g sugar
- 3 tsp pumpkin spice (add as much/little as you want)
- 2 tbsp vegetable oil (to soak the threads)
- 8 pieces food grade thread (45 cm / 18 in)
- vegetable milk for brushing
- 2 sticks cinnamon for decoration
Instructions
-
Dissolve the yeast in 3 tbsp of the total amount of water and let it rest a few minutes
-
In a small bowl mix the pumpkin puree, the sugar, and the yeast solution
-
In a bigger bowl, add the flour, the salt, the pumpkin spice, and mix well
-
Grate the vegetable butter and add it to the flour. Using your hands, mix the flour and butter
-
Add the pumpkin mixture to the flour and combine
-
Add the leftover water and incorporate all the ingredients well until you don't see dry flour particles. Let it rest for 20-30 min (autolysis)
-
Knead the dough until it's soft and shiny. You can do it by hand or with a stand mixer
-
Lightly oil a bowl and place the dough inside. Cover it and let it rise until it doubles in size
-
Deflate the dough gently and let it rest a few minutes.
-
Divide the dough into 2 similar pieces, pre-shape them into balls, and let them rest 5-10 mins
-
In the meanwhile prepare the threads. Cut 8 threads (food grade) of 45 cm (18in) long and soak them into 2tbsp of vegetable oil
-
Put 2 threads making a cross on the table, and 2 more making an X (Try to put them as center as possible)
-
Take one piece of dough, shape it into a tight ball and place it on top of the threads
-
Tie the thread tight enough so they won't fall apart but loose enough you don't push the dough. Do the same with the other piece of dough.
-
Preheat your oven at 350F
-
Cover the pumpkins and let them rise until you see the pumpkin shape
-
When ready, brush them with vegetable milk and bake them for 35-45 minutes (depends on your oven)
-
Let the loaves cool for 30 mins before you take the threads out. And let them cool completely before cutting through them
-
OPTIONAL: Insert a cinnamon stick on top of the loaves for decoration
Recipe Notes
If your loaves are browning too quickly, lower the oven temperature to 330 F and put foil on top if necessary.
Delicious Nuts & Cardamom Babka – Video
It’s that time of the year again!
Fall is here and with it, all holidays and family & friends gatherings. Although, to be honest, sometimes I feel like I’m running out of ideas of what to bring to a party. Luckily for us all, I came up with a wonderful one!
Jump to Recipe
Babka!
You might think it’s not very original but this babka is different! I’ve developed a dough that keeps soft and fresh for many days, and a filling that’s unique and delicious! Oh, and also VERY customizable to fit everyone’s needs and preferences!
Nuts & cardamom babka!
In my opinion, babka is the perfect bread to play around with flavors and fillings. Firstly, because the dough it’s not too sweet and goes great with everything. Secondly, because it’s a beautiful bread!
Babka bread is a Polish Jewish bread (The non-Jewish babka is a cake rather than bread). The word “babka” comes from the Slavic word “babcia” which means “grandmother”.
Apparently, grandmas are worldwide known for making the yummiest food!
Babkas gained popularity after Polish people brought the recipe to New York City, and today is a very well known and loved sweet bread.
Although the original recipe called for a cinnamon filling, babka nowadays is made with plenty of other fillings, both sweet and savory.
On this recipe, I used pecans, hazelnuts, and almonds for the filling. I added cardamom powder and orange blossom water to make a paste with the ground nuts. And O EM GEE!
Note: You can find orange blossom water in Asian or Arabic stores. If you don’t live close to any, you can also find it on Amazon.
Okay, let’s talk nerdy for a minute!
One of the problems of bread (any bread) is shelf life. It dries out rather quickly (aka bread staling). However, when fats and sugar are added to the dough, the bread tends to last a bit longer because of how the fats and the gluten proteins attach to each other, and how the starch granules help give the gluten network elasticity and keep the moisture in the crumb. Okay, so what happens when we add nuts to the equation, especially when they are ground?
I’ve been thinking a lot about this, and although the dough ingredients and procedure definitely help, based on my reading and nerdy research, the oils in the nuts are released while cooking the paste, and during the baking process. The way babkas are shaped, they have several layers of filling. So, the layers of nut paste might stop the crumb moisture from leaving the bread so fast. Therefore, if it takes longer for the moisture to leave the bread, the bread will stay soft for longer time. Although I highly doubt this babka will last long!
There’s always a but…
But… adding nuts cannot make up for insufficient kneading. You still have to knead your dough well. The dough of this recipe is pretty sticky, but it does come together at the end. Check my brioche recipe to get directions on how to knead enriched dough.
You have to do it in batches. Knead a few minutes, let the dough rest a few minutes. You will see how after stopping for 5-10 minutes the dough is much more elastic and comes together much better. Don’t freak out if you spend a whole hour (with rests included) kneading. There’s nothing wrong with the dough. Eventually, it’ll become soft and elastic and shiny and it’ll have little blisters on the surface, and it won’t be sticky!
Never get intimidated by the time you spend kneading, it’s easier to not knead enough than to over work the dough.
Let’s start with this yummy recipe!
You can make this recipe with regular milk and butter, but I also tested a non-dairy version using soy milk and almond oil butter (it’s the one on the video) and it worked perfectly! If you use milk, just make sure you boil it first. Boiling the milk breaks down some enzymes that affect the development of the dough.
As always, activate the yeast first, then add the sugar and eggs and combine well.
Add the salt to the flour and mix the wet ingredients with the dry ingredients.
When you don’t see dry flour particles, cover the dough and let it rest a few minutes.
Start kneading and when you feel the dough is starting to get elastic add the butter or dairy-free spread.
I used Country Crock plant butter, the one with almond oil, and the dough turned out great! (Not an ad, I’m just letting you know what worked for my dairy free version ;] )
Incorporate the butter well and keep kneading. Let the dough rest as many times as you need, if you feel the dough is not coming together, stop, cover it, let it rest 5-10 mins and start again.

Avoid using too much flour while you knead, it will break the balance of the ingredients and your babka will end up drier. Trust in the power of gluten!
When the dough is elastic, it passes the windowpane test, it’s shiny and has blisters covering the surface it’s ready! You can stop kneading, shape it into a ball, and place it in a lightly oiled container.

Let the dough ferment until it is puffy and has risen about twice its volume. Then deflate the dough and let it rest a few minutes before dividing it into 2 equal pieces.
This recipe yields 2 loaves. So, while you work with one piece, make sure you cover the other piece of dough well. You can even place it in the fridge to slow down the fermentation.
While the dough is fermenting you can make the filling.
Grind the nuts thin enough they will make a paste. Add the cardamom powder, milk, and orange blossom water. If you want it sweeter you can add sugar too.
Cook at medium heat until the nuts get a paste-like consistency. Turn off the heat, add the butter and stir. The butter helps the paste be creamier.

Transfer the paste to a plate and let cool to room temperature. Remember that if you add the filling while it’s too hot you can kill the yeast.
When the dough has risen enough flour your work surface lightly and roll the dough into 12 x 17 in rectangle. You can roll it into a longer length, the thinner you roll it, the more layers your babka will have, but the slices will fall apart easier.
Spread the filling on the dough and roll it into a log. Cut the log lengthwise and twist both strands leaving the open part up.
Grease your baking pan and place the babka in it. Let it rise until it reaches the edges of the pan.

Before the fermentation time ends, turn your oven on at 335F
Brush the babka with the leftover egg white and bake until it’s golden brown (about 45 mins, it depends on your oven). If the babka is not dark enough, you can bake it 5 minutes at 350F but be careful, the top can burn quickly!
After baking, babka is usually brushed with a simple syrup
If you want to make the syrup mix 2 tbsp of water and 2 tbsp of sugar and bring it to a boil. Cook until it reaches syrup consistency.
If you don’t want to make the syrup, I found a shortcut: Maple syrup!
Mix 2 tbsp of maple syrup and 2 tsp of water and mix very well.
When your babka is cooked, brush it with the syrup immediately, you can even pour the leftover syrup through the gaps. This will also help keep the moisture in the loaf.

Let the babka cool down a few minutes in the pan an then transfer it to a cooling rack to cool completely… If you can wait that long!
The next step is to make a nice cappuccino an enjoy it with a slice of your babka!

Let me know what you think if you make this recipe and don’t forget to subscribe to my YouTube channel so you can receive a notification when I upload a video!
Enjoy!

Nuts and Cardamom Babka
Ingredients
Dough
- 500 g bread flour
- 225 g milk or vegetable milk
- 5 g dry yeast
- 80 g butter or dairy-free spread
- 2 L eggs
- 1 L egg yolk
- 50 g granulated white sugar
- 6 g salt
- 2 tsp vanilla extract
Filling (1 loaf)
- 200 g assorted nuts
- 70-100 g milk or vegetable milk
- 30 g sugar (optional)
- 2 tsp ground cardamom
- 2 tbsp orange blossom water
- 10 g butter or dairy-free spread (optional)
Instructions
Dough
-
Add the yeast to the lesser amount of milk and let it sit for 1o minutes to activate the yeast
-
Add the sugar, eggs, and vanilla extract and mix well
-
On a separate bowl sift the flour and add the salt
-
Add the flour to the wet ingredients, combine until you don't see dry flour particles, and let it rest 20-30 mins (autolysis)
-
Knead the dough until it's elastic, shiny and covered with small blisters. It should pass the windowpane test.
-
Let the dough ferment until it doubles in size and it's puffy
-
Deflate the dough well and divide it in 2 equal pieces
-
Roll one piece into a 12 x 17 in a rectangle. Spread the filling and roll the dough into a log
-
Cut the log lengthwise and twist each strand
-
Grease a 9in loaf pan and place the babka inside. Let it proof until the dough reaches the edges of the pan
-
Turn your oven on at 335F
-
Brush the babka with the leftover egg white and bake it for 45 minutes or until is golden brown
-
Prepare the syrup and brush it on the babka immediately after you take it out of the oven.
Filling
-
Grind the nuts in a food processor
-
Add the cardamom and sugar if you're adding any and stir well
-
Add the milk and orange blossom water and combine everything
-
Cook the nuts at medium heat until it gets a paste consistency
-
Add the butter for a creamier paste
-
Transfer to a plate and let it cool down to room temperature
How to make brioche with sourdough discards
Hello friends!
I hope you’re having a wonderful summer! I’m definitely enjoying my well-deserved break! Since I have time, I’m baking almost every day. Nothing makes me happier than having fresh bread on the table!
I’m also taking this time to look for new recipes, try flavor combinations… And also, to look into how bread science can help your baking.
Lately, I’ve seen several brioche recipes and from the pictures, I could tell that the crumb wasn’t what brioche crumb should be. In other words, most likely, the dough wasn’t developed properly.
Why is brioche usually labeled as a “difficult” bread to make? Well, adding solid butter is challenging, and developing dough with that amount of fat takes extra time. So, it’s easy to give up
But let me tell you something, brioche = patience, that’s it. That’s the secret.
Sometimes we’re tempted to melt the butter and make the whole process easier
Or we stop kneading because we’re just tired of waiting for the dough to be ready…
Both butter and kneading, are strongly related when we make brioche.
On this post, I explain why we should use solid butter and how to knead brioche to achieve the PERFECT texture.
I hope that once you understand the science behind, it’ll be easier for you to achieve better results and not to get discouraged when handling enriched dough.
Also, on this recipe, I show you a way to use sourdough discards.
If you’re beginning your brioche journey, this recipe is for you because the butter content is not too high. Practice with this recipe and feel free to increase the amount of butter later on.
This is not a 100% sourdough brioche, it also has commercial yeast. But the sourdough enhances its aroma, and the long fermentation times improve its texture considerably. Speaking of texture….

How to get the best texture in your brioche
First things first. When making brioche we need to have one thing in mind: the fat content is very high, not just because of the butter, but also the eggs, therefore, developing the dough is going to take time and patience.
Although this brioche has a relatively low flour:butter ratio, all the explanations apply to higher butter content brioche and other enriched doughs.
How does fat affect the dough?
The first thing you need to know is that melted butter and softened butter (which is still in solid-state) are two completely different things.
The structure of solid butter is made of little crystals that interact with other ingredients and are essential for developing a nice gluten network. When you melt butter, those crystals are destroyed, so the structure of the butter is different, therefore, the way it interacts with other ingredients it’s also different.
Although the role of solid fats is not fully understood yet, scientists have agreed in a three-parts mechanism to explain what happens when we add butter or shortening to bread dough:
- Wheat proteins have bound phospholipids in their structure which are essential for gluten elasticity. These lipids interact with the crystals found in the butter to create gluten-fat complexes (structures) that strengthen the gluten network and give it more elasticity.
- Butter (or solid fats) can act as a lubricant between the gluten structure and starch matrix, improving the gas retention capacity of the dough. As a result, dough that has a higher content of solid fat has the ability to rise more due to an improved gas retention capacity.
- Solid fat melts during baking and seals pores that are present in the dough through which the gas would, otherwise, scape. CO2 eventually leaves the dough, but the butter retards this process and, again, helps the expansion of the dough during baking, the famous “oven spring”.
You can see that a proper redistribution of the fats within the dough is very important. And the way to achieve it is…. By kneading! Of course 😉
How to knead dough with high-fat content
Developing the gluten network of enriched dough consists of two major steps: One is the development of the gluten-starch matrix the other is the development of the gluten-butter complexes.
First, we need to develop the gluten-starch matrix, so then, the butter has a place to start forming the complexes I mentioned before. That’s why we don’t add the butter at the beginning, we knead the dough a little bit until it has a good consistency.
After that is when we start adding the butter.
Think of it as building a house. First, you need the main structure, then you start building up the walls.
However, how many times have you tried to develop the dough and it looks as it will never come together?
That’s because the long strands of gluten proteins, as they form, they get all tangled. If you force them too much (knead too much) you might end up breaking them, or in other words: over-kneading the dough. There’s a simple solution though… Let the dough rest!
Letting the dough rest while kneading can go a long way and reduce the kneading time. Whenever you have troubles to bring the dough to full development stop for 5-10 minutes so the gluten strands have time to detangle.
What do you achieve with this?
- You avoid over-working the dough having better control over it.
- You can develop a better gluten network, with organized gluten strands that are more elastic. This will improve the cohesiveness and strength of the final product. The crumb of your bread will be AMAZING!
- You avoid increasing the temperature of the dough to the point where the fats will melt. Either if you’re using your hands or a stand mixer.
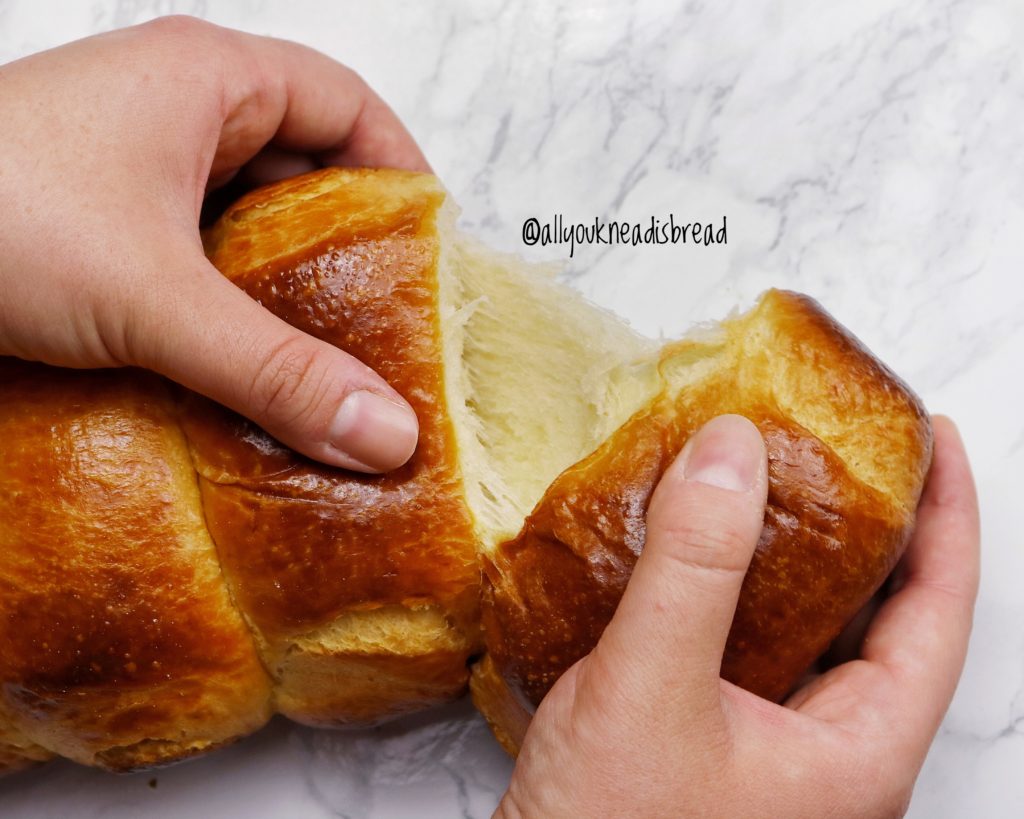
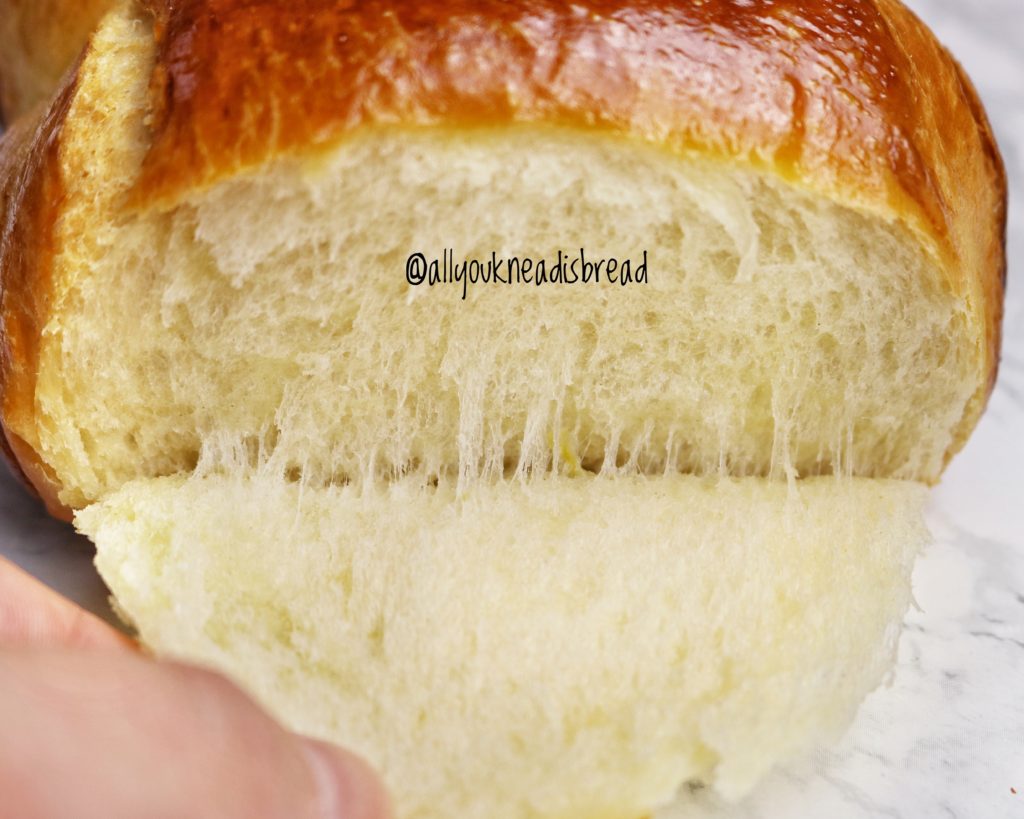
The texture of your brioche should NOT look like cake or banana bread. It should NOT be crumbly. It should be cohesive, soft, spongy and springy. You should be able to pull apart strands of crumb. If not, most likely, the dough wasn’t properly developed
Although there can be many other reasons to explain why the texture didn’t come out right, I believe dough development is, usually, the main cause.
As you can see, breadmaking is pure science. And I hope that by understanding better what goes on when you mix the ingredients, you can succeed and make better and better brioche!
And now… let’s go to the recipe!
For this brioche, I wanted to play with aromas a little bit because one of the loaves was going to be a gift. So I added blossom water, orange syrup, and lemon zest. But feel free to skip these ingredients or add other you like better
POSSIBLE SWAPS
- If you don’t have sourdough starter, just add half of the weight in milk or eggs and the other half in flour. You can also make the day before “pâte fermentée” (also known as old dough).
- If you don’t have orange syrup you can substitute if for honey, molasses, agave… Whatever you have at home.
- If you don’t have lemons, you can add any other type of citric zest.
- If you don’t have orange blossom water, you can add orange juice or brown liquor (rum would give a really nice aroma).
DAY 1 – Late Afternoon
In the morning I fed my starter to bake a sourdough loaf, I always make more than I need just in case! So, I use some for the loaf, some to keep and the rest… I used it in this recipe.
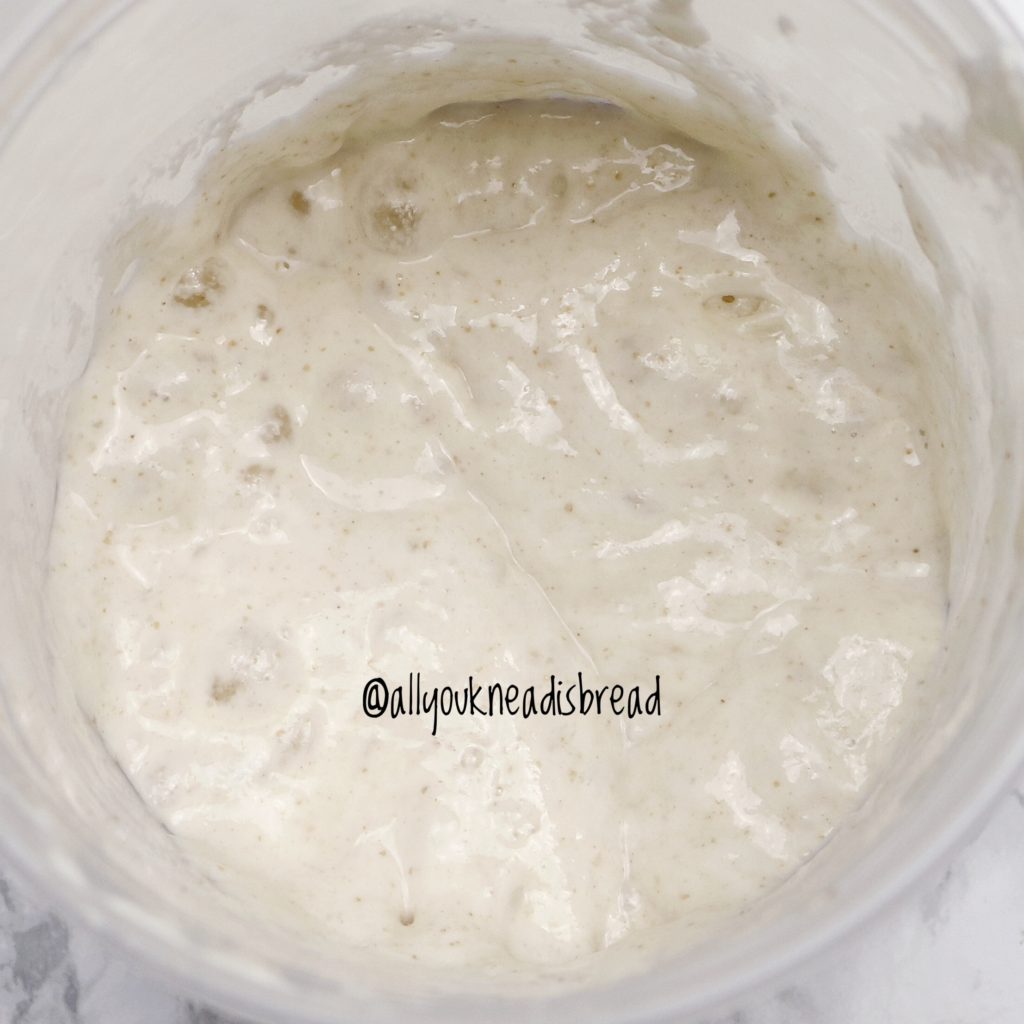
I started mixing my ingredients at 3 pm.
First, I mix all the wet ingredients and the sourdough discards to dissolve them a little. Then add the sugar and the yeast, combine everything well and let it rest a few minutes.

Sift the flour and add it to the wet ingredients along with the salt and lemon zest. Mix everything until you don’t see dry flour particles and let it rest for 20-30 minutes to allow the hydration of the flour.


After the autolysis period, start kneading the dough until it reaches certain consistency.

Start adding butter little by little. It’s better to use it at room temperature (softened butter) so it can be incorporated easier. Otherwise, you might have chunks of butter in the dough and it will be difficult to incorporate it.
I find easier to incorporate the butter by hand, what I do is squeeze the dough and twist it until the butter is absorbed. You can see how I do it on my Belgian waffles video
Then continue kneading the dough at low speed. After 15 minutes stop, cover the bowl and let it rest for 5 minutes. Knead again for another 10 minutes, stop and let it rest for 5 minutes. Continue again for another 10 minutes, stop and let it rest 5 minutes.
At this point your dough should be almost ready, it should start coming up the dough hook of your stand mixer and separating from the sides of the bowl. After this last resting period, keep kneading until the dough is ready, it shouldn’t take much longer.
If you live in a cold and dry environment, you might need more time. So pay attention to your dough, let it tell you what it needs 😊
It took me almost 50 minutes to have the dough fully developed (without resting time).

A fully developed dough should not be sticky, should come out of the bottom of the bowl without tearing and should pass the windowpane test.
To check the windowpane test, let the dough rest a few minutes first. Otherwise, you coul have a “false negative”. The dough could tear because the gluten strands are tangled, not because they’re not ready.
When your dough is ready, let it ferment at room temperature until it almost doubles in size, after that, put in the fridge, and leave it there overnight. Mine was in the fridge for 18 h
Turn the dough onto your work surface and deflate it. Be gentle, but make sure there aren’t big air pockets.
This recipe yields one 9 in (22-23cm) springform pan and one 9.75 x 6 in (25 x 15 cm) loaf pan. If you just want the brioche in the circular pan, multiply all the ingredients by 0.75
Separate 8 pieces of 130-140 g each and shape them into balls and place them into the pans. Then shape the rest of the dough in 4 logs as wide as your pan or 2 longer logs and cut them in half (this is what I did 😉)


And now time to wait! Let the dough rise until it’s puffy; if you poke it with your finger, the dough will spring back but not immediately. That means the dough has enough gas trapped inside. Sometimes, the dough can be ready but does not necessarily double its size.


20 minutes before the brioche is ready, preheat your oven at 350 F (175 C)
Before baking, brush the brioche with egg wash. I like to use an egg yolk and a Tbsp of milk. This egg wash helps soften the crust and the brioche it’s like the one you buy in the store, but better because you made it!

Bake the brioche for 30 – 40 mins, keeping an eye on it. Bake it until it has a nice golden-brown color.


Before you dig into this tasty treat, let the brioche cool down to room temperature. This step is very important because to let the crumb finish baking, set aromas, etc. But after it cools down… oh boy!
If you can see these strands, you worked the dough well. The gluten was properly developed, the fats were successfully incorporated, and the structure of the baked brioche is very cohesive.


Brioche with sourdough discards
Ingredients
Dough
- 500 g bread flour
- 2 eggs large
- 140 g milk
- 160 g 100% hydration SD starter
- 4 g active dry yeast
- 100 g sugar
- 5 tsp orange blossom water
- 2 tbsp orange syrup optional
- zest of 2 lemons
- 10 g salt
- 1 ½ sticks unsalted softened butter
Egg wash
- 1 egg yolk
- 1 tbsp milk
Instructions
Day 1 – late afternoon
-
Add the eggs, milk, sugar, salt, dry yeast, orange blossom water, orange syrup, and the sourdough discards to your stand mixer bowl and give it a good whisk.
-
Sift the flour and add it to the wet ingredients. Combine until there are no dry flour particles.
-
Let the dough rest for 20-30 minutes to allow the flour particles to hydrate.
-
Start kneading the dough at low speed for about 10 minutes or until the dough gets a bit elastic
-
Add the butter in 3 or 4 times, making sure it's completely incorporated before you add more.
-
Knead the dough at medium speed until it's very elastic, shiny, the surface has blisters and it's not sticky. You shouldn't need to add more flour. It should pass the windowpane test
-
Cover the bowl and let the dough rise at room temperature until it doubles in size
-
Place the dough in the fridge for a cold fermentation for at least 15 h. You can leave the dough in the fridge for up to 2 days
Day 2
-
Remove the dough from the fridge and gently deflate it. Cover it and let it rest for 10 minutes
-
For the round pan: take 8 pieces of dough of 130 – 140 g (4 – 5 oz) shape them into balls, and place them into your round baking pan.
-
For the rectangular pan: divide the rest of the dough into 4 equal pieces. Flatten them and roll them into logs as wide as your baking pan.
-
Cover the two pans and let the dough rise unti it's almost at the border of the pans.
-
Preheat your oven at 350 F
-
Before baking, whisk the egg yolk and the milk together and brush the brioche with it.
-
Bake the brioche until it's golden brown or has an internal temperature of at least 96C
-
For best results, let the brioche cool down to room temperature before cutting through it.
Recipe Notes
- Let the dough rest for 5-10 minutes before performing the windowpane test.
- You can shape the brioche in any way you prefer. Just make sure that the dough fills half of the container you use.
Happy baking!

Authentic Liège Waffles – Video

Hello there! Welcome to my new life! A stress-free, sweet-full life!
This last month was full of emotional moments, last good byes, rehearsals, graduation… I still can’t believe I’m a doctor! Thinking about how this journey started I can’t help but feel a bit homesick. There are many things I miss from my hometown, but maybe one of my fondest memories is strolling down the bustling Calle del Principe with my friends or my sister and buy Belgian style waffles at a little joint that probably would go unnoticed if you didn’t know about it.

The sweet aroma of the waffles floods the whole street and you can always see people waiting in line to buy a waffle, even during winter time!
These waffles are special to me, so I have been working on this recipe for quite some time, I wanted to really find the recipe that brought all the memories and I think I did!

What’s different about these waffles?
There are many different types of waffles in Belgium, the recipe I bring today is typical from Liège, on the eastern part of the country. These waffles are made using yeast and dough instead of using batter and baking powder. They’re denser, smaller and FULL of aromas. Absolutely delicious!
The original recipe calls for pearl sugar that’s added after the fermentation. These sugar crystals caramelize and give the waffle it’s characteristic crunchy texture.
However, pearl sugar is sometimes difficult to find and a bit expensive, that’s why I wanted to try this recipe using cane sugar for a more affordable recipe. The result was amazing, so if you don’t want to spend the money on pearl sugar, you can still have Liège-quality waffles.
Then you add your favorite toppings: melted chocolate, whipping cream, fruits, honey… Or eat them plain, they’re sweet enough and yummy too! It’s an incredible sweet treat for the weekend and a great activity to involve kids.
They’re best served warm, but you can keep them in a Ziplock bag for a few days or freeze them and pop them into the toaster before eating them.
The recipe
Let’s get to business! This recipe takes longer time than the regular waffle because it involves a dough, so there’s going to be some kneading and fermentation times.
Once you finish the dough you can either let it ferment at room temperature until it doubles in size or put it in the fridge overnight and eat waffles for breakfast!
NOTE: When I am using cane sugar and the dough is room temperature I prefer to add it after I’ve divided the dough. If your dough is cold, you can add the sugar before dividing. Just to avoid the sugar from dissolving before the waffles are cooked. If you used pearled sugar, you can add it before dividing the dough as well, regardless of the temperature of the dough.
As always, the first step is to activate the yeast and combine all the wet ingredients. Then you add the flour and mix it until there aren’t dry flour particles and let it rest for 20-30 mins.
This is the autolysis period. During this time the flour particles fully hydrate, and the gluten proteins are ready to start developing the gluten network. These few extra minutes really make the kneading process easier, especially for enriched dough.

Knead the dough until it cohesive and start adding the butter. Like in brioche dough, this process can be tedious and sometimes it feels as if the dough will never come together, but keep kneading, and avoid adding more flour, and eventually the gluten network will be developed and the dough will be very elastic, smooth and not too sticky.
If you want to practice kneading enriched dough by hand, this is your recipe! Check the video if you want to see how I do it.
Once the dough is ready let it ferment until it doubles in size. If you prefer a cold fermentation let the dough rest at room temperature about 30 mins and then put it in the fridge.
After the dough raised to double its size, degas the dough very well, make sure there are no big air cells. Divide the dough and add the cane sugar. You don’t want to incorporate it completely into the dough. The crystals should be mostly on the outside, so they can caramelize while the waffle is cooked.
To cook the waffles follow the instructions of your waffle maker. Keep in mind that they should be cooked at least 3 minutes.

Look at this beautiful waffle! The caramelized sugar… gahh! I can smell it just by looking at the picture!

And now… topping time!

If you really want to wow your friends, your kids, or even yourself, make these Liège waffles! They won’t disappoint!
And if you want to see more of my recipes don’t forget to subscribe my YouTube channel to get a notification every time I upload a video 😉
Enjoy!

Authentic Liège Waffles
Ingredients
- 250 g bread flour g bread flour
- 1 stick unsalted butter
- 1 egg L
- 115-125 g milk
- 50 g white sugar
- 150 g pearl sugar or cane sugar (If you use cane sugar you'll use less, just 1-2 tbsp per waffle)
- 3 g salt
- 5 g active dry yeast
- 1 tsp vanilla extract
Instructions
-
Activate the yeast in lukewarm milk and let it rest for 10 mins until it's active
-
Combine yeast mixture, eggs, salt, white sugar and vanilla extract together
-
Sift the flour and add it to the wet ingredients
-
Let it rest 20-30 mins
-
Knead the dough until it starts getting elastic
-
Add the softened butter in 2 or 3 steps
-
Knead until the dough is very elastic and soft
-
Shape the dough into a ball and place it in a container covered. Let it ferment until it doubles in size (1h at 75F approx.)
-
Deflate the dough very well and divide it into 6 pieces of similar weight.
-
Shape each piece into a ball and let them rest for 10 mins. In the meanwhile turn on your waffle maker.
-
Add the cane sugar to each ball of dough and cook them for at least 3 minutes
-
Add your favorite toppings and enjoy!
Recipe Notes
* I used soy milk for this recipe because it’s the one I drink, for a more intense flavor, use whole fat cow milk.

Super Soft Hot Cross Buns – Video
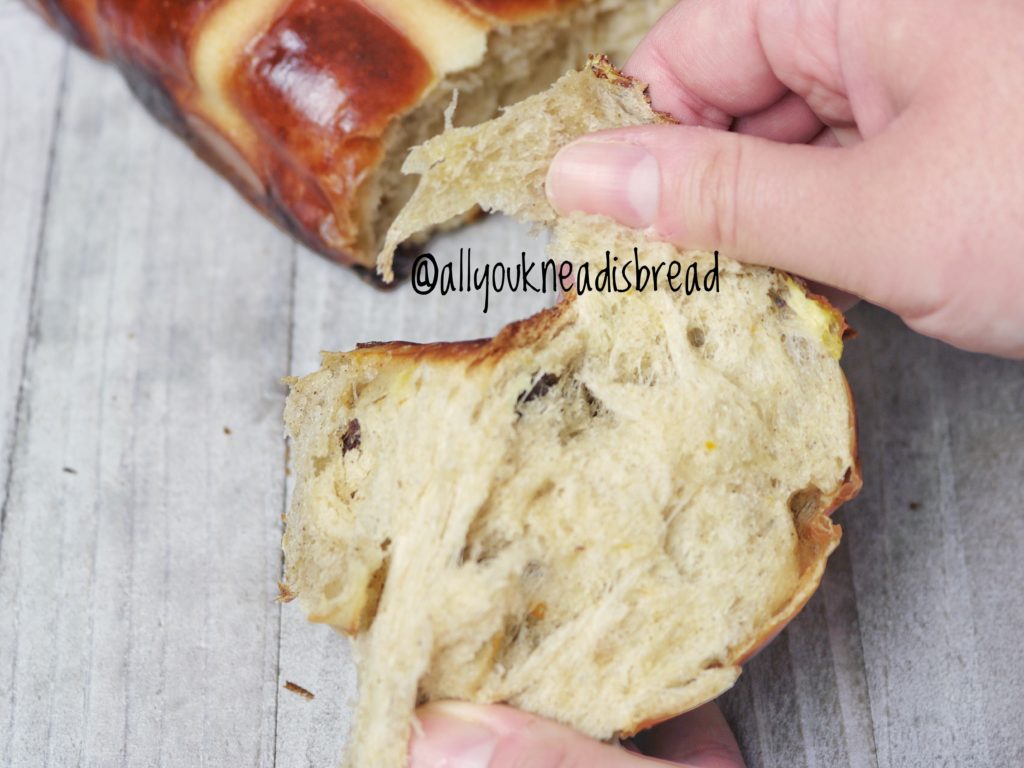
Easter is here!
When I was a kid I was always looking forward the next special occasion because I knew my mom and my grandma would cook something good and I’d get to be the official taster 😊 Now, as an adult, I do the same, I look for recipes for every occasion!
I discovered hot cross buns about 3 years ago. The moment I saw the recipe I was already in love. The combination of spices, the fruits… so aromatic! I LOVE these buns! Bread, sweet fruits and spices all together? Uhmm.. yeah!
I have seen many videos and recipes and I have found a common “problem”, and that’s the lack of a proper gluten network. The tricky part of this recipe, in my opinion, is the kneading process. It takes a bit of time to develop the gluten network, it’s an enriched dough and therefore, not easy. This recipe has a good amount of wet ingredients, I found that increasing the liquid and fat content a little bit can go a long way. It’s a bit of a long process to get the dough ready, but boy! The result is AMAZING! The buns are SUPER SOFT and they last fresh much longer.
HOW SHOULD YOU KNEAD ENRICHED DOUGH?
Well… being patient is a must, with butter, eggs, and sugar in the middle, developing the gluten network is more difficult, so take your time. If you’re using a stand mixer, don’t knead too fast. You can start with the paddle attachment until the dough starts to come off the bowl sides and rolls upon the paddle, then change to the hook attachment. My stand mixer has 10 speeds and I use the paddle attachment at speed 2-3 and then the hook attachment at speed 3-4.
I’d suggest you knead for 10 minutes and then let the dough rest for 3-5 minutes. Then knead again, and rest again. It helps the gluten proteins 😉
WHY DOES GLUTEN NEED TO REST?
Gluten proteins get tired of being kneaded, basically. And it’s difficult for them to keep linking each other. When we knead the dough, we facilitate the interactions between the gluten strands, but at the same time, the long chains get somehow tangled. So, when we let the dough rest, what happens is that these chains reorganize and realign. It’s like a ball of yarn, when it’s tangled you can’t do anything with it, but when it’s properly rolled you can keep taking the yarn out of it.
Enriched doughs need longer kneading times, that means the gluten proteins are going to be under a lot of stress. Let them rest a little and save time in the long run.
WHAT ABOUT THESE BUNS?
Jump to Recipe
Let’s get into this delicious recipe!
NOTE: if you’re using cow milk, boil it for a couple of minutes and let it cool down until it’s lukewarm. Boiling the milk will break down some enzymes that, otherwise, could weaken the gluten network. Boil more milk than the amount in the recipe because some of it will evaporate as it heats up.
As always, dissolve the yeast in the lukewarm milk and let it sit for a few minutes. You can add a pinch of sugar and when the mixture is frothy, the yeast is active!
Add the eggs, sugar, and spices to the yeast mixture and give it a good whisk. I like to add the spices to the liquid ingredients because I think they can infuse more aromas this way. But if you prefer to mix them with the flour it’s fine too.
Then add the sifted flour and combine everything until you don’t see dry flour particles. You should have a sticky mess, a bit runny even.

Cover the dough and let it rest for 20-30 minutes. This step will allow the flour particles to hydrate so the gluten proteins are at full strength when you start kneading.
After the autolysis period, add the salt and start kneading.

When the dough starts being elastic add the softened butter and keep kneading.

When the dough is elastic enough (it should be smooth), add the dry fruits and knead just enough to integrate all the fruits.
Make a ball with the dough and place it in a lightly oiled container. It’s better to use vegetable or canola oil, because they have milder flavors than, for example, olive oil.

NOTE: the dough should pass the windowpane test. Let the dough rest 5 minutes before checking it. If you can see some of the fruits through the dough and it doesn’t tear apart, that’s a good sign of proper gluten development.
HOW TO PREPARE THE FRUITS
Typically, this recipe calls for raisins, but I like to add a bit of everything. You can add candied orange, dry apricots, candied green cherries…
The night before (preferably), or at least a few hours before, mix the raisins (and other very dry fruits you might use) with about ¼ cup of some liquid. You can use tea, freshly squeezed orange juice, or even rum or sherry if you don’t mind the alcohol. Close the container and shake it every now and then to make sure all the fruits get to soak some liquid. Strain the fruits before adding them to the dough. You don’t want to incorporate too much liquid to the dough.

ROOM TEMPERATURE VS. OVERNIGHT FERMENTATION
If you want to bake the buns the same day, let the dough rise at room temperature until it has almost doubled in size, deflate it very well and knead it for 1 minute to get rid of big air pockets.
If you prefer to do a cold fermentation let the dough ferment at room temperature for about 30 minutes and then transfer it to the fridge and let it rise overnight. The next morning take the dough out of the fridge and let it warm up a little bit (30mins to 1h, depending on the temperature of your kitchen), deflate it very well and knead it for 1 minute.

Line a 16x12in (40x30cm) with parchment paper. Divide the dough into 12 pieces of similar weight.
NOTE: I had to use a smaller pan and bake the other 3 buns apart because I forgot my 16×12 pan was in the freezer! 😊

Cover it with plastic wrap and let the buns rise until they look puffy and they increased in size. They don’t need to double in size necessarily, just make sure the dough feels puffy, not hard. The buns should touch each other too.

MAKE THE CROSS AND PREPARE THE BUNS FOR BAKING
***preheat your oven at 375F (190C)***
To prepare the paste just mix the all-purpose flour, icing sugar and milk. It must be a pest. So, it’s better to add the milk little by little until you have the right consistency. The amount of milk depends on the flour you use, play around with the ratio as long as you end up with a paste.

Now that the paste is ready, let’s finish up these buns! Prepare the egg wash, and brush the buns with it BEFORE you pipe the cross. I emphasize before, because I didn’t do it and brushing the buns when the cross was already there was tricky, to say the least!

With a piping bag, make the crosses. Don’t be afraid! I know there’s a lot of pressure but don’t let the piping part intimidate you 😊
Place the buns in the preheated oven and let them bake until they have a nice golden brown color. If your oven doesn’t bake evenly, turn the pan 180 degrees halfway.
When ready, take them out of the oven and let them cool down for 5 minutes before you take them out of the pan.


Enjoy!

Super Soft Hot Cross Buns
Ingredients
Dough
- 500 g bread flour
- 280-320 g lukewarm milk depends on the protein content of your flour. Start with the lesser amount and add more if needed.
- 1 L egg
- 1 L yolk
- 90 g softened butter
- 50 g brown sugar
- 1 tsp salt
- 7 g active dry yeast
- 1 tsp ground cinnamon
- 1 tsp ground allspice
- 1/4 tsp nutmeg optional
- 1 1/2 tsp vanilla extract
- zest of 1 orange
Fruits
- 100 g dark raisins
- 50 g golden raisins
- 50 g glazed green cherries optional
- 2 tbsp dark rum
- 2 tbsp orange syrup
- 1 tbsp water
Cross paste
- 60 g all purpose flour
- 24 g icing sugar
- 80-90 g cold milk amount could vary
Instructions
Dough
-
Combine yeast and lukewarm milk, mix until the yeast is dissolved and let it sit for 10 minutes to activate the yeast.
-
Add the eggs, spices, vanilla extract, orange zest, and salt to the yeast mixture and combine very well.
-
Sift the flour and add it to the wet ingredients. Combine everything until you don’t see dry flour particles. Let it rest for 20-30 minutes
-
Start kneading with the paddle attachment until the dough starts coming off the sides of the bowl.
-
Change to the hook attachment and knead for a few minutes or until you see it’s starting to be elastic and add the butter little by little
-
Keep kneading until the dough is no longer sticky, it comes off the bowl completely and it’s very elastic. It should pass the windowpane test.
-
Add the drained fruits and knead just until they are incorporated into the dough
-
Place the dough into an oiled container, cover and let it ferment until it almost doubles in size.
-
Deflate the dough very well and divide it into 12 portions of equal weight.
-
Roll each portion into a ball an place them into a 16x12in pan lined with parchment paper. Cover and let them rise until they’re puffy and touching each other.
-
Preheat your oven at 375F
-
Brush the buns with egg wash and with a piping bag make the crosses.
-
Bake the buns for about 22 minutes or until they’re golden brown. Keep an eye on them after 20 minutes.
-
Take the buns out of the oven and wait 5 minutes before taking them out of the pan.
Fruits
-
The night before combine the fruits with the rum, syrup, and water in a container. Close it and shake it once in a while to redistribute the liquid
-
Drain the liquid before adding the fruits to the dough
Cross paste
-
Mix the flour and the icing sugar
-
Start adding the milk little by little until you get the right viscous consistency. Whisk the mixture well until there are no lumps.
Recipe Notes
The glazed cherries are completely optional, I like to add them because of their intense color.
The nutmeg is optional too. I like how it can intensify other aromas, but the buns can be perfectly fine without it too.
For best storage wait until the buns cooled down completely and put them into a sealed plastic bag. Keep at room temperature
Vegan Hokkaido Milk Bread
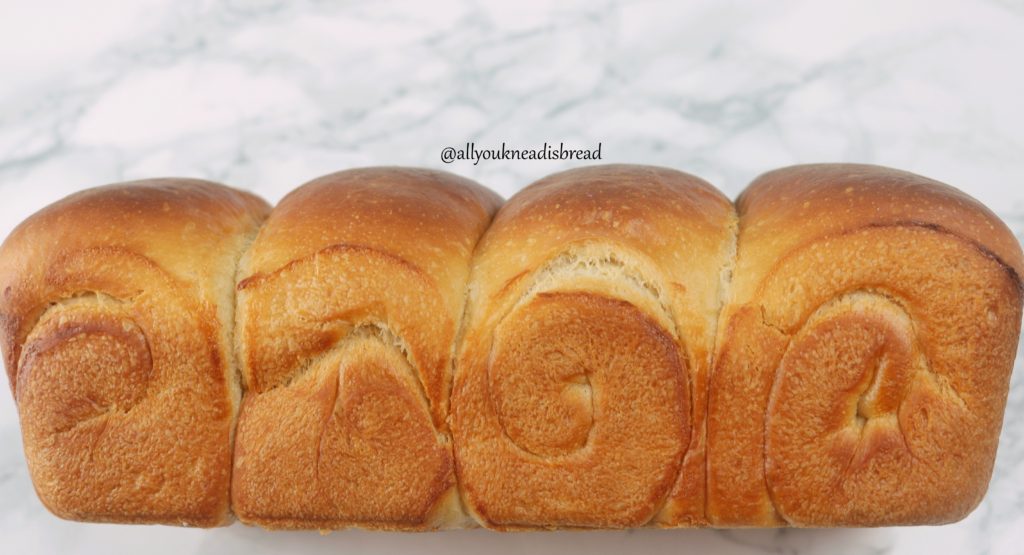
This past January I decided to bake only vegan
For the past 2 years or so I’ve been following a mostly plant-based diet. Not continuously, but I did reduce significantly the
If you read my previous post, you know fiber is important for me, and a vegan diet it’s full of it! To be honest, I think all these benefits I get from eating vegetables are, in part, related to an improvement in my gut microbiota. My lovely gut bugs are having a feast with all this fiber! Plus, I did lose some weight because I am eating healthier.
NOTE: I have been tracking my diet and protein intake with a nutritionist. So, if you want to change your diet, and especially if you have any health condition whatsoever, you should talk to your doctor or a nutritionist first. A vegan diet works for me and I really feel the benefits, but it doesn’t have to be the same for you. With that being said, and regardless of your diet… eat your veggies! 😊
LET’S VEGANIZE A RECIPE!
Or… You can jump to the Recipe!
Since I started flirting with a plant-based diet I’ve been having the same question in the back on my mind: how do you replace eggs in bread baking? You can always switch butter with a non-dairy option, or vegetable oil… but eggs? Then it kicked me, what are eggs but a mixture of fat (yolk) and liquid protein (whites)? All I had to do was replace the yolks with more fat and add a bit more liquid to make up for the whites. An oil and water emulsion should work perfectly!
The first thing that came to my mind was my Hokkaido bread recipe. It uses whipping cream as part of the liquid and it gives it an incredible crumb texture. I just thought that whipping cream can be easily replaced by coconut milk. My recipe only calls for 1 egg so I thought my experiment shouldn’t go too bad…
WHAT MAKES HOKKAIDO BREAD SPECIAL?
Something that defines Hokkaido milk bread is the Tangzhong method. This method is original from Asian countries (although now it’s widely used) and it really makes a difference in enriched doughs. Essentially, it’s a water roux. You cook a small amount of the flour of the recipe with part of the liquid of the recipe. When you start cooking the flour/liquid mixture, it’s just liquid. The more it heats up, the thicker it gets, until you end up with a paste, the
WHAT HAPPENS TO THE STARCH?
The reason the
WHY DOES TANGZHONG IMPROVE THE TEXTURE?
The role of starch in bread making is important because the particles get stuck to the gluten matrix and
But this method goes beyond that! All the starch in the dough will gelatinize at some point during baking, but the pre-gelatinized starch of the
LET’S GO WITH THE RECIPE!
The first thing you need to do is prepare the
Mix the flour, the cold water, and the cold milk in a saucepan and give it a whisk until you don’t see flour lumps. Then start to heat it at medium heat (my stove has 10 levels of heat, I use the 6). Stir the mixture all the time, after a few minutes you’ll start seeing lumps, like custard-like lumps. Keep stirring, at some point I’d say to do it vigorously to be able to have a homogeneous paste. When you stir and start to see the bottom of the pan, pay attention! It’ll take no time to be ready! (I’m sorry, I Prepared it ahead of time and forgot to take a picture of mine).
Once it’s ready, transfer it to a bowl and cover it with plastic wrap. Make sure the wrap touches the surface. This way you won’t have the “skin
Let it cool down to room temperature. You can refrigerate it until you use it. Just make sure you don’t add it to the dough too cold. It might slow down fermentation times.
NOTE: once it cools down it’ll get harder, but don’t worry, it’s normal!

As always, to make the dough we first activate the yeast in the soy milk (or vegetable milk of your preference). If you want, you can add a bit of sugar from the recipe (about 1 tsp).

Then the yeast mixture is foamy, add it to a bowl, add the sugar, the coconut milk, the
Prepare the emulsion: mix the water and the olive oil until you get a with-ish viscous liquid.
In a separate bowl, sift the flour and the salt, and then add the wet ingredients, the emulsion and mix it with your hands until you don’t see dry flour particles.

Let it rest 20 or 30 minutes so the flour particles can hydrate.
Knead the dough very well, it should pass the “window pane test” and it should be elastic and smooth. Try not to use too much flour if you knead by hand, otherwise, you will change the flour

Lightly oil a container and place the dough in it. Let it rest until It has doubled in size.
Deflate the dough and separate it into 2 equal pieces. This recipe yields 2 loaves.

Take one of the balls, divide it into 4 pieces of equal weight and round each piece into a ball. Cover with a loose plastic wrap or a damped clean towel and let the balls rest 5 or 10 minutes so the gluten can relax a little bit and shaping the loaf can be easier!
Take one of
With a rolling pin, roll the dough into a larger oval. The length should be 20-22 (8-9 in approx.) cm and the width should be the width of your baking pan (My pan is 9.5 x 5 in – 23.9 x 12.6 cm).

Take the narrower side and start rolling the dough into a log. Place the log in the baking pan.


Do the same with the other 3 pieces of dough and cover the pan.
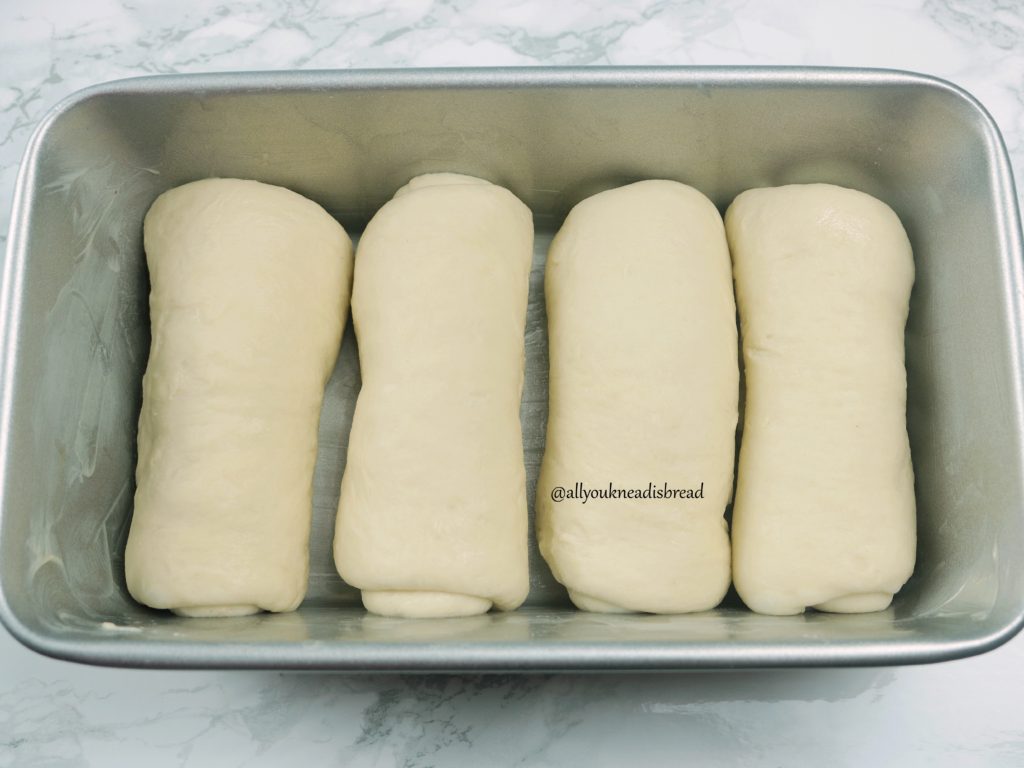
Let the loaf rise until it’s puffy. It doesn’t have to necessarily double in size. Just make sure it did grow and when you touch the dough, it puffs back slowly.

While you’re waiting for the dough to proof, preheat your oven at 350F (177 C).
Before baking, I brushed the dough with coconut milk leftovers. You can use soy milk or vegan butter… Whatever you prefer. I tried coconut milk and I liked the result!
If you see the bread is getting dark too quickly, reduce the temperature to 340F (171C) and cover it with aluminum foil.
Once you finish baking take the pan out of the oven and put it in a cooling rack for 20 mins before you take the bread out. The bread is still finishing up baking inside, if you shake it too much you could destroy the crumb.

This bread is very tasty! You can definitely taste the coconut, but the flavors are totally balanced. The coconut is not overwhelming. The crumb is very soft and cohesive. Look at how it “peels”!
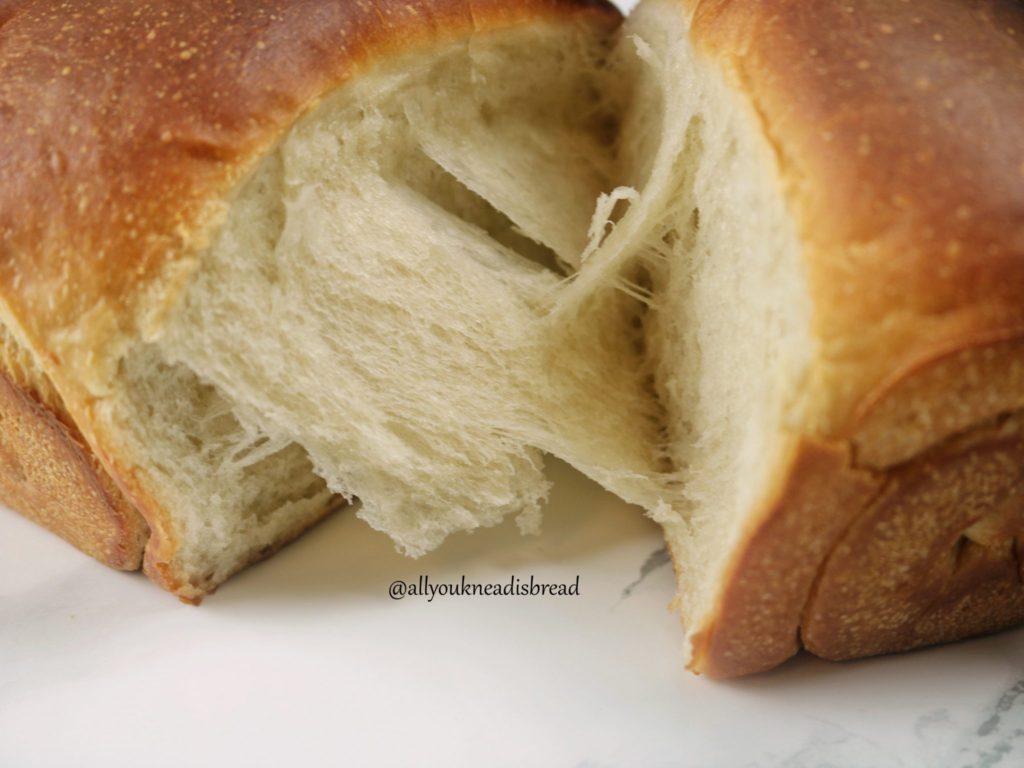
Once the bread has cooled down to room temperature you can store it in a Ziplock bag.
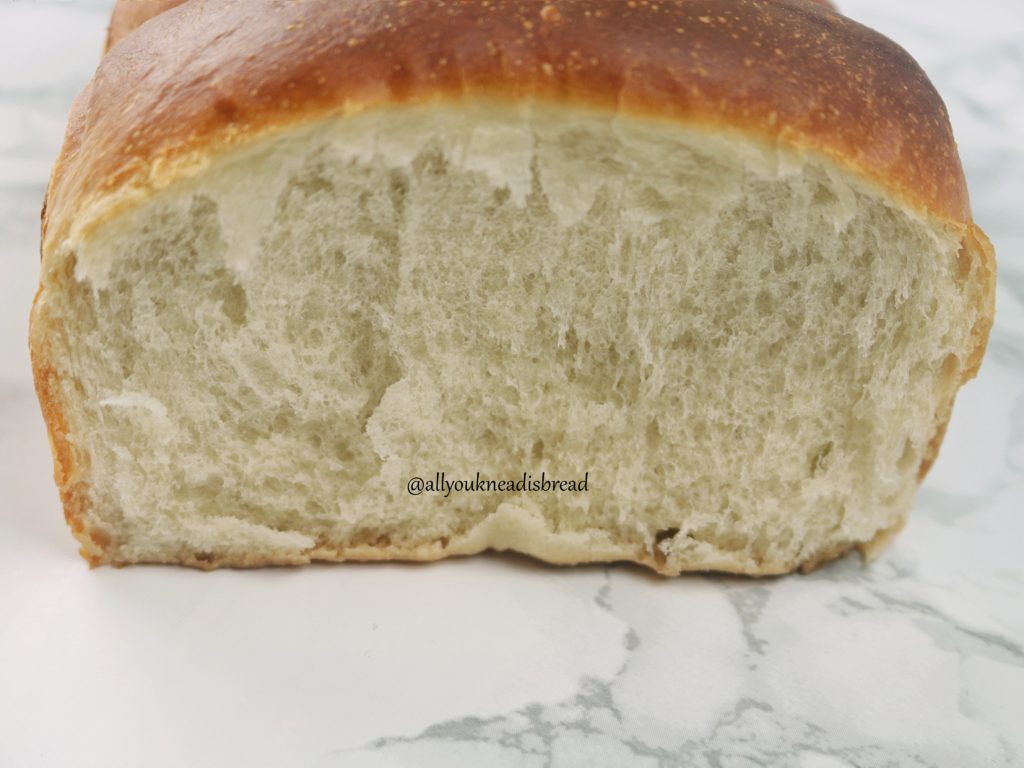
I baked it in the evening and ate a piece, it was very good. But in my opinion, it was even better the next morning!

Vegan Hokkaido Milk Bread
This is a vegan version of a Hokkaido Milk Bread recipe
Ingredients
Tangzhong
- 30 g bread flour
- 85 g water
- 85 g soy milk
Dough
- 575 g bread flour
- 7 g active dry yeast
- 80 g sugar
- 8 g salt
- 2 tsp vanilla extract
- 25 g water for emulsion
- 25 g olive oil for emulsion
- 200 g full fat coconut milk
- 200 g soy milk
Instructions
Tangzhong
-
Mix the flour, water, and milk very well in a saucepan. You shouldn’t see lumps.
-
Start heating the mixture at medium heat and stir continuously until it thickens and turns into a paste.
-
Once ready, cover it with a plastic wrap and refrigerate it until you need it. You can make the tangzhong the day before.
Dough
-
Mix the soy milk at room temperature with 1 tsp of the total sugar and the yeast and stir until everything dissolves. Wait until it’s foamy.
-
In a separate bowl sift the flour and the salt
-
When the yeast is active add the sugar and the tangzhong and mix it very well
-
Add the coconut milk to the liquid mixture and stir well
-
Mix 25 g of water and 25 g of olive oil and stir until you get a whit-ish yellow-ish viscous liquid
-
Add the wet ingredients to the flour.
-
Add the oil/water emulsion
-
Mix until you don’t see dry flour particles.
-
Let the dough rest 20-30 mins to allow the flour to absorb moisture.
-
Knead the dough very well until you can stretch it into a thin layer without tearing apart. It shouldn’t be very sticky
-
Let the dough rest until it doubles in size
-
Divide the dough into two parts of equal weight.
-
Divide one of the parts into four equal pieces, shape them into a small ball and let them rest for 5 minutes.
-
Take one of the pieces, flatten it with your hand into an oval and with a rolling pin stretch the oval into a larger one. The narrow side should be as wide as the narrow side of your baking pan.
-
Roll the piece of dough into a log and place it in a lightly oiled baking pan.
-
Do the same for the other 3 pieces.
-
Preheat your oven at 340F
-
Let the dough rise until it’s puffy. It might take up to 1h or 1h30mins
-
Bake the loaves until they’re a nice brown color. If you think the inside is not ready and the dough is starting to get too dark cover it with a piece of aluminum foil.
NOTE: With the other half of dough, you can either make another loaf, or dinner rolls, or anything you want. Deflate it very well, shape it the way you like it and let it rise at room temperature. If you want to retard the fermentation, let it rest 30 mins at room temperature first, and then move it to the fridge up to 12-14h. More than that might result in big bubbles that can burn during baking.

Homemade Christmas Panettone
Christmas is here! Finally! I’ve been really looking forward to the holidays. I can’t wait to turn the laptop off and completely disconnect from anything lab related!
My husband and I decided to go to NYC to spend the holidays instead of going to our home countries. And to be honest, I think it was the best decision. 2018 has been an eventful year, good and bad stuff happened, tears of joy and tears of sorrow. We need a break, a real one. Like a big apple break! Which means I’m not cooking anything for Christmas!
However, I know many people will, and you’ll be looking to impress your guests.
So *guest* what?? (Did you see what I did there? Lol)

It’s panettone time!!!!
Okay, let me say this. It’s NOT the original recipe and I didn’t use any type of
I’ve been working on this recipe for quite a long time. This dough was difficult to handle. But there was something I was NOT going to give up on. And that’s the eggs and sugar content. Which is exactly what makes this dough so difficult to handle. But panettone has to have a strong aroma of eggs, and the yellow color, and it has to be sweet and rich and full of flavor! And it has to last fresh for a long time! Because, let’s be honest. We don’t want to go through all this work for just a couple of days of fresh panettone.
NOPE!
Now.. you do need a strong flour for this: A protein content of at the very least 14-15%.
I could’ve bough the flour online. But I wanted to try something that could be a solution for when you need high gluten flour and you forgot to order it online or you want to save some money in the long run.
I made my own high gluten flour. How? By adding more gluten!
I have wheat gluten at home because I use it to make plant base “meat”. So, what I did was: I first calculated the total amount of gluten in my recipe using a 15% protein flour. Then I calculated the actual protein content of my flour and the gluten I have. And finally, I calculated how much gluten I had to add to my flour.
I know, it sounds weird all these calculations. Don’t worry, I did the calculations for you, so you don’t have to do it. I’ll add another post on how to do it.
Once I adjusted the ingredients to the size of my molds, I tried the recipe with my flour that has 12.7% protein content. It didn’t go very well, I ended up with a cake-like crumb rather than bread.
I tried again adding the gluten. based The quality of the crumb really improved, and the panettones were fresh for 2 weeks at least! (We didn’t have any left after 2 weeks!).
WHAT’S WRONG WITH YOUR FLOUR?
Nothing. Absolutely nothing. However, think about the amount of eggs and sugar and butter panettones have. There are so many things in between the gluten molecules that it’s extremely difficult to develop the gluten network. If you do it by hand it’s going to take you forever. If you use a stand mixer you’ll have to knead the dough for a long long time, and that means that the stand mixer will transfer heat to the dough and make it too soft, and you’ll also take the risk of over kneading the dough. Because stand mixers don’t knead homogeneously. So, chances are that some parts of the dough won’t have good gluten development while other parts will be over kneaded. Long story short, the whole structure will be destroyed.
That’s why we need more protein! If there are more gluten proteins, there are more chances they’ll find each other among all the sugars and fats. Which means, you don’t have to put in such an arduous work to knead the dough, and you reduce the risk of over-kneading it
Don’t smile, it’s still gonna be tough enough lol
BACK TO THE RECIPE!
A panettone is a masterpiece. And you have to do it step by step. No rush. So pick a day that you’ll be home and you’ll have time. You can also make this bread a couple of days ahead of time. Just keep it in a plastic bag so it won’t dry out.
My recipe has two pre-ferments and the final dough. In a warm kitchen you can get it done the same day. Or you can even retard the bulk fermentation overnight in the fridge.
NOTE 1: If you don’t have the high protein flour and you decided to add gluten, make sure you mix it very well with the flour first, otherwise the moment it gets in contact with a liquid it’ll start forming the network and you won’t be able to properly mix the ingredients.
SOAKING THE FRUITS
For this recipe I used golden and dark raisins, candied orange and dried apricots.
I make the candied orange at home and I made this batch barely 1 month ago, they’re still soft, so I did not soak the orange, but I did soak the rest.
In a
I like to start soaking the fruits 1 day in advance, but if you don’t have time or forgot about it, just start soaking the fruits when you start the process. They’ll have enough time to get soft. Plus, the moisture of the dough will also help during the fermentation.
PREFERMENT 1
Once you have your flour ready, add the yeast to the water and let it sit while you whisk the eggs. Then mix the eggs, and the yeast mixture and give it a whisk. It must be very homogenous. Then add the flour and mix very well.
You should have something like a thick pancake batter. Not quite a dough.

When everything is well mixed transfer it to a tall pitcher, mine is 2.5 or 3 qt. And let this preferment rise until it triples or quadruples in size. Look for a place in your house where it’s not too cold. It’ll take some time to start growing. Be patient!
When you see the preferment is all the way to the edges of your pitcher, use your wire whisk or a spatula and try to deflate it a bit. Mine took about 1h 30 mins to 2h approx.

PREFERMENT 2
On another big bowl add the egg yolks and the sugar and mix it very well until you see the eggs getting whiter and fluffy. Then add the honey, the orange syrup (if you have) and the orange, lime and lemon zest and mix thoroughly. Then add the flour (with the gluten mixed already if using this method) and mix again.

Now add the preferment 1 and mix everything very well until you don’t have big lumps and both batters are well integrated. Cover the bowl and let it rise until it triples or quadruples in size. I left mine go up to the bowl edges. This preferment rises quicker

When preferment 2 is ready, time to roll up our sleeves and start working the dough!
FINAL DOUGH
On this
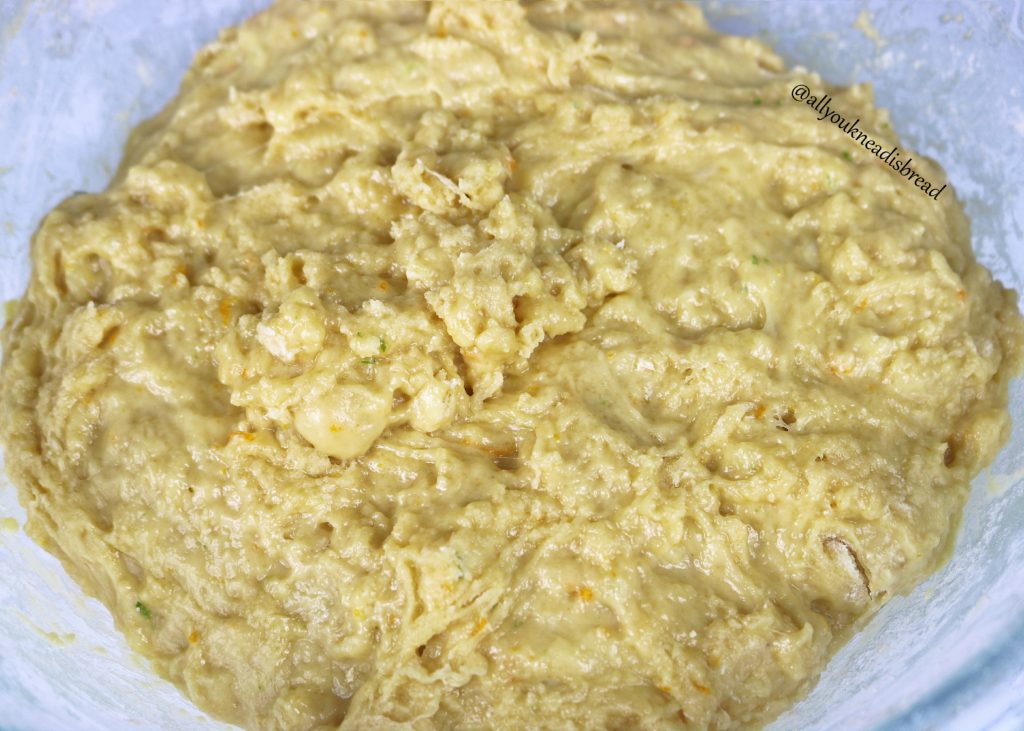
Now… start the workout! I used my stand mixer first. I used the paddle attachment on speed 3 (of 10 total speeds) for about 20 minutes or maybe a bit more. For doughs this sticky, I find the paddle attachment much more efficient to start developing the dough.
NOTE 2: If you’re using a stand mixer, be careful, when the dough starts getting some consistency, it can come up through the hook and get in between the moving parts. Just keep an eye on it!
NOTE 3: The paddle attachment is going to speed things up because the dough is too soft and somehow runny/sticky so the paddle will apply more pressure and will help develop the gluten network better at the beginning.
When I saw the dough was strong enough to pull itself from the bottom of the bowl I stopped and started to add the butter manually. Adding a bit of butter and squeezing it until it was absorbed.
You will notice the change in the consistency!
Keep kneading until the gluten has been developed properly. The dough should be very elastic and you should be able to stretch it without tearing it.

When the dough is good, let it rest 5 mins and then add the fruits. Don’t knead it too much, just enough to make sure the fruits are well distributed.

Put the dough in a lightly oiled bowl and let it ferment!
Look at how thin you can stretch the dough. That’s a sign of a proper gluten development

OPTIONAL STEP: If you think your dough is delicate you can do 3 sets of stretch and folds every 25 mins to improve the structure without destroying it.
At this point, you can place the dough in the fridge for
Let the dough rise until it doubles in size. Then deflate the dough and separate it in two equal parts.
Pre-shape each part into a ball to create some tension and put them in the panettone molds. My molds are the largest ones (6″ x 4½”). The dough should occupy 3/4 of the total volume of the mold.

Preheat your oven at 350F and, in the meanwhile, let the panettones rise until the dough reaches the rim of the mold.
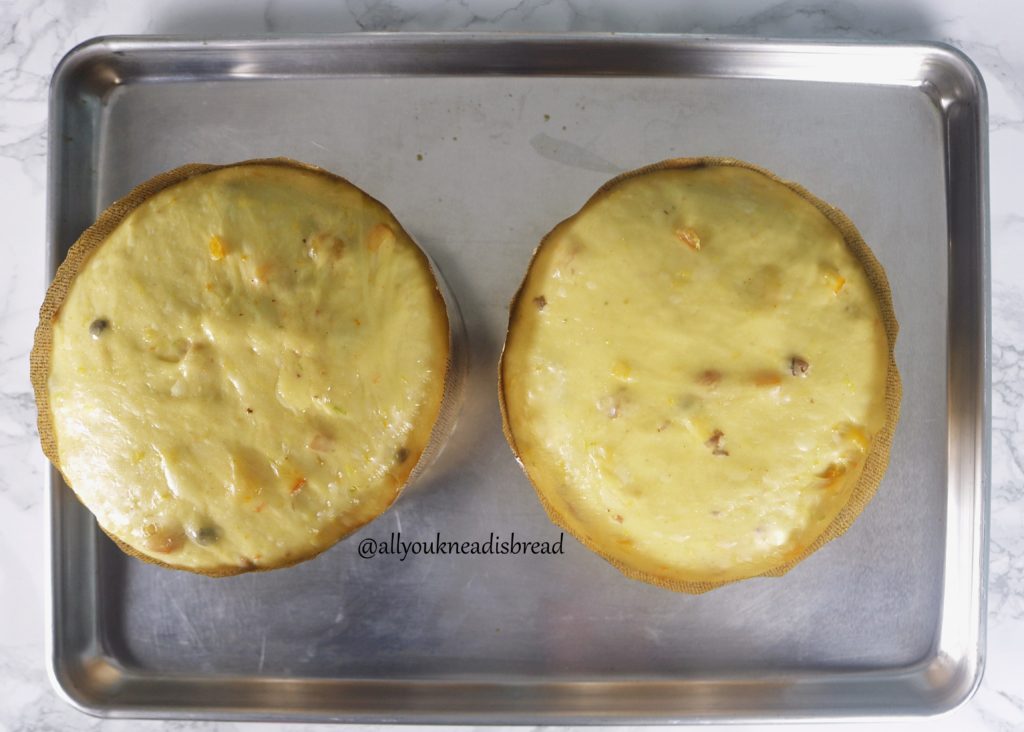
Make a cut on the top of each panettone and open it up a little bit
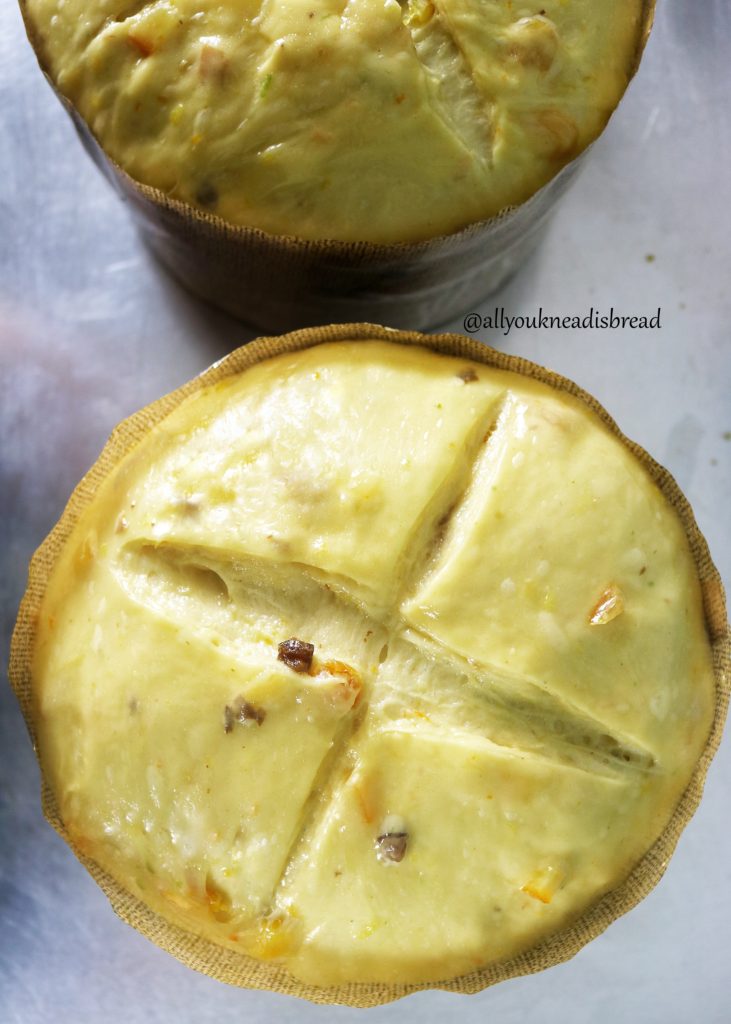
Now add a little bit of butter inside of the cut
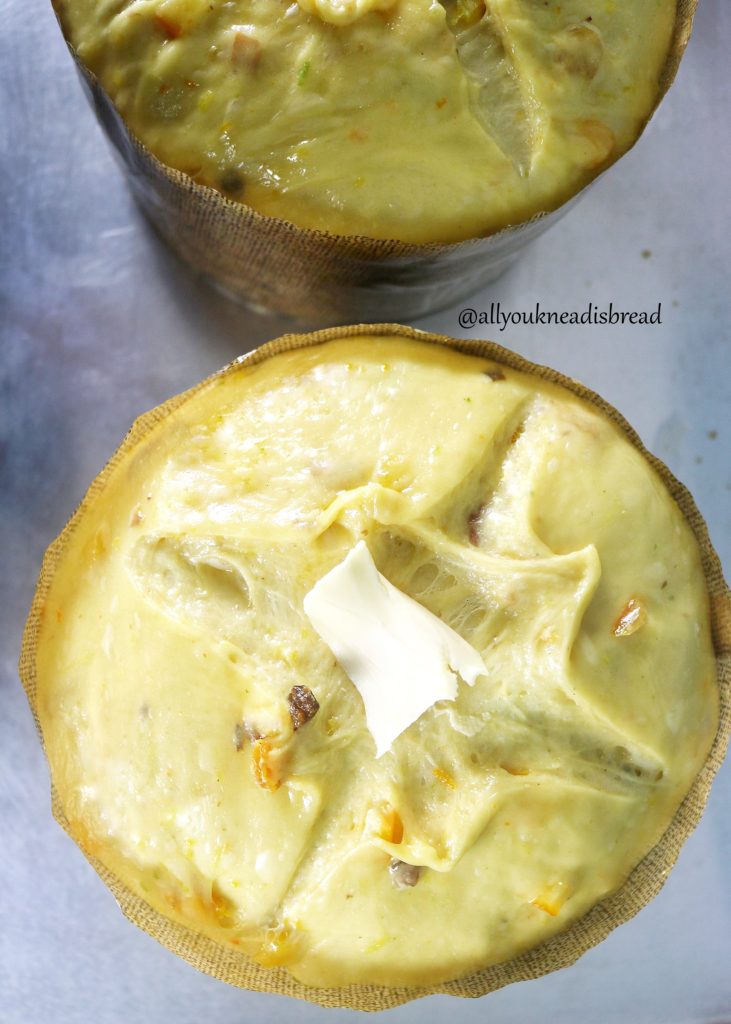
Put the panettones in the oven and turn the oven down to 325F. This way the browning reactions won’t occur too fast.
Bake until they’re ready and immediately after baking insert a skewer in the bottom part of the panettones and hang them upside down until they cool down completely
This step is important because it’ll make sure the crumb and structure are not compromised. After baking the crumb is still finishing cooking, but it’s also too soft and too heavy, so you must be careful, or the panettones could collapse!
Once they cooled down… enjoy this Christmas delicacy! With all the work, I’m sure you’ll enjoy them even more!
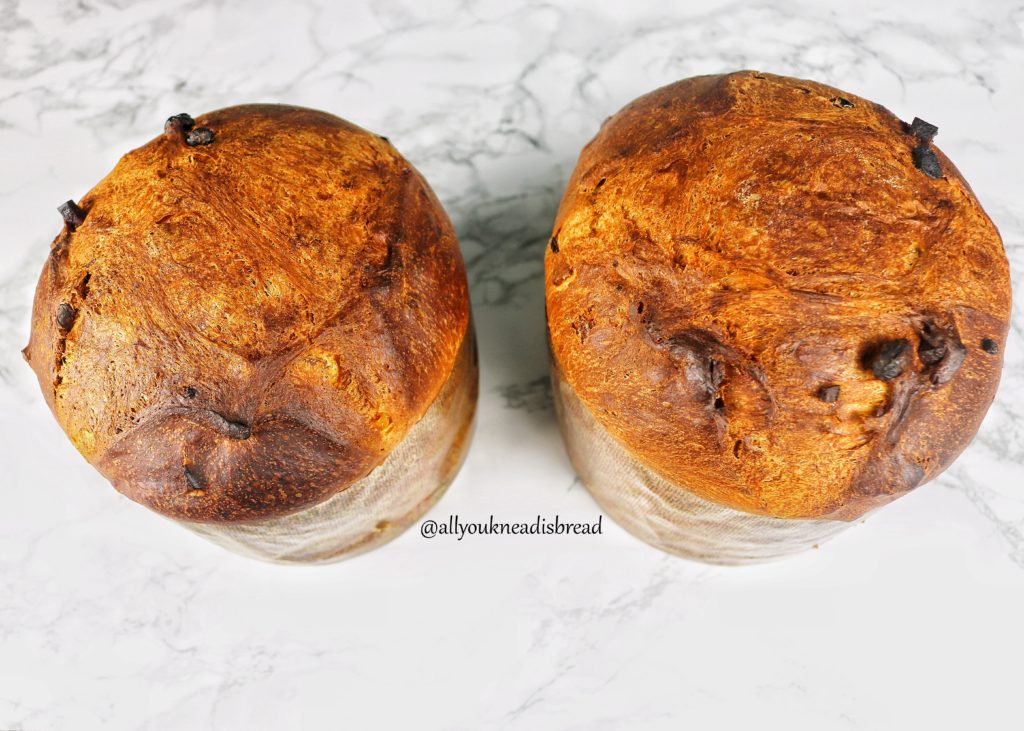
Look at this crumb! Fantastic! So cohesive and soft and yellow and it smells so good!
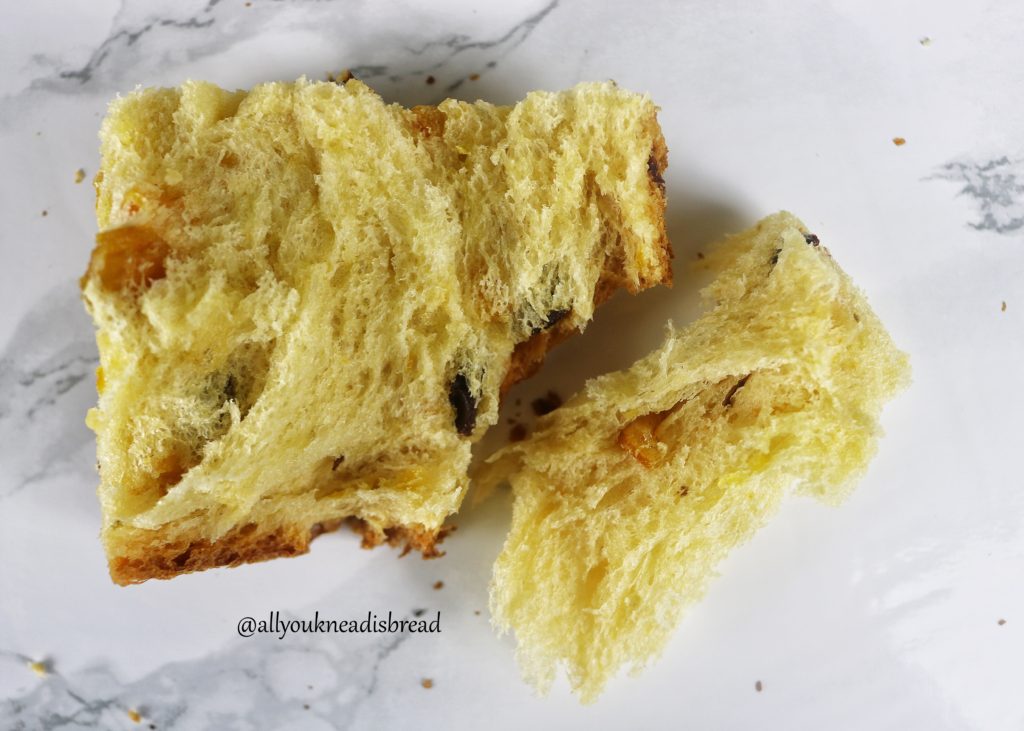
Let me know if you make these panettones or if you have any suggestion/ doubt etc.

Homemade Christmas Panettone
Ingredients
Dried fruits
- 180 g candied orange
- 110 g black raisins
- 110 g golden raisins
- 100 g dried apricots
- 40 g brown rum
Preferment 1
- 470 g bread flour
- 21 g vital wheat gluten
- 390 g water
- 3 L eggs
- 7 g active dry yeast
Preferment 2
- 200 g bread flour
- 10 g vital wheat gluten
- 5 L egg yolks
- 2 tbsp honey
- 2 tbsp orange syrup
- 100 g sugar
- 1 orange zest
- 1 lemon zest
- 1 lime zest
Dough
- 260 g bread flour
- 15 g vital wheat gluten
- 180 g sugar
- 10 g salt
- 227 g butter (2 sticks)
- 2 tbsp vanilla extract (or 2 vanilla beans)
Instructions
Dried fruits
-
Mix the raisins and apricot with the rum 24h prior baking. Shaking the container once in a while to make sure the liquid is distributed evenly.
Preferment 1
-
Mix the flour and the vital gluten
-
Dissolve the yeast in the water and let it sit for 10 minutes
-
Whisk the eggs into the yeast solution and mix very well
-
Add the flour mixture and mix until there are no dry particles
-
Let rise until it triples or quadruples its size
Preferment 2
-
Mix the flour and the vital gluten
-
Whisk the egg yolks until they thicken up a bit
-
Add the honey and orange syrup and mix them very well
-
Add the citrus zest
-
Add preferment 1 and mix very well until there are no big lumps
-
Let rise until it triples its size
Dough
-
Deflate the preferment 2 and add the sugar, vanilla extract. Mix everything very well
-
Mix the flour and the vital gluten
-
Add the flour mixture to the preferment 2 and mix thoroughly until you don’t see dry flour particles and let it rest 20 mins
-
Start kneading. About 20 mins on speed 3 with the paddle attachment of your stand mixer and later use the hook or by hand until the dough gets some consistency. I took 20-25 more minutes
-
Add the butter little by little and keep kneading until its elastic
-
Add the fruits and knead just enough to integrate them into the dough.
-
Place the dough in an oiled container and let ferment until it doubles in size (you can do this step overnight in the fridge)
-
Deflate the dough and separate it into 2 equal pieces
-
Preshape the pieces into balls and place them in the molds
-
Preheat your oven at 350 F
-
Cover the panettones with an oiled plastic wrap and let rise until it reaches the top of the mold
-
Make a cut on the panettones and add a little chunk of butter
-
Put the panettones in the oven and lower the temperature to 325F
-
Bake for about 55 minutes or until they’re brown outside and completely cooked inside.
-
Right after baking insert a skewer through each panettone and turn upside down. Let them cool down completely
Happy Holidays!


