
Well well well… Looks like summer is already here! One of the things I like of the crazy weather we have in NC is the summer storms. I find rain quite relaxing, the trickling sound of the water, the smell of wet soil, the sunset of a stormy day… And baking while raining? That’s a complete spa day!
I guess many of you will go on a vacation this summer, but if for some reason you won’t, I’d like to take you on a little trip without leaving your kitchen! I’d like to take you to the Caucasus region!
This region is well known for their kefir. A fermented milk drink made from kefir grains. These grains are a combination of yeasts and bacteria that you add to milk. The culture ferments overnight, and the next morning you have your fresh fermented drink! The consistency is similar to drinkable yogurt. A little bit sour because of the lactic acid bacteria. While I’m not an expert on homemade kefir, I believe you can control the sourness by controlling the fermentation temperature and times.
Kefir has gained much attention in the last years because it’s a probiotic, so it’s very healthy for your gut microbiota and digestive system. Now you can find it in almost all grocery stores!
I came to realize that almost every country and region have a bread recipe that uses local ingredients or cooking techniques, so in Eastern European countries, kefir is sometimes used to make “батон” (baton) bread. I guess the name comes from the shape of the bread.
I’ve been doing some research on this recipe, I’ve looked for blogs and videos (Thank you Google translate!) and I finally found a recipe that I like, although I’ve made a few changes.
This bread is very easy to make and it the perfect candidate to start kneading by hand. This dough is on the dry side, therefore comes together pretty fast. It’s great to try different kneading techniques and develop your own style. I think making this bread can also be an excellent activity to do with your kids, the recipe it’s simple, they can help you knead, and they won’t make a mess because the dough is not very sticky! 😉
You can eat this kefir bread with savory dishes, or jam, or just plain! And it makes wonderful French toasts too! The flavor is rich and delicate, and the kefir really gives the bread an interesting kick and aroma! The crumb is perfectly fluffy and cohesive, and the crust is not too thick, so you can use this recipe to make homemade subs! The crust will get softer after a few hours. And in my opinion, the aroma of the bread is better after it cooled down completely.

The recipe yields 3 large loaves or 4 medium loaves, so if you’re not going to eat them all you can freeze some and keep the rest in a Ziplock bag for a few days.
Let’s start with the recipe!
As always, activate the yeast in the water and let it sit for a few minutes.
Once the yeast is active, add sugar, salt, kefir and butter and give it a good whisk. Don’t worry if there are chunks of butter.
Then add 1/3 of the flour and combine everything very well until you have a thick paste. By doing this, incorporating the butter will be easier and you don’t have to melt it. Bread usually turns out better if you don’t melt the butter.

Add the paste to the rest of the flour (previously sifted) and combine all the ingredients together until there are no dry flour particles.
Let the dough rest for 20-30 minutes to allow the flour particles to hydrate. This is a pretty dry dough, since the gluten doesn’t have much moisture, it’s important to start working the dough after the gluten proteins had some time to hydrate.
Knead the dough until it’s soft and elastic. Knead it the best way you can with the technique you’re more comfortable with. The dough feels a little hard at the beginning, use the heel of your hand to apply pressure and eventually it’ll become more elastic. Be patient, it’ll take about 15 minutes to have the dough ready.

After autolysis 
After kneading
You shouldn’t need extra flour to knead the dough, it’s not sticky, but if you do, try not to add too much or your bread will turn out too dry.
When the dough is ready, let it ferment until it doubles in size and it’s puffy. In a warm environment it will take between 1 h and 1 h 30 mins.
After that, deflate the dough very well, we’re not looking for big alveoli in the crumb, but a bun-like crumb.
Divide the dough into 4 equal pieces (or as many as you want! It depends on how large you want the loaves). Shape them into balls and let them rest, covered, for 10 minutes. During this time the gluten strands will relax, and it’ll be easier to shape the loaves.
To shape the loaves, flatten each dough ball with your hand and with a rolling pin roll them into a rectangle as wide as you’d like the loaves. The rectangle should be about 1/3 or 1/4 of an inch (0.5-0.8 cm).

You can use some flour while you shape the loaves to avoid the dough from sticking on the counter.
Once you have the rectangle start rolling the dough from the narrowest side, tugging the ends inside of the log.
Let the loaves rest, covered, until they double in size. Before the proofing time is over, preheat your oven at 375 F (190 C).

Right before baking the loaves, make cuts through them and brush some water. This step is optional, the water will help develop the crust but if you prefer a softer crust, don’t brush it.

Bake the loaves for 25 minutes or until they are golden brown
NOTE: you might need to bake at lower temperature to make sure the loaves are fully cooked. You know your oven better!
When the loaves are ready, let them cool down on a cooling rack. I know it’s tempting but try to wait until the bread is at room temperature so the crumb finish baking and the aromas finish developing.

Enjoy!

Russian Kefir Bread
A delicious and easy bread recipe
Ingredients
- 600 g bread flour sifted
- 175 g plain kefir
- 175 g water room temperature
- 6 g dry yeast
- 10 g salt
- 30 g white sugar
- 50 g unsalted butter softened
Instructions
-
Dissolve the yeast in the water and let it sit for 10 minutes
-
Add to the yeast mixture the salt, sugar, kefir, butter, and 200 g of flour and combine everything until you get a paste.
-
Add the paste to the leftover flour and incorporate all the ingredients until there are no dry flour particles. Let it sit, covered, for 20 minutes
-
Knead the dough until it's elastic and soft
-
Place the dough on a lightly oiled bowl and let it ferment, covered, until it doubles in size and it's puffy.
-
Deflate the dough and knead it for 1 or 2 minutes to make sure you get rid of big bubbles
-
Divide the dough in 4 equal pieces. Shape them into balls, cover them and let them rest for 10 minutes.
-
With a rolling pin roll the balls into a rectangle and shape the loaves.
-
Let the loaves rest, covered, until they double in size and they are puffy.
-
Make cuts on the loaves, brush them with water (optional) and bake them at 375 F for 25 minutes or until they're golden brown
Authentic Liège Waffles – Video
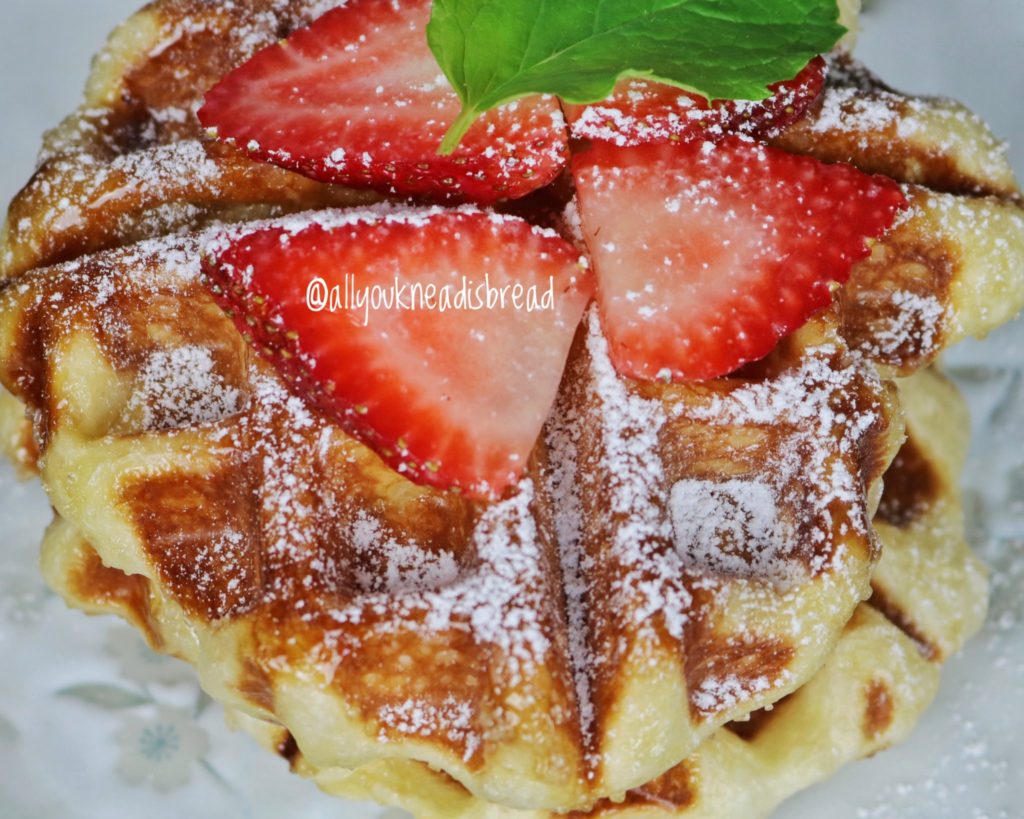
Hello there! Welcome to my new life! A stress-free, sweet-full life!
This last month was full of emotional moments, last good byes, rehearsals, graduation… I still can’t believe I’m a doctor! Thinking about how this journey started I can’t help but feel a bit homesick. There are many things I miss from my hometown, but maybe one of my fondest memories is strolling down the bustling Calle del Principe with my friends or my sister and buy Belgian style waffles at a little joint that probably would go unnoticed if you didn’t know about it.

The sweet aroma of the waffles floods the whole street and you can always see people waiting in line to buy a waffle, even during winter time!
These waffles are special to me, so I have been working on this recipe for quite some time, I wanted to really find the recipe that brought all the memories and I think I did!

What’s different about these waffles?
There are many different types of waffles in Belgium, the recipe I bring today is typical from Liège, on the eastern part of the country. These waffles are made using yeast and dough instead of using batter and baking powder. They’re denser, smaller and FULL of aromas. Absolutely delicious!
The original recipe calls for pearl sugar that’s added after the fermentation. These sugar crystals caramelize and give the waffle it’s characteristic crunchy texture.
However, pearl sugar is sometimes difficult to find and a bit expensive, that’s why I wanted to try this recipe using cane sugar for a more affordable recipe. The result was amazing, so if you don’t want to spend the money on pearl sugar, you can still have Liège-quality waffles.
Then you add your favorite toppings: melted chocolate, whipping cream, fruits, honey… Or eat them plain, they’re sweet enough and yummy too! It’s an incredible sweet treat for the weekend and a great activity to involve kids.
They’re best served warm, but you can keep them in a Ziplock bag for a few days or freeze them and pop them into the toaster before eating them.
The recipe
Let’s get to business! This recipe takes longer time than the regular waffle because it involves a dough, so there’s going to be some kneading and fermentation times.
Once you finish the dough you can either let it ferment at room temperature until it doubles in size or put it in the fridge overnight and eat waffles for breakfast!
NOTE: When I am using cane sugar and the dough is room temperature I prefer to add it after I’ve divided the dough. If your dough is cold, you can add the sugar before dividing. Just to avoid the sugar from dissolving before the waffles are cooked. If you used pearled sugar, you can add it before dividing the dough as well, regardless of the temperature of the dough.
As always, the first step is to activate the yeast and combine all the wet ingredients. Then you add the flour and mix it until there aren’t dry flour particles and let it rest for 20-30 mins.
This is the autolysis period. During this time the flour particles fully hydrate, and the gluten proteins are ready to start developing the gluten network. These few extra minutes really make the kneading process easier, especially for enriched dough.

Knead the dough until it cohesive and start adding the butter. Like in brioche dough, this process can be tedious and sometimes it feels as if the dough will never come together, but keep kneading, and avoid adding more flour, and eventually the gluten network will be developed and the dough will be very elastic, smooth and not too sticky.
If you want to practice kneading enriched dough by hand, this is your recipe! Check the video if you want to see how I do it.
Once the dough is ready let it ferment until it doubles in size. If you prefer a cold fermentation let the dough rest at room temperature about 30 mins and then put it in the fridge.
After the dough raised to double its size, degas the dough very well, make sure there are no big air cells. Divide the dough and add the cane sugar. You don’t want to incorporate it completely into the dough. The crystals should be mostly on the outside, so they can caramelize while the waffle is cooked.
To cook the waffles follow the instructions of your waffle maker. Keep in mind that they should be cooked at least 3 minutes.

Look at this beautiful waffle! The caramelized sugar… gahh! I can smell it just by looking at the picture!

And now… topping time!

If you really want to wow your friends, your kids, or even yourself, make these Liège waffles! They won’t disappoint!
And if you want to see more of my recipes don’t forget to subscribe my YouTube channel to get a notification every time I upload a video 😉
Enjoy!

Authentic Liège Waffles
Ingredients
- 250 g bread flour g bread flour
- 1 stick unsalted butter
- 1 egg L
- 115-125 g milk
- 50 g white sugar
- 150 g pearl sugar or cane sugar (If you use cane sugar you'll use less, just 1-2 tbsp per waffle)
- 3 g salt
- 5 g active dry yeast
- 1 tsp vanilla extract
Instructions
-
Activate the yeast in lukewarm milk and let it rest for 10 mins until it's active
-
Combine yeast mixture, eggs, salt, white sugar and vanilla extract together
-
Sift the flour and add it to the wet ingredients
-
Let it rest 20-30 mins
-
Knead the dough until it starts getting elastic
-
Add the softened butter in 2 or 3 steps
-
Knead until the dough is very elastic and soft
-
Shape the dough into a ball and place it in a container covered. Let it ferment until it doubles in size (1h at 75F approx.)
-
Deflate the dough very well and divide it into 6 pieces of similar weight.
-
Shape each piece into a ball and let them rest for 10 mins. In the meanwhile turn on your waffle maker.
-
Add the cane sugar to each ball of dough and cook them for at least 3 minutes
-
Add your favorite toppings and enjoy!
Recipe Notes
* I used soy milk for this recipe because it’s the one I drink, for a more intense flavor, use whole fat cow milk.

Super Soft Hot Cross Buns – Video
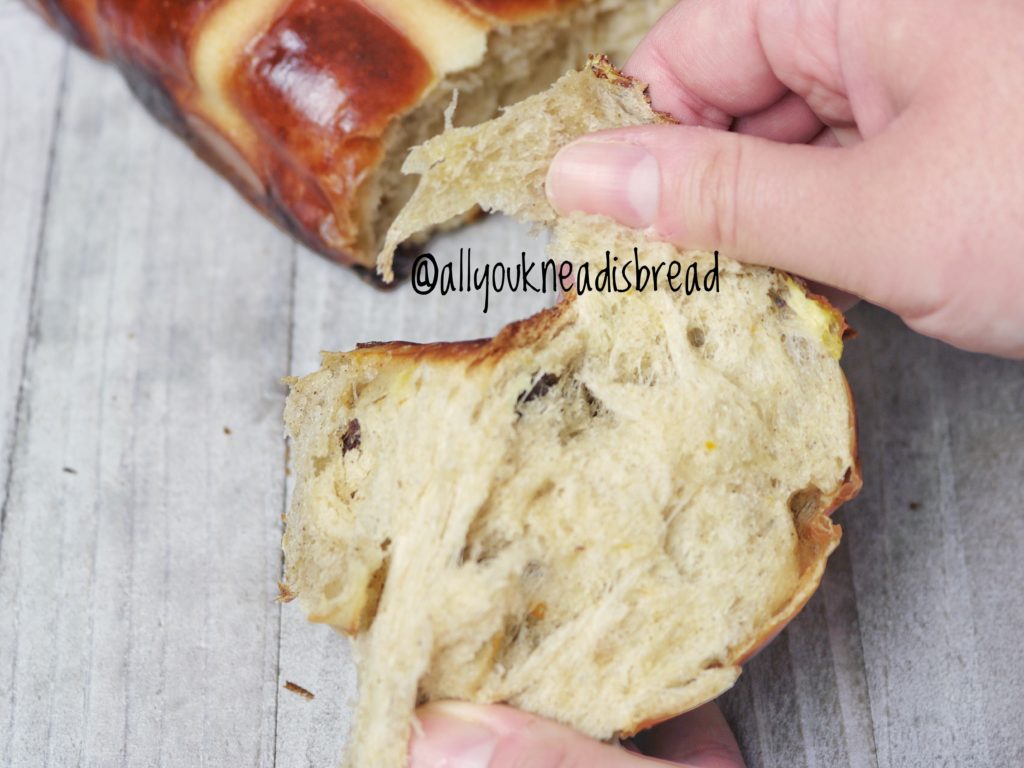
Easter is here!
When I was a kid I was always looking forward the next special occasion because I knew my mom and my grandma would cook something good and I’d get to be the official taster 😊 Now, as an adult, I do the same, I look for recipes for every occasion!
I discovered hot cross buns about 3 years ago. The moment I saw the recipe I was already in love. The combination of spices, the fruits… so aromatic! I LOVE these buns! Bread, sweet fruits and spices all together? Uhmm.. yeah!
I have seen many videos and recipes and I have found a common “problem”, and that’s the lack of a proper gluten network. The tricky part of this recipe, in my opinion, is the kneading process. It takes a bit of time to develop the gluten network, it’s an enriched dough and therefore, not easy. This recipe has a good amount of wet ingredients, I found that increasing the liquid and fat content a little bit can go a long way. It’s a bit of a long process to get the dough ready, but boy! The result is AMAZING! The buns are SUPER SOFT and they last fresh much longer.
HOW SHOULD YOU KNEAD ENRICHED DOUGH?
Well… being patient is a must, with butter, eggs, and sugar in the middle, developing the gluten network is more difficult, so take your time. If you’re using a stand mixer, don’t knead too fast. You can start with the paddle attachment until the dough starts to come off the bowl sides and rolls upon the paddle, then change to the hook attachment. My stand mixer has 10 speeds and I use the paddle attachment at speed 2-3 and then the hook attachment at speed 3-4.
I’d suggest you knead for 10 minutes and then let the dough rest for 3-5 minutes. Then knead again, and rest again. It helps the gluten proteins 😉
WHY DOES GLUTEN NEED TO REST?
Gluten proteins get tired of being kneaded, basically. And it’s difficult for them to keep linking each other. When we knead the dough, we facilitate the interactions between the gluten strands, but at the same time, the long chains get somehow tangled. So, when we let the dough rest, what happens is that these chains reorganize and realign. It’s like a ball of yarn, when it’s tangled you can’t do anything with it, but when it’s properly rolled you can keep taking the yarn out of it.
Enriched doughs need longer kneading times, that means the gluten proteins are going to be under a lot of stress. Let them rest a little and save time in the long run.
WHAT ABOUT THESE BUNS?
Jump to Recipe
Let’s get into this delicious recipe!
NOTE: if you’re using cow milk, boil it for a couple of minutes and let it cool down until it’s lukewarm. Boiling the milk will break down some enzymes that, otherwise, could weaken the gluten network. Boil more milk than the amount in the recipe because some of it will evaporate as it heats up.
As always, dissolve the yeast in the lukewarm milk and let it sit for a few minutes. You can add a pinch of sugar and when the mixture is frothy, the yeast is active!
Add the eggs, sugar, and spices to the yeast mixture and give it a good whisk. I like to add the spices to the liquid ingredients because I think they can infuse more aromas this way. But if you prefer to mix them with the flour it’s fine too.
Then add the sifted flour and combine everything until you don’t see dry flour particles. You should have a sticky mess, a bit runny even.

Cover the dough and let it rest for 20-30 minutes. This step will allow the flour particles to hydrate so the gluten proteins are at full strength when you start kneading.
After the autolysis period, add the salt and start kneading.

When the dough starts being elastic add the softened butter and keep kneading.

When the dough is elastic enough (it should be smooth), add the dry fruits and knead just enough to integrate all the fruits.
Make a ball with the dough and place it in a lightly oiled container. It’s better to use vegetable or canola oil, because they have milder flavors than, for example, olive oil.

NOTE: the dough should pass the windowpane test. Let the dough rest 5 minutes before checking it. If you can see some of the fruits through the dough and it doesn’t tear apart, that’s a good sign of proper gluten development.
HOW TO PREPARE THE FRUITS
Typically, this recipe calls for raisins, but I like to add a bit of everything. You can add candied orange, dry apricots, candied green cherries…
The night before (preferably), or at least a few hours before, mix the raisins (and other very dry fruits you might use) with about ¼ cup of some liquid. You can use tea, freshly squeezed orange juice, or even rum or sherry if you don’t mind the alcohol. Close the container and shake it every now and then to make sure all the fruits get to soak some liquid. Strain the fruits before adding them to the dough. You don’t want to incorporate too much liquid to the dough.

ROOM TEMPERATURE VS. OVERNIGHT FERMENTATION
If you want to bake the buns the same day, let the dough rise at room temperature until it has almost doubled in size, deflate it very well and knead it for 1 minute to get rid of big air pockets.
If you prefer to do a cold fermentation let the dough ferment at room temperature for about 30 minutes and then transfer it to the fridge and let it rise overnight. The next morning take the dough out of the fridge and let it warm up a little bit (30mins to 1h, depending on the temperature of your kitchen), deflate it very well and knead it for 1 minute.

Line a 16x12in (40x30cm) with parchment paper. Divide the dough into 12 pieces of similar weight.
NOTE: I had to use a smaller pan and bake the other 3 buns apart because I forgot my 16×12 pan was in the freezer! 😊

Cover it with plastic wrap and let the buns rise until they look puffy and they increased in size. They don’t need to double in size necessarily, just make sure the dough feels puffy, not hard. The buns should touch each other too.

MAKE THE CROSS AND PREPARE THE BUNS FOR BAKING
***preheat your oven at 375F (190C)***
To prepare the paste just mix the all-purpose flour, icing sugar and milk. It must be a pest. So, it’s better to add the milk little by little until you have the right consistency. The amount of milk depends on the flour you use, play around with the ratio as long as you end up with a paste.

Now that the paste is ready, let’s finish up these buns! Prepare the egg wash, and brush the buns with it BEFORE you pipe the cross. I emphasize before, because I didn’t do it and brushing the buns when the cross was already there was tricky, to say the least!

With a piping bag, make the crosses. Don’t be afraid! I know there’s a lot of pressure but don’t let the piping part intimidate you 😊
Place the buns in the preheated oven and let them bake until they have a nice golden brown color. If your oven doesn’t bake evenly, turn the pan 180 degrees halfway.
When ready, take them out of the oven and let them cool down for 5 minutes before you take them out of the pan.


Enjoy!

Super Soft Hot Cross Buns
Ingredients
Dough
- 500 g bread flour
- 280-320 g lukewarm milk depends on the protein content of your flour. Start with the lesser amount and add more if needed.
- 1 L egg
- 1 L yolk
- 90 g softened butter
- 50 g brown sugar
- 1 tsp salt
- 7 g active dry yeast
- 1 tsp ground cinnamon
- 1 tsp ground allspice
- 1/4 tsp nutmeg optional
- 1 1/2 tsp vanilla extract
- zest of 1 orange
Fruits
- 100 g dark raisins
- 50 g golden raisins
- 50 g glazed green cherries optional
- 2 tbsp dark rum
- 2 tbsp orange syrup
- 1 tbsp water
Cross paste
- 60 g all purpose flour
- 24 g icing sugar
- 80-90 g cold milk amount could vary
Instructions
Dough
-
Combine yeast and lukewarm milk, mix until the yeast is dissolved and let it sit for 10 minutes to activate the yeast.
-
Add the eggs, spices, vanilla extract, orange zest, and salt to the yeast mixture and combine very well.
-
Sift the flour and add it to the wet ingredients. Combine everything until you don’t see dry flour particles. Let it rest for 20-30 minutes
-
Start kneading with the paddle attachment until the dough starts coming off the sides of the bowl.
-
Change to the hook attachment and knead for a few minutes or until you see it’s starting to be elastic and add the butter little by little
-
Keep kneading until the dough is no longer sticky, it comes off the bowl completely and it’s very elastic. It should pass the windowpane test.
-
Add the drained fruits and knead just until they are incorporated into the dough
-
Place the dough into an oiled container, cover and let it ferment until it almost doubles in size.
-
Deflate the dough very well and divide it into 12 portions of equal weight.
-
Roll each portion into a ball an place them into a 16x12in pan lined with parchment paper. Cover and let them rise until they’re puffy and touching each other.
-
Preheat your oven at 375F
-
Brush the buns with egg wash and with a piping bag make the crosses.
-
Bake the buns for about 22 minutes or until they’re golden brown. Keep an eye on them after 20 minutes.
-
Take the buns out of the oven and wait 5 minutes before taking them out of the pan.
Fruits
-
The night before combine the fruits with the rum, syrup, and water in a container. Close it and shake it once in a while to redistribute the liquid
-
Drain the liquid before adding the fruits to the dough
Cross paste
-
Mix the flour and the icing sugar
-
Start adding the milk little by little until you get the right viscous consistency. Whisk the mixture well until there are no lumps.
Recipe Notes
The glazed cherries are completely optional, I like to add them because of their intense color.
The nutmeg is optional too. I like how it can intensify other aromas, but the buns can be perfectly fine without it too.
For best storage wait until the buns cooled down completely and put them into a sealed plastic bag. Keep at room temperature
Pulp crackers – rich in fiber!

Hello guys! I am back!!!
These last few months have been a roller coaster. This is my last semester in my PhD program and I was full time writing. I never realized under how much stress I was until I finally defended my dissertation. It felt as if I took a heavy load off my shoulders. I can’t tell you how much better I’m sleeping now! And my bread-creative mind is starting to function again! I have this “to-bake” list that I carry with me everywhere and every time I have an idea, or I see a bread I want to make, I write it down. Welp… I haven’t written anything down in the last few months (I still have a long list of breads I want to make).
There’s this thing about me, when I’m anxious I crave weird things. And I had been craving horchata for the longest time!
Note: Do not mistake with Mexican horchata, which is a different beverage made with rice and milk.
Spanish horchata is a vegetable milk made from tiger nuts (also known as chufa seeds) typical from the south-east of Spain (Valencia). Chufas are naturally sweet with a very distinct flavor. A cold glass of horchata is one of the best beverages for hot summer days! I bought a small packet on amazon and I made my vegetable milk. It’s very easy to make, the only thing is that the seeds are very hard and dry, so you need to soak them for at least 24h (best results after 48-72h). Then put them in your blender with water and strain the mixture!
I was so happy with my horchata! Plus, tiger nuts are rich in resistant starch, which is a type of starch that is not digested and counts as dietary fiber (yeah!). With ½ pound of seeds, I made about 40 oz of this vegetable milk aaaand I had a bunch of leftover pulp!
Why you should use leftover pulp
The pulp is rich in dietary fiber too, so I didn’t want to throw it away because it’s the healthiest part. Throwing the pulp away (or cereal bran, fruit peel etc.) is like finding a diamond full of dirt, keeping the dirt and throwing the diamond away. Crazy right?! So, I used the pulp to make crackers! I had enough to make lots of crackers and they can last a long time in an airtight container 😊
The reason I am posting this recipe is because all of us, at some point, might have some “edible leftovers” that are packed with nutrients, but we toss them because we don’t know that to do with them. Not only this recipe will help you to use valuable leftovers, but also to reduce food waste.
Let’s make some crackers!
This dough is super easy to make, you don’t have to knead too much, just enough to have a good ball of dough. This might be one of the few cases were developing the gluten network very well its not crucial. You can also add whatever spices or seeds you like to the dough. And, of course, you can adjust this recipe to any type of pulp you have. You can use almond pulp, cashew pulp, okara… Or you can switch it for any cereal bran or fruit peels… Your choice!
In this recipe I use butter because I was looking for that flaky texture but if you don’t want to use butter, substitute it for shortening or any vegetable oil. If you want to make the crackers healthier, you don’t have to use any type of fat, maybe just a bit more water. But the crackers won’t be as flaky.
The only requirement here is to be able to make a nice dough ball. Not too sticky, not too dry. That’s it, that’s my secret

Start by mixing flour and the rest of the dry ingredients and then add the pulp and the butter.
Then blend the butter with the flour and pulp. You can use a pastry blender, a fork or your hands, whatever is more comfortable for you. I did it by hand.
You should have small pieces of solid butter

Then start adding the cold water. Do it little by little, controlling you don’t add too much. We’re not looking for a wet dough.

Knead the dough for a few minutes and with a rolling pin roll it on parchment paper to your desired thickness. My crackers were about 1/5 of an inch (0.5 cm). The thicker the crackers, the longer the baking time, just keep that in mind.

With a knife or a cookie cutter cut the crackers. Trim the edges and roll the dough again on another piece of parchment paper. By doing this you don’t need to transfer the crackers and mess their shape. And remember, you can use parchment paper several times before you discard it. You can do this as well using silicone baking sheets.

With a fork or a toothpick prick the crackers so during baking they won’t puff.

You can brush the crackers with oil or egg if you want, I didn’t. Sprinkle your favorite toppings and bake the crackers!
I like to sprinkle coarse salt or black pepper, but you can use whatever you like.
Baking time: it depends, bake the crackers at 400 F (205 C) and after 5-7 minutes (less time if your crackers are thinner) Check the crackers, if they’re not ready let them bake a bit longer but keep an eye on them. When they start getting some color they’ll be almost ready! Don’t let them bake too long or they will get hard and the taste might not be good.
NOTE: keep in mind that because of how the heat is transferred in your oven and the thickness of the crackers, some might take longer time than others. So don’t worry if you need to take some out of the oven while others are not fully cooked yet.
Now, go make some hummus and enjoy these crackers!


Tiger nuts pulp crackers
An easy way to use leftovers packed with nutrients!
Ingredients
- 300 g bread flour
- 150-200 g finely ground tiger nut pulp (any other pulp works too)
- 75 g butter (optional)
- 100-160 g water
- 2 tsp salt
- 1 tbsp baking powder
- 1/2 tbsp sugar (optional)
- 2 tbsp sesame seeds (optional)
Instructions
-
Preheat your oven at 400 F (205 C)
-
Mix dry ingredients, spices, seeds and pulp
-
Add cold butter and blend it in with your hands or a pastry blender until you have small pieces of butter evenly distributed
-
Start adding cold water little by little until you have a cohesive ball of dough. Not too dry and not too wet
-
Knead the dough a little bit and let it rest 20 mins
-
Roll the dough onto a piece of parchment paper to the desired thickness and with a cookie cutter or a knife cut the crackers.
-
Trim the edges, roll them out again and keep cutting crackers
-
Prick the crackers with a fork or a toothpick and add your toppings (salt, black pepper, dried onion…)
-
Bake for 5-7 minutes keeping an eye on them. After that time take out the crackers that have a nice brown color and keep baking the rest.
-
Enjoy!
Recipe Notes
You can customize this recipe as you wish. Add spices, herbs… Change the tiger nuts pulp for something else.
Keep in mind that the pulp I used was moist and that affects the total water I used. If you use cereal bran you might need more water.

Vegan Hokkaido Milk Bread
This past January I decided to bake only vegan
For the past 2 years or so I’ve been following a mostly plant-based diet. Not continuously, but I did reduce significantly the
If you read my previous post, you know fiber is important for me, and a vegan diet it’s full of it! To be honest, I think all these benefits I get from eating vegetables are, in part, related to an improvement in my gut microbiota. My lovely gut bugs are having a feast with all this fiber! Plus, I did lose some weight because I am eating healthier.
NOTE: I have been tracking my diet and protein intake with a nutritionist. So, if you want to change your diet, and especially if you have any health condition whatsoever, you should talk to your doctor or a nutritionist first. A vegan diet works for me and I really feel the benefits, but it doesn’t have to be the same for you. With that being said, and regardless of your diet… eat your veggies! 😊
LET’S VEGANIZE A RECIPE!
Or… You can jump to the Recipe!
Since I started flirting with a plant-based diet I’ve been having the same question in the back on my mind: how do you replace eggs in bread baking? You can always switch butter with a non-dairy option, or vegetable oil… but eggs? Then it kicked me, what are eggs but a mixture of fat (yolk) and liquid protein (whites)? All I had to do was replace the yolks with more fat and add a bit more liquid to make up for the whites. An oil and water emulsion should work perfectly!
The first thing that came to my mind was my Hokkaido bread recipe. It uses whipping cream as part of the liquid and it gives it an incredible crumb texture. I just thought that whipping cream can be easily replaced by coconut milk. My recipe only calls for 1 egg so I thought my experiment shouldn’t go too bad…
WHAT MAKES HOKKAIDO BREAD SPECIAL?
Something that defines Hokkaido milk bread is the Tangzhong method. This method is original from Asian countries (although now it’s widely used) and it really makes a difference in enriched doughs. Essentially, it’s a water roux. You cook a small amount of the flour of the recipe with part of the liquid of the recipe. When you start cooking the flour/liquid mixture, it’s just liquid. The more it heats up, the thicker it gets, until you end up with a paste, the
WHAT HAPPENS TO THE STARCH?
The reason the
WHY DOES TANGZHONG IMPROVE THE TEXTURE?
The role of starch in bread making is important because the particles get stuck to the gluten matrix and
But this method goes beyond that! All the starch in the dough will gelatinize at some point during baking, but the pre-gelatinized starch of the
LET’S GO WITH THE RECIPE!
The first thing you need to do is prepare the
Mix the flour, the cold water, and the cold milk in a saucepan and give it a whisk until you don’t see flour lumps. Then start to heat it at medium heat (my stove has 10 levels of heat, I use the 6). Stir the mixture all the time, after a few minutes you’ll start seeing lumps, like custard-like lumps. Keep stirring, at some point I’d say to do it vigorously to be able to have a homogeneous paste. When you stir and start to see the bottom of the pan, pay attention! It’ll take no time to be ready! (I’m sorry, I Prepared it ahead of time and forgot to take a picture of mine).
Once it’s ready, transfer it to a bowl and cover it with plastic wrap. Make sure the wrap touches the surface. This way you won’t have the “skin
Let it cool down to room temperature. You can refrigerate it until you use it. Just make sure you don’t add it to the dough too cold. It might slow down fermentation times.
NOTE: once it cools down it’ll get harder, but don’t worry, it’s normal!

As always, to make the dough we first activate the yeast in the soy milk (or vegetable milk of your preference). If you want, you can add a bit of sugar from the recipe (about 1 tsp).

Then the yeast mixture is foamy, add it to a bowl, add the sugar, the coconut milk, the
Prepare the emulsion: mix the water and the olive oil until you get a with-ish viscous liquid.
In a separate bowl, sift the flour and the salt, and then add the wet ingredients, the emulsion and mix it with your hands until you don’t see dry flour particles.

Let it rest 20 or 30 minutes so the flour particles can hydrate.
Knead the dough very well, it should pass the “window pane test” and it should be elastic and smooth. Try not to use too much flour if you knead by hand, otherwise, you will change the flour

Lightly oil a container and place the dough in it. Let it rest until It has doubled in size.
Deflate the dough and separate it into 2 equal pieces. This recipe yields 2 loaves.

Take one of the balls, divide it into 4 pieces of equal weight and round each piece into a ball. Cover with a loose plastic wrap or a damped clean towel and let the balls rest 5 or 10 minutes so the gluten can relax a little bit and shaping the loaf can be easier!
Take one of
With a rolling pin, roll the dough into a larger oval. The length should be 20-22 (8-9 in approx.) cm and the width should be the width of your baking pan (My pan is 9.5 x 5 in – 23.9 x 12.6 cm).

Take the narrower side and start rolling the dough into a log. Place the log in the baking pan.


Do the same with the other 3 pieces of dough and cover the pan.
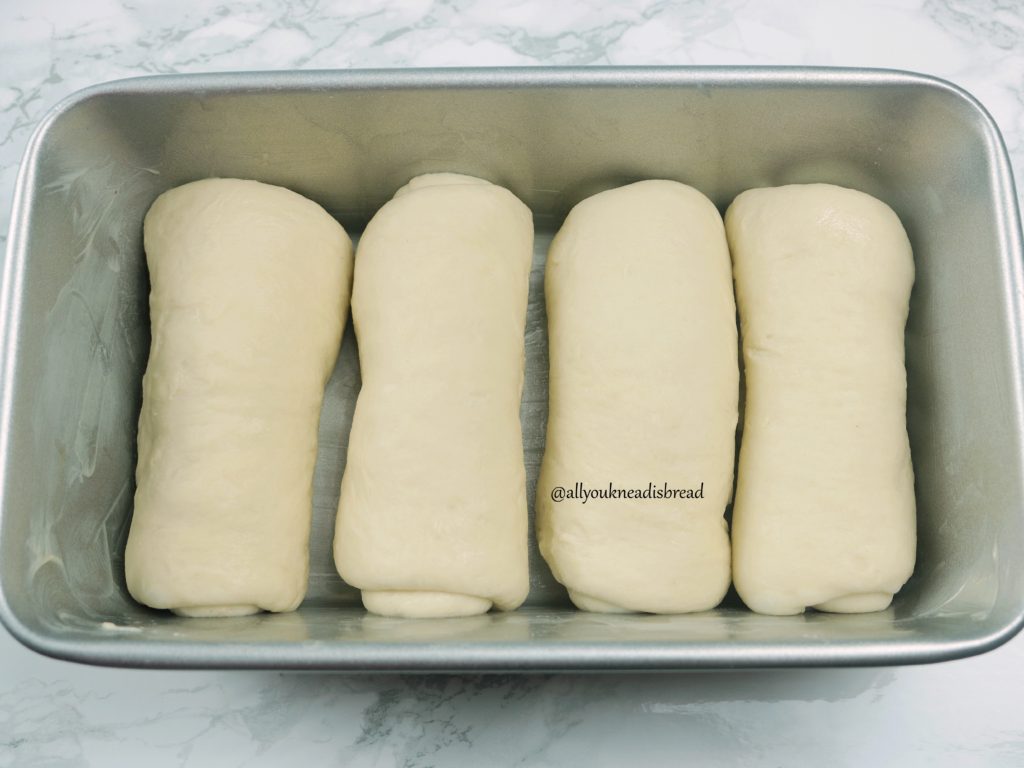
Let the loaf rise until it’s puffy. It doesn’t have to necessarily double in size. Just make sure it did grow and when you touch the dough, it puffs back slowly.

While you’re waiting for the dough to proof, preheat your oven at 350F (177 C).
Before baking, I brushed the dough with coconut milk leftovers. You can use soy milk or vegan butter… Whatever you prefer. I tried coconut milk and I liked the result!
If you see the bread is getting dark too quickly, reduce the temperature to 340F (171C) and cover it with aluminum foil.
Once you finish baking take the pan out of the oven and put it in a cooling rack for 20 mins before you take the bread out. The bread is still finishing up baking inside, if you shake it too much you could destroy the crumb.

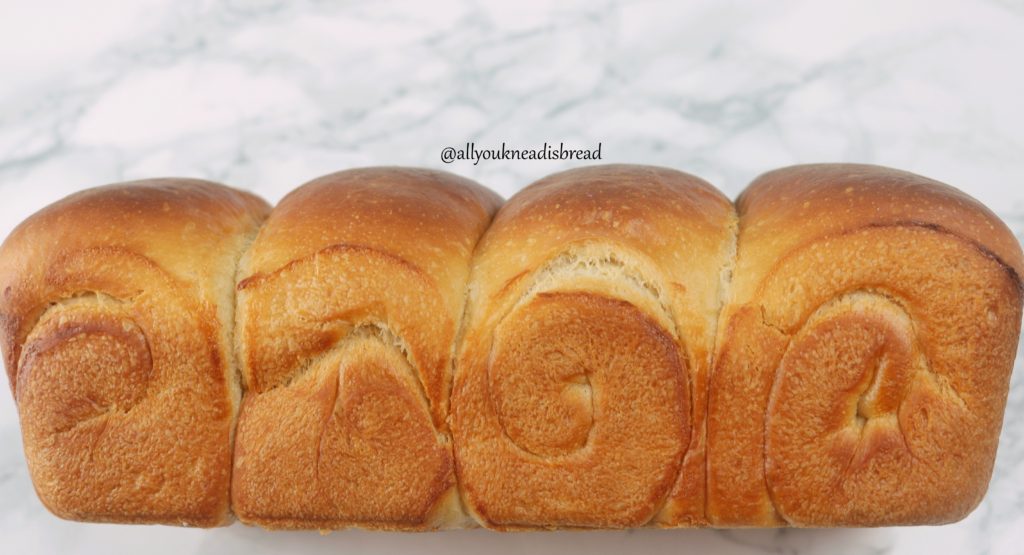
This bread is very tasty! You can definitely taste the coconut, but the flavors are totally balanced. The coconut is not overwhelming. The crumb is very soft and cohesive. Look at how it “peels”!
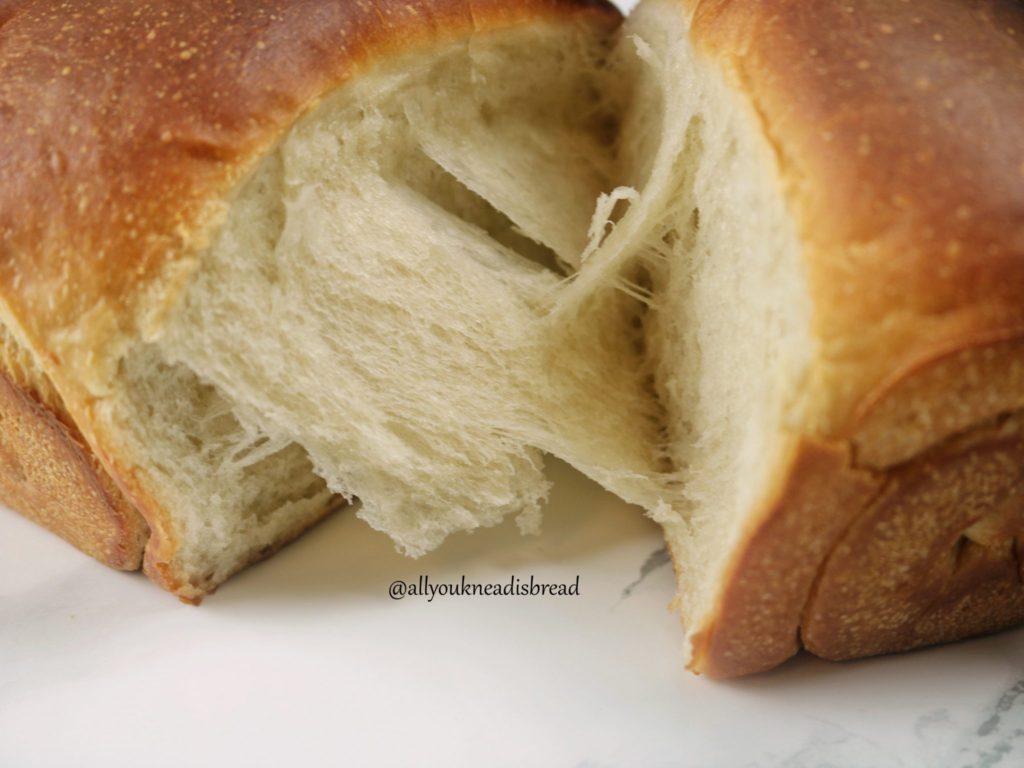
Once the bread has cooled down to room temperature you can store it in a Ziplock bag.
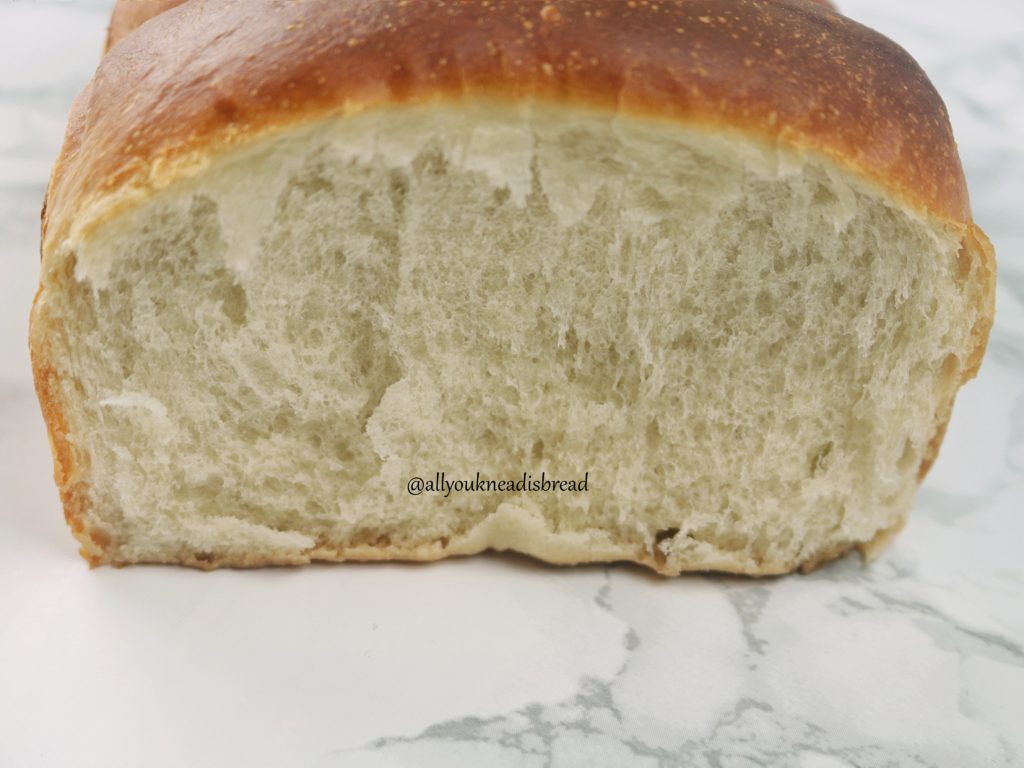
I baked it in the evening and ate a piece, it was very good. But in my opinion, it was even better the next morning!

Vegan Hokkaido Milk Bread
This is a vegan version of a Hokkaido Milk Bread recipe
Ingredients
Tangzhong
- 30 g bread flour
- 85 g water
- 85 g soy milk
Dough
- 575 g bread flour
- 7 g active dry yeast
- 80 g sugar
- 8 g salt
- 2 tsp vanilla extract
- 25 g water for emulsion
- 25 g olive oil for emulsion
- 200 g full fat coconut milk
- 200 g soy milk
Instructions
Tangzhong
-
Mix the flour, water, and milk very well in a saucepan. You shouldn’t see lumps.
-
Start heating the mixture at medium heat and stir continuously until it thickens and turns into a paste.
-
Once ready, cover it with a plastic wrap and refrigerate it until you need it. You can make the tangzhong the day before.
Dough
-
Mix the soy milk at room temperature with 1 tsp of the total sugar and the yeast and stir until everything dissolves. Wait until it’s foamy.
-
In a separate bowl sift the flour and the salt
-
When the yeast is active add the sugar and the tangzhong and mix it very well
-
Add the coconut milk to the liquid mixture and stir well
-
Mix 25 g of water and 25 g of olive oil and stir until you get a whit-ish yellow-ish viscous liquid
-
Add the wet ingredients to the flour.
-
Add the oil/water emulsion
-
Mix until you don’t see dry flour particles.
-
Let the dough rest 20-30 mins to allow the flour to absorb moisture.
-
Knead the dough very well until you can stretch it into a thin layer without tearing apart. It shouldn’t be very sticky
-
Let the dough rest until it doubles in size
-
Divide the dough into two parts of equal weight.
-
Divide one of the parts into four equal pieces, shape them into a small ball and let them rest for 5 minutes.
-
Take one of the pieces, flatten it with your hand into an oval and with a rolling pin stretch the oval into a larger one. The narrow side should be as wide as the narrow side of your baking pan.
-
Roll the piece of dough into a log and place it in a lightly oiled baking pan.
-
Do the same for the other 3 pieces.
-
Preheat your oven at 340F
-
Let the dough rise until it’s puffy. It might take up to 1h or 1h30mins
-
Bake the loaves until they’re a nice brown color. If you think the inside is not ready and the dough is starting to get too dark cover it with a piece of aluminum foil.
NOTE: With the other half of dough, you can either make another loaf, or dinner rolls, or anything you want. Deflate it very well, shape it the way you like it and let it rise at room temperature. If you want to retard the fermentation, let it rest 30 mins at room temperature first, and then move it to the fridge up to 12-14h. More than that might result in big bubbles that can burn during baking.

Fiber packed loaf
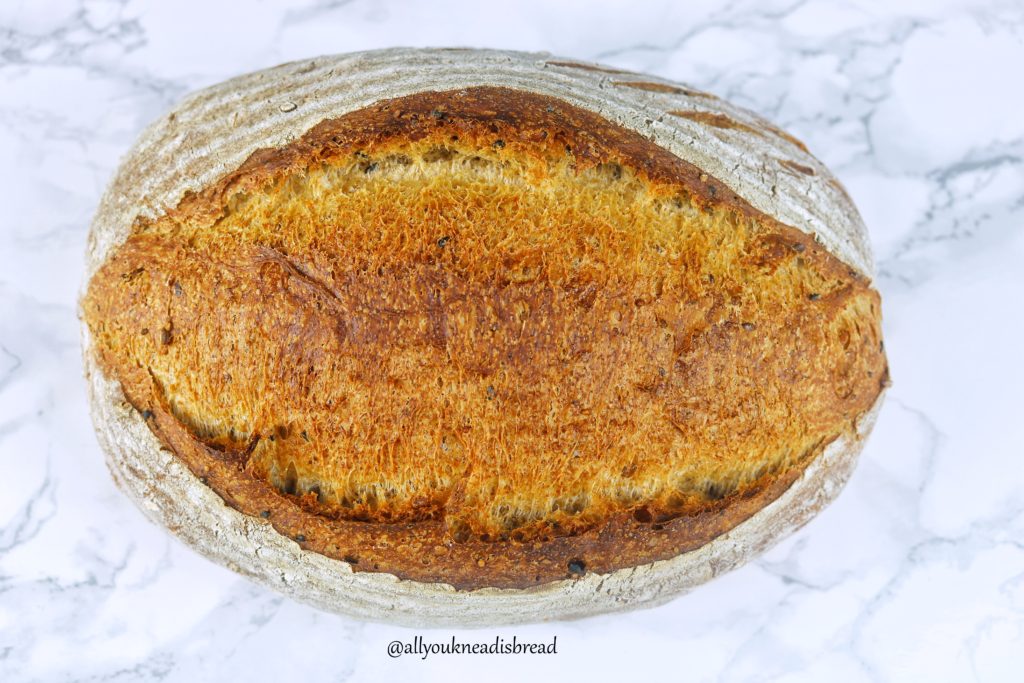
Hello everyone! Happy New Year even though it’s mid-January already! 😊
I hope you all had a wonderful holiday time! I sure did! We spent Christmas in NYC and it was so pretty! It was a great trip, we disconnected from the routine and eat some delicious food! (I’m looking at you, Queens Chinatown!). We walked, walked, walked… My fitbit was so happy!
Unfortunately, the holidays are over, and we have a new chance to start living a healthier life. Less sugar, more veggies, more FIBER.
For those who don’t know, I do research on high fiber bread, so I know a bit about the importance of eating fiber and I know how difficult it is sometimes to eat the 25g/day that the FDA recommends.
This is what 25g of fiber looks like:
- 1.2 kg of boiled kale OR
- 240 g of old fashioned oats OR
- 2.7 Kg of grapes OR
- 1 kg of broccoli
It’s very possible you’re not eating enough fiber. But what if you change your bread slices for whole grain bread? Bread is an excellent way to increase our fiber intake because it’s everywhere! Morning toasts, lunch sandwiches, dinner rolls, garlic bread, snack crackers… you name it!
Easy, right?
NOPE
If you’ve baked a few loaves, you might now already how difficult it is to bake with whole wheat flour, and more so if you want to add more grains or a mixture of flour with less (or none) gluten.
I could literally go on a full essay on why this happens (currently writing my dissertation, it’d be a copy/paste lol), but long story short: THE GLUTEN NETWORK.
A little bit of nerdy talk.
What happens when there’s fiber in the bread dough?
We all know that gluten is what makes the dough elastic, what helps the dough retain the gas the yeast releases and what helps the baked bread have that particular structure and soft crumb. When we add fiber (as cereal bran, whole grains etc.) there are three major things that happen in the bread:
1.-The replacement some of the flour with some cereal bran, grains etc. that DON’T have gluten, so for the same weight of bread,
2.- Competition for water between gluten proteins and fiber. Gluten proteins need water to bind to each other and create the gluten network. Without enough water, the network can’t be developed properly, and it’d be weaker. BUT fiber loves water too and can take it faster than the gluten proteins, so they cannot build a good gluten network.
3.- We’re still not sure about how it works, but some molecules present in the cereal bran might interact with the gluten proteins and weaken the gluten structure, making the dough more prone to collapse during fermentation and/or baking.
Basically, everything that makes bread healthier, destroys its structure (and texture, and quality).
OH, THE IRONY!
With this recipe, I had to face another problem: whole rye flour. Rye flour has a different type of gluten and it works a bit different. It’s going to affect the dough and the final bread.
Lucky for us, we can add a bit of magic to our dough, that is: vital wheat gluten.
For those who are not sure about adding “weird” things to your bread I’ll say this: Unless you have a gluten allergy or sensitivity, adding extra gluten to your bread it’s perfectly safe. If you do have a problem with it, you probably wouldn’t be eating bread anyway.
You can make this recipe without the extra gluten, but the dough will be less elastic and the bread will have a denser crumb. I’ve tried with and without and the difference is palpable!
Why is fiber so healthy?
We all know fiber is good, but why?
You know fiber helps us… ehm… to go to the toilet more regularly! And this is important because that’s the way our body has to get rid of toxins and sometimes even cells that are acting weird and could become cancerous. Fiber also helps us regulate the bad cholesterol, it makes us feel full for
FIBER FEEDS THE GUT MICROBIOTA! Fiber is super important to keep your gut bacteria healthy and balanced. And gut bacteria is EVERYTHING! Everyday there are new studies that link our gut bacteria to something unexpected like mental health or neurodegenerative diseases. It’s an amazing field of research by itself.
Seriously, I cannot stress enough how important fiber is for the proper functioning of our body. So please, please, please… today more than ever: eat your veggies!
Now, this doesn’t mean that eating all the veggies and all the fiber is going to fix all our problems. But it will significantly reduce the probability of developing other problems or suffering other diseases, and help you have a healthier lifestyle 😉
This bread is also vegan, so if you’re lactose-free, egg-free, vegan or taking part in Veganuary this is your bread!
Without further ado, here are my notes on the recipe!

The very first thing to do is to soak the grains that would take up lots of water. Oats, chia seeds, wheat grains and millet in my case. But feel free to add whatever you want!
Boil some water and add it to where you have your grains. Don’t worry about the amount, just make sure there’s plenty. You’ll rinse the water later on.
Let the grains soak until the water is at room temperature or lukewarm. In the meanwhile, you can prepare the rest of the ingredients.
Mix all the flours, the salt and the vital wheat gluten ( I like to add the salt now because this dough is a bit reluctant to absorb it later on. But you can perfectly add the salt later if you prefer).
Take 300 g of water and dissolve the sugar and the yeast in it. Start with just 300g you’ll add more water with the grains that are soaking and your flour might not have as much protein as mine, so start with 300 and add more gradually if needed.
Once the temperature of the soaking grains is okay, use a colander and get rid of as much water as you can. It should be viscous and the grains should be swollen
To the yeast mixture add the soaked grains and mix well.

Then add the sesame and flax seeds.

Add the wet ingredients to the flour mixture and mix until you don’t see wet particles. If the dough doesn’t come together add more water, 1 tbsp at a time. I used 350 g of water.

Let the dough rest for 25mins to make sure the water can be absorbed by the flour particles.
After the autolysis period, start kneading the dough and when it starts getting a bit of consistency, add the oil little by little and knead until the dough is no longer sticky and has a good elasticity.

You can replace the oil with whatever other fat of your choice. I like to use olive oil because it’s a good source of omega 3 and I love the taste . Plus, I wanted to make this bread vegan because I am doing veganuary! 😊
I love this dough! The extra gluten works wonders. You’ll see how great it is to knead!
When the dough is ready, place it in a lightly oiled container and let it ferment until it doubles in size. This recipe yields 2 loaves.

Deflate the dough and separate it into two equal balls and let them rest, covered, for 5 minutes

Shape the dough and use either a metallic mold or a banneton. I used bannetons because I wanted a “rustic” loaf.

Let the dough rise until is puffy. Follow the “poke” test to know how your dough is.
Turn on your oven at 450F. If you’re using a pizza stone or a dutch oven let them heat up inside of the oven.
Before placing the dough in the oven score it (Make a deep cut), you can even practice a bit your scoring skills, this is a very nice dough to do so because it’s easy to cut through.

Put the bread in the oven and let the magic happen!
If you’re using a pizza stone, make sure you generate enough steam inside to allow a proper oven rise. If you use a dutch oven, you can spray a bit of water on the dough or even put a little piece of ice inside.
If you’re using a dutch oven, take the lid off after 25mins of baking and keep baking until it gets a nice brown color.
Take the bread out of the oven and let it cool down. Right after baking the bread might feel a bit hard, but the crust will soften. This bread is perfect for sandwiches!


Fiber packed loaf
Ingredients
- 140 g whole wheat flour
- 60 g whole rye flour
- 360 g bread flour
- 17 g vital wheat gluten
- 20 g extra virgin olive oil
- 14 g brown sugar
- 10 g salt
- 1/2 cup mixed grains (millet, oats, wheat, chia seeds)
- 2 tbsp white sesame seeds
- 2 tbsp black sesame seeds
- 2 tbsp flax seeds
- 7 g active dry yeast
- 300-350 g water
Instructions
-
Soak the grains with boiling water and let them rest until they cool down to room temperature.
-
Mix the whole wheat flour, bread flour, rye flour, vital wheat gluten, and salt.
-
Dissolve the yeast and the sugar in 300 g of water and let it rest for 5 minutes to activate the yeast.
-
When the soaking grains are at room temperature use a strainer or colander to drain the water and add them to the yeast mixture.
-
Add the seeds to the yeast and grains mixture and mix thoroughly.
-
Add the wet ingredients to the dry ingredients and mix with your hand until you don’t see dry flour particles. Adjust water if needed 1 tbsp at a time.
-
Cover the dough and let it rest for 25 minutes.
-
Start kneading the dough and when it starts to be elastic add the oil little by little.
-
Keep kneading until the dough is no longer sticky and it’s very elastic.
-
Place the dough in a lightly oiled container and let it ferment, covered, until it doubles in size (about 2h in a cold kitchen – approx time).
-
Deflate the dough and separate it into 2 equal parts.
-
Roll each part into a ball, cover them and let them rest for 5 minutes.
-
Shape each loaf and place it in a floured banneton or a couche or a lightly oiled Pullman pan.
-
Let the loaves ferment until they’re puffy (about 1h in my kitchen). They don’t have to necessarily double in size.
-
Preheat your oven at 450 F with the pizza stone or dutch oven inside if you’re using any of those.
-
When the loaves are ready, take them out of the bannetons, score them (avoid scoring if you’re using a Pullman pan), and put them inside of the dutch oven or on top of the pizza stone.
-
Bake for 25 minutes and remove the lid of the dutch oven if using it. If no, bake for 45 minutes or until the loaves have a nice brown color.
Enjoy!

Homemade Christmas Panettone
Christmas is here! Finally! I’ve been really looking forward to the holidays. I can’t wait to turn the laptop off and completely disconnect from anything lab related!
My husband and I decided to go to NYC to spend the holidays instead of going to our home countries. And to be honest, I think it was the best decision. 2018 has been an eventful year, good and bad stuff happened, tears of joy and tears of sorrow. We need a break, a real one. Like a big apple break! Which means I’m not cooking anything for Christmas!
However, I know many people will, and you’ll be looking to impress your guests.
So *guest* what?? (Did you see what I did there? Lol)

It’s panettone time!!!!
Okay, let me say this. It’s NOT the original recipe and I didn’t use any type of
I’ve been working on this recipe for quite a long time. This dough was difficult to handle. But there was something I was NOT going to give up on. And that’s the eggs and sugar content. Which is exactly what makes this dough so difficult to handle. But panettone has to have a strong aroma of eggs, and the yellow color, and it has to be sweet and rich and full of flavor! And it has to last fresh for a long time! Because, let’s be honest. We don’t want to go through all this work for just a couple of days of fresh panettone.
NOPE!
Now.. you do need a strong flour for this: A protein content of at the very least 14-15%.
I could’ve bough the flour online. But I wanted to try something that could be a solution for when you need high gluten flour and you forgot to order it online or you want to save some money in the long run.
I made my own high gluten flour. How? By adding more gluten!
I have wheat gluten at home because I use it to make plant base “meat”. So, what I did was: I first calculated the total amount of gluten in my recipe using a 15% protein flour. Then I calculated the actual protein content of my flour and the gluten I have. And finally, I calculated how much gluten I had to add to my flour.
I know, it sounds weird all these calculations. Don’t worry, I did the calculations for you, so you don’t have to do it. I’ll add another post on how to do it.
Once I adjusted the ingredients to the size of my molds, I tried the recipe with my flour that has 12.7% protein content. It didn’t go very well, I ended up with a cake-like crumb rather than bread.
I tried again adding the gluten. based The quality of the crumb really improved, and the panettones were fresh for 2 weeks at least! (We didn’t have any left after 2 weeks!).
WHAT’S WRONG WITH YOUR FLOUR?
Nothing. Absolutely nothing. However, think about the amount of eggs and sugar and butter panettones have. There are so many things in between the gluten molecules that it’s extremely difficult to develop the gluten network. If you do it by hand it’s going to take you forever. If you use a stand mixer you’ll have to knead the dough for a long long time, and that means that the stand mixer will transfer heat to the dough and make it too soft, and you’ll also take the risk of over kneading the dough. Because stand mixers don’t knead homogeneously. So, chances are that some parts of the dough won’t have good gluten development while other parts will be over kneaded. Long story short, the whole structure will be destroyed.
That’s why we need more protein! If there are more gluten proteins, there are more chances they’ll find each other among all the sugars and fats. Which means, you don’t have to put in such an arduous work to knead the dough, and you reduce the risk of over-kneading it
Don’t smile, it’s still gonna be tough enough lol
BACK TO THE RECIPE!
A panettone is a masterpiece. And you have to do it step by step. No rush. So pick a day that you’ll be home and you’ll have time. You can also make this bread a couple of days ahead of time. Just keep it in a plastic bag so it won’t dry out.
My recipe has two pre-ferments and the final dough. In a warm kitchen you can get it done the same day. Or you can even retard the bulk fermentation overnight in the fridge.
NOTE 1: If you don’t have the high protein flour and you decided to add gluten, make sure you mix it very well with the flour first, otherwise the moment it gets in contact with a liquid it’ll start forming the network and you won’t be able to properly mix the ingredients.
SOAKING THE FRUITS
For this recipe I used golden and dark raisins, candied orange and dried apricots.
I make the candied orange at home and I made this batch barely 1 month ago, they’re still soft, so I did not soak the orange, but I did soak the rest.
In a
I like to start soaking the fruits 1 day in advance, but if you don’t have time or forgot about it, just start soaking the fruits when you start the process. They’ll have enough time to get soft. Plus, the moisture of the dough will also help during the fermentation.
PREFERMENT 1
Once you have your flour ready, add the yeast to the water and let it sit while you whisk the eggs. Then mix the eggs, and the yeast mixture and give it a whisk. It must be very homogenous. Then add the flour and mix very well.
You should have something like a thick pancake batter. Not quite a dough.

When everything is well mixed transfer it to a tall pitcher, mine is 2.5 or 3 qt. And let this preferment rise until it triples or quadruples in size. Look for a place in your house where it’s not too cold. It’ll take some time to start growing. Be patient!
When you see the preferment is all the way to the edges of your pitcher, use your wire whisk or a spatula and try to deflate it a bit. Mine took about 1h 30 mins to 2h approx.

PREFERMENT 2
On another big bowl add the egg yolks and the sugar and mix it very well until you see the eggs getting whiter and fluffy. Then add the honey, the orange syrup (if you have) and the orange, lime and lemon zest and mix thoroughly. Then add the flour (with the gluten mixed already if using this method) and mix again.

Now add the preferment 1 and mix everything very well until you don’t have big lumps and both batters are well integrated. Cover the bowl and let it rise until it triples or quadruples in size. I left mine go up to the bowl edges. This preferment rises quicker

When preferment 2 is ready, time to roll up our sleeves and start working the dough!
FINAL DOUGH
On this
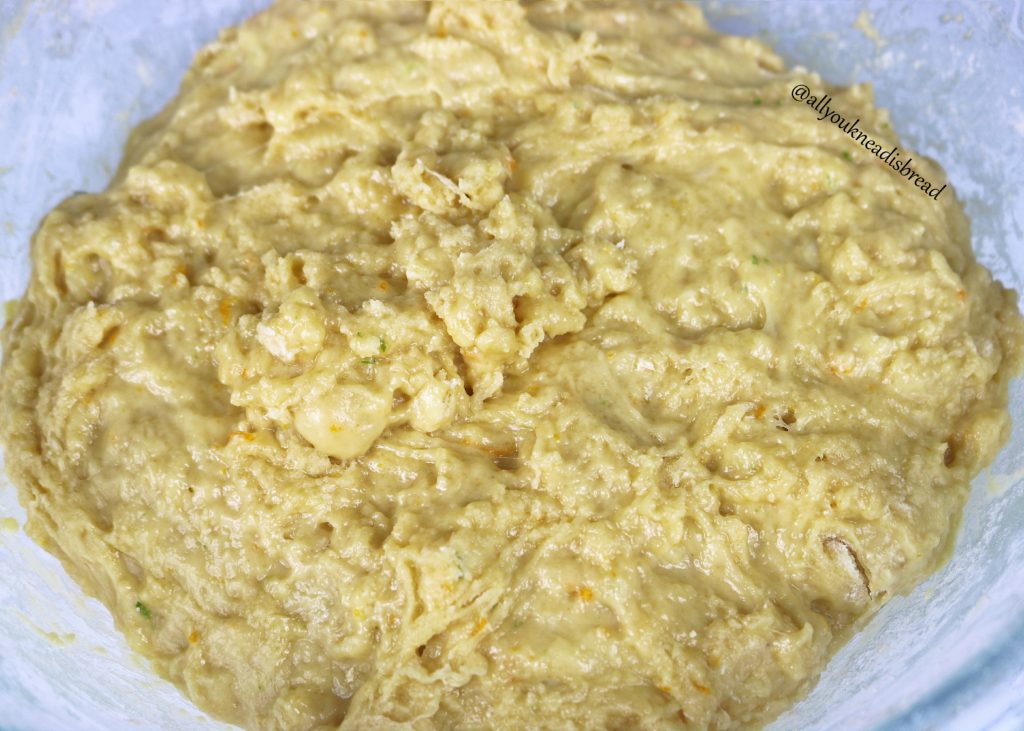
Now… start the workout! I used my stand mixer first. I used the paddle attachment on speed 3 (of 10 total speeds) for about 20 minutes or maybe a bit more. For doughs this sticky, I find the paddle attachment much more efficient to start developing the dough.
NOTE 2: If you’re using a stand mixer, be careful, when the dough starts getting some consistency, it can come up through the hook and get in between the moving parts. Just keep an eye on it!
NOTE 3: The paddle attachment is going to speed things up because the dough is too soft and somehow runny/sticky so the paddle will apply more pressure and will help develop the gluten network better at the beginning.
When I saw the dough was strong enough to pull itself from the bottom of the bowl I stopped and started to add the butter manually. Adding a bit of butter and squeezing it until it was absorbed.
You will notice the change in the consistency!
Keep kneading until the gluten has been developed properly. The dough should be very elastic and you should be able to stretch it without tearing it.

When the dough is good, let it rest 5 mins and then add the fruits. Don’t knead it too much, just enough to make sure the fruits are well distributed.

Put the dough in a lightly oiled bowl and let it ferment!
Look at how thin you can stretch the dough. That’s a sign of a proper gluten development

OPTIONAL STEP: If you think your dough is delicate you can do 3 sets of stretch and folds every 25 mins to improve the structure without destroying it.
At this point, you can place the dough in the fridge for
Let the dough rise until it doubles in size. Then deflate the dough and separate it in two equal parts.
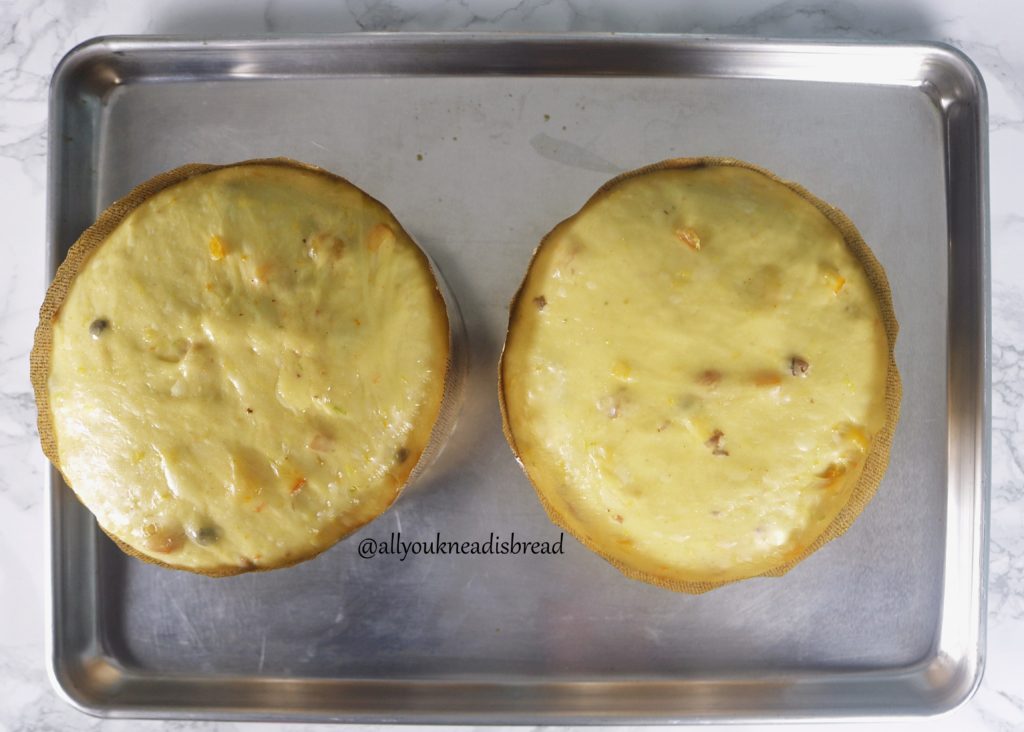
Pre-shape each part into a ball to create some tension and put them in the panettone molds. My molds are the largest ones (6″ x 4½”). The dough should occupy 3/4 of the total volume of the mold.

Preheat your oven at 350F and, in the meanwhile, let the panettones rise until the dough reaches the rim of the mold.
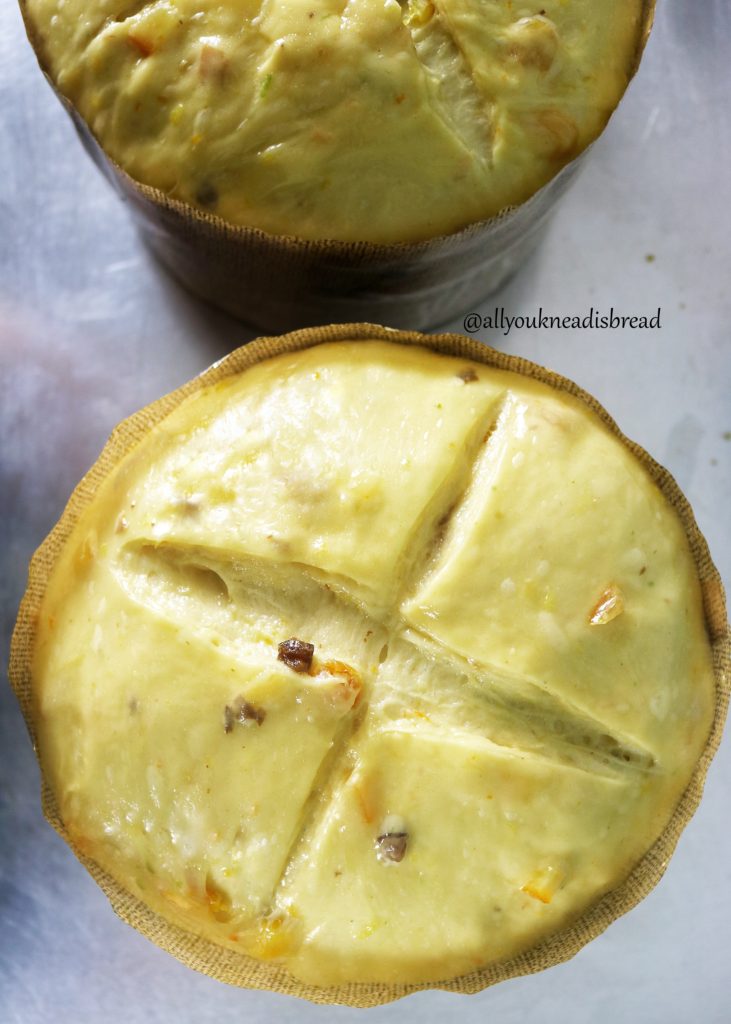
Make a cut on the top of each panettone and open it up a little bit
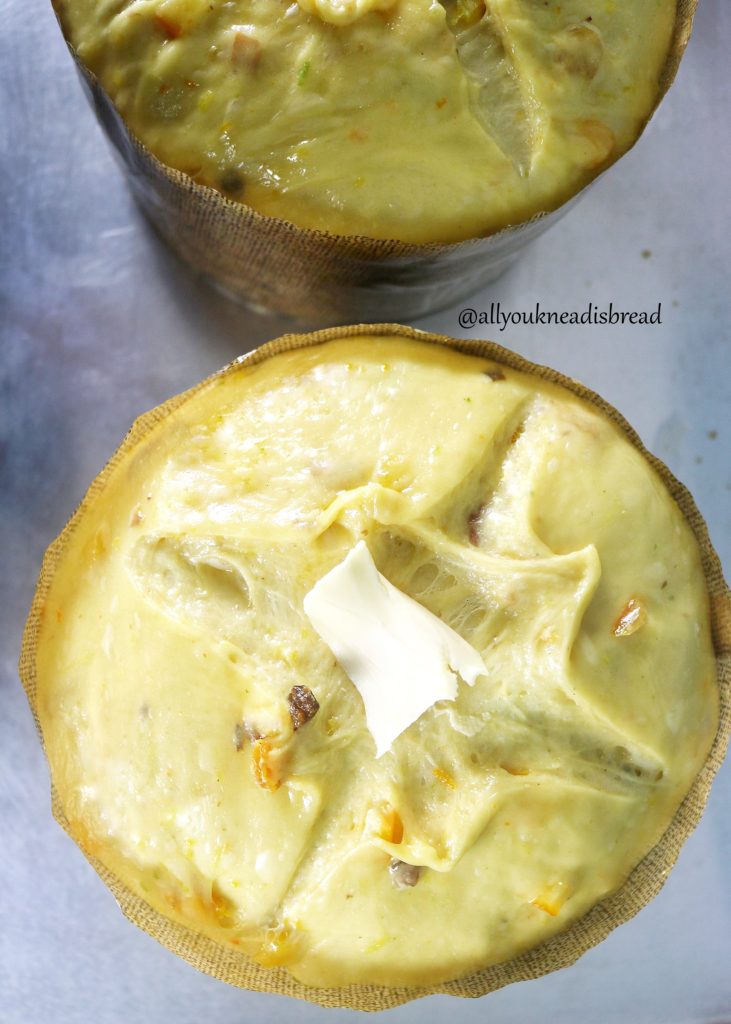
Now add a little bit of butter inside of the cut
Put the panettones in the oven and turn the oven down to 325F. This way the browning reactions won’t occur too fast.
Bake until they’re ready and immediately after baking insert a skewer in the bottom part of the panettones and hang them upside down until they cool down completely
This step is important because it’ll make sure the crumb and structure are not compromised. After baking the crumb is still finishing cooking, but it’s also too soft and too heavy, so you must be careful, or the panettones could collapse!
Once they cooled down… enjoy this Christmas delicacy! With all the work, I’m sure you’ll enjoy them even more!
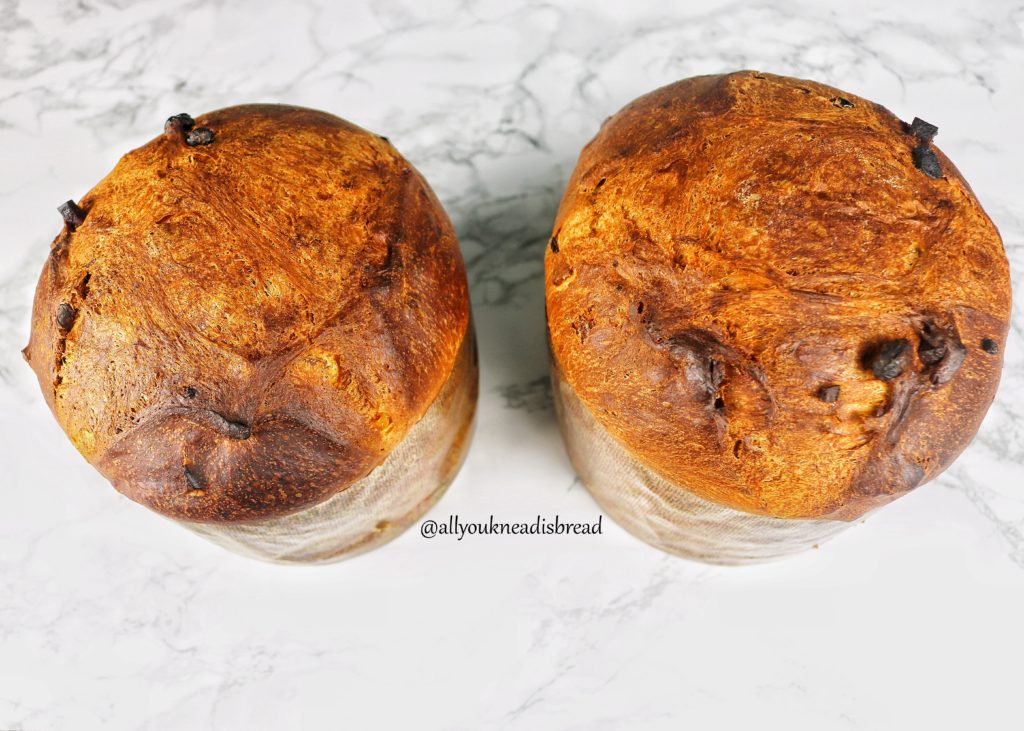
Look at this crumb! Fantastic! So cohesive and soft and yellow and it smells so good!
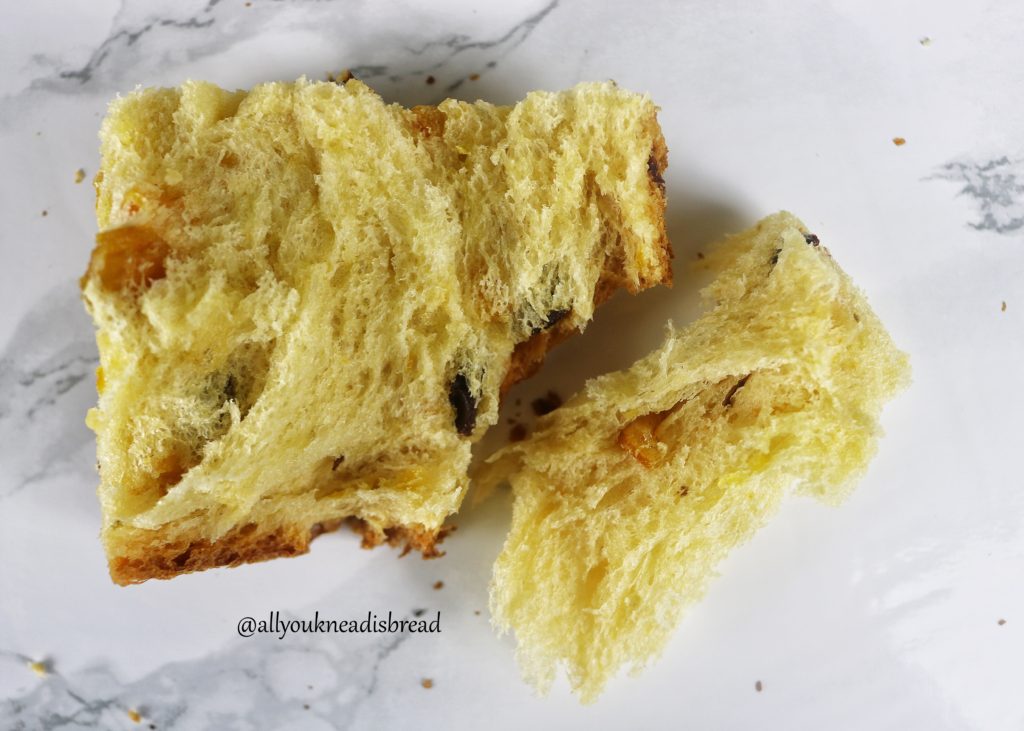
Let me know if you make these panettones or if you have any suggestion/ doubt etc.

Homemade Christmas Panettone
Ingredients
Dried fruits
- 180 g candied orange
- 110 g black raisins
- 110 g golden raisins
- 100 g dried apricots
- 40 g brown rum
Preferment 1
- 470 g bread flour
- 21 g vital wheat gluten
- 390 g water
- 3 L eggs
- 7 g active dry yeast
Preferment 2
- 200 g bread flour
- 10 g vital wheat gluten
- 5 L egg yolks
- 2 tbsp honey
- 2 tbsp orange syrup
- 100 g sugar
- 1 orange zest
- 1 lemon zest
- 1 lime zest
Dough
- 260 g bread flour
- 15 g vital wheat gluten
- 180 g sugar
- 10 g salt
- 227 g butter (2 sticks)
- 2 tbsp vanilla extract (or 2 vanilla beans)
Instructions
Dried fruits
-
Mix the raisins and apricot with the rum 24h prior baking. Shaking the container once in a while to make sure the liquid is distributed evenly.
Preferment 1
-
Mix the flour and the vital gluten
-
Dissolve the yeast in the water and let it sit for 10 minutes
-
Whisk the eggs into the yeast solution and mix very well
-
Add the flour mixture and mix until there are no dry particles
-
Let rise until it triples or quadruples its size
Preferment 2
-
Mix the flour and the vital gluten
-
Whisk the egg yolks until they thicken up a bit
-
Add the honey and orange syrup and mix them very well
-
Add the citrus zest
-
Add preferment 1 and mix very well until there are no big lumps
-
Let rise until it triples its size
Dough
-
Deflate the preferment 2 and add the sugar, vanilla extract. Mix everything very well
-
Mix the flour and the vital gluten
-
Add the flour mixture to the preferment 2 and mix thoroughly until you don’t see dry flour particles and let it rest 20 mins
-
Start kneading. About 20 mins on speed 3 with the paddle attachment of your stand mixer and later use the hook or by hand until the dough gets some consistency. I took 20-25 more minutes
-
Add the butter little by little and keep kneading until its elastic
-
Add the fruits and knead just enough to integrate them into the dough.
-
Place the dough in an oiled container and let ferment until it doubles in size (you can do this step overnight in the fridge)
-
Deflate the dough and separate it into 2 equal pieces
-
Preshape the pieces into balls and place them in the molds
-
Preheat your oven at 350 F
-
Cover the panettones with an oiled plastic wrap and let rise until it reaches the top of the mold
-
Make a cut on the panettones and add a little chunk of butter
-
Put the panettones in the oven and lower the temperature to 325F
-
Bake for about 55 minutes or until they’re brown outside and completely cooked inside.
-
Right after baking insert a skewer through each panettone and turn upside down. Let them cool down completely
Happy Holidays!

What happens to bread waste?

Hey there! These last few days I’ve been in bed with a terrible cold. Or maybe flu. I feel so much better now. I don’t sound better, but I am lol. I wanted to write something related to bread science, and this afternoon, while I was looking for articles to read I found something that immediately caught my attention:
“Bread crumbs extrudates: A new approach for reducing bread waste”
When I do experiments in the lab I bake lots of bread loaves, I take all the measurements I need and then I have to throw all that bread away. Since we use other chemicals and do other experiments our lab is not considered “safe” to eat the food we make.
Getting rid of all the bread is always very upsetting… And it makes me think about the baking industry. What do they do with all that bread waste they have?
In the baking industry, there are always problems, under and overcooked loaves, deformed loaves, mistakes in the formulation…. That’s bread that cannot be sold.
According to this article a whopping 12.5 MILLION TONS of bread per year are wasted. Just in the baking industry. I mean.. some can be used for bread crumbs but… those are way too many tons to turn into bread crumbs!
But… here comes science to the rescue!
Something that I love from food engineering is that it’s not only focused on developing new products, but also on using raw materials that are otherwise disposed of (Reducing waste and reducing the production of new materials).
This article explores the possibilities of making snacks using extruded bread.
Maybe the word “extruded” makes you cringe but worry not! Extrusion is a very common process in the food industry. Cheetos, macaroni, cheese, plant-based protein, cereals, cookie dough, French fries, and so many other products are examples of what extrusion can do.
The ingredients undergo high pressure and temperature conditions and they get shaped and cooked at somehow the same time.
After the extrusion, the product expands, and it’s usually a good signal when the expansion is relatively high because it makes the product puffy and the texture is just better.
In the video below you can see the type of machine they use. It’s not the same one, but you can have an idea of how it works and how the snack expands when it comes out of the machine.
Minute 2:02 is where you can see all this:
So what’s the deal with the bread?
Long story short, these scientists made a snack like the one on the video using bread that was going to waste. And they found that the expansion and texture of these snacks are better than the control ones made with flour. The fiber content was also higher than the initial ingredients, mostly because the starch of the bread turns into “resistant starch” (starch that cannot be digested and therefore counts as fiber).
This is particularly important because typically, food with high contents of fiber tends to either taste bad or have a poor textural quality.
So this new approach to bread waste also opens the door to many other options. The snacks can be mixed with other ingredients to increase their nutritional value. Different bread can lead to different nutritional profiles. The options are endless! This is just the beginning! And best of all?
1- We could reduce the waste of bread
2- We could have healthier options for our snacks
3- We could have cheaper
And all this while taking care of the environment, our health and our pocket!
In my opinion, this is a very good solution for a problem that’s only going to increase because the food industry keeps increasing, and therefore, the waste that comes along with it. And it’s also a good way to start developing better and healthier snacks!
I was planning on writing something about how important gluten is in bread making, but when I saw this article, I thought it was a very interesting topic and something I’d like to share with you.
Fiber up my friends!
See you soon!

Reference:
Samray, M. N., Masatcioglu, T. M., & Koksel, H. (2018). Bread Crumbs Extrudates: A New Approach for Reducing Bread Waste. Journal of Cereal Science.
No-knead overnight focaccia
I am back!
These last couple of weeks have been a bit busy. Visits, graduation ceremonies… It’s been difficult to sit down and write, write, write. But still… I’m just so excited the blog is finally live! I can only think about recipes I want to share with you or new things I want to try, or just go on a full essay about my friend “the gluten network”.
One of the biggest challenges of making bread is the time it takes. What if you need to bake something but your schedule is tight? What if your best friend comes all the way from Oregon and you just need to adapt your baking plans? Ahem… 😉
For my second post, I wanted to share a recipe that I developed by myself. Something I could call mine from start to finish. And I also needed a recipe that I could easily modify to retard the fermentation. Baking a focaccia sounded just about right. This bread is in my top 10 because of its versatility. Very customizable, perfect for any occasion, and simple to make!
As you might know, focaccia is an Italian bread, it shares some similarities with pizza, but it has fewer toppings, and instead of a round shape, focaccias are typically rectangular, which doesn’t mean that you must do it that way. You can use whatever baking tray you have! Previously I had used Italian herbs and garlic, olives… But I wanted to try something different, something like…caramelized onion and goat cheese, maybe?
Yes!
The beauty of food is that everyday ingredients can go from “okay” to “omg-this-is-so-good” with just a bit of patience and some heat. That’s the case for caramelized onions. They can turn any dish upside down!
I typically use biga to enrich my focaccia. Biga is a preferment that has flour, water and a very small amount of yeast. It ferments for several hours (and up to a few days) and accumulates aromas that will make the bread dough much richer. But since I was going to do a cold fermentation, I skipped this stage.
I was a bit worried the dough could over ferment, but it didn’t! It worked and the focaccia came out beautiful and with a very intense flavor.
Thanks to the high water content, it had very nice holes and a soft crumb. It stayed fresh for at least 2 days, probably more but I can’t tell you exactly because we finished it within 2 days.
Oh well!
I started to make the dough on Saturday evening. Somewhere around 9 pm. First I activated the yeast, then I mixed all the ingredients except the salt and let the dough rest for 30 mins (Autolysis).

After the autolysis, I added the salt and started with the stretch and fold method, every 30-40 minutes, a total of 4 times.
This is a very easy method. You can do stretch and folds (S&F) while you’re watching a movie. Or in our case, while we surfed Netflix trying to find a movie to watch lol
It’s amazing how the dough develops with so little work!
Look!

Once you’re done with S&F just cover the container and put it in the fridge until next day! Mine was in the fridge for about 18h, I had enough time to go to the airport to pick my friend up, go visit her family, have a girls day with another friend and come back home to a bubbly dough!
Look at how lovely it is!

I took the focaccia out of the fridge and turned the dough onto the tray. I caramelized the onion at the same time I stretched the dough to fill the baking tray. My dough was snapping back quickly so I had to do it little by little. Make sure you use your fingertips to leave those characteristic holes.

When the onion was ready I let it cool down to room temperature and spread it evenly with the cheese.
TIP* don’t caramelize the onion completely or it’ll burn while you bake the focaccia. I know it because that’s what I did haha!

I also found a trick that I think helps improve the final result: I used an olive oil and water emulsion instead of just drizzling olive oil. The oil will be absorbed by the dough or leak to the bottom and help make the bottom crunchy.
To prepare the emulsion whisk the oil and the water very well until you get a thick mixture and drizzle it on top of the focaccia.
Now put the focaccia in the oven and wait until is baked!
Just… look!
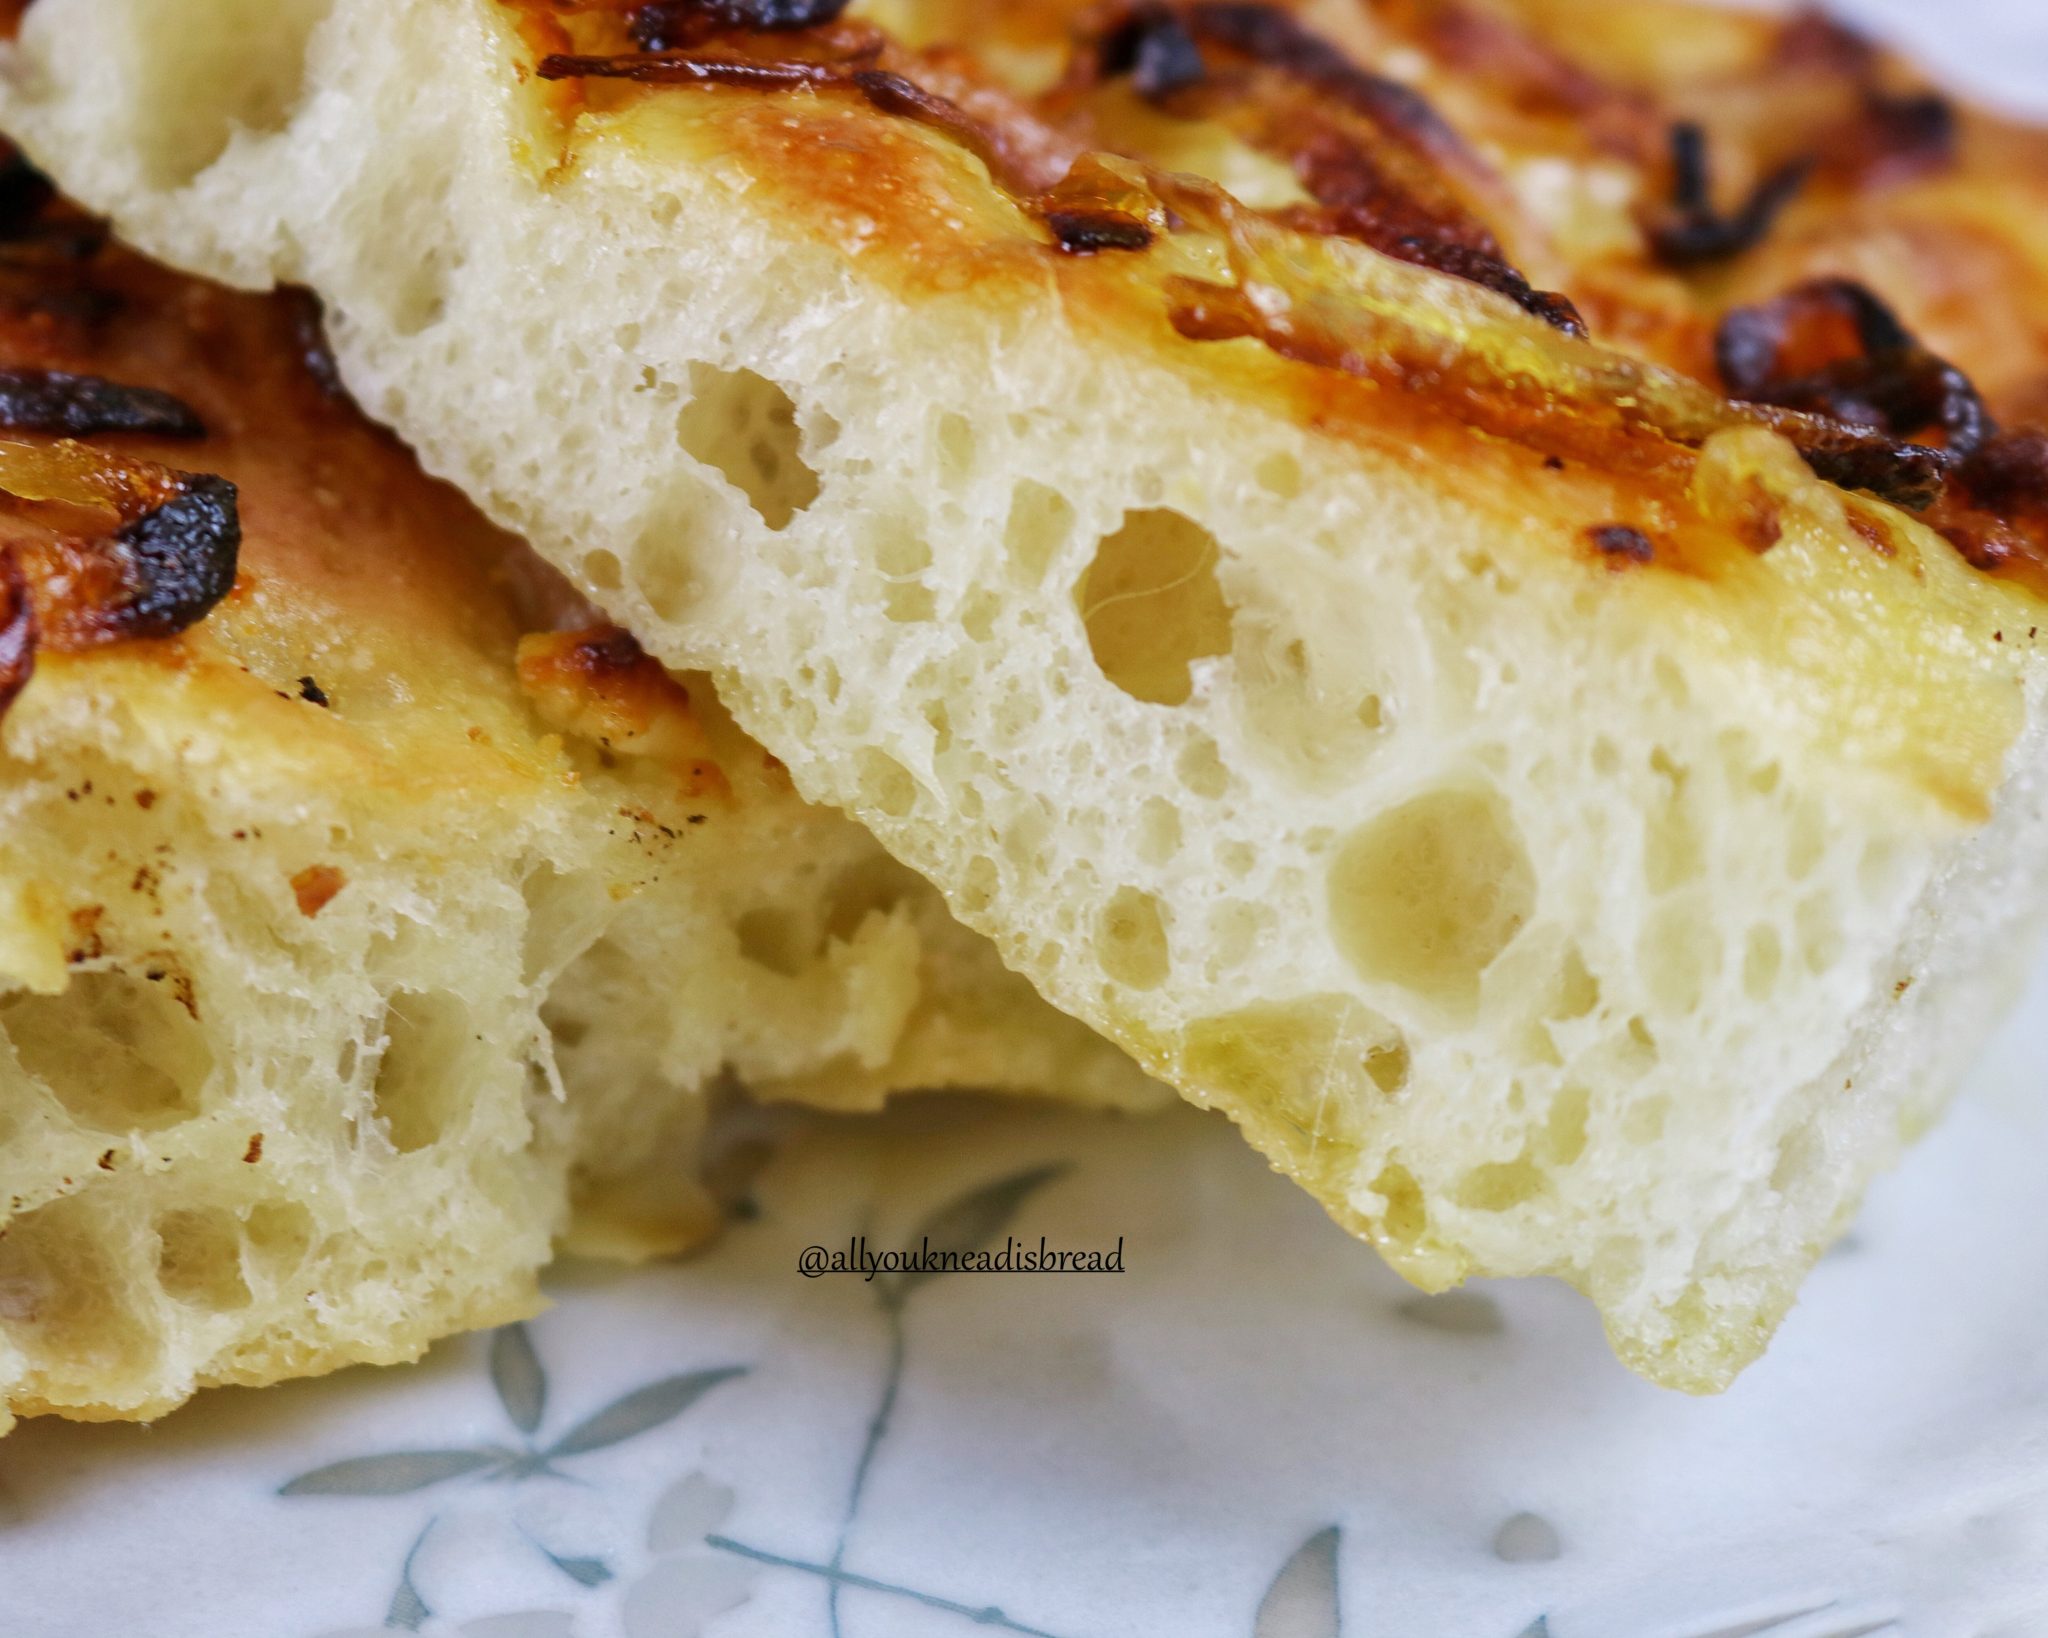
Let me know if you make this focaccia and what you think!

Caramelized onion and goat cheese no-knead focaccia
Ingredients
Focaccia dough
- 600 g bread flour
- 480 g water
- 15 g sugar
- 3 g active dry yeast
- 12 g salt
- 50 g olive oil extra virgin
Oil & water emulsion
- 2 tbsp water
- 2 tbsp olive oil extra virgin
Toppings
- 1/2 yellow onion large
- 2 oz goat cheese plain
- olive oil for cooking the onion
Instructions
-
Dissolve sugar and yeast in the water and let it sit for 15 minutes
-
When the yeast is activated add the oil and mix well
-
Sift the flour in a bowl and add the water/yeast/oil mixture
-
Mix everything well until you don't see any dry flour particle and let it rest 30 mins (autolysis)
-
After the autolysis period add the salt and do the first set of stretch and folds.
-
Repeat the stretch and folds 3 more times, every 30-40 minutes
-
Cover the container and place the dough in the fridge until the next day
-
Take the dough out of the fridge
-
Line a 46 x 33 cm baking tray (18 x 13 in) with parchment paper and brush it with olive oil
-
Turn the dough onto the baking tray and little by little stretch it to fill the whole tray.
-
Slice the onion thinly and cook it at medium-low heat until is soft and brown-ish. Don't caramelize it completely. When done, set aside and let it cool down until is warm.
-
When the onion is warm and the dough is good to go, spread the onion and goat cheese evenly on top of the dough
-
Preheat your oven at 450 F
-
Mix 2 tbsp of water and 2 tbsp of olive oil and whisk it until you have a thick mixture. It might take a few minutes but it'll eventually come together.
-
Drizzle the emulsion around the focaccia, you don't have to add all of it, just as much as you'd like.
-
Bake on a preheated oven for 20-25 minutes or until golden brown.
Happy baking!

Best Basic Challah
Finally! My first post!
I can’t believe it took me this long. Can you imagine that I spent most of the time deciding colors, styles, logos, etc?? It’s the first time for me to design something and let’s say that creativity is not my strength.
Anyways, here we are! Holiday time! A time where I’m sure Pinterest is on fire with people looking for recipes, décor ideas, centerpieces… When setting the table for any event, I like it to be more functional. I don’t like to have things between the people at the table that will make conversations or interactions difficult. I like to make the food be part of the ornaments.
Last week I went to a Friendsgiving dinner, and I was assigned the bread. We all came from different places around the world, many of the guests weren’t used to crusty bread ( as a Spaniard, that would’ve been my first option). So, I decided to make some soft bread. But dinner rolls seemed so not-holiday-worthy. There’s nothing wrong with dinner rolls, but I wanted something different, and tasty but not too sweet either. And I wanted edible decorations! Something to complement the table but that it’ll eventually disappear.
My solution? A nice challah!
I love challah because with simple ingredients you can make amazing things! I particularly enjoy the shaping. The 6 strand braid is my favorite, I think. It took me a bit to learn because I kept getting lost midway!
The loaf was a success! Everyone was taking pictures; some people had never heard of challah before and they were pretty impressed. And all that just because of the shape! Of course, when they actually tried the bread, they were even more impressed with the taste!
This recipe is from “The bread baker’s apprentice”, by Peter Reinhart, it’s my go-to challah recipe. I love this book, it has many different recipes, from different parts of the world. The book has great tips and in general, the ingredient lists are simple. I think it’s a great book for beginners and home bakers.
I just changed the type of flour, the original recipe uses all-purpose flour, but I like bread flour better. Enrich doughs have to be strong to be able to “lift” all the eggs, fats, and sugar. And also, I always bake with the same type of flour, and I can anticipate the amount of water I’d need or how the dough will behave.
But this is up to you really. Changing the flour won’t make the bread better or worse, just different! 😊
The original recipe also calls for vegetable oil. I chose olive oil because I love the combination it makes with eggs. I think both ingredients complement each other perfectly! You can use other shortenings, but I wouldn’t recommend butter. The reason is that it has a strong taste, and challah is all about the egg, I don’t want the butter to hinder the taste of eggs. But again, this is my opinion. You can make it the way you enjoy it most!
To make this challah you’re going to need the following ingredients:

- First, you need to activate the yeast. I like to use active dry yeast, but even when I use instant yeast, I activate it as well. Just to make sure it’s working well.
If your kitchen it’s cold, you can use lukewarm water to activate the yeast. If it’s hot, room temperature water works well. You can even add a teaspoon of sugar to the water. The yeast will feed on it, so it won’t add any extra sweetness.
Your yeast will be ready after a few minutes, and you should see some bubbles on top (maybe not as many as in my picture, I like to use a whisk to make sure the yeast dissolves completely, and that adds extra bubbles).
- While you’re waiting for the yeast, you can sift the flour, sugar, and salt into a bowl and stir it well to mix everything.
- Then add the yeast mixture to your dry ingredients
- And incorporate the eggs. You can whisk the eggs into the yeast mixture, or in a separate bowl and pour them into the flour, or like me, add them directly to your flour and yeast mixture.
Now it’s time for one of the most important steps, the autolysis step.
- Mix everything thoroughly, until you don’ see dry flour particles anymore and you have a sticky mess. If you think your dough is dry, you can add a little bit more water. Just 1 tablespoon at a time. Cover your bowl and leave it there for 20-30 minutes.
This step is important because it’ll allow the flour particles to fully hydrate before you start kneading. That means that the flour will work at full strength and the gluten network will be developed much easier.

After the autolysis step, the fun starts! Kneading time!
- Knead the dough in your most comfortable way. By hand or using a stand mixer with the hook attachment. At the beginning the dough will be sticky but don’t add more flour, keep kneading.
The dough is sticky because it has lots of eggs and sugar, So they get between the water molecules and the gluten proteins. So you must keep kneading to ensure all the gluten proteins get to link with each other and form the gluten network.
Regardless of your kneading method, eventually, you should see your dough coming together, getting more elastic, and getting some consistency.
- Now it’s time to add the oil (or any other fat or shortening).
If you’re not very used to adding the fat content midway, I’d suggest you add the oil little by little. One tablespoon at a time if you have to. Otherwise, you might get very frustrated.
Once the gluten network is halfway developed, it’s difficult to add fats, you have to keep kneading and squeezing the dough. It’ll eventually absorb the oil.
I like to squeeze the dough and turn it around and squeeze it again. I found that by doing this the dough absorbs the oil much faster. Also, trying to knead while everything is covered in oil… is not easy!
- After adding all the oil, keep kneading until the dough is not sticky anymore and the surface is covered by small blisters. At this point, the dough should pass the windowpane test. Remember to let the dough rest 5 minutes before you try to stretch it.
It took me around 20-25 minutes to get the dough ready. Your kneading time can be different, don’t worry. Your kitchen temperature, your skills, the stand mixer you use, or even the flour, play a role in the development of the dough. So don’t aim for time, but for dough consistency.
Look at the difference!

- Now you just need to put your dough in a bowl, cover it and let it ferment until it rises enough to be all puffy and about 1.5 times its original size. If your kitchen is cold, you can put the bowl in the oven with a pot with boiling water to create a warm microenvironment. Be careful not to turn the oven on!
- After the fermentation, deflate the dough and let it rest for a few minutes. Cut 6 pieces of equal weight and make small balls with each one.
You can use a little bit of flour for dusting, but try not to incorporate too much flour or your challah might end up dry.
You can shape your challah the way you like the most, a simple braid, 4 strands braid… you name it!
- Let the dough balls rest for 5 minutes. These resting times are important to let the gluten relax. 5 minutes can make a HUGE difference on your dough and it’ll be much easier to shape.
- After 5 minutes, take the first ball, flatten it with your hand, and with the help of a rolling pin, roll it into a 25 cm long oval (10 in approx) and 0.5 cm thick (1/4 in). Now, with the help of your hands, and starting on the widest part, roll it back to form a log. Repeat with each ball.

- Once the logs are ready, you just need to stretch them and make the strands. They should be about 50 cm (20 in) long. Start with the first log you made, since that one should’ve had more time to rest.
If at any point you feel that the strands keep getting back to their original shape, let them rest and come back a few minutes later. Try to make the strands in a way that is thicker in the middle and thinner on the ends. This way, the challah will have a beautiful shape, bigger in the middle and thinner on the ends.
- Time to braid the challah! I did not include a tutorial on the braiding part because I think it’s easier to understand if you see it in a video, rather than if you read it.
To avoid your challah from having a weird oven spring (meaning: end up with a terrible shape), try not to braid it too tight so you leave some room for the strands to rise.
- Put the challah on a baking tray and cover it with lightly oiled plastic wrap.
If you like a crusty challah, you can brush now once with the leftover egg whites, and a second time right before going into the oven. If you prefer it softer, just brush it once before going into the oven.
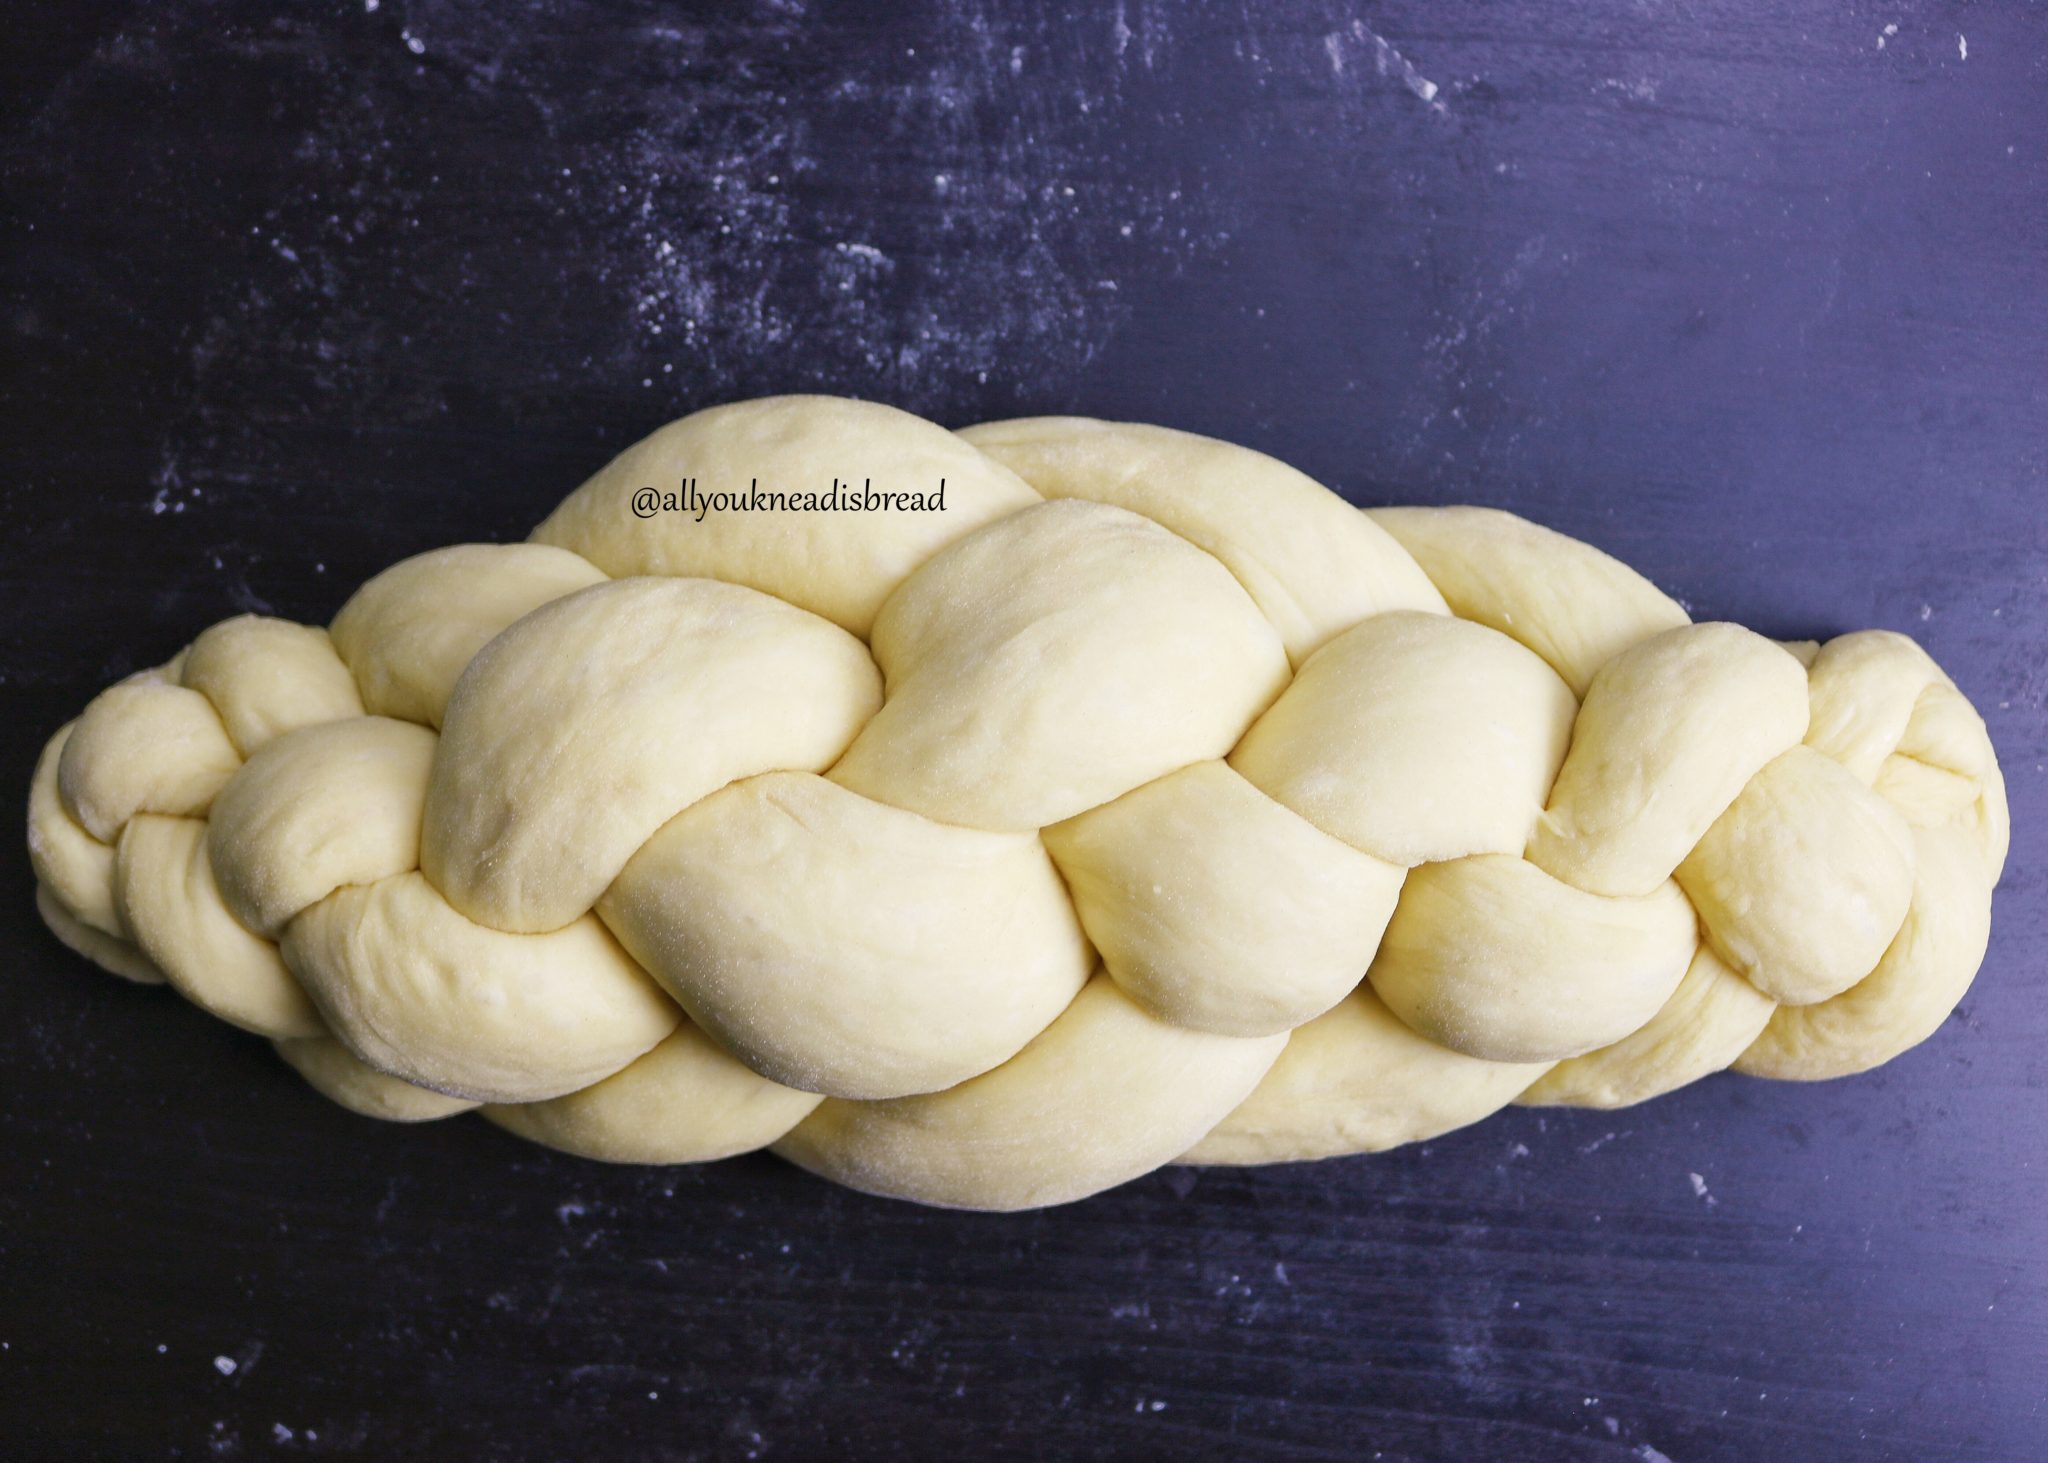
- Let the challah rise again until it’s puffy. It doesn’t have to double in size.
- Preheat your oven at 350 F (175 C)
- Once the challah has risen enough, put it in the oven and bake for about 20-25 minutes. After that time, turn the baking tray 180 degrees, so it gets to bake homogeneously.
If you think the challah is browning too fast, you can put aluminum foil on top and reduce the heat to 325 F (165 C).
Depending on your oven, you might need a bit more time, it’s okay. Just make sure that the inside it’s completely cooked.
And here it is!
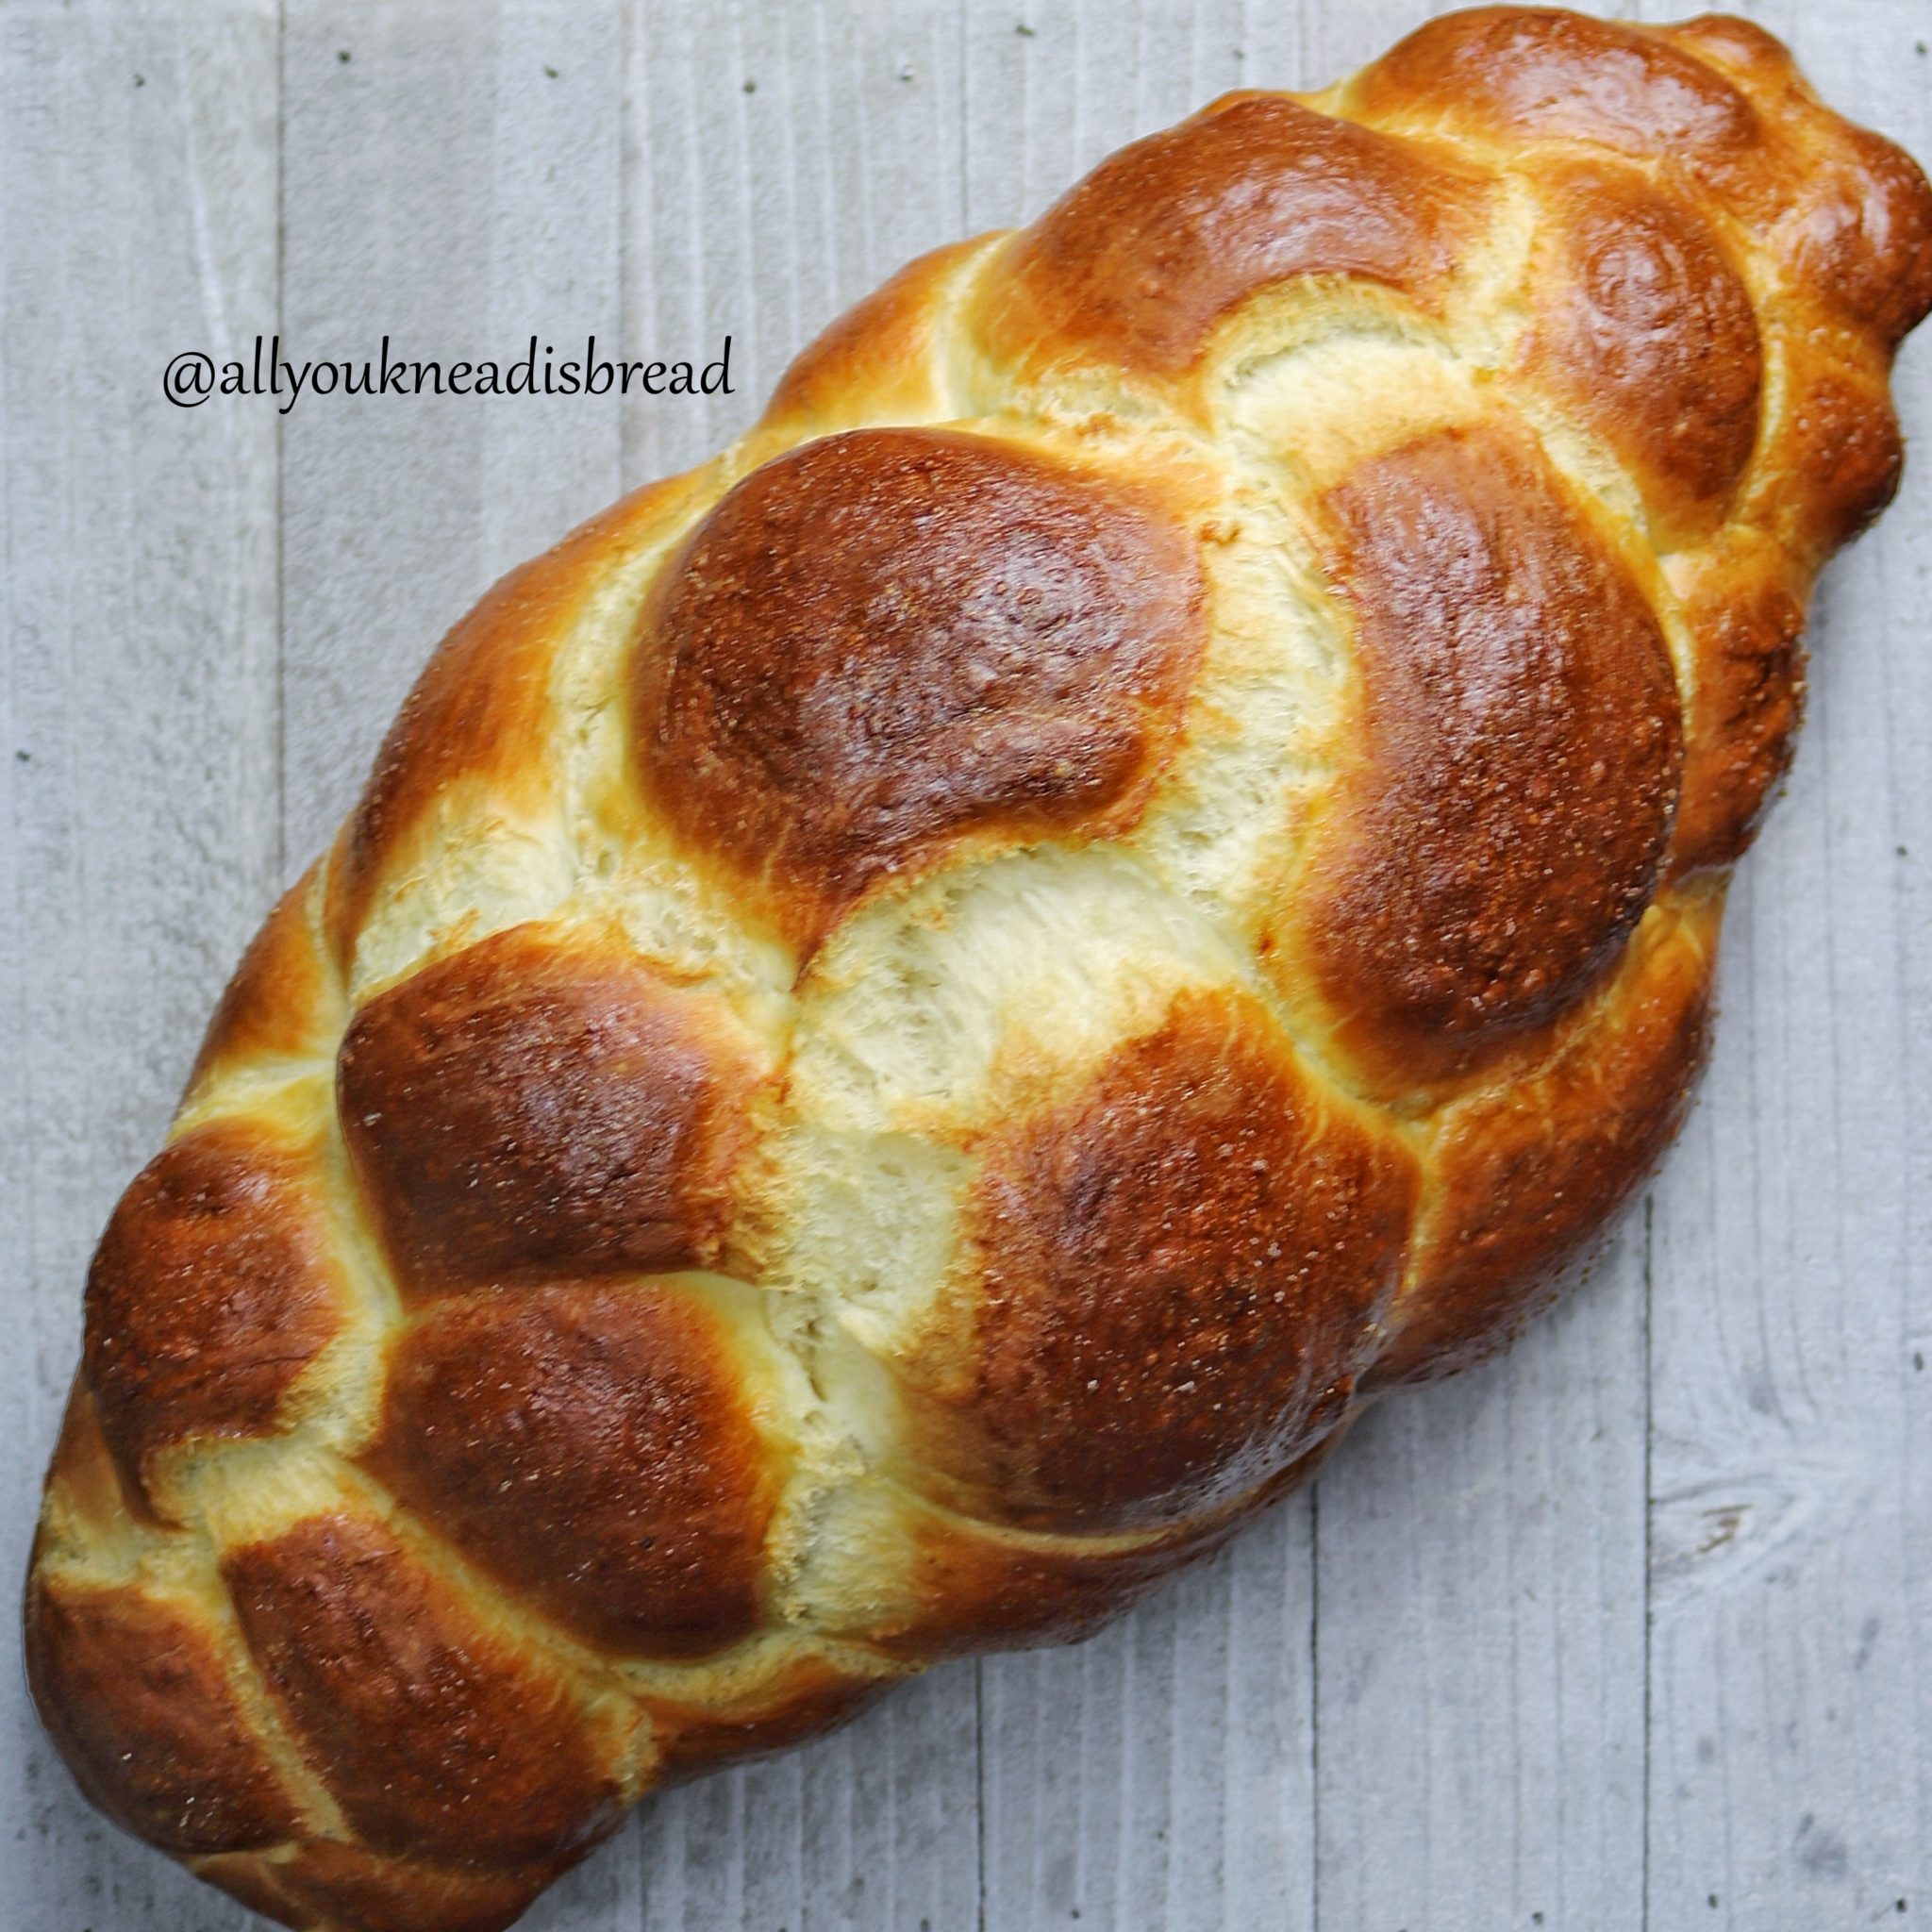
I’m sorry I cannot show you how the crumb looked, but I can tell you it was awesome! Very soft, cohesive, and beautifully yellow!
I hope you enjoy the recipe. Below you can find a printable version with a detailed step-by-step.

Best Basic Challah
Follow this recipe for a foolproof challah.
Ingredients
- 510 g bread flour (mine has 12.7% protein content)
- 30 g sugar
- 7 g salt *
- 4 g active dry yeast
- 30 g olive oil
- 2 large eggs
- 2 large egg yolks
- 215 ml water **
- 2 egg whites
Instructions
-
Add the yeast to the water and mix well. I like to use a wire whisk to make sure there are no lumps. Let it sit 5 mins to activate.
-
While the yeast is activating. Sift the flour into a bowl and add the salt and the sugar. Mix well with a wire whisk.
-
Once the yeast is active (you should see some bubble on top) add it to the flour mixture
-
Add the eggs and the yolks
-
Mix everything very well until you don’t see dry flour particles. If the dough is not cohesive, you might need to add a little bit more water. Do it half tbsp at a time. You don’t want to add too much water.
-
Let the dough rest for 20 minutes for a short autolysis. You can skip this step if you don’t have time, but I strongly recommend it since it’ll make your life easier when you have to knead the dough.
-
Start kneading the dough until it gets some consistency and elasticity.
-
Add the oil little by little until the dough absorbs it all.
-
Keep kneading until the dough is no longer sticky and you see small blisters covering the surface. It should pass the windowpane test.
-
Once the dough is ready, shape it into a ball. Lightly oil a bowl and place the dough inside. Cover the bowl and let the dough ferment for 1h approx. It doesn’t have to duplicate the size.
-
After 1h, deflate the dough, shape it again into a ball and let it ferment again until it’s about 1.5 times in size or until it’s puffy but not over fermented.
-
Remove the dough from the bowl, deflate it and let it rest 5 mins.
-
Divide the dough into 6 equal parts (if you’re doing a 6-strand challah)
-
Shape each part into a ball, cover them with plastic wrap and let them rest 5 mins.
-
Roll each ball into a 50 cm (20 in) log. Start making short logs and let them rest before rolling them to the final length. It’ll give the gluten time to rest and it’ll be easier for you.
-
Shape your Challah the way you’d like, line a baking sheet with parchment paper and place the Challah there.
-
Brush the Challah with the egg whites wash, cover it with lightly oiled plastic wrap and let it rise until it's puffy.
-
Preheat your oven at 350 F (175 C).
-
Once the Challah is ready, carefully remove the plastic wrap and brush again with the egg whites.
-
Bake in the middle rack for about 20-25 minutes and turn the baking sheet 180 degrees. Bake for another 20mins or until it’s golden brown (we turn the baking sheet halfway to ensure an even baking)
Recipe Notes
* You can omit the salt when you mix the dry ingredients and add it after the autolysis.
** You might need to adjust the water. The range should be anywhere between 200-250 ml.
Happy baking!


